Setting up object archiving in SAP ERP for beginners
Greetings to all. Many people know about the need to archive (backup) information systems, regardless of the level of the system. For ERP systems, this is usually a multi-level backup at the operating system level, at the level of the database management system, at the level of the ERP system itself.
In an SAP environment, functional consultants often confuse data backup and archiving. From the point of view of the consultant, there is a baseline (system administrator), who should take care of the functioning of the system, restoring it in case of failure or the need for rollback. For my modest experience in this market, I have never met a consultant who would raise the question of the need for data archiving. Moreover, archiving can have different purposes, for example, not only reducing the amount of data and improving system performance, but also transferring the same data to other systems.
We configure archiving using the example of documents for changing HR data. We believe that the change documents themselves are configured and the result of the change in the infotype can be viewed through transaction S_AHR_61016380.
')
All customization is done in the SARA transaction, where we have to do a number of things:
To set up archiving of change documents, take the standard PA_LDOC “PA: Long Term Documents” object. Open the transaction SARA.
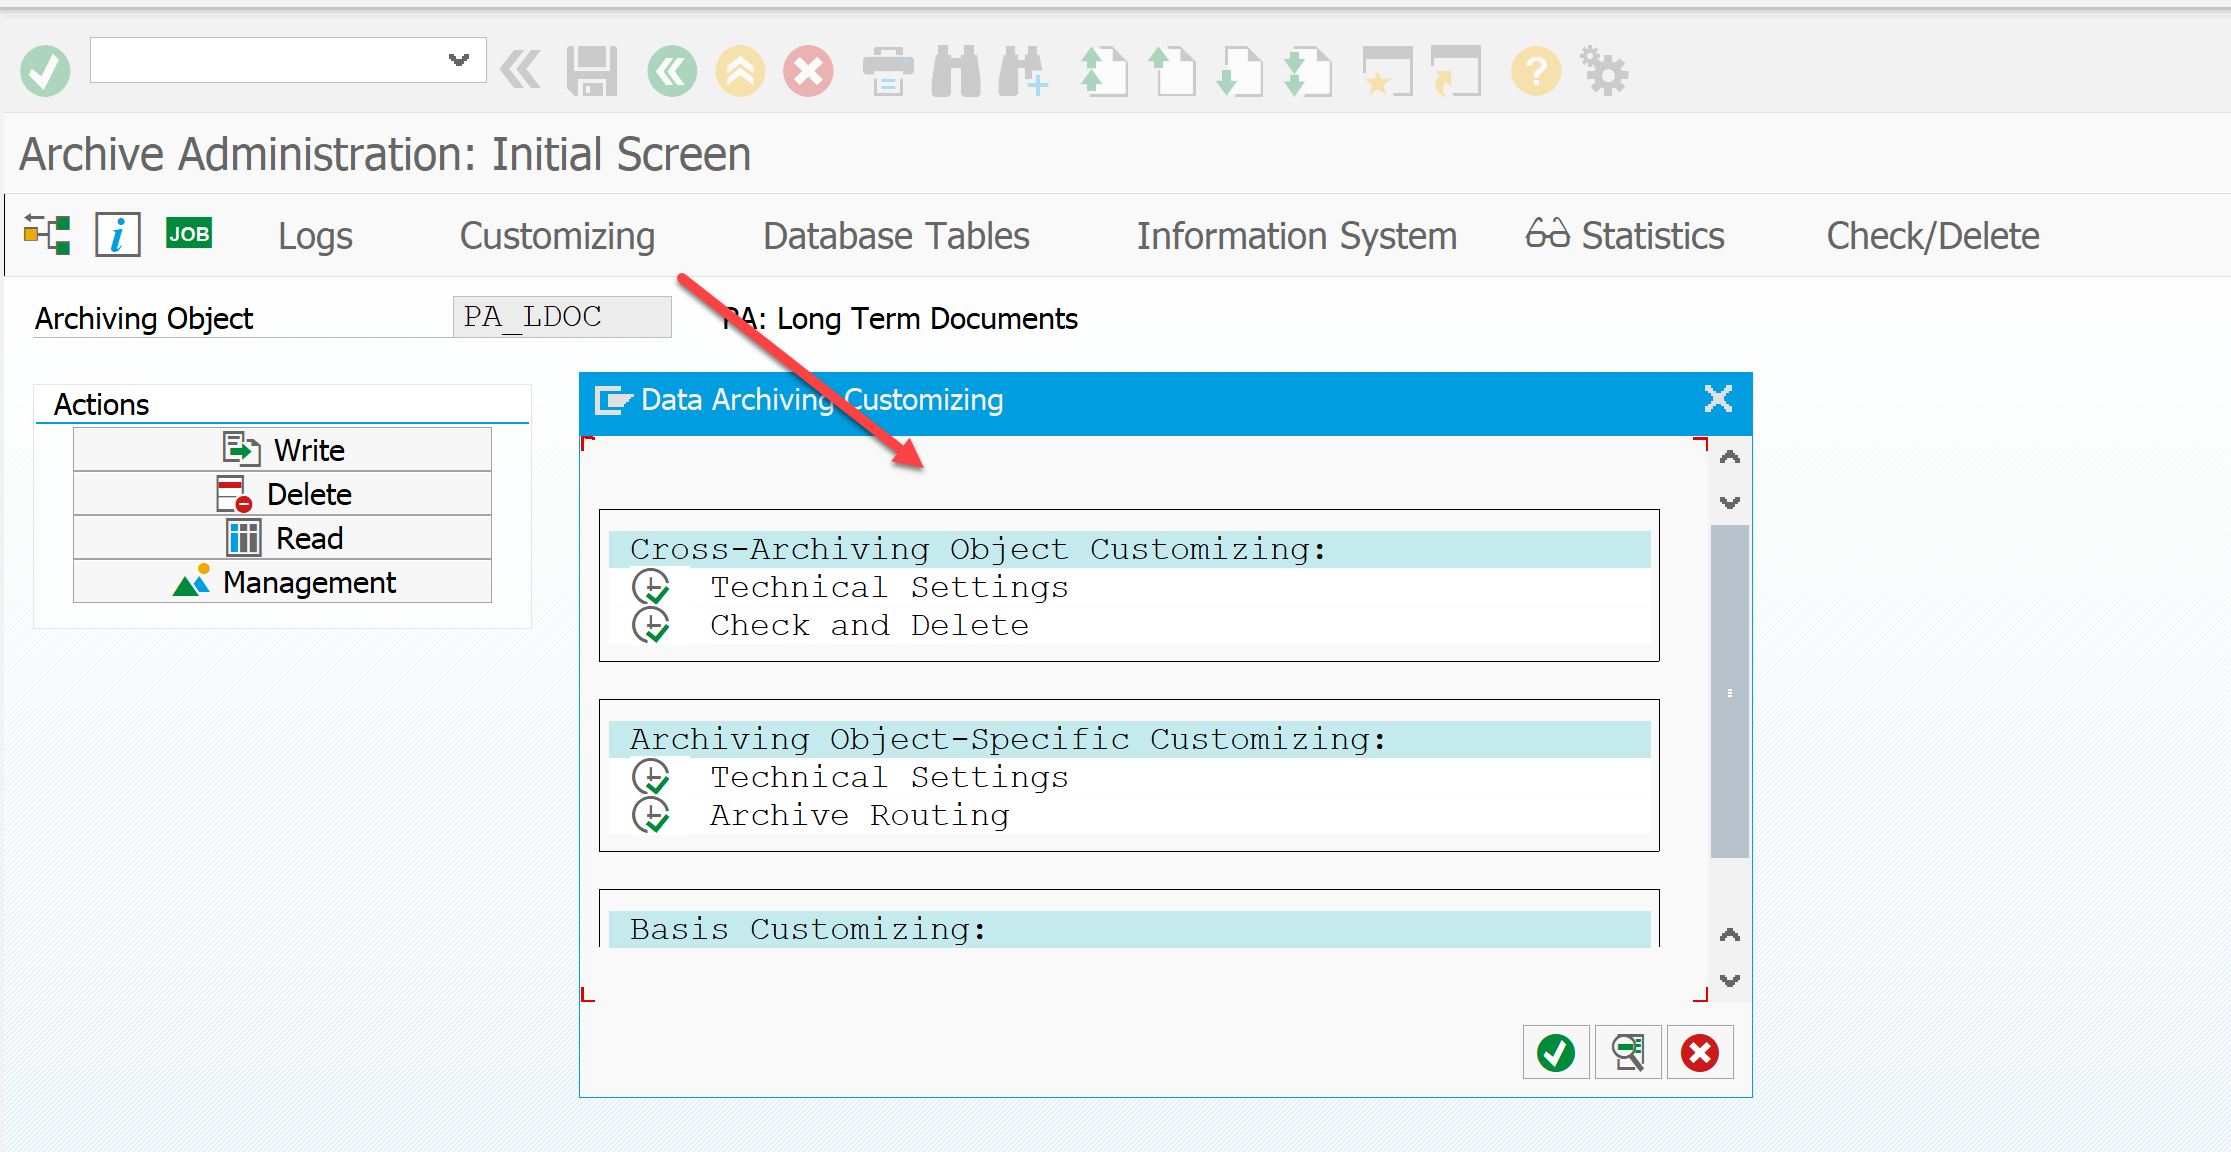
The Customizing button opens a window where we set up the archiving system.
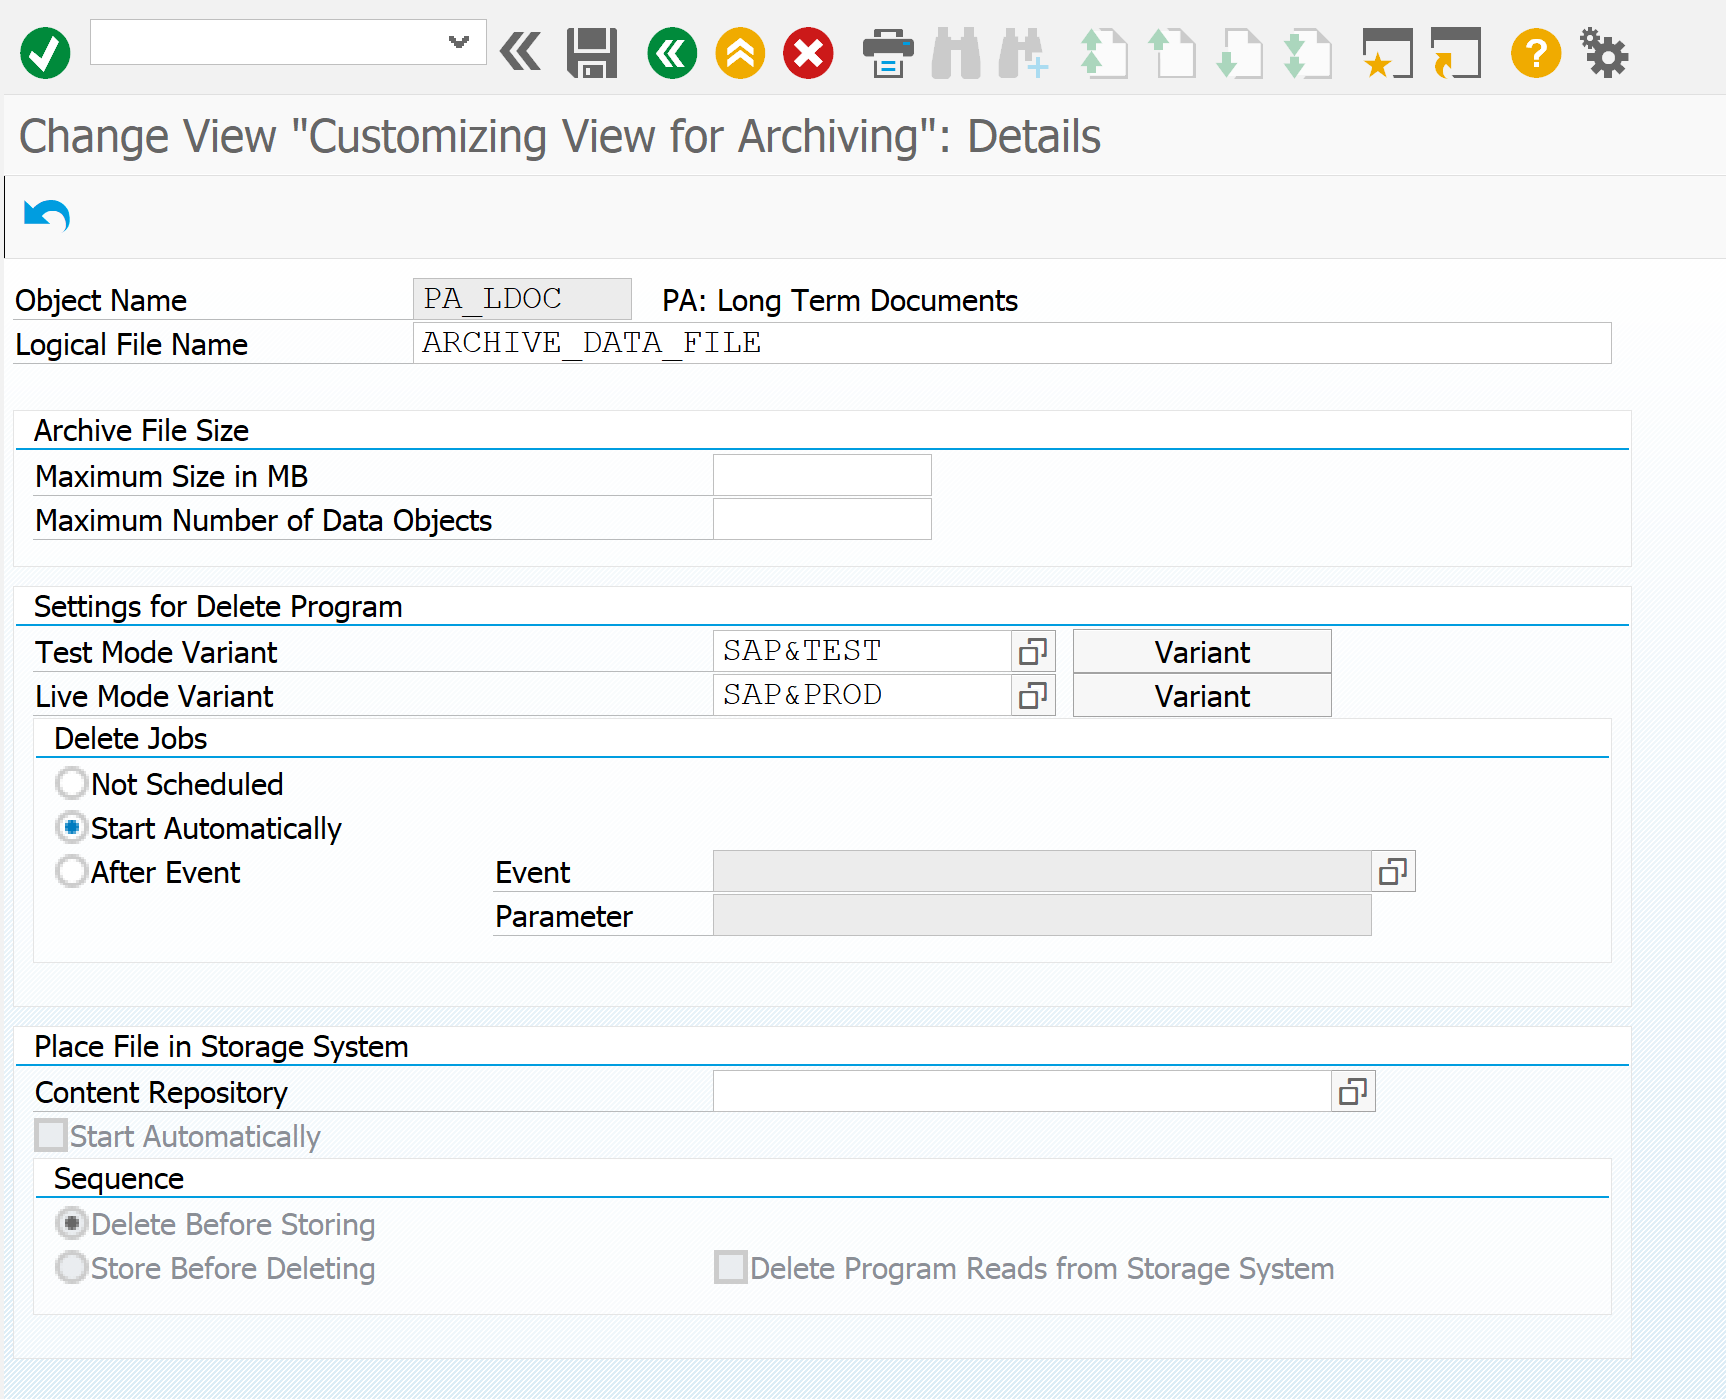
Select Technical Settings. Here, a specific archiving object is assigned a logical path to store the archive. In our case, this is ARCHIVE_DATA_FILE. Please note that for this object there is a tick "Delete Jobs - Automatically". The system itself will delete the archived records from the database. For some objects this is not required, so a separate step is provided for them to delete records from the database.
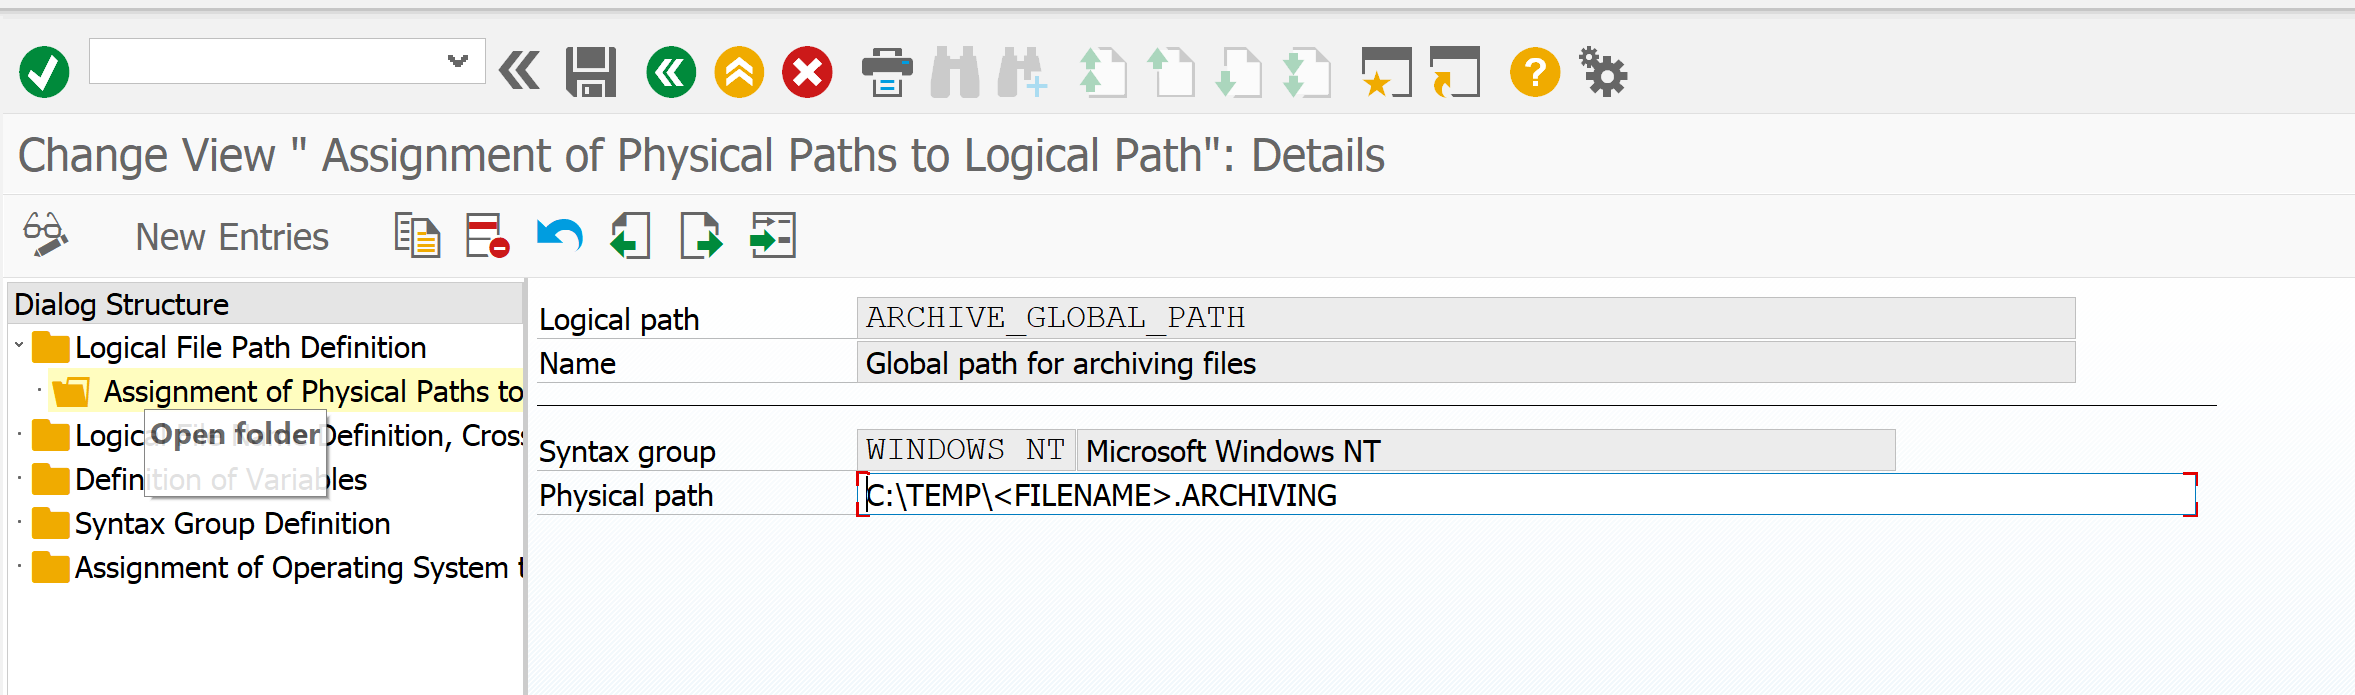
Now you need to configure the path to store the archive. In the same Customizing menu, select just below the “Cross-Client File Names / Paths”.
First we define the file name. Here for each operating system, you can choose your own path. By the F1 button you can see hints with macro substitutions.
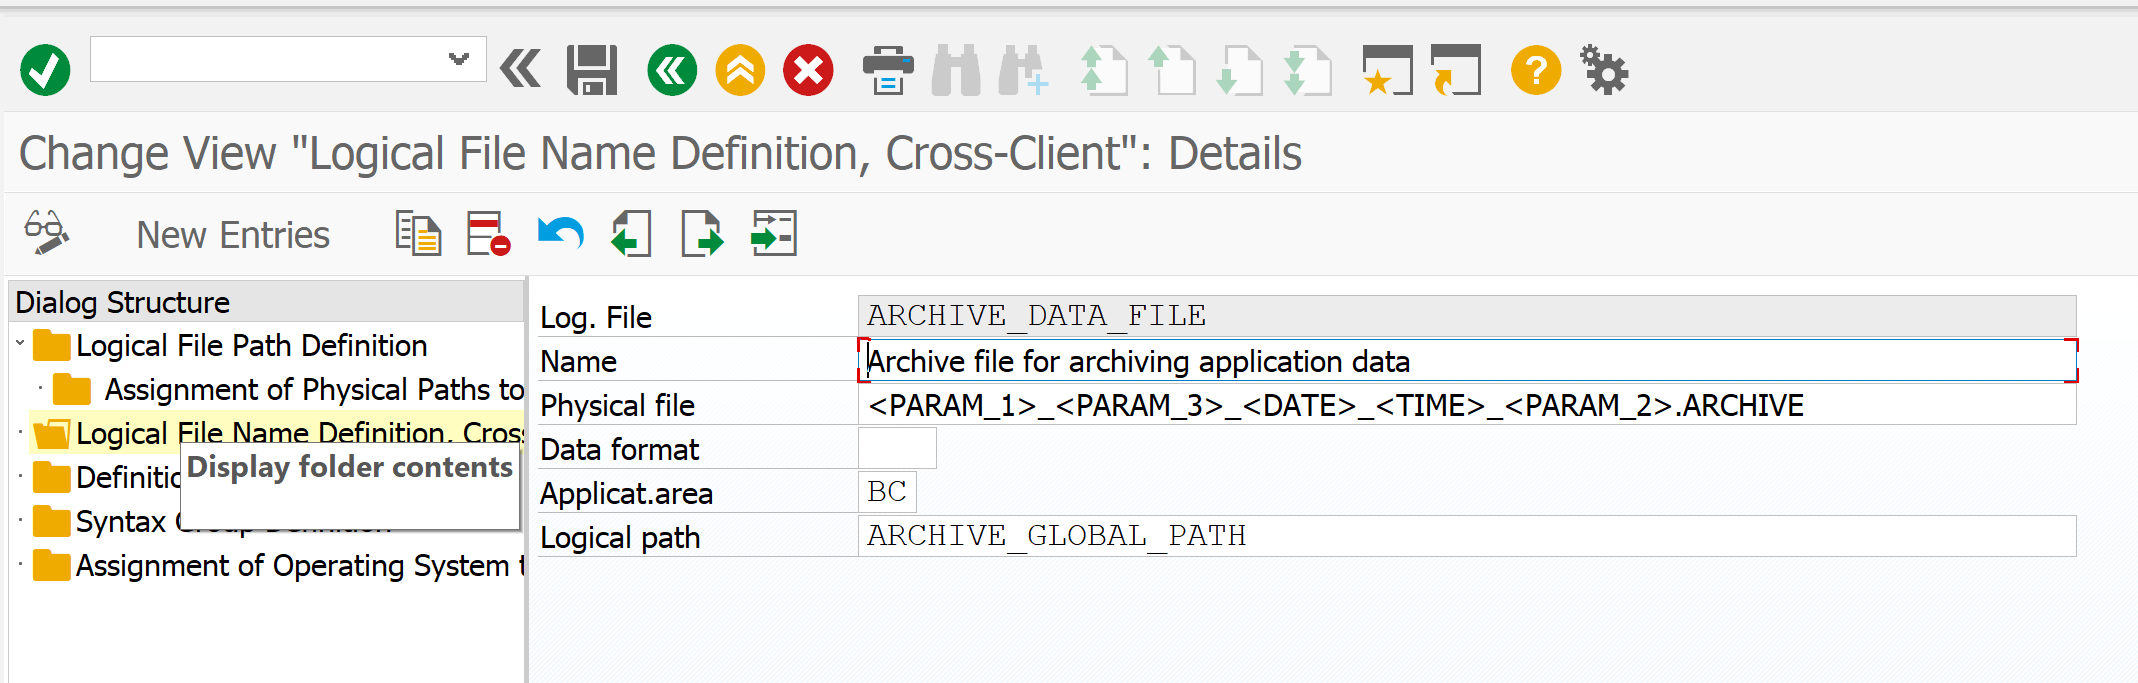
Now you need to set the rules for forming the file name.
Save and exit to the main menu SARA. Now run the program for archiving. Button "Write".
Here you need to determine the option to run the archiving program. Inside it is already specified that by default archiving takes place until today. Using the date substitution mechanism in a variant, you can dynamically define another date. For example, last month.
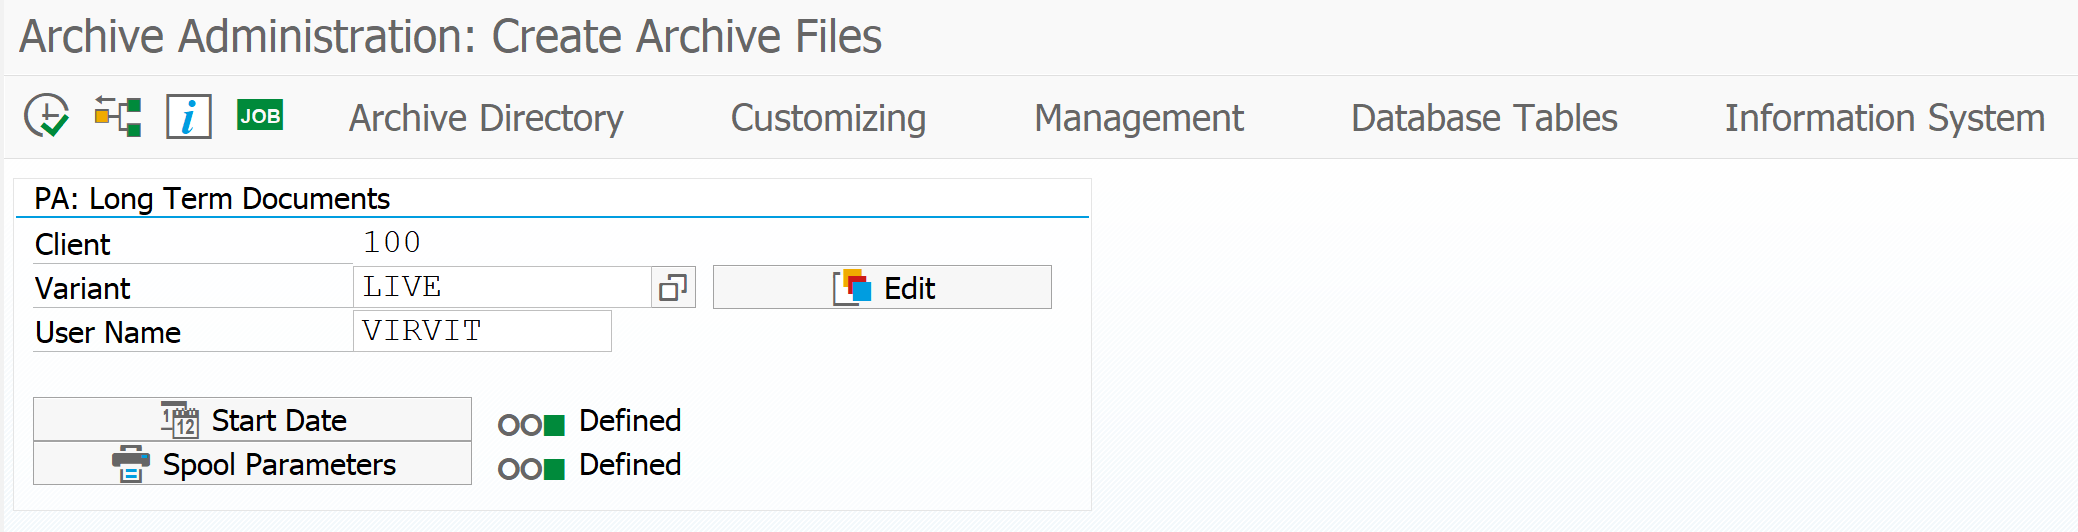
After determining the option, we plan when to start archiving using the “Start Date” button. Do not forget to define spool parameters a bit lower (to whom to send the results of the execution of the archiving program). Everything is ready to start - we set fire.
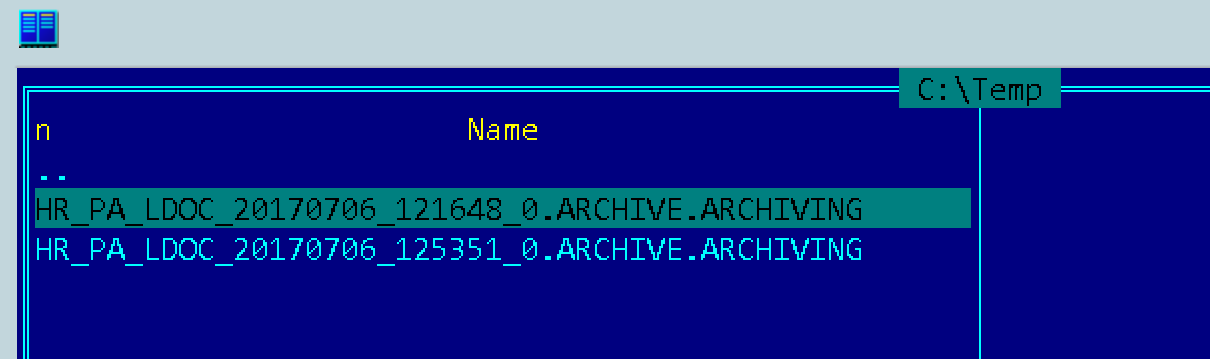
The system will schedule the background job according to the setting. For example, I launched immediately without waiting. An archive was formed on the server (I have two archives, since I already started archiving).
To view the archives there is a button 'Management'. To see what's inside - 'Read'.
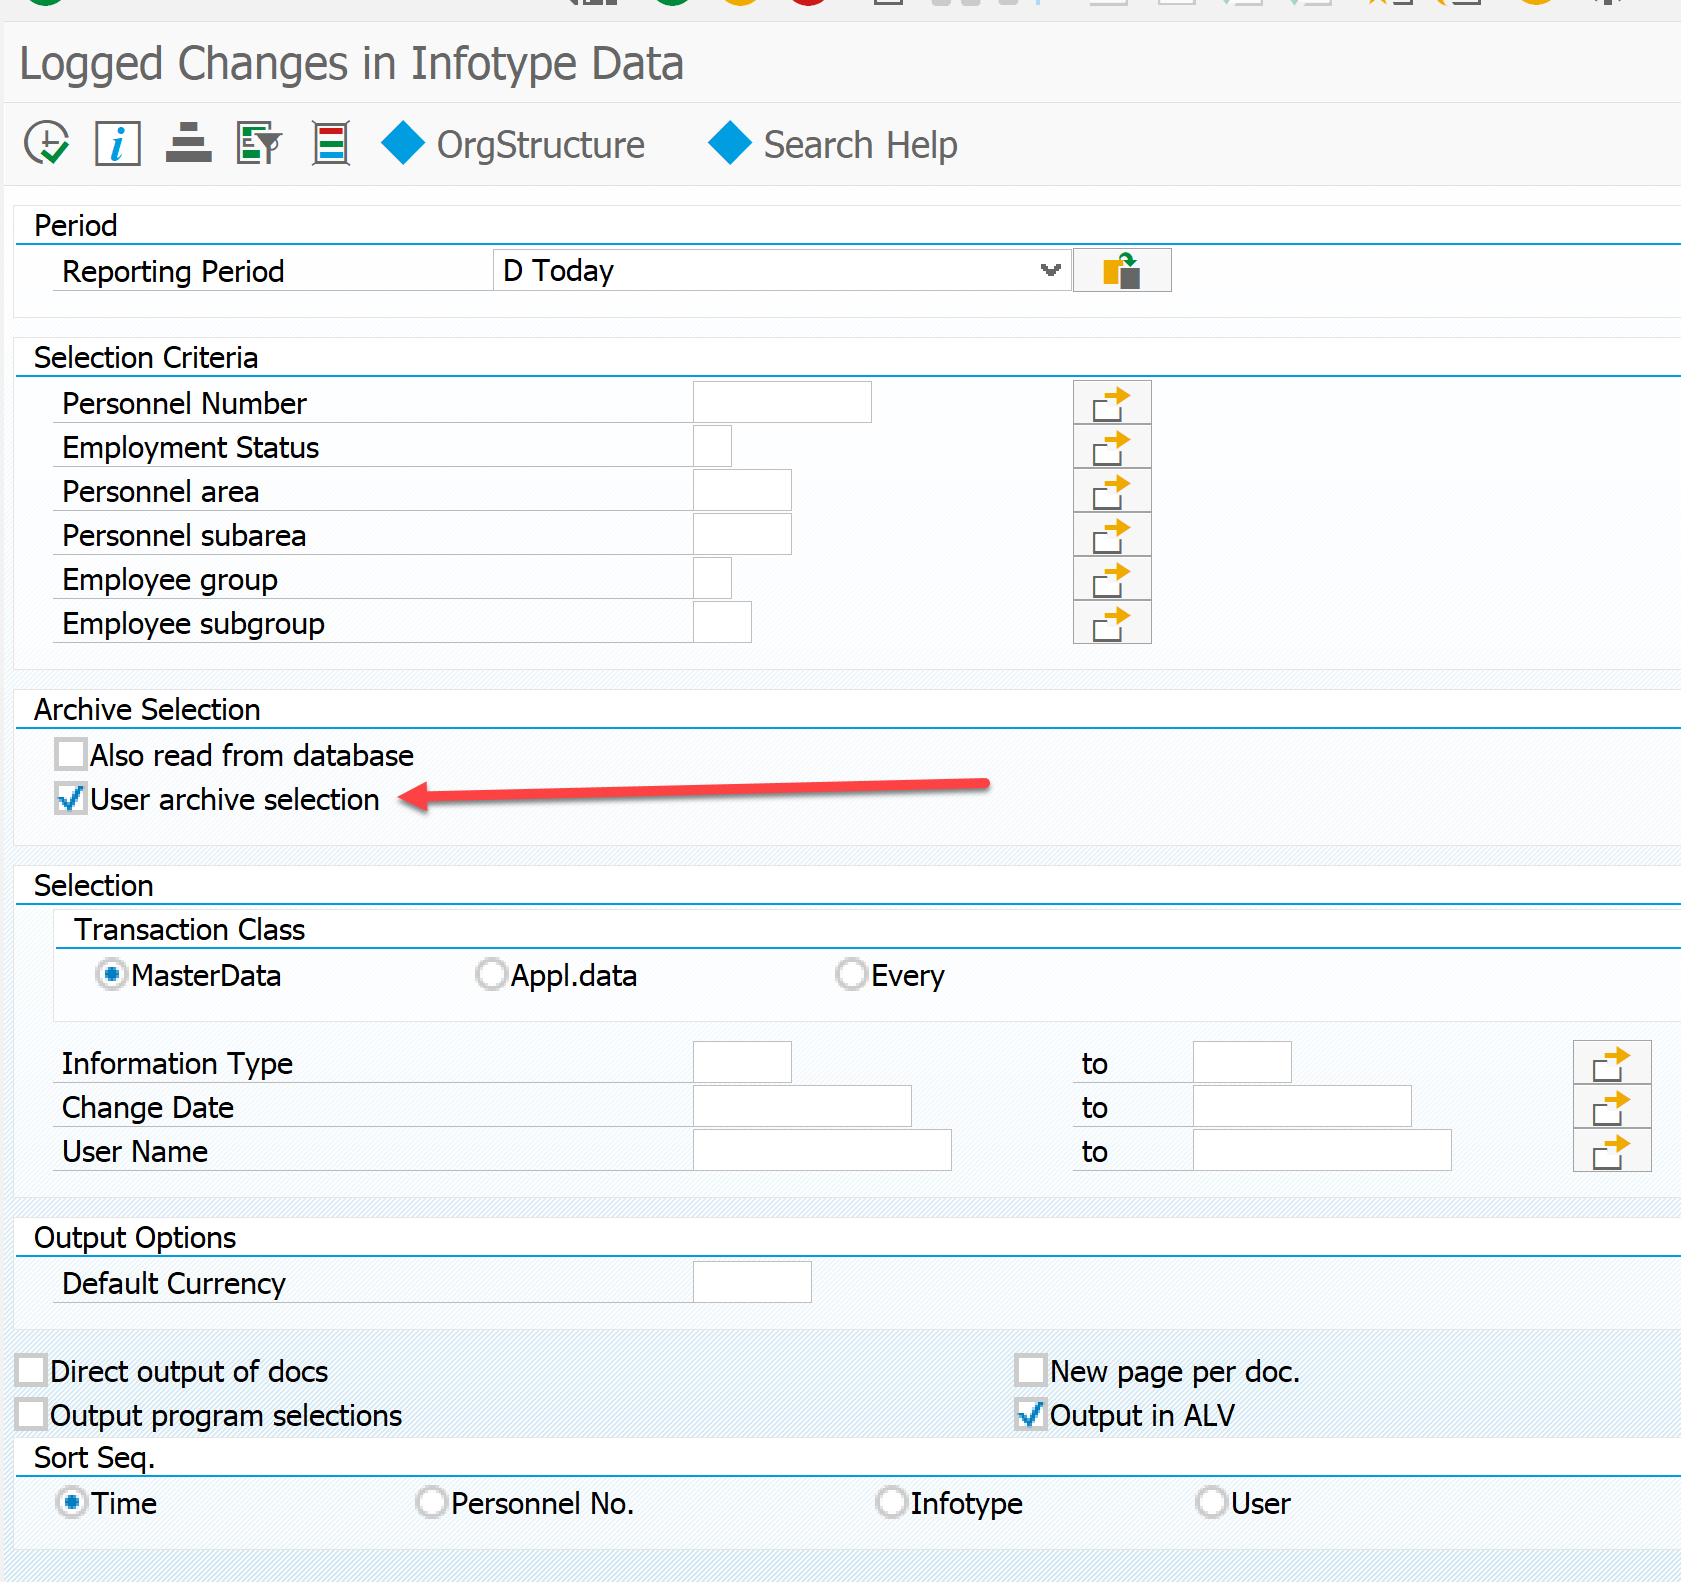
It is important to tick the read from the archive.
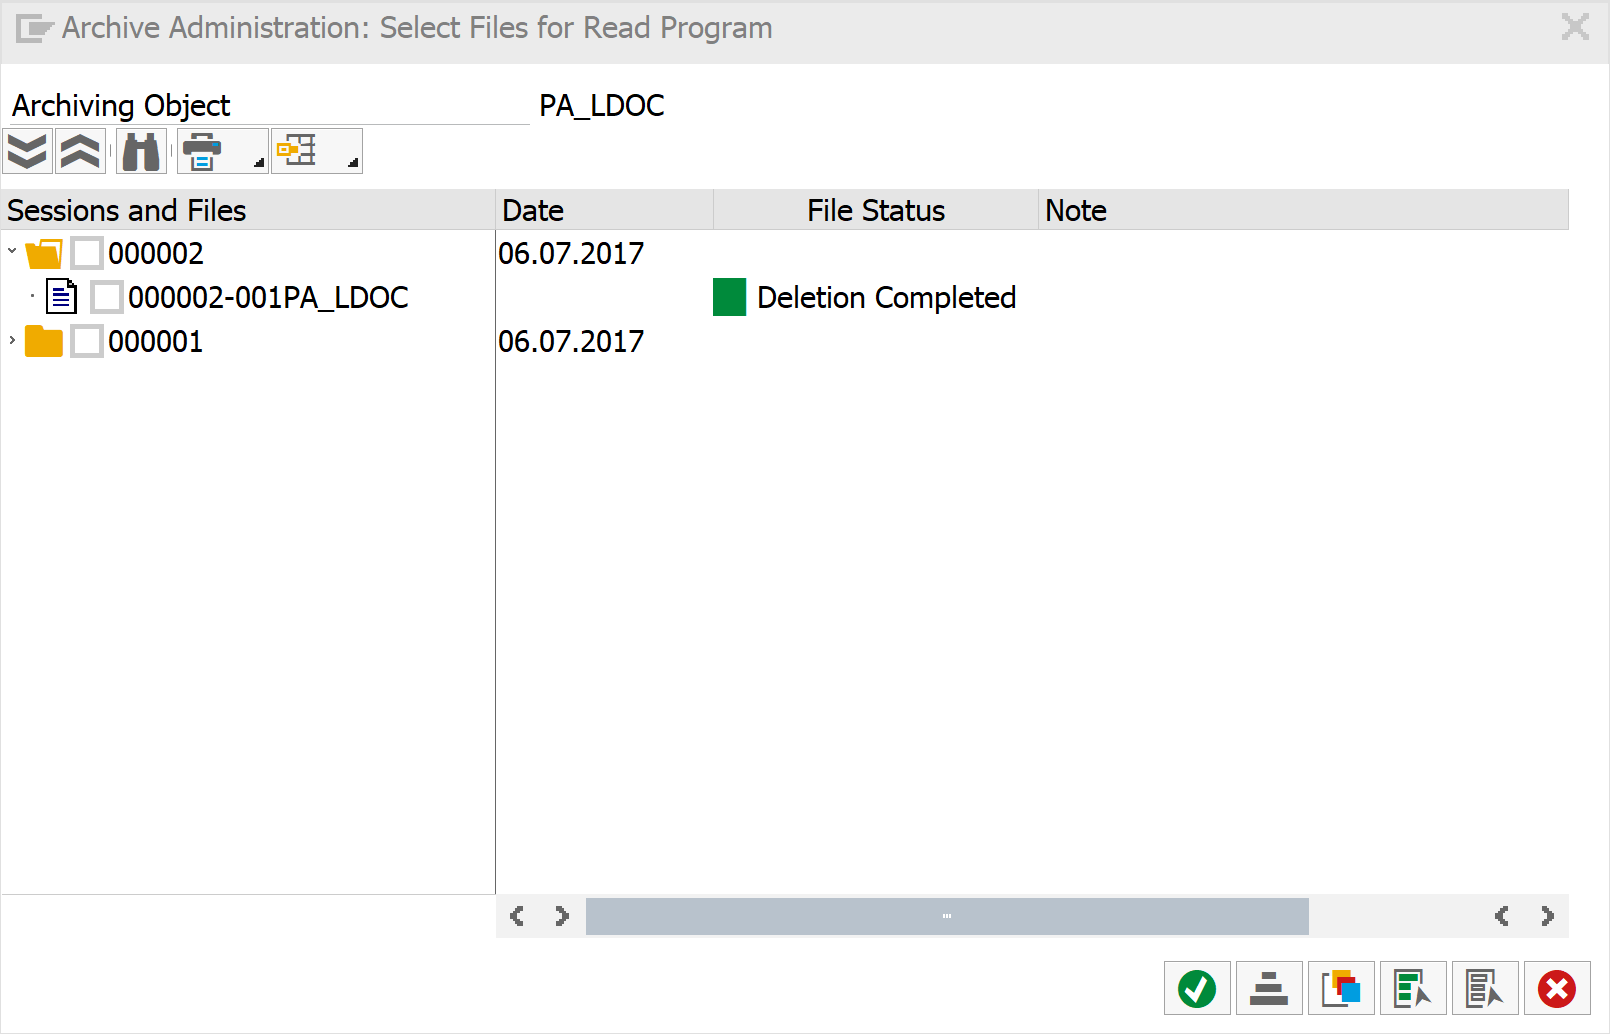
Next, choose from which archive to view the data.
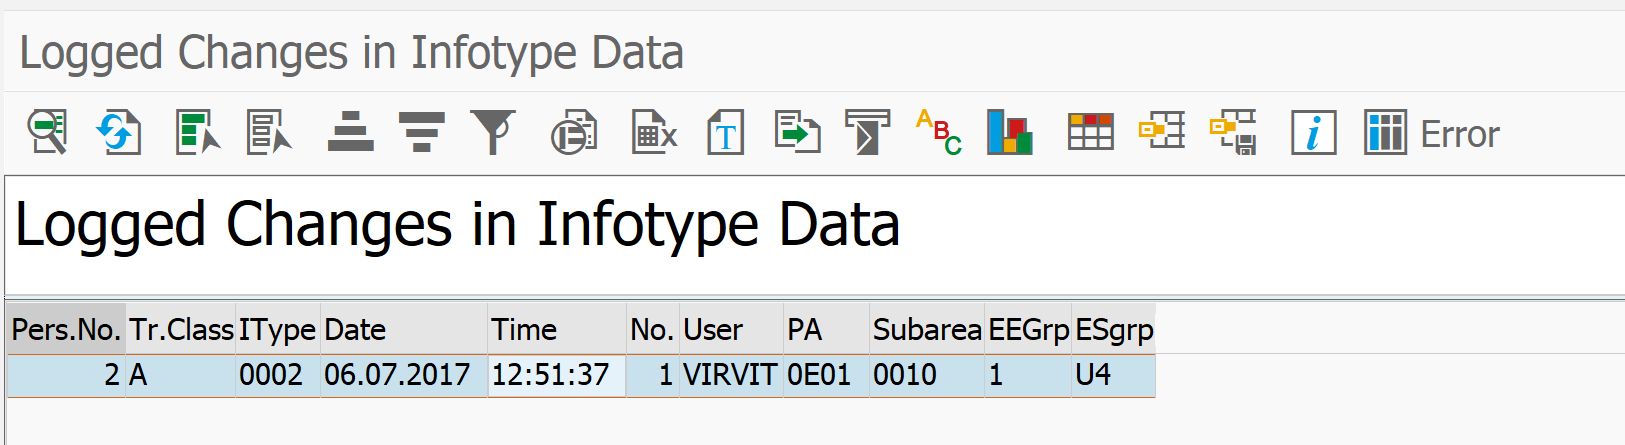
And here is the result.
Thanks to all.
In an SAP environment, functional consultants often confuse data backup and archiving. From the point of view of the consultant, there is a baseline (system administrator), who should take care of the functioning of the system, restoring it in case of failure or the need for rollback. For my modest experience in this market, I have never met a consultant who would raise the question of the need for data archiving. Moreover, archiving can have different purposes, for example, not only reducing the amount of data and improving system performance, but also transferring the same data to other systems.
We configure archiving using the example of documents for changing HR data. We believe that the change documents themselves are configured and the result of the change in the infotype can be viewed through transaction S_AHR_61016380.
')
All customization is done in the SARA transaction, where we have to do a number of things:
- Configure archiving paths, logical and physical files
- Configure Options for Archiving Launchers
- Schedule archiving programs themselves
To set up archiving of change documents, take the standard PA_LDOC “PA: Long Term Documents” object. Open the transaction SARA.
The Customizing button opens a window where we set up the archiving system.
Select Technical Settings. Here, a specific archiving object is assigned a logical path to store the archive. In our case, this is ARCHIVE_DATA_FILE. Please note that for this object there is a tick "Delete Jobs - Automatically". The system itself will delete the archived records from the database. For some objects this is not required, so a separate step is provided for them to delete records from the database.
Now you need to configure the path to store the archive. In the same Customizing menu, select just below the “Cross-Client File Names / Paths”.
First we define the file name. Here for each operating system, you can choose your own path. By the F1 button you can see hints with macro substitutions.
Now you need to set the rules for forming the file name.
Save and exit to the main menu SARA. Now run the program for archiving. Button "Write".
Here you need to determine the option to run the archiving program. Inside it is already specified that by default archiving takes place until today. Using the date substitution mechanism in a variant, you can dynamically define another date. For example, last month.
After determining the option, we plan when to start archiving using the “Start Date” button. Do not forget to define spool parameters a bit lower (to whom to send the results of the execution of the archiving program). Everything is ready to start - we set fire.
The system will schedule the background job according to the setting. For example, I launched immediately without waiting. An archive was formed on the server (I have two archives, since I already started archiving).
To view the archives there is a button 'Management'. To see what's inside - 'Read'.
It is important to tick the read from the archive.
Next, choose from which archive to view the data.
And here is the result.
Thanks to all.
Source: https://habr.com/ru/post/332934/
All Articles