How to create your own metro
Metroid: style of play (2D or 3D), in which research is often present and where a character controlled by a player gains new abilities that allow him to move forward. Such games are often action adventure games with the intersection of traffic routes. They use the system of "growth", opening the important upgrades necessary for the passage of the game. The name “metroidwatch” comes from the confusion of words Metroid and Castlevania, but there are other games that use the same fundamental design philosophy. These games include all Zelda, Shadow Complex and Cave Story franchise games. In fact, there is no significant difference in the structure of the gameplay between the games Zelda, Metroid or Castlevania: Symphony of the Night.
This article is intended for game creators who want to tackle the difficult task of writing a game in the metro-play genre. If you have never made games before, and are looking for tips on how to start creating games, I recommend getting acquainted with tools such as Unity , Unreal Engine , Construct 2, or any other game-building tools . You first need to learn how to make games, because I will not teach them how to create from scratch.
If you continued reading, then I suppose you have the necessary skills and you are looking for information on planning a game in the metro mode.
')
Basics of metro
Planning a metro game can be a daunting task. There are many traps in this process that you can please if you don't plan everything correctly before starting development. We see not so many games of this genre because when using the linear model of development they usually turn out unsuccessful. To create a good metro development, the developer needs to understand how all the abilities and upgrades work, and only then begin to make levels. (Note: you can start working on metroidvania without first realizing all the abilities, but then very likely you will be able to add very little later without significantly reworking the already completed part of the project.) You must not only realize all the abilities received by the player, but also create a number of test levels to simulate passing the game and the growth of the character in its process (I will tell you more about this later).
Here I will give my own philosophy and thoughts about the development of metro-development, so do not consider the article a strict planning model. Only you will know what you need and how to achieve it best of all, so take the article as advice, not as a rule. Some of the most innovative solutions will require breaking the rules from time to time. The design creation strategies considered here are suitable for two-dimensional and three-dimensional games, as well as any camera styles (side-scroller, camera overhead, first-person view, etc.).
1. Planning gameplay systems

Before starting work on the levels, we need to create a foundation for the game.
A. Design / Uniqueness
Decide on the concept of the game and what makes it unique.
- 2D or 3D?
- How does the camera work? (Camera with scrolling, above the character’s head, controlled by the player, from the first person view, from the third person, moving along the curve, controlled by the script, static, etc.)
- What controls the player? (Character, machine, object, etc.)
- What will be the style of play? (Sci-fi, fantasy, realistic, cartoon, grotesque, unique)
- What is important in your game and what makes it stand out from the crowd? (Mechanics, idea, appearance, history, characters) (you can do something unique or memorable, or something that has already been created, but realize it better)
B. Player Properties
Select basic player properties. (What can a character do before gaining new abilities?)
- How does the character move? (Flies, walks, rides, slides, etc.)
- What does a character do to interact with the world? (Jumps, shoots, cuts, grabs, kisses, farts, etc.) (The interactions in the game must match its design. Such standard interactions define the character in the game. They can be new or derivative.)
B. Abilities, weapons, tools, equipment
Decide what abilities, weapons, tools and equipment a character will receive during the game. These abilities can improve his previous skills, or be used on top of existing ones, they can be equipped, they can have limitations, for example, ammunition. The most important thing is to determine what distinguishes the abilities from each other.
- How many unique ways can a character's movement ability improve? (Can he jump higher, fly, accelerate, run, crawl, roll, slide, swing, spin, swim, etc.?) (All motion properties require restrictions and unique mechanics. One cannot devalue the other.)
- How many unique ways can a character transform? (Does it change form, becomes a different character, change its state, etc.) (Transformations can completely change the properties of a character’s movement, collisions and vulnerabilities.) (All transformations require limitations and unique mechanics. You shouldn’t do so one devalued others.)
- How many unique ways are there to expand the character interaction? (Weapons, projectiles, magic, types of elemental damage, contact, special properties, etc.) (All interactions require restrictions and unique mechanics. One cannot depreciate the other.)
- If a character uses projectiles, how many different ways can they move? (Do they fly in an arc or directly, do they disappear with time, shoot quickly, fly around the edge of the screen, fly in a zigzag, bounce, bounce, stop objects, explode, etc.)
- In how many unique ways does the character see the world and how do the enemies see the character? (Vizors, visibility options, invisibility, lighting, measurements, secrets, etc.) (All visibility options require restrictions and unique mechanics. One cannot discount the other.)
- How many unique dangers are there in the game and can a player get something to protect him from these dangers? (Costumes, spells, armor, uniform, hats, etc.) (To protect or reduce damage from threats such as fire, lava, water, enemies, electricity, space, etc.)
- How many special abilities that change the world can get or use a character? (Stop time, change gravity, teleportation, fast move, activate, etc.)
- Does the player have health, does he need fuel or ammunition that increases or decreases with time? (How much does the player start the game with and what maximum can he get?)
Do not forget that abilities, tools and equipment can be implemented in various ways. They can be active, requiring the player to press a button or execute a command. Passive, automatically performing their task at the right time. They can be worn and removed at the option of the player. They may have restrictions that do not allow their reuse or in certain places. They can be used to interact with the environment, enemies or obstacles. They may be limited or disposable.
2. Implementation of systems

Now that we have planned the concept of what we want to do with the main character and the process of his growth, it's time to start. Remember that in a quality metroidvaniya there are nuances of the work of all mechanics. The best mechanics are those that have different uses. They create new gameplay features and have limitations so that they can be implemented in configurations that create difficulties for the player. At this point, most of the failures occur when creating games of the “metroidvania” genre. All abilities received by the player must be unique and reward him with well-thought-out and refined mechanics. It's time to create.
You should have a complete list of abilities, similar to the one below.
A. Example of a list of abilities - in this example I use simple and standard abilities. I hope that your list will be more creative and unique.
- Abilities by default - hit, jump. walking
- Ability upgrades - high jump, projectile shot, turning into a cat, poisonous costume, night vision, reverse gravity, ice strike, running
The number of abilities a player receives depends on you. You can any number required for your game. The list at this stage has no order yet.
B. Ability Standards — you need standards for building levels that show how far your ability can reach when used. This will help in level design and customization. (Example: default maximum jump height: 2 meters, for high jump: 5 meters) (Illustrations and diagrams help in planning)
- First create a blank of the main character and set up the basic movement properties of the character. (You do not need graphics or animation, just a rectangle is enough to display collisions.) Create a small test level close enough to the actual game space to achieve the correct parameters. He is still ugly, but at least you can play and feel about him. Sometimes it's even good that he is ugly. (Build a grid, no need to measure everything "by eye".)
- Then you need to realize all the abilities that change the way a character moves in the world. This is the most important part to complete, because it will determine all the constraints that need to be taken into account when creating levels and their contents.
- Having realized and adjusted all the motion-changing abilities and having achieved their good mutual work, you can start to lay out a simple sequence of levels or rooms.
(At this stage, there is still no interaction with enemies, but still, it is worth starting work on the character's interaction capabilities. They will be used to interact with the world.)
3. Test Sequence

The mechanics are implemented, so now you need to outline an extended test environment to answer some questions. It is worth creating resources for levels so that they have a standardized look. (Use the same dimensions and build them on the grid.) This way you can move the resources of the levels and change the order in which they are connected.
The test passage will be a set of rooms connected together, one after the other. We use this sequence to find out what abilities the players will open and in what order.
Each room has the following objectives.
- Allows players to enter a room and see a graphic representation of the ability they will open.
- Puts a player in a situation with a single exit, in which he has no other options than to receive the item.
- Allows players to touch an item to gain a new ability.
- Put the player in a situation in which he has to use the ability to leave the room.
- Allows players to leave this room only after using the ability to enter the next room.

The player falls into a room in which he cannot jump to the exit. The player picks up the subject of "high jump." He sees the ledge, to which to jump with a new ability. The player is forced to use the high jump ability to get out of the room.
These rooms should be self-sufficient gameplay. It does not have to be large rooms and they do not need to look beautiful. All information needed by the players should be immediately shown by the camera by default. It should show the most standard use of a player’s ability. The room and the situation should be simple and clear. The only interesting part in the room should be the one in which you need to apply a new ability. (AT THIS STAGE, DON'T TRY TO MAKE THE LEVEL STRUCTURE INTERESTING OR DIFFICULT! This may distract you from your goals in the development phase.)
Having outlined all the rooms with all the abilities to be opened, try to build them in the order in which they will be interesting to receive.

Start - run testing - high jump testing - cat testing - reverse gravity testing - end
4. Testing the sequence

Now that you can test the sequence, you will begin to see what the game will be in a compressed form. (You will understand the feelings of the character at any time of his "growth".)
- Can a player complete the entire sequence and gain all abilities
- Does the order in which the player gains new abilities is felt right? Maybe something out of line?
- Where can I stop the passage of the game until the player gets a new opportunity?
- What are the feelings from the ability when it is used in the room you created?
- Is the player confused about how or where to use the ability in a sequence?
- Did the players manage to turn back or go through the sequence incorrectly?
In the process of answering these questions, start thinking about how to improve everything that needs improvement. If players get interesting opportunities too early, try changing the order of rooms and the sequence of gaining abilities. If the players "break" the passage, then try to correct the example or adjust the mechanics so that it provides a restriction. If players get confused, correct the room or the mechanics of the ability. If something feels wrong or unpleasant, correct or remove it.
At this stage it is quite normal to abandon the idea, because you have not started creating a game yet. Need to do it right.
If everything works and you can go through the entire sequence of levels without problems, then you can move on. If everything seems good and you are satisfied with the order of transmission using the abilities of the movement, then it's time to work on the capabilities of interaction. Make it so that you can include any abilities in the debugging options at any time. It will save you a lot of time.
5. Testing interactions with the world, objects and enemies

So, we already know all the ways of character movement and it is time to decide in interactions with enemies and objects. Create another simple test environment to customize interaction with the world and objects.
Most likely, you will have:
- Doors - they divide areas and are a great way to lock areas until a player gets the ability or item they want. (Special weapons, key, suit, items, etc., which are needed to unlock.) Create all types of doors in your test environment! Try using a single standard size door with a different appearance, showing what the player needs to do to open them. Remember that doors can:
- Open and close several times
- Close behind the player to make him cope.
- Unlock by solving a puzzle or killing an enemy.
- Require to open an ability, weapon or key.
- Used to disguise loading level or assist in the transition between areas
- Destroyed objects - such objects can break, dissolve or disappear, so that players can go further or find hidden objects.
- Obstacles - these objects can hurt the player. He must be able to pass through them with the help of acquired abilities. Each has to serve its purpose and is set up in such a way that the player can easily overcome it after receiving the right tool.
- Devices / moving objects are items that require certain abilities to activate. They move the player from one point to another and they must be used to get to a new location. (Ropes, elevators, moving platforms, gears, pistons, power supplies, etc.)
Remember that some of these items can and should be used before gaining new abilities. Using others requires the use of abilities. Each ability must have at least one interactive element with which it works well. (Or that requires this ability to apply)
6. Enemies

It should be interesting to fight with each enemy with the help of any abilities available by default for the character. They should not be easy to win, but still possible. You need to plan enough enemies so that each ability has at least one enemy vulnerable to it. You need such enemies with whom it is interesting to fight even a completely "pumped" character. It is up to you to decide which enemies will fit your game and levels better.
Enemies are needed to maintain the character’s growth. They are an important part of the equation.
7. Completion of the ability testing sequence.

After completing at least one type of door or obstacle that requires a new interaction to pass through, you can complete the ability testing sequence.
Now you can create new test rooms in which players can unlock or receive abilities that allow them to interact with the world. You will add these rooms to the original test pattern you created. The task is to insert all the doors and to make sure that the rate of unlocking of interactions and motion modifiers coincide and they fit together well.
Most often, interactions (new weapons or attacks) are placed evenly between movement upgrades so that the pace is smooth. But you can choose a different pace, because the game with a steady pace is predictable. And people are tired of predictability.
Use your own taste when arranging all abilities in a test sequence. As a result, you get a micro-version of the entire game you create. You will be able to enter all rooms, one after another, and unlock abilities that will allow you to move forward and open the door to the next room. There should be one room for each received ability with only one interaction required for the passage. At this stage, you will find the correct order in which players will need to gain abilities to play the game along the optimal route.

Start - test run - test high jump - test firing shells - test toxic suit - test turning into a cat - test ice attack - test night vision - test reverse gravity - end
Do not worry about the destruction of the sequence in these test levels. If you did everything right, then it will be impossible.
At this stage you will know how the gameplay feels and what the abilities do. You will know that you can interrupt the passage until the player receives an ability, item or weapon. You will also know when each ability opens and get a good idea of this order. You will have a set of interactions and enemies to get started. The quality of the game depends on the mechanic, and if at this stage the character is boring to control, then you definitely need to achieve an interesting control.
Now you have a list of all completed abilities and the order in which they are opened by the player to complete the game. The finished playlist might look like this:
- Run
- High jump
- Shooting
- Poison suit
- Becoming a cat
- Ice attack
- Night vision
- Reverse gravity
Level design example
It seemed to me that it is worthwhile to add this guide, useful in planning the schemes of individual levels.

Passing the basic cycle of interactions
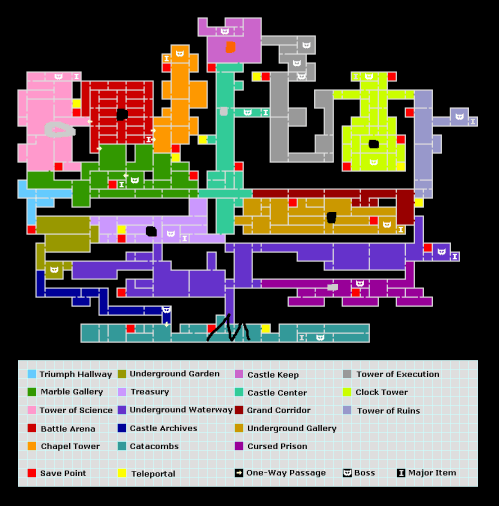
This image is an example of how planning levels for a metro-play game. From the legend it is clear what the symbols on the map mean. This scheme is suitable for a side scroller, a game with a camera overhead, or even a fully three-dimensional game.
The scale and shape of the rooms do not matter. At the beginning of work they can be of any size. This scheme simply helps to mentally go through the whole game at the planning stages and to remember how to place objects. For my example, I made the circuit almost completely linear. Now we look at the design philosophy used to create this scheme.
1. Start
Players enter this world where the START mark is located.
2. Doors
Standard entry points are the doors that players can open using the abilities they have at the current stage of the game. They are marked in green.
3. Save points
If your game cannot be saved anywhere and savepoints are used instead, then you should place one of them right at the beginning of the world. So players after death will have to go again as little as possible.
4. Entry to room A1
Room A1 introduces players to the world. This is the very first room in which players meet with the theme of the world. This room should be impressive and there should be an element that attracts the attention of players.
5. Study room A1
Studying room A1 can reward players with finding a secret. It can be important or trivial, depending on what you can offer the player.
6. Exit room A1 + entrance to the transition area
Players exit A1 and pass before entering A2 through an intermediate area. Transitional areas can be used to create diversity, they help players to take a break from action. They can also be used to mask the download of the next room, if required by the engine.
7. Entering room A2 (it requires an ability that the player does not yet have)
A2 is a room that serves the same purpose. This room ensures that the players will immediately see the area in which they need to use the ability while the player is absent. This is a barrier that prevents the player from going further. I marked it red. This room leads the players so that they will see this barrier. He must certainly stand out. It is necessary to arrange it in such a way that it is imprinted in the memory of the players. This should be the only important, eye-catching part of the room. (To highlight this barrier, you have different tools. You can use lighting to emphasize the importance of the area. You can place a remarkable object (statue or symbol) next to it. You can also shape the room so that the location of the barrier is obvious. Make everything necessary for the player I noticed a point leading to an area that was inaccessible to him.)
8. Exit room A2
Having seen the barrier in room A2, players continue on their way to the only available new exit. Here they can see another barrier, but it should not be highlighted. (Later, you will understand why the second barrier was set here.)
9. Entrance to room A3 (puzzle or study area)
Players finally get into A3. It can be made a puzzle or study area. Players obviously solve the puzzle in order to gain access to A4. If the players are smart, they can figure out how to get to the extra room B1 (Optional B1). The route through it is optional, but it can be made valuable by placing a secret in B1.
10. The entrance to the A4 (room to fight)
Finally, players get into A4. This could be a room with a serious fight or an area in which dangerous enemies begin to appear. It should not be too difficult for the player not to die right before the save point.
11. Entrance to the conservation room
If the game has save points, then the battle room is followed by a save room. If a player dies in the next room or in a boss battle, he will not have to go too far. Do not place the save too close to the boss room, otherwise a close encounter with the boss will become too predictable.
12. Entry to room A5 (teasing future ability + ability to replenish ammunition / farm resources)
A5 is the last area before the boss battle. The layout of this room serves two purposes. First: she teases the player using a future ability. This will give him the motivation to return to this world, gaining the ability later in the game. Second: she creates a little difficulty before meeting with the boss. It also allows you to replenish ammunition or resources, putting them right in front of the boss. (There must be a secret in this room that players cannot yet achieve. So you can add to the game what you didn’t plan before. Such a secret could be an increase in ammunition, an expansion of opportunities or even a way back to this level from another world.)
13. Entrance to the transition area (in front of the room with the boss)
You can see that on the door to the boss room there is a one-way access icon. This one-way entrance may simply be a door closing behind the player, or a more difficult transition. For example, a player may fall into the arena. At this point, we want the player to not be able to go back the same way he came.
14. The entrance to the room with the boss
If there are bosses in your game, then it is in this place that you should arrange a meeting with one of them. If there are no bosses in the game, then just make this room an area for obtaining a new ability. After defeating the boss, the player gets a well-designed "special thing."
15. Getting a new ability
New ability should be tempting for the player. It needs to be located in a place that seems deliberate and special.
16. Use new ability to exit a room.
Having received this new ability, the player must use it to exit the room. So you force the player to learn how to use the ability. Most often, you don’t even need to use hints, because players cannot lose here. They must use the ability to overcome the barrier marked in red.And this action should be obvious to the players.
17. Reuse of a new ability in the transition area
After the players have used the ability to pass through the barrier, they must use it again in the next transition area. At this point, you just need to remind them what the new ability is doing. This is where the magic lies.
18. Re-entry into room A2 (cut-off).
The exit through which players have just emerged using a new ability has just created a short path exactly where to go next. That is, he directs them in the right direction. Now they are back in A2, face to face with the most memorable object on the level.
19. Creating levels that create cuts after receiving new features.
The players went through a long sequence of levels to get a new ability, and now they don’t have to go back through the level they had just fought through. (This is an important part of metro-quality gameplay.) Levels should be structured in such a way as to create cuts after new abilities are gained. This does not happen by chance. We need to deliberately strive for this.
20. Reuse of new ability in room A2
Then the players use their new ability to overcome the barrier that they have been paying special attention to. For this, the game rewards them with a hit in a new area. They have used the new ability three times already. Players will most likely remember the presence of this ability, even if they do not use it for a while.
Finally
I outlined the basics of the approach. which can be used to create a level. You should not repeat the same techniques, you should be more and more inventive in the variation of schemes.
About the author: Keenan Pearson as lead worked on games such as Halo 4/5, Metroid Prime 2/3, Donkey Kong Country Returns.
Source: https://habr.com/ru/post/332588/
All Articles