Creating a blog engine with Phoenix and Elixir / Part 9. Channels

From the translator: “ Elixir and Phoenix are a great example of where modern web development is heading. Already, these tools provide high-quality access to real-time technologies for web applications. Sites with increased interactivity, multiplayer browser games, microservices - those areas in which these technologies will serve a good service. The following is a translation of a series of 11 articles that describe in detail the aspects of development on the Phoenix framework that would seem such a trivial thing as a blog engine. But do not hurry to sulk, it will be really interesting, especially if the articles encourage you to pay attention to the Elixir or become its followers.
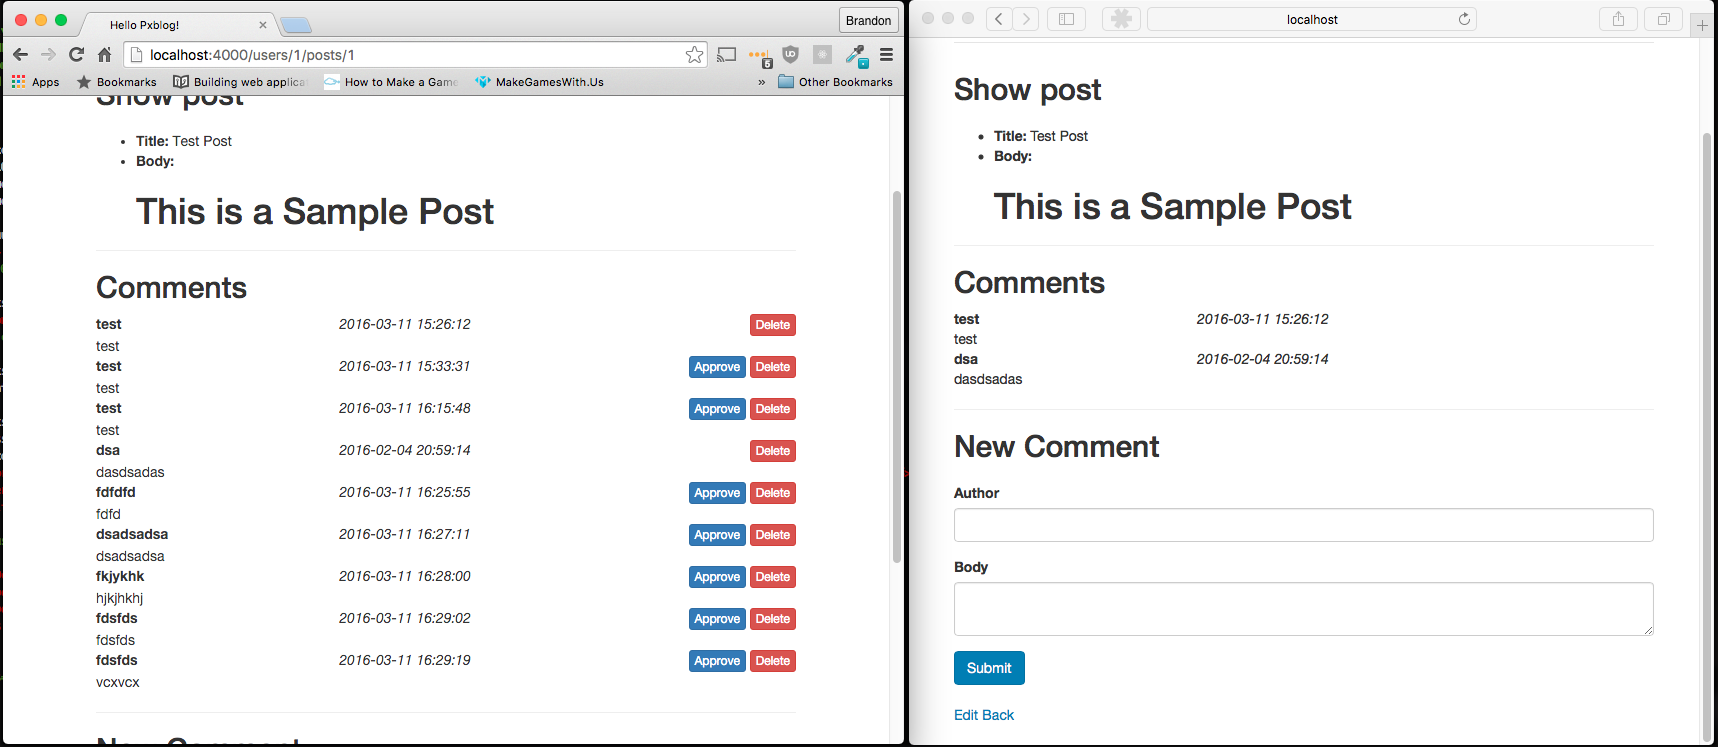
In this section, we’ll use Phoenix feeds to animate comments.
At the moment, our application is based on:
- Elixir : v1.3.1
- Phoenix : v1.2.0
- Ecto : v2.0.2
Where did we leave off
The last time was completely over with the comments! Now that all the features are ready, let's make the blog really cool, taking advantage of the opportunities that Elixir and Phoenix provide right out of the box. Let's turn the comment system into a live comment system using feeds from Phoenix. Frankly speaking: in this part there are a LOT of heavy javascript .
Let's go the same way as before: we will design a new function before its implementation. The following requirements apply to the live comment system:
- New comments as they appear should be broadcast only to authorized users.
- When approved, comments should be broadcast to all users.
- Deleted comments should disappear for all users.
Adding channels
The first step in implementing any channel in Phoenix is to work with the file web/channels/user_socket.ex . Change the commented line under ## Channels to the following:
channel "comments:*", Pxblog.CommentChannel And then create the channel itself, which we will work with. To do this, use the Phoenix generator:
$ mix phoenix.gen.channel Comment * creating web/channels/comment_channel.ex * creating test/channels/comment_channel_test.exs Add the channel to your `web/channels/user_socket.ex` handler, for example: channel "comment:lobby", Pxblog.CommentChannel Based on the requirements, we will create a separate comment channel for each post_id .
Let's start with the simplest implementation and go backwards to add security, so first we will have an authorized channel visible to everyone. We also need to identify the events that will be broadcast.
For authorized users:
- Comment created
- Comment has been deleted
- Comment approved
For all:
- Comment approved
- Comment has been deleted
First we need to set up some basic things. Add jQuery to the application to more easily interact with the DOM.
Adding jQuery with Brunch
Let's start by installing jQuery via NPM.
npm install --save-dev jquery And then we reboot the Phoenix server and verify that jQuery has been successfully installed. Open the web / static / js / app.js file and add the following code down:
import $ from "jquery" if ($("body")) { console.log("jquery works!") } If you see the jquery works! Message in the Developer Console of your browser, you can delete these lines and proceed to the next step.
Javascript channel implementation
First let's go back to the web/static/js/app.js and uncomment the socket import statement.
Then open the web/static/js/socket.js and make some small edits:
// For right now, just hardcode this to whatever post id you're working with const postId = 2; const channel = socket.channel(`comments:${postId}`, {}); channel.join() .receive("ok", resp => { console.log("Joined successfully", resp) }) .receive("error", resp => { console.log("Unable to join", resp) }); Referring to the description of the socket, to understand what messages you need to listen / broadcast. We will use “CREATED_COMMENT” for newly created comments, “APPROVED_COMMENT” for approved comments and “DELETED_COMMENT” for deleted ones. Add them as constants to the file socket.js :
const CREATED_COMMENT = "CREATED_COMMENT" const APPROVED_COMMENT = "APPROVED_COMMENT" const DELETED_COMMENT = "DELETED_COMMENT" Then we proceed to adding channel event handlers for each of these actions.
channel.on(CREATED_COMMENT, (payload) => { console.log("Created comment", payload) }); channel.on(APPROVED_COMMENT, (payload) => { console.log("Approved comment", payload) }); channel.on(DELETED_COMMENT, (payload) => { console.log("Deleted comment", payload) }); Finally, change the Submit button to create a “fake” event instead of sending a comment:
$("input[type=submit]").on("click", (event) => { event.preventDefault() channel.push(CREATED_COMMENT, { author: "test", body: "body" }) }) Refinement code to support channels
If you try to test in the browser, the application will fall. You will get an error message like this:
[error] GenServer #PID<0.1250.0> terminating ** (FunctionClauseError) no function clause matching in Pxblog.CommentChannel.handle_in/3 (pxblog) web/channels/comment_channel.ex:14: Pxblog.CommentChannel.handle_in(“CREATED_COMMENT”, %{“author” => “test”, “body” => “body”}, %Phoenix.Socket{assigns: %{}, channel: Pxblog.CommentChannel, channel_pid: #PID<0.1250.0>, endpoint: Pxblog.Endpoint, handler: Pxblog.UserSocket, id: nil, joined: true, pubsub_server: Pxblog.PubSub, ref: “2”, serializer: Phoenix.Transports.WebSocketSerializer, topic: “comments:2”, transport: Phoenix.Transports.WebSocket, transport_name: :websocket, transport_pid: #PID<0.1247.0>}) (phoenix) lib/phoenix/channel/server.ex:229: Phoenix.Channel.Server.handle_info/2 (stdlib) gen_server.erl:615: :gen_server.try_dispatch/4 (stdlib) gen_server.erl:681: :gen_server.handle_msg/5 (stdlib) proc_lib.erl:240: :proc_lib.init_p_do_apply/3 Last message: %Phoenix.Socket.Message{event: “CREATED_COMMENT”, payload: %{“author” => “test”, “body” => “body”}, ref: “2”, topic: “comments:2”} State: %Phoenix.Socket{assigns: %{}, channel: Pxblog.CommentChannel, channel_pid: #PID<0.1250.0>, endpoint: Pxblog.Endpoint, handler: Pxblog.UserSocket, id: nil, joined: true, pubsub_server: Pxblog.PubSub, ref: nil, serializer: Phoenix.Transports.WebSocketSerializer, topic: “comments:2”, transport: Phoenix.Transports.WebSocket, transport_name: :websocket, transport_pid: #PID<0.1247.0>} Right now we have no function to process messages inside the channel. Open the web/channels/comment_channel.ex file and let's make the handle_in function broadcast messages to subscribers instead of watching in silence. We also need to change the standard join function at the top:
def join("comments:" <> _comment_id, payload, socket) do if authorized?(payload) do {:ok, socket} else {:error, %{reason: "unauthorized"}} end end # ... # It is also common to receive messages from the client and # broadcast to everyone in the current topic (comments:lobby). def handle_in("CREATED_COMMENT", payload, socket) do broadcast socket, "CREATED_COMMENT", payload {:noreply, socket} end Now we can add similar code for two other messages that we are supposed to “listen to”.
def handle_in("APPROVED_COMMENT", payload, socket) do broadcast socket, "APPROVED_COMMENT", payload {:noreply, socket} end def handle_in("DELETED_COMMENT", payload, socket) do broadcast socket, "DELETED_COMMENT", payload {:noreply, socket} end We also need to make some changes to the templates. You need to know what post we work with and who the current user is. Thus, we add the following code to the top of the web/templates/post/show.html.eex file:
<input type="hidden" id="post-id" value="<%= @post.id %>"> Then open the web/templates/comment/comment.html.eex and change the opening div :
<div id="comment-<%= @comment.id %>" class="comment" data-comment-id="<%= @comment.id %>"> Now that everything related to comments is processed through Javascript, we need to remove some previously written code for the Approve / Reject buttons. Change the whole block to make it look like this:
<%= if @conn.assigns[:author_or_admin] do %> <%= unless @comment.approved do %> <button class="btn btn-xs btn-primary approve">Approve</button> <% end %> <button class="btn btn-xs btn-danger delete">Delete</button> <% end %> Also, inside the div tags, where the author and the text of the comment are displayed, change the strong tag so that they have the classes .comment-author and .comment-body , respectively.
<div class="col-xs-4"> <strong class="comment-author"><%= @comment.author %></strong> </div> ...
<div class="col-xs-12 comment-body"> <%= @comment.body %> </div> Finally, we need to make sure that we can appropriately refer to the author and the text of the comment, so we open the web/templates/comment/form.html.eex and make sure that the comment input field and the submit button look like this:
<div class="form-group"> <%= label f, :body, class: "control-label" %> <%= textarea f, :body, class: "form-control" %> <%= error_tag f, :body %> </div> <div class="form-group"> <%= submit "Submit", class: "btn btn-primary create-comment" %> </div> Now it is necessary to implement each of the broadcasting capabilities properly, so let's return to the “javascript field” and continue!
Implementing a user id through Phoenix.Token
We will need a way to check whether the user is who he claims to be and whether he has access to change the comment data. To do this, we will use the Phoenix.Token module built into Phoenix.
We start by putting a custom token in the application template. This is quite convenient, because we probably want to display it everywhere. In the web/templates/layout/app.html.eex add the following to the remaining meta tags:
<%= if user = current_user(@conn) do %> <%= tag :meta, name: "channel_token", content: Phoenix.Token.sign(@conn, "user", user.id) %> <% end %> Here we say we want a signed token that points to the user ID (of course, if the user is logged in). This will give us a great way to validate the user_id of a user through Javascript without having to trust hidden input fields or use other strange methods.
Next in the web/static/js/socket.js , make a few changes to the socket connection code:
// Grab the user's token from the meta tag const userToken = $("meta[name='channel_token']").attr("content") // And make sure we're connecting with the user's token to persist the user id to the session const socket = new Socket("/socket", {params: {token: userToken}}) // And then connect to our socket socket.connect() Now we will transfer the valid token back to the Phoenix code. This time we need the file web/channels/user_socket.ex , in which we change the connect function to check the user's token:
def connect(%{"token" => token}, socket) do case Phoenix.Token.verify(socket, "user", token, max_age: 1209600) do {:ok, user_id} -> {:ok, assign(socket, :user, user_id)} {:error, reason} -> {:ok, socket} end end So, we call the verify function from the Phoenix.Token module and pass the socket to it, the value to check, the token itself and the max_age value (the maximum token lifetime, for example, two weeks).
If the verification is successful, then send back the {: ok, [, value extracted from the token]}} tuple, which in our case is user_id. Then we support the connection with the user_id value stored in the socket (similar to saving the value in a session or conn).
If the connection could not be verified, this is also normal. Since we still want unauthorized users to receive updates without verified user_id, we will not assign anything, but simply return {:ok, socket} .
Go back to Socket.js
We will need a ton of Javascript code to support all our plans. Consider the problem in more detail:
- Take the postId value straight from the DOM
- Write a function to generate a new comment template
- Write a function to get the author comment
- Write a function for comment text.
- Write a function to get the comment ID
- Write a comment reset function
- Write a function to handle the creation of a comment
- Write a function to process comment approval
- Write a function to handle comment deletion
- Write function to handle comment creation event
- Write function to handle comment approval event
- Write function to handle comment deletion event
And I warned you that there will be a lot of javascript here :) Let's not waste time and immediately begin to write each of these functions. Comments in this piece of code describe each of the requirements, respectively.
// Import the socket library import {Socket} from "phoenix" // And import jquery for DOM manipulation import $ from "jquery" // Grab the user's token from the meta tag const userToken = $("meta[name='channel_token']").attr("content") // And make sure we're connecting with the user's token to persist the user id to the session const socket = new Socket("/socket", {params: {token: userToken}}) // And connect out socket.connect() // Our actions to listen for const CREATED_COMMENT = "CREATED_COMMENT" const APPROVED_COMMENT = "APPROVED_COMMENT" const DELETED_COMMENT = "DELETED_COMMENT" // REQ 1: Grab the current post's id from a hidden input on the page const postId = $("#post-id").val() const channel = socket.channel(`comments:${postId}`, {}) channel.join() .receive("ok", resp => { console.log("Joined successfully", resp) }) .receive("error", resp => { console.log("Unable to join", resp) }) // REQ 2: Based on a payload, return to us an HTML template for a comment // Consider this a poor version of JSX const createComment = (payload) => ` <div id="comment-${payload.commentId}" class="comment" data-comment-id="${payload.commentId}"> <div class="row"> <div class="col-xs-4"> <strong class="comment-author">${payload.author}</strong> </div> <div class="col-xs-4"> <em>${payload.insertedAt}</em> </div> <div class="col-xs-4 text-right"> ${ userToken ? '<button class="btn btn-xs btn-primary approve">Approve</button> <button class="btn btn-xs btn-danger delete">Delete</button>' : '' } </div> </div> <div class="row"> <div class="col-xs-12 comment-body"> ${payload.body} </div> </div> </div> ` // REQ 3: Provide the comment's author from the form const getCommentAuthor = () => $("#comment_author").val() // REQ 4: Provide the comment's body from the form const getCommentBody = () => $("#comment_body").val() // REQ 5: Based on something being clicked, find the parent comment id const getTargetCommentId = (target) => $(target).parents(".comment").data("comment-id") // REQ 6: Reset the input fields to blank const resetFields = () => { $("#comment_author").val("") $("#comment_body").val("") } // REQ 7: Push the CREATED_COMMENT event to the socket with the appropriate author/body $(".create-comment").on("click", (event) => { event.preventDefault() channel.push(CREATED_COMMENT, { author: getCommentAuthor(), body: getCommentBody(), postId }) resetFields() }) // REQ 8: Push the APPROVED_COMMENT event to the socket with the appropriate author/body/comment id $(".comments").on("click", ".approve", (event) => { event.preventDefault() const commentId = getTargetCommentId(event.currentTarget) // Pull the approved comment author const author = $(`#comment-${commentId} .comment-author`).text().trim() // Pull the approved comment body const body = $(`#comment-${commentId} .comment-body`).text().trim() channel.push(APPROVED_COMMENT, { author, body, commentId, postId }) }) // REQ 9: Push the DELETED_COMMENT event to the socket but only pass the comment id (that's all we need) $(".comments").on("click", ".delete", (event) => { event.preventDefault() const commentId = getTargetCommentId(event.currentTarget) channel.push(DELETED_COMMENT, { commentId, postId }) }) // REQ 10: Handle receiving the CREATED_COMMENT event channel.on(CREATED_COMMENT, (payload) => { // Don't append the comment if it hasn't been approved if (!userToken && !payload.approved) { return; } // Add it to the DOM using our handy template function $(".comments h2").after( createComment(payload) ) }) // REQ 11: Handle receiving the APPROVED_COMMENT event channel.on(APPROVED_COMMENT, (payload) => { // If we don't already have the right comment, then add it to the DOM if ($(`#comment-${payload.commentId}`).length === 0) { $(".comments h2").after( createComment(payload) ) } // And then remove the "Approve" button since we know it has been approved $(`#comment-${payload.commentId} .approve`).remove() }) // REQ 12: Handle receiving the DELETED_COMMENT event channel.on(DELETED_COMMENT, (payload) => { // Just delete the comment from the DOM $(`#comment-${payload.commentId}`).remove() }) export default socket Perhaps enough with javascript. We now have working functionality, but without any protection. Let's add it in our Elixir code by creating a helper function to add, approve and delete comments.
Auxiliary functions for channels
With our Javascript code, everything is fine, so you probably need to add helper functions on the backend side. Let's start with creating a new module that will become the workhorse of our interactions with the database to create / approve / delete comments. So create a web / channels / comment_helper.ex file:
defmodule Pxblog.CommentHelper do alias Pxblog.Comment alias Pxblog.Post alias Pxblog.User alias Pxblog.Repo import Ecto, only: [build_assoc: 2] def create(%{"postId" => post_id, "body" => body, "author" => author}, _socket) do post = get_post(post_id) changeset = post |> build_assoc(:comments) |> Comment.changeset(%{body: body, author: author}) Repo.insert(changeset) end def approve(%{"postId" => post_id, "commentId" => comment_id}, %{assigns: %{user: user_id}}) do authorize_and_perform(post_id, user_id, fn -> comment = Repo.get!(Comment, comment_id) changeset = Comment.changeset(comment, %{approved: true}) Repo.update(changeset) end) end def delete(%{"postId" => post_id, "commentId" => comment_id}, %{assigns: %{user: user_id}}) do authorize_and_perform(post_id, user_id, fn -> comment = Repo.get!(Comment, comment_id) Repo.delete(comment) end) end defp authorize_and_perform(post_id, user_id, action) do post = get_post(post_id) user = get_user(user_id) if is_authorized_user?(user, post) do action.() else {:error, "User is not authorized"} end end defp get_user(user_id) do Repo.get!(User, user_id) end defp get_post(post_id) do Repo.get!(Post, post_id) |> Repo.preload([:user, :comments]) end defp is_authorized_user?(user, post) do (user && (user.id == post.user_id || Pxblog.RoleChecker.is_admin?(user))) end end Let's start at the top. We will often refer to the Comment / Post / User / Repo modules, so for the purity of the code, it is correct to add aliases for them. We also need to import the build_assoc function from Ecto , but only the arity version 2.
Then we proceed immediately to the creation of the post. We habitually pass to the socket function, but we don’t always need it. For example, in this case, after all, anyone can add a comment. We associate the post_id, body, and author values in the arguments with the sample so that we can work with them inside the function.
def create(%{"postId" => post_id, "body" => body, "author" => author}, _socket) do post = get_post(post_id) changeset = post |> build_assoc(:comments) |> Comment.changeset(%{body: body, author: author}) Repo.insert(changeset) end We get the post through the function get_post , which has not yet been written. This will be a private function just below. Then create a changeset from the post to create a linked comment. At the end we will return the result of the function Repo.insert. This is an absolutely simple and standard code for Ecto, so there should be no surprises. The same can be said about all other functions. Next, take a look at the approve function:
def approve(%{"postId" => post_id, "commentId" => comment_id}, %{assigns: %{user: user_id}}) do authorize_and_perform(post_id, user_id, fn -> comment = Repo.get!(Comment, comment_id) changeset = Comment.changeset(comment, %{approved: true}) Repo.update(changeset) end) end Here again the necessary values are matched with the sample — post_id and comment_id from the first argument and verified user_id from the socket passed to the second. Next, we call the helper function authorize_and_perform and pass into it an anonymous function that receives the comment, updates the approved flag to true through the changeset, and then sends the update to Repo. Pretty standard code, but the authorize_and_perform function looks mysterious, so let's digress into parsing it:
defp authorize_and_perform(post_id, user_id, action) do post = get_post(post_id) user = get_user(user_id) if is_authorized_user?(user, post) do action.() else {:error, "User is not authorized"} end end Post_id and user_id are passed to it, since both of these values are required for proper authorization of actions with a comment. Then another auxiliary function is_authorized_user? which, receiving user and post, returns true or false. If all is well, then the anonymous action function is called. Note the point between the name and the brackets. Otherwise, a {: error, “User is not authorized”} tuple is returned, which we can intercept further if we want to display a nice error message.
Authorization is performed inside the function, and then the actions passed via the fn -> ... end block are executed. This is a good example when a lot of logic is duplicated.
With the function authorize_and_perform enough. Let's move on to the delete function:
def delete(%{"postId" => post_id, "commentId" => comment_id}, %{assigns: %{user: user_id}}) do authorize_and_perform(post_id, user_id, fn -> comment = Repo.get!(Comment, comment_id) Repo.delete(comment) end) end Here is the same approach. We obtain the necessary values through pattern matching, authorize the action, then get a comment and delete it. It's simple!
Finally, take a look at the smaller helper functions.
defp get_user(user_id) do Repo.get!(User, user_id) end defp get_post(post_id) do Repo.get!(Post, post_id) |> Repo.preload([:user, :comments]) end defp is_authorized_user?(user, post) do (user && (user.id == post.user_id || Pxblog.RoleChecker.is_admin?(user))) end Getting a user, getting a post and checking user authorization (code taken from PostController ). Auxiliary functions are over. Add them to CommentChannel .
Embedding helper functions in the comment channel
All we need is to replace the original code with the messages CREATED / APPROVED / DELETED with auxiliary functions. Open the web/channels/comment_channel.ex file:
alias Pxblog.CommentHelper # It is also common to receive messages from the client and # broadcast to everyone in the current topic (comments:lobby). def handle_in("CREATED_COMMENT", payload, socket) do case CommentHelper.create(payload, socket) do {:ok, comment} -> broadcast socket, "CREATED_COMMENT", Map.merge(payload, %{insertedAt: comment.inserted_at, commentId: comment.id, approved: comment.approved}) {:noreply, socket} {:error, _} -> {:noreply, socket} end end def handle_in("APPROVED_COMMENT", payload, socket) do case CommentHelper.approve(payload, socket) do {:ok, comment} -> broadcast socket, "APPROVED_COMMENT", Map.merge(payload, %{insertedAt: comment.inserted_at, commentId: comment.id}) {:noreply, socket} {:error, _} -> {:noreply, socket} end end def handle_in("DELETED_COMMENT", payload, socket) do case CommentHelper.delete(payload, socket) do {:ok, _} -> broadcast socket, "DELETED_COMMENT", payload {:noreply, socket} {:error, _} -> {:noreply, socket} end end The principles are similar in all three calls, so let's look only at create :
# It is also common to receive messages from the client and # broadcast to everyone in the current topic (comments:lobby). def handle_in("CREATED_COMMENT", payload, socket) do case CommentHelper.create(payload, socket) do {:ok, comment} -> broadcast socket, "CREATED_COMMENT", Map.merge(payload, %{insertedAt: comment.inserted_at, commentId: comment.id, approved: comment.approved}) {:noreply, socket} {:error, _} -> {:noreply, socket} end end The signature of the function has not changed, so leave it alone. The first thing we do is add a case statement for the CommentHelper.create function and pass payload and socket into it (think about the pattern matching we did). If it arrives :ok along with the created comment, we translate the CREATED_COMMENT message into the socket along with some data from the database, which Javascript does not have. If an error has occurred, then you do not need to broadcast anything, just return the socket and carefreely move on.
Conclusion
Now the blog has an awesome real-time commenting system. We also dived deep into the study of channels and tokens in Phoenix, and learned how to combine them to improve security. In this regard, the example is, of course, not perfect - we still broadcast all the comments, but not all are added to the div . So someone can see all the comments added, even disapproved ones. This can be further improved by creating separate authenticated and unauthenticated channels and only broadcast messages to the necessary ones. Considering that filtering comments only helps to avoid spam, increasing security in this case is not so important. But this technique may be useful in the future. We also forgot about the tests. It is better to try not to do this, but this part turns out to be painfully long, so let's end up with tests in the next one. This will keep the code coverage level high and remove some unnecessary code.
Design is still bad, so you need to do it. To do this, add Zurb Foundation 6 and create a clean look for our blogging platform!
Other series articles
- Introduction
- Authorization
- Adding Roles
- Process roles in controllers
- We connect ExMachina
- Markdown support
- Add comments
- We finish with comments
- Channels
- Channel testing
- Conclusion
Modest conclusion from a translator
Guys!Another three dozen articles on Elixir in Russian are waiting for you on the site of our project called Wunsh. You can also subscribe to the cool newsletter and receive the most interesting news on Elixir along with exclusive articles. I invite you to also join the work on the translation of documentation . And if you have any questions, then connect to our chat and channel in Telegram.
')
Source: https://habr.com/ru/post/332094/
All Articles