Artificial Intelligence Half-Life SDK: Retrospective
At the time of release in 1998, Half-life received a warm welcome for its game design, which was made possible by artificial intelligence. This AI influence has led to that. that HL was called one of the most important games in history .
And even twenty years later, after studying its code, you can learn a lot about creating simple but effective AI systems. All AI logic is hard-coded in C ++ and not too object-oriented, so it is much easier to understand in it than in more recent engines (although it is not so easy to expand it).
')
In this article we will look at the open SDK for Half-Life 1, analyze the various aspects of AI, such as the task scheduler system, its implementation, similar to finite automata, and the sensor system. After reading the article, you will more deeply understand the principle of using these concepts and their implementation in games.
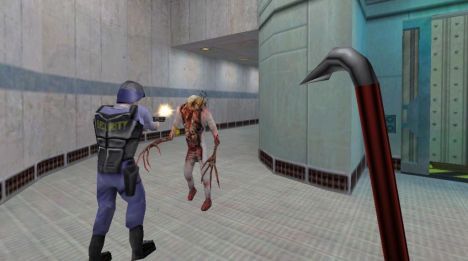
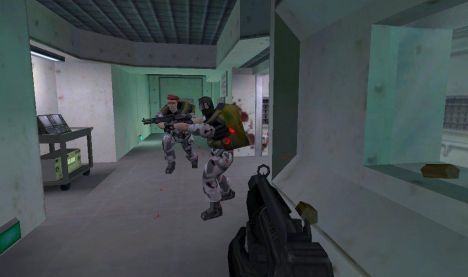
Screenshot 1: Guard Barney fights with one of the monsters
Download Half-Life SDK
Installing the Valve SDK for Half-Life is very simple (unlike the FEAR tools ) and if you want to develop mods, then it only requires the original game. Here's what you need:
- Download version 2.3 of the Half-Life SDK, or just source files without resources, or a copy of the full SDK with models.
- Unzip the file to any directory, preferably to the game folder, if you want to develop using the SDK mods. It takes a few seconds, as a result you will have a pack of directories with models and source code.
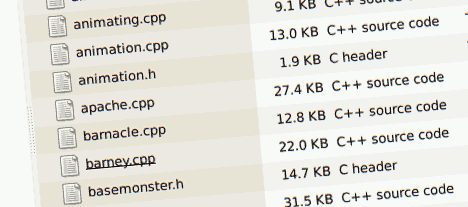
Screenshot 2: C ++ game code in Half-Life SDK version 2.3.
We deal with the code
The codebase is not as well structured as in FEAR or even Quake 3 . There are several subdirectories in it, but the files have not very clear names, and the implementation of C ++ classes is scattered across several files, from the names of which almost nothing can be understood.
- The full SDK has two folders that contain code:
Single-Player SourceandMultiplayer Source. Both have a similar directory structure. - Most of the game logic is in the
/dll/subdirectory, which contains all the files needed to build hl.dll, which is also a framework for mods. In addition, this directory contains AI code scattered across multiple files, with names like*monster*.[h,cpp],*ai*.[h,cpp]and other files - There are other directories in the source code directory, such as the
engine, which contains header files that interact with the main executable file (as basic entities). Thecommondirectory also contains similar low-level files used by the engine and game code.
If you study or modify AI, then you will spend most of your time on the
/dll/ directory, because it contains the behavior of various actors in the game.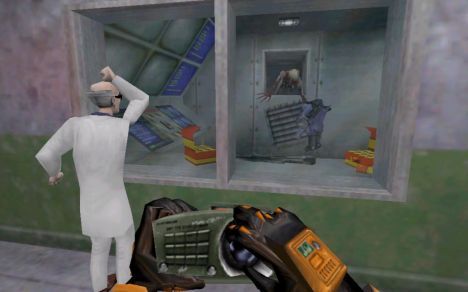
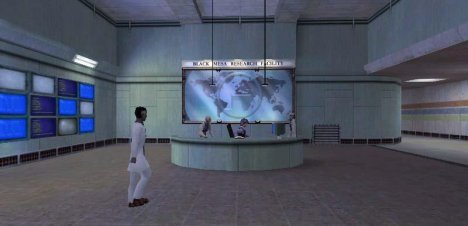
Screenshot 3: cutscene from the game with the scientist.
Scheduler and goal system
The
schedule.[h,cpp] files contain a very simple goal-driven system. It consists of several levels of tasks that can be procedurally combined.Tasks
Tasks are short atomized behaviors that have a specific purpose. For example, most of the Half-Life actors support the following tasks:
TASK_WALK_PATH , TASK_CROUCH , TASK_STAND , TASK_GUARD , TASK_STEP_FORWARD , TASK_DODGE_RIGHT , TASK_FIND_COVER_FROM_ENEMY , TASK_EAT , TASK_STOP_MOVING , TASK_TURN_LEFT , TASK_REMEMBER They are defined as enumerations in the header file and are implemented as C ++ methods.Conditions
Conditions are used to express the situation of an actor in the world. As is the case for the
Plans
The plan consists of a series of tasks (with arbitrary parameters) and takes into account the bit field of conditions to determine when the plan is not applicable. For easy debugging, the plan objects have names.
Goals
The goals are at a higher level and consist of plans. The goal logic can, if necessary, select a plan based on the failed task and the current context. Examples of goals from Half-Life:
GOAL_ATTACK_ENEMY , GOAL_MOVE , GOAL_TAKE_COVER , GOAL_MOVE_TARGET and GOAL_EAT .The code used by Valve is extracted from the Quake engine, and is still fairly obvious, despite being converted to C ++; files and struct have similar names.
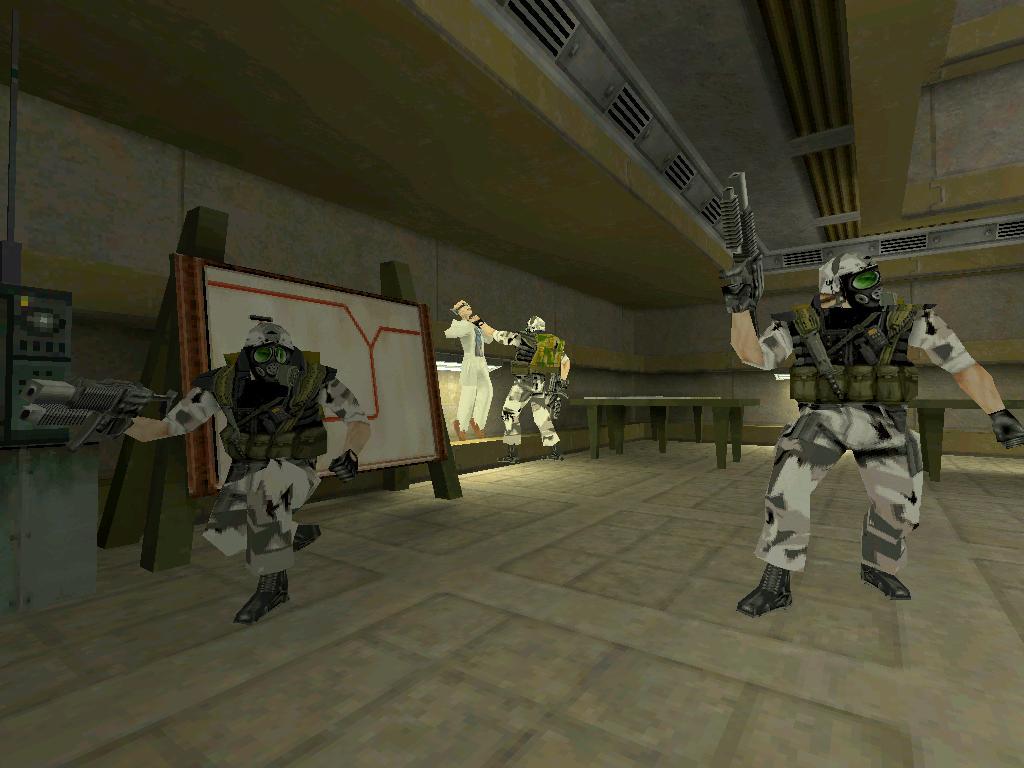
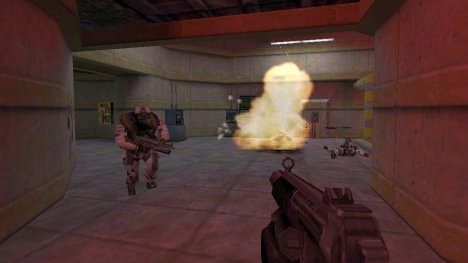
Screenshot 4: paratroopers raised the alarm at the research center.
State machine
In practice, all these plans and tasks are connected together in a structure similar to a finite state machine. At the top level, the function in
monsterstate.cpp is called to update the AI: void CBaseMonster :: RunAI ( void ); It, in turn, calls the overloaded functions responsible for checking with
MaintainSchedule() applicability of the current plan and selecting new ones with GetSchedule() . They can be modified according to needs using the generated classes, see, for example, barney.cpp or scientist.cpp .At the lower level, the
StartTask() and RunTask() functions implement logic for each of the task identifiers defined in the enum construct. They are implemented in classes that are also inherited from CBaseMonster . As a result, it largely looks like a finite state machine, implemented as a switch construction. void CScientist :: RunTask( Task_t *pTask ) { switch ( pTask->iTask ) { case TASK_RUN_PATH_SCARED: if ( MovementIsComplete() ) TaskComplete(); if ( RANDOM_LONG(0,31) < 8 ) Scream(); break; case TASK_MOVE_TO_TARGET_RANGE_SCARED: /* ... */ break; case TASK_HEAL: if ( m_fSequenceFinished ) { TaskComplete(); } else { if ( TargetDistance() > 90 ) TaskComplete(); pev->ideal_yaw = UTIL_VecToYaw( /* ... */ ); ChangeYaw( pev->yaw_speed ); } break; default: CTalkMonster::RunTask( pTask ); break; } } A more typical approach would be to implement each of these
case blocks in their own class, but with the existing implementation it is much easier to use the logic of one object in another, albeit at the cost of modularity.It is also interesting to note that AI stores two states: one ideal and one current. Thus, it is easier for the game code to create goals for actors, and force them to find the best ways to achieve them. This is an interesting combination of a finite state machine and a focused system.
Screenshot 5: game cutscene with the scientist.
Implementation of the sensory system
In the base
monster.[h,cpp] there is a code that gives all the actors sight, smell, and hearing. void CBaseMonster :: Look ( int iDistance ); The view function checks various flags, such as
SF_MONSTER_PRISONER and SF_MONSTER_WAIT_TILL_SEEN , to ensure that designers can control if necessary. The equation also takes into account parameters such as scope and angle of view. CSound* CBaseMonster :: PBestSound ( void ); The hearing and smell code works in a similar way, only using sound events. A list of objects that require the attention of monsters is stored, and the sensor system selects the best one for focusing.
Results and additional reading
In general, the source code behind this system, although simple, is very informative. If you want to choose an easy implementation of decision making by artificial intelligence, then you should choose this approach. However, it may be worthwhile to implement each task in its own facility: these days they usually use this solution in commercial games.
Screenshot 6: Spontaneous behavior of units in Half-Life.
The AI Half-Life code contains other interesting ideas.
- The game code represents the navigation points in the form of a 3D vector only and a location type! They are tied to the downstream navigation system, but they can also be used in the old-school system of bread crumbs, followed by monsters.
- Half-Life has surprised many with the behavior of units. However, there is no top-level AI in the game that controls these units, that is, all behavior manifests itself spontaneously.
If you want to recreate something more than just the monster from Half-Life, it is best to explore the bots framework. It will allow you to create AI bots for multiplayer games that can be used in third-party half-life modes. They can be found here:
Source: https://habr.com/ru/post/331438/
All Articles