Xamarin.Forms for WPF and UWP developers
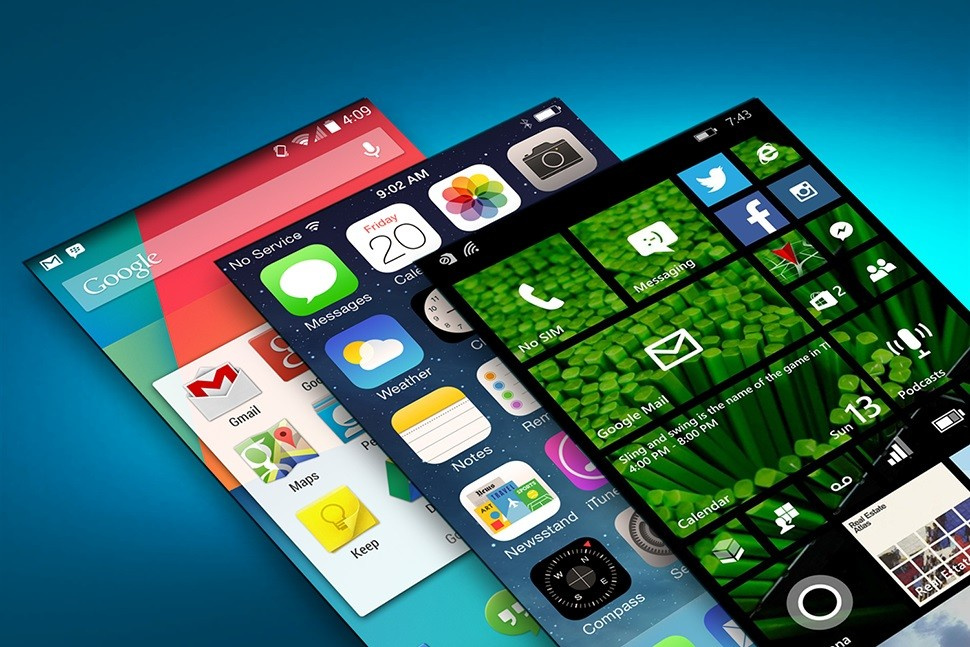
I will try shortly, but clearly, to tell the most interesting about Xamarin. The most basic concepts that UWP and WPF developers need to know in order to start working with Xamarin.Forms right off the bat.
Being engaged in development on Xamarin I did not quit UWP, but simply expanded my stack. UWP projects are one of the types of projects supported by Xamarin.Forms. It seemed to me that Xamarin is the closest UWP to developers, since it is the most native and very convenient to test applications when working with Visual Studio on Windows. But as it turned out, the UWP project type is not supported by Visual Studio for Mac. So Xamarin is close to all platforms.
Xamarin was created by the same team that was developing Mono. The name was taken from the monkey species Tamarin. Xamarin 2.0 was released in early 2013. And in fact, with its release it became possible to create applications for iOS, Android and Windows in C #. A year later, in 2014, the release of Xamarin 3 was released, and with it Xamarin.Forms.
')
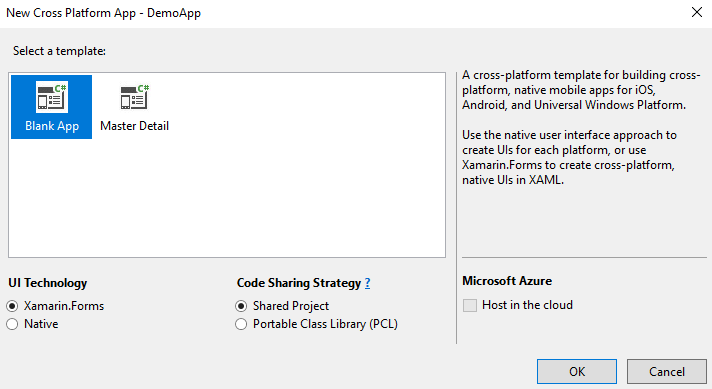
There are two types of projects you can create with Xamarin - Xamarin.Forms and Native . In the first case, for all platforms, a common interface is created using XAML or C #, and in the second case, the interface is created separately for each of the platforms. That is, for Xamarin.Forms, the interface is also written in a code common to all platforms (but edits are possible for each of the platforms separately). But Native applications have the ability to use the designer to create a graphical interface. And in order to create a UI for Xamarin.Forms, you have to write the code manually and run the application debugging each time to look at the changes in the appearance of the page.
What to choose? Standard tip: Xamarin.Forms is great for applications with a regular design. If your client is not capricious and does not require any special graphic effects and if you do not need to use platform-specific APIs in large volumes, then choose Forms. In addition, if you have experience in developing UWP or WPF, then XAML or C # Xamarin.Forms interface will be familiar and understandable to you. In a sense, Native, on the contrary, is closer to those who used to work with native applications of a specific platform.
Yes Yes. You are not "misheard", or more precisely, not "got drunk." In Xamarin.Forms, you have the choice to create an interface on XAML or C #. XAML graphics editor is not yet supported by Visual Studio.
If you create controls from C # code, then this reduces readability and increases the complexity of development. But the code is compiled and becomes a bit more productive.
It may be easier for someone unfamiliar with XAML to create an interface in C #. But as for me, XAML is much more convenient and readable. After the release of XAML Standard, it will become more familiar.
The simplest example. This page MainPage.xaml will be created by default:
<?xml version="1.0" encoding="utf-8" ?> <ContentPage xmlns="http://xamarin.com/schemas/2014/forms" xmlns:x="http://schemas.microsoft.com/winfx/2009/xaml" xmlns:local="clr-namespace:App1" x:Class="App1.MainPage"> <Label Text="Welcome to Xamarin Forms!" VerticalOptions="Center" HorizontalOptions="Center" /> </ContentPage> You can delete this page and create the MainPage.cs class with the following similar content:
using Xamarin.Forms; namespace App1 { public class MainPage : ContentPage { public MainPage() { Label lblIntro = new Label { Text = "Welcome to Xamarin Forms!", VerticalOptions = LayoutOptions.Center, HorizontalOptions = LayoutOptions.Center, }; Content = lblIntro; } } } By the way, XAML can also be compiled. In the case of a successful compilation, the size of the application will decrease and loading will accelerate. In addition, when compiling bindings are checked.
For this you need to place
using Xamarin.Forms.Xaml and
[assembly: XamlCompilation(XamlCompilationOptions.Compile)] anywhere in the code (no matter in which file - the main thing before the namespace)
How it all works
Xamarin uses the Mono platform to associate C # code with the native one for API platforms. The .NET framework itself is included in the application packages. At the same time, unused classes are excluded from it in order to reduce the size of the package. It turns out something like a portable distribution of .NET Core.
The binding of C # classes to the classes native to the platforms occurs at compilation. Both for iOS and for Android platforms, the binding is the same, the only difference is in compiler mode.
Xamarin.Android uses just-in-time compilation to fine-tune performance optimization when compiling to native Android APK.
The Ahead-of-Time (AOT) compiler compiles Xamarin.iOS projects into native ARM code right away and the resulting IPA file is also a native binary.
For writing code, you can use the languages C # and F #.
In order to develop and test applications, it is desirable to have physical devices. To test Android projects, it is possible to use not only real devices, but also various emulators. Setting up Android emulators is sometimes nontrivial. Although, if you have Hyper-V on your computer, then you're in luck. Visual Studio includes an excellent Visual Studio Emulator for Android , which requires Hyper-V, x64 and Windows PRO or Enterprise.
If you don't have Hyper-V, then you can still set up a Google Android emulator. It can be configured on both Intel and AMD processors, but not the fact that it will work quickly. Setting up an emulator is a separate topic.
If you are developing an application using Visual Studio for Mac, then you can use the iOS emulator. Users of Visual Studio for Windows are deprived of the opportunity to test applications using an emulator due to the limitations of the iOS platform. To compile and test the Xamarin.iOS project, you need a real device.
At the Build 2017 conference, Xamarin Live Player was announced with which you can connect a physical iOS or Android device with Visual Studio and test it on real iOS and Android devices without installing gigabytes of SDK. Already available preview Xamarin Live Player .
Visual Studio, along with Xamarin and all SDKs, takes up quite a lot of disk space. If your HDD is quite bulky, then this will not be a problem for you. Visual Studio 2017 takes up less space than 2015, so if you have a choice, put it. In the near future, saving space will allow the installation of Xamarin Live Player instead of the SDK.
Small cheat sheet on XAML elements
Pages / Pages
On iOS, the page control function is View Controller, on Windows Phone - Page, and on Android - Activity. But if you work in Xamarin.Forms application, then for you it is Page.
Main page types:
ContentPage - displays a single View (usually a container / layout item)
MasterDetailPage - a page that displays two information panels
NavigationPage - the main page of the application can be wrapped in the NavigationPage. For example: new NavigationPage (new MainPage ()); Then navigation will be added to the application.
TabbedPage - a page with several tabs ( Tabs )
CarouselPage - a page that can be flipped through. About how in the Photos application you can flip through photos using the swipe gesture.

There is also a TemplatedPage - this is what is at the core of ContentPage. In fact, thanks to TemplatedPage, you can use a ControlTemplate for ContentPage.
The material was conceived as a cheat sheet for not very novice developers, but for now everything should be too simple and clear. Therefore, in order to slightly deepen it, let’s analyze the application of TemplatedPage, a bit complicated by binding:
Add the following ControlTemplate to the App.xaml file:
<Application.Resources> <ResourceDictionary> <ControlTemplate x:Key="MainPageTemplate"> <StackLayout> <Label Text="{TemplateBinding HeaderText}" FontSize="24" /> <ContentPresenter /> </StackLayout> </ControlTemplate> </ResourceDictionary> </Application.Resources> Add ControlTemplate = "{StaticResource MainPageTemplate} to MainPage.xaml
<?xml version="1.0" encoding="utf-8" ?> <ContentPage xmlns="http://xamarin.com/schemas/2014/forms" xmlns:x="http://schemas.microsoft.com/winfx/2009/xaml" xmlns:local="clr-namespace:App1" x:Class="App1.MainPage" ControlTemplate="{StaticResource MainPageTemplate}"> <Label Text="Welcome to Xamarin Forms!" VerticalOptions="Center" HorizontalOptions="Center" /> </ContentPage> Well, once we have a {TemplateBinding HeaderText} in the ControlTemplate, then we need to implement it in MainPage.xaml.cs
public static readonly BindableProperty HeaderTextProperty = BindableProperty.Create("HeaderText", typeof(string), typeof(MainPage), ""); public string HeaderText { get { return (string)GetValue(HeaderTextProperty); } } Although even this example should be clear and close to WPF / UWP developers.
Instead of OnNavigatedTo and OnNavigatedFrom, Xamarin pages have OnAppearing () and OnDisappearing () methods.
Layouts / Layouts
Layouts, like most controls, are inherited from the View class. Let's look at the most basic layout elements:
StackLayout - arranges items horizontally or vertically in order
AbsoluteLayout - absolute positioning (as in WinForms)
RelativeLayout is something like AbsoluteLayout, but positions are set as a percentage.
Grid - table
ContentView is a View variant of the same ContentPage (i.e. containing only one item)
ScrollView - an item whose contents can be scrolled if it does not fit.
Frame - contains only one padding element with a default indentation of 20

And a couple of Layout can be considered separately:
TemplatedView is very similar to TemplatedPage, but in this case it is a View, not a Page.
ContentPresenter - layout manager for template views
Controls
The controls that are in Xamarin.Forms. The following controls are also inherited from View and do not require special presentation of UWP / WPF to developers:
Label , Button , Image , ProgressBar , Slider , SearchBar , DatePicker , TimePicker , WebView
And I will tell you about the following controls in two words:
Stepper - a function like the slider, but the interface is in the form of two buttons (increasing and decreasing the value)
Switch - switch. Performs the checkbox function
Entry - text field
Editor - multiline text field
BoxView - a rectangle that can be painted in some color
ActivityIndicator - shows that something is happening (the moment when the application "thought")
In addition, there are elements for placing various collections in them: Picker , ListView , TableView .
And elements for special tasks, the name of which more or less corresponds to the content:
Map , OpenGLView .
The full list of controls inherited from View is available on the following page: Xamarin.Forms Views .
Cells
The last type of control is the type inherited from Cells. As content located in the cells of ListView, TableView can be various controls with eloquent names: EntryCell , SwitchCell , TextCell , ImageCell .
Accordingly, the value of a table cell can be: a text entry field (EntryCell), a switch (SwitchCell), text (TextCell) or an image (ImageCell).
You can use different types of cells in the same table. Below is an example of a TableView, whose contents are a text field and a switch:
<TableView> <TableRoot> <TableSection Title=""> <SwitchCell Text=" " /> <EntryCell Text=" " /> </TableSection> </TableRoot> </TableView> In addition to the four cell types ListView and TableView already mentioned, you can specify some of your content in a cell using ViewCell. For example, you can place it inside a StackLayout with some content.
<TableSection Title="Getting Started"> <ViewCell> <StackLayout Orientation="Horizontal" WidthRequest="300"> <Image Source="portrait.jpg" /> <Label Text=" " TextColor="#503026" /> </StackLayout> </ViewCell> </TableSection> A bit unusual, but the control of the width and height of the element is controlled by the attributes WidthRequest and HeightRequest. As it may become clear from their names, they do not set the size of the element right away, but accept the request to set the size.
The set values for platforms are set equal to their size measurement types. For UWP this is Effective pixels, for iOS - Points and for Android these are Density-independent pixels. The Width and Height attributes are read only and return the current dimensions.
Messagingcenter
MessagingCenter allows different components of the application to communicate with each other.
Where can this be used? For example, it may be necessary to send a message between two Page or ViewModel objects. Or it may be necessary to report a completed background download.
A real example of how this can be implemented. Somewhere in the code the following registration of the event subscription is placed:
MessagingCenter.Subscribe<MainPage, string>(this, "SomeIdText", GetMessage); If after this MainPage sends a message with the text SomeIdText, then the GetMessage method with the following signature will be called:
private void GetMessage(object sender, string args) { // - } or you can use a lambda expression:
MessagingCenter.Subscribe<MainPage, string>(this, "SomeIdText", (sender, arg) => { // - }); The message is sent as follows:
MessagingCenter.Send<MainPage, string>(this, "SomeIdText", ", args"); And the cancellation is done using the following line:
MessagingCenter.Unsubscribe<MainPage, string>(this, "SomeIdText"); useful links
If you have few controls, then you can use the Xamarin portal , where you can download any ready-made paid or free components.
In addition, you can install NuGet packages .
Some popular Open-Source components can be found on GitHub .
The open source code itself Xamarin can also be found on GitHub .
You can send some bug via BugZilla .
Shared Projects, PCL or .NET Standard
You can store the shared code either in a shared project (Shared Project) or in a shared PCL library.
Depending on what you choose, you will have certain specific nuances in the work.
Shared Projects theoretically allow you to access all the capabilities of the .NET Framework. But not the fact that all of them can be used in the Xamarin project. So the great features of Shared Projects are deceptive.
PCL features are limited according to the number of platforms assigned to the library. The more platforms you assign to a library, its capabilities will be more limited there.
Nobody forbids in one decision to have both Shared Project and PCL at once.
In order for PCL to use some namespaces, it is sometimes necessary that the solution be brought to .NET Standard.
Suppose you want to use the System.Security.Cryptography class. Until your PCL library is converted to .NET Standard, you will not succeed.
However, you can use cryptography in each of the projects separately. For UWP, this can be done using the Windows.Security.Cryptography namespace, and for Android and iOS - System.Security.Cryptography.
The downside to bringing to .NET Standard is that Android projects in this case will only support Android 7.0 and iOS 10.0 and higher. For PCL, profiles are used for standardization.
Overall, use in PCL projects brings more convenience and features. For future projects it is better to use .NET Standard. Over time, libraries of this type will replace PCL.
How to work with API of various platforms
Shared Project Features
If you use the Shared Project as a source of common code, then you can use compiler directives:
#if , #elif , #else and #endif
For example:
#if __ANDROID__ // , Android #endif If you use compiler directives, then the IDE enclosed in them will not be affected when refactoring by means of IDE. This is attributed to the cons of common projects.
You can create your own implementation of a class in each of the projects separately using Class Mirroring.
For example, create your own Alert implementation in each of the iOS, Android and UWP projects. For example, for Android, the class might be:
internal class Alert { internal static void Show(string title, string message) { new AlertDialog.Builder(Application.Context).SetTitle(title).SetMessage(message); } } Why do you need it? In this example, you can create your own window with a message using the native capabilities of the platform.
Pay attention to the predicate internal. It is obligatory in this case. From the general project, the method can be called as follows:
Alert.Show("", " Xamarin!"); DependencyService
With this functionality, you can write a single code for various platforms in PCL and in common projects. The functionality is based on the Dependency Injection pattern. Hence the name.
It is done this way. Some kind of interface is created common for all platforms (in a general project or PCL) and after, an implementation of this interface is created for each of the platforms (in each of the platform projects).
Let me give you an official example of Xamarin - Introduction to DependencyService , but only with changes for UWP.
In the general project / PCL we create the interface:
public interface ITextToSpeech { void Speak(string text); } In projects for each of the platforms we create implementation. For UWP, you need to create a TextToSpeechImplementation.cs file in your project with the following code:
public class TextToSpeechImplementation : ITextToSpeech { public TextToSpeechImplementation() { } public async void Speak(string text) { MediaElement ml = new MediaElement(); SpeechSynthesizer synth = new SpeechSynthesizer(); SpeechSynthesisStream stream = await synth.SynthesizeTextToStreamAsync(text); ml.SetSource(stream, stream.ContentType); ml.Play(); } } And you need in any UWP project file before the namespace to register the DependencyService:
[assembly: Xamarin.Forms.Dependency(typeof(AppName.UWP.TextToSpeechImplementation))] namespace AppName.UWP For Android, the code will be like this:
TextToSpeech _speaker; string _toSpeak; public TextToSpeechImplementation() { } public void OnInit([GeneratedEnum] OperationResult status) { if (status.Equals(OperationResult.Success)) { var p = new Dictionary<string, string>(); _speaker.Speak(_toSpeak, QueueMode.Flush, p); } } public async void Speak(string text) { var ctx = Forms.Context; _toSpeak = text; if (_speaker == null) { _speaker = new TextToSpeech(ctx, this); } else { var p = new Dictionary<string, string>(); _speaker.Speak(_toSpeak, QueueMode.Flush, p); } } } And you need to register implementation in any Droid project file before the namespace:
[assembly: Xamarin.Forms.Dependency(typeof(TextToSpeechImplementation))] namespace AppName.Droid The code for iOS can be viewed on the following StackOverflow documentation page: Accessing native features with DependencyService .
Now you can invoke the interface implementation in the PCL or common project code. The implementation for the platform you are currently using will be automatically called:
DependencyService.Get<ITextToSpeech>().Speak("Hello from Xamarin Forms"); Attribute registration simplifies the use of DI. But you can apply Dependency Injection yourself. For example, so. Add a class to PCL:
public static class TextToSpeech { public static ITextToSpeech Instance { get; set; } } In each project, initialize the class instance:
TextToSpeech.Instance = new TextToSpeechImplementation(); And you can use from PCL:
TextToSpeech.Instance.Speak("Hello! How are you?"); Device Class
This class allows you to:
- Determine the current device type using Device.Idiom (Desktop, Tablet, Phone, Unsupported).
- Determine the operating system using Device.OS (Android, iOS, Windows, WinPhone).
Device.RuntimePlatform is used to set various parameters (very often different sizes) to platforms. It can be used as a condition
if (Device.RuntimePlatform == Device.Android) Margin = new Thickness(0, 20, 0, 0); Indents and sizes may vary on different platforms. Therefore, very often for some of their platforms, it is necessary to set a larger or smaller indent, or to change some other parameter.
Hint : Previously, it was possible to set a value using Device.OnPlatform, but now this method is marked as obsolete. Although it has become possible to use a tag with the Platform attribute from XAML. For example:
<StackLayout> <StackLayout.Padding> <OnPlatform x:TypeArguments="Thickness"> <On Platform="Android, WinPhone">0</On> <On Platform="iOS">0,20,0,0</On> </OnPlatform> </StackLayout.Padding> </StackLayout> Hint 2 : Different classes for platforms are used to obtain information about the operating system and model:
UIKit.UIDevice for iOS
Android.OS.Build for Android
Windows.Security.ExchangeActiveSyncProvisioning.EasClientDeviceInformation for Windows
Custom renderers
In Xamarin Forms, you can change the appearance of the main control using the rendener decorator. To do this, you can create a custom renderer - that is, a separate appearance of drawing controls for each of the platforms.
Consider the simplest example:
In Xamarin, the control with the text entry line is called Entry. Let's make it so that the appearance of the text entry line is slightly different from the standard one. To do this, create a class in PCL or Shared Project
public class MyEntry : Entry { } Now, in each of the projects, you can create an instance of the MyEntryRenderer class in which you need to override the OnElementChanged drawing event and in this event first draw the control using base.OnElementChanged (e), and then modify its interface according to need. The following class is an example of how to change the background color of the MyEntry control in an iOS application:
using Xamarin.Forms.Platform.iOS; [assembly: ExportRenderer (typeof(MyEntry), typeof(MyEntryRenderer))] namespace YourAppName.iOS { public class MyEntryRenderer : EntryRenderer { protected override void OnElementChanged (ElementChangedEventArgs<Entry> e) { base.OnElementChanged (e); if (Control != null) { Control.BackgroundColor = UIColor.FromRGB (204, 153, 255); } } } } As you can see, the class inherits from EntryRenderer. A list of all the classes from which to inherit is available in the English-language documentation: Renderer Base Classes and Native Controls .
In order to change the appearance of MyEntry for the Android platform, you can take the same class, but make small changes. First of all, change the name of the platform from iOS to Android. Well, and then, in the OnElementChanged event, replace the interface code with a platform-specific interface.
if (Control != null) { Control.SetBackgroundColor (global::Android.Graphics.Color.LightGreen); } As you understand, in order to change the style of an element, you need to know a little about the features of the platform.
In addition to checking for Control! = Null, there are 2 more checks:
if (e.OldElement != null) { // ( ) } and
if (e.NewElement != null) { // } If you just need to change the design a bit, then you can simply use Control! = Null
e.Old or e.NewElement is a Xamarin.Forms control that is rendered with the renderer. For example, Entry or Button.
Control is the version of the control that is used by the current platform. You can say native to the platform control (you remember that Xamarin.Forms links its classes with the classes native to the platforms).
For example, for UWP, the native equivalent of Entry would be a TextBox. For iOS, the Entry analog is UITextView, and for Android, it is EditText.
Or take the Xamarin.Forms control called DatePicker. For UWP, its native counterpart will be a class with the same name - DatePicker. On iOS, a control called UITextField will be drawn, and on Android, an EditText.
Even in a fairly voluminous article, it is difficult to fully disclose the topic of Xamarin development. The Xamarin.Forms interface is not very far from WPF and UWP. Therefore, the familiar C # classes allow you to start developing almost immediately. Yes, and platform developers are trying to make it more familiar. For example, Xamarin applications are quite similar to the UWP life cycle.
The application just as well can go into a state of suspended (sleep). For processing, you can use the following events: OnStart , OnSleep , OnResume .
After some time, after the final transition to .NET Standard and XAML Standard, C # developers will become even more comfortable working with various technologies from the language stack.
Source: https://habr.com/ru/post/331308/
All Articles