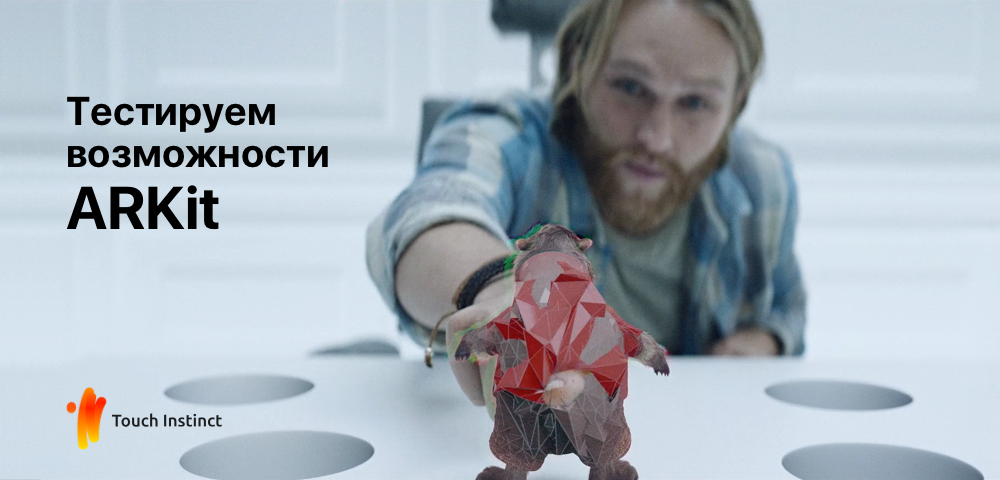
We are testing the capabilities of ARKit. Create a game with augmented reality
At WWDC 2017, Apple announced the ARKit - SDK for working with augmented reality. Thanks to him, the threshold of entry into this technology has become much lower. You can expect a large number of high-quality games and applications.
If you watched Keynote, then you probably already delighted with what he saw. The game world, which Apple engineers were able to deploy on a regular table with ARKit, can not leave indifferent even the most sophisticated gamers. It was not just a prototype, but a well-working technology that was really worked on. This is easily seen by running a few demos or trying to bring something virtual to our world.
Forced to upset happy owners of iPhone 6 and below. On these devices all these charms of life will be unavailable. To use all the key functions of ARKit, an A9 or higher processor is required. Apple, of course, will give curtailed access to functionality, but that’s not at all.
Augmented Reality
Augmented reality (augmented reality, AR) is a virtual environment that is superimposed on the real world to make it more expressive, informative, or just for fun. The term, presumably, was proposed by Boeing researcher Thomas Codell in 1990. Even then, the first examples of devices using this technology began to appear. For the first time, augmented reality was implemented on electronic helmets of pilots to display information about the flight and the radar.
I would like to ask what everyone has been doing for almost 20 years and why this technology has received large-scale development only now. Everything is extremely simple. The emergence of good cameras in phones, sensors and the development of computer vision technologies made this possible.
What can be done useful and what to expect in the near future on the shelves of the AppStore? In fact, everything is limited only by the imagination of the developers. It is safe to name several industries where AR will revolutionize with the release of the new Apple framework:
- Game industry;
- Architecture;
- Film industry.
ARKit features
ARKit is not a Harry Potter wand, but a tool that can intelligently process a large amount of data received from the device. Thanks to the camera and motion sensors, the framework tracks movement, finds surfaces, and determines the light intensity. After analyzing the data, we get a concrete idea of the surrounding world in the form of intersection points, the coordinates of the surfaces and the position of the camera in space.
The core task of ARKit is World Tracking to create a virtual model of the real world. The framework recognizes the features of video frames, tracks changes in their position and compares this information with data from motion sensors. The result is a virtual model of the real world. A separate feature is the recognition of flat horizontal surfaces. ARKit finds the plane and reports on their location and size.
Tracking the outside world requires an analysis of the image received from the camera. To achieve the best result, you need good lighting.
The basis of ARKit are ARSCNView and ARSKView . They are used to display live video and render 3D and 2D images. As everyone guessed, these are the heirs from SCNView and SKView . Therefore, ARKit does not introduce any incredible features in the display of data. These are all the same engines for working with 2D and 3D graphics, with which everyone is already familiar. Therefore, the threshold of entry into this technology will be quite low. Apple is famous for its love for its technologies and products, but despite this, the ARKit developers made support for Unity and the Unreal Engine. This will positively affect the number of high-quality applications that will appear in the near future.
ARSCNView and ARSKView contain the heart of ARKit - ARSession . It is this class that contains everything you need to work with augmented reality. To start the ARSession you need to transfer the configuration of the session.
The type of configuration determines the style and quality of work of the AR, which can be achieved:
- On devices with an A9 processor or newer, you can use
ARWorldTrackingSessionConfiguration. It is this configuration that makes it possible to take advantage of all the power of the new framework. A model of the surrounding world in virtual reality will be created for you and information about the planes in the field of view of the camera will be provided. This will help position the virtual objects with maximum accuracy. - On other devices that support ARKit, only
ARSessionConfigurationwill be available. The base class provides only information about the movement of the device in space, but does not build virtual models. This will not give the desired effect and will not allow to enjoy all the quality of the new technology. You will not be able to capture virtual objects relative to objects in the real world.
After selecting the type of configuration, you need to create an instance of it, configure it and start the session:
override func viewWillAppear(_ animated: Bool) { super.viewWillAppear(animated) // Create a session configuration let configuration = ARWorldTrackingSessionConfiguration() // Run the view's session sceneView.session.run(configuration) } It is important to remember that ARKit consumes quite a lot of energy for calculations. If the View with content is not currently displayed on the screen, then it makes sense to pause the session for this time using session.pause() .
After starting the session, you can start working with virtual content. If you want ARKit to recognize planes, do not forget to set the planeDetection value of the configuration to horizontal . Initially, recognition of horizontal surfaces is disabled. Let's hope that in the future it will be possible to find vertical surfaces, but so far only horizontal ones.
The method of obtaining information about the environment depends on what kind of data display you will use ARSCNView , ARSKView or Metal . The unit of information that ARKit provides is ARAnchor . If you have surface recognition enabled, you will encounter the subclass ARPlaneAnchor . It contains information about the planes found. Thanks to these anchors it is possible to navigate in space. In case of using Metal, you will have to manually render. Then you can subscribe to updates using the ARSessionDelegate delegate from the ARSession class, and receive anchors from the session. If you use one of the Apple engines to render objects, then you can use the more convenient delegates ARSCNViewDelegate or ARSKViewDelegate .
At first glance, everything is quite simple. Almost all the hard work is done by ARSession . Let's try to make a test application.
We test the capabilities of ARKit
Augmented reality is now all associated with the game Pokémon GO, which blew up the gaming industry market. Let's try to do something similar.
To create a test application, we will use ARSCNView to create and render 3D models. Our game will consist of 2 stages. First, we will set targets in the room, and then try to hit them all as quickly as possible. The game is rather primitive, but it will demonstrate the simplicity of creating games with augmented reality.
To begin with, we stretch the entire ViewController ARSCNView and create an IBOutlet. Further we will work with it, as with usual SCNView . Make the initial setup. Let's make the controller a delegate of the contacts of the physical world and display statistics. Set the session start and pause when the controller appears and is hidden.
override func viewDidLoad() { super.viewDidLoad() sceneView.scene.physicsWorld.contactDelegate = self // Show statistics such as fps and timing information sceneView.showsStatistics = true } override func viewWillAppear(_ animated: Bool) { super.viewWillAppear(animated) // Create a session configuration let configuration = ARSessionConfiguration.isSupported ? ARWorldTrackingSessionConfiguration() : ARSessionConfiguration() // Run the view's session sceneView.session.run(configuration) } override func viewWillDisappear(_ animated: Bool) { super.viewWillDisappear(animated) // Pause the view's session sceneView.session.pause() } The choice of session configuration depends on the model of the device on which the application was launched. It is imperative to do this check. Otherwise, in case of an incorrect configuration, the session will send an error and the game will not start at all.
ARKit is so simple that we will no longer use any of its settings. The only thing that is needed is the location of the camera in the space of the virtual world. The rest is a matter of technology and a bit of SceneKit.
We will not describe here the processing of clicks or scoring. This is not so important, and you can see it yourself in the DEMO presented at the end of the article.
Our game contains two models of objects: the ball, which we will shoot, and the flying Touch Instinct logos. To add these models to the screen, you need to create them using SCNNode .
What you need to create a physical object:
- set a shape of a certain size;
- create a shape with physical properties to control contacts with other objects;
- create a physical body to describe the behavior of an object in contact;
- set the texture.
An example of the implementation of the classes of the cartridge in the form of a ball and a logo in the form of a cube with the necessary textures.
class ARBullet: SCNNode { override init() { super.init() let arKitBox = SCNSphere(radius: 0.025) self.geometry = arKitBox let shape = SCNPhysicsShape(geometry: arKitBox, options: nil) self.physicsBody = SCNPhysicsBody(type: .dynamic, shape: shape) self.physicsBody?.isAffectedByGravity = false self.physicsBody?.categoryBitMask = CollisionCategory.arBullets.rawValue self.physicsBody?.contactTestBitMask = CollisionCategory.logos.rawValue // add texture let material = SCNMaterial() material.diffuse.contents = UIImage(named: "art.scnassets/ARKit_logo.png") self.geometry?.materials = [material] } required init?(coder aDecoder: NSCoder) { fatalError("init(coder:) has not been implemented") } } class Logo: SCNNode { override init() { super.init() let logo = SCNBox(width: 0.1, height: 0.1, length: 0.1, chamferRadius: 0) self.geometry = logo let shape = SCNPhysicsShape(geometry: logo, options: nil) self.physicsBody = SCNPhysicsBody(type: .dynamic, shape: shape) self.physicsBody?.isAffectedByGravity = false self.physicsBody?.categoryBitMask = CollisionCategory.logos.rawValue self.physicsBody?.contactTestBitMask = CollisionCategory.arBullets.rawValue // add texture let material = SCNMaterial() material.diffuse.contents = UIImage(named: "art.scnassets/logo-mobile.png") self.geometry?.materials = Array(repeating: material, count: 6) } required init?(coder aDecoder: NSCoder) { fatalError("init(coder:) has not been implemented") } } I want to draw attention to the CollisionCategory. This structure is used to determine the type of object in contact.
struct CollisionCategory: OptionSet { let rawValue: Int static let arBullets = CollisionCategory(rawValue: 1 << 0) static let logos = CollisionCategory(rawValue: 1 << 1) } This is the standard tactic for determining contact. The categoryBitMask property sets the mask for a specific object, and contactTestBitMask sets up all contacts that are interesting to us and about which we want to receive notifications.
Since we started talking about contact processing, let's see how it looks in the controller. In viewDidLoad we have already subscribed to the contact events of the physical world. It remains to implement one function.
extension ViewController: SCNPhysicsContactDelegate { func physicsWorld(_ world: SCNPhysicsWorld, didBegin contact: SCNPhysicsContact) { guard let nodeABitMask = contact.nodeA.physicsBody?.categoryBitMask, let nodeBBitMask = contact.nodeB.physicsBody?.categoryBitMask, nodeABitMask & nodeBBitMask == CollisionCategory.logos.rawValue & CollisionCategory.arBullets.rawValue else { return } contact.nodeB.removeFromParentNode() logoCount -= 1 if logoCount == 0 { DispatchQueue.main.async { self.stopGame() } } DispatchQueue.main.asyncAfter(deadline: .now() + 0.5, execute: { contact.nodeA.removeFromParentNode() }) } } The most interesting is the first verification that it was the collision of the cartridge and the target in the form of a cube that occurred. It is based on a bit mask. It is very convenient and eliminates a lot of other checks.
In a collision, we reduce the counter of the remaining logos and remove both objects. The second object is removed with a slight delay to render the collision.
The two main gaming features are target addition and shot. Adding occurs at a short distance from the screen in the direction to which the camera is directed. We simply create an already configured cube object, add it to the scene and set up its location relative to the camera in space.
private func addLogo() { guard let currentFrame = sceneView.session.currentFrame else { return } let logo = Logo() sceneView.scene.rootNode.addChildNode(logo) var translation = matrix_identity_float4x4 translation.columns.3.z = -1 logo.simdTransform = matrix_multiply(currentFrame.camera.transform, translation) logoCount += 1 if logoCount == ViewController.logoMaxCount { startGame() } } When fired, we also create a ball object. Add it to the scene. But now we need not only to add it, but also to accelerate it. To do this, we determine the position in the middle of the screen and attach acceleration by applying force in the right direction.
private func shoot() { let arBullet = ARBullet() let (direction, position) = cameraVector arBullet.position = position arBullet.physicsBody?.applyForce(direction, asImpulse: true) sceneView.scene.rootNode.addChildNode(arBullet) } So in just a couple of dozen lines, we created a simple game.
The future will come in September
As you can see, Apple did their best. Thanks to the new ARKit framework, creating applications with augmented reality is as easy as making an application with multiple controllers. At the same time you do not need to worry about the beautiful scenery. This technology will precisely change our understanding of mobile applications.
Download the new Xcode 9, and create applications that add to our world of virtual magic. The future is here. Well, or will be here closer to September, after the next presentation of Apple.
Demo project
Download in Touch Instinct repository
')
Source: https://habr.com/ru/post/331078/
All Articles