UltraVNC as a replacement for TeamViewer

Warning: all arriving slippers will be sold, tomatoes - eaten, eggs - fried, spoiled - thrown out. Those who think that we garbage garbage - you guessed it, take a pie from the shelf. The author does not urge to throw bags by a breast on an embrasure. He does not call for anything at all - he is not a politician and not a citizen with an active citizenship. But wishing to discuss - you are welcome. Today I will tell you an interesting story about replacing Teamviewer with UltraVNC.
Why do we need such troubles, because Teamviewer is so awesome? In my case this is due to several reasons. We needed a system to remotely manage users' servers and workstations, and we have> 1000 support systems. Teamviewer is controlled by a third-party company and it is not known what it does with traffic. Teamviewer is not trusted by some of our customers. We needed unique IDs for all users. Well, its cost for a fairly large infrastructure is very decent, which also influenced the decision. At the same time, we have sufficiently wide communication channels and there are no stringent requirements for speed of response, which eliminated the main drawback of UltraVNC, namely, a lower speed of work.
')
How it works
The original architecture of the VNC protocol is weakly designed to work through global networks. There are several reasons for this.
- Lack of encryption of transmitted data.
- Short passwords (8 characters in the modern world? Are you serious?)
- No end-to-end server numbering, IP connectivity.
- Impossibility of work because of NAT.
I, of course, listed not all. But these are the main drawbacks that prevented us from considering this decision seriously. As a result, they were all overcome in one way or another. The current work scheme looks like this:

The client UltraVNC server connects to our repeater, which with its own port (non-standard) looks on the Internet and accepts connections. And we connect to the same server at the internal address from the inside and from there to the client. Connections are encrypted with RSA2048 / AES256. Since servers and clients cling to different ports, you can flexibly restrict who and from where has the right to connect without touching the possibility of UltraVNC servers to connect to the repeater.
Install UltraVNC Repeater
Since the repeater will be the only public service, its configuration should be given maximum attention. Use non-standard ports, block suspicious activity, such as port scans, and tightly determine where Viewers can connect from. But let's start with the simplest - installation and configuration. The server is configured in the second mode, the third (via SSL) requires special assemblies of viewers and servers, so it was decided not to use it.
So, we go to the server, which is destined to become the future repeater and start a witch. Installation will be described for Ubuntu 16.04. We put the necessary dependencies.
sudo apt-get install build-essential Create a user to start the repeater.
sudo useradd -c 'UltraVNC Repeater User' -M -s /sbin/nologin uvncrep Download the source of the repeater.
wget http://www.wisdomsoftware.gr/download/uvncrep017-ws.tar.gz Unpack the repeater and go inside the folder.
tar -xzvf uvncrep017-ws.tar.gz && cd uvncrep017-ws We collect the repeater.
make Install the repeater in the system.
sudo ./install.sh Everything is ready for a successful launch, but we need to slightly change the settings file. Therefore, open the favorite editor /etc/uvnc/uvncrepeater.ini and bring the settings to the following form:
viewerport = 5900 According to the author's strange whim, the port number is different from the standard one. We will set up a non-standard port on the firewall.
logginglevel = 2 We slightly increase the logging level in order to see information about the ports bin and connections in the log.
allowedmodes = 2 We prohibit both modes, leaving only 2, because the first one works on a different principle and can create vulnerability for us.
useeventinterface = false Disable sending messages. While we will not send anything to anyone. Maybe later…
Save the file and test the correctness of its settings.
sudo uvncrepeatersvc /etc/uvnc/uvncrepeater.ini UltraVnc Linux Repeater version 0.17 UltraVnc Sat Feb 11 16:48:29 2017 > listInitializationValues(): viewerPort : 5900 UltraVnc Sat Feb 11 16:48:29 2017 > listInitializationValues(): serverPort : 5500 UltraVnc Sat Feb 11 16:48:29 2017 > listInitializationValues(): maxSessions: 100 UltraVnc Sat Feb 11 16:48:29 2017 > listInitializationValues(): loggingLevel: 2 UltraVnc Sat Feb 11 16:48:29 2017 > listInitializationValues(): ownIpAddress (0.0.0.0 = listen all interfaces) : 0.0.0.0 UltraVnc Sat Feb 11 16:48:29 2017 > listInitializationValues(): runAsUser (if started as root) : uvncrep UltraVnc Sat Feb 11 16:48:29 2017 > listInitializationValues(): Mode 1 connections allowed : No UltraVnc Sat Feb 11 16:48:29 2017 > listInitializationValues(): Mode 2 connections allowed : Yes UltraVnc Sat Feb 11 16:48:29 2017 > listInitializationValues(): Mode 1 allowed server port (0=All) : 0 UltraVnc Sat Feb 11 16:48:29 2017 > listInitializationValues(): Mode 1 requires listed addresses : No UltraVnc Sat Feb 11 16:48:29 2017 > listInitializationValues(): Mode 2 requires listed ID numbers : No UltraVnc Sat Feb 11 16:48:29 2017 > listInitializationValues(): useEventInterface: false UltraVnc Sat Feb 11 16:48:29 2017 > listInitializationValues(): eventListenerHost : localhost UltraVnc Sat Feb 11 16:48:29 2017 > listInitializationValues(): eventListenerPort : 2002 UltraVnc Sat Feb 11 16:48:29 2017 > listInitializationValues(): useHttpForEventListener : true UltraVnc Sat Feb 11 16:48:29 2017 > dropRootPrivileges(): privileges successfully dropped, now running as user uvncrep UltraVnc Sat Feb 11 16:48:29 2017 > routeConnections(): starting select() loop, terminate with ctrl+c All right, you can run as a standard service. Stop the repeater with Ctrl + C and start it as a service.
sudo systemctl start uvncrepeater We check that the service has started.
$ ps ax | grep uvnc 11168 ? S 0:00 /usr/sbin/uvncrepeatersvc /etc/uvnc/uvncrepeater.ini 11170 pts/0 S+ 0:00 grep --color=auto uvnc The log file can be viewed at /var/log/uvncrepeater.log.
Install and configure UltraVNC server
So, the first obstacle between us and nirvana collapsed with a bang. Now we can connect to clients for NAT. The next two queues are the lack of end-to-end numbering and encryption. We configure the test UltraVNC server. Since our main fleet of managed machines is Windows, the server and client installation will be scheduled for them.
Download the necessary components from the links. Components must have an architecture (x86 and x64) corresponding to the architecture of the computer on which the server is being installed.
- UltraVNC Server
- SecureVNC Plugin:
- Mirror driver

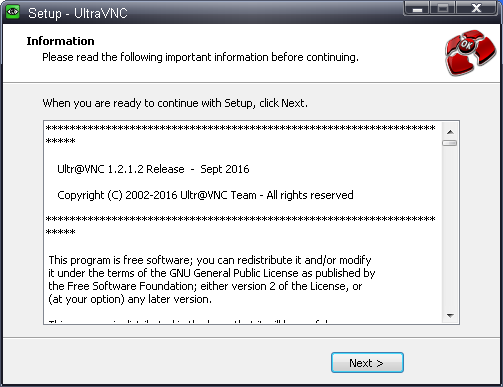
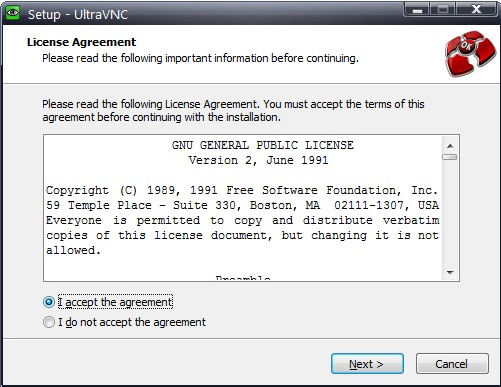
Run the installer UltraVNC server. Accept the terms of the agreement and click Next> .
We read with interest and Next> .

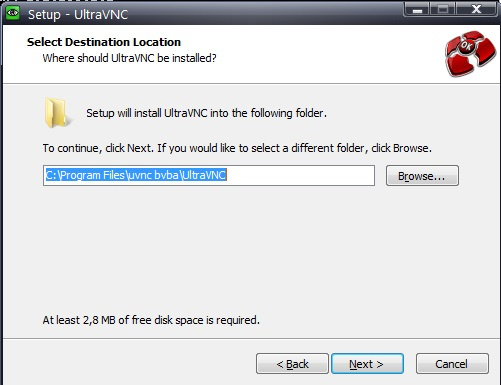
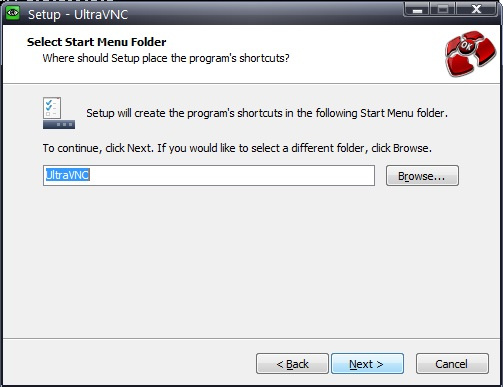
Select the folder to install. It is not recommended to change without special need. What to reap, I think, and so it is clear.
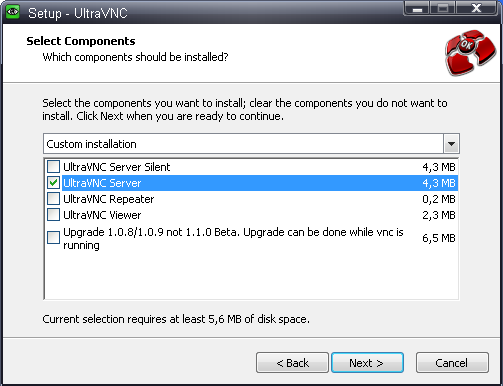
Select the installation only UltraVNC Server and click Next> .

Click Next> and no nails.
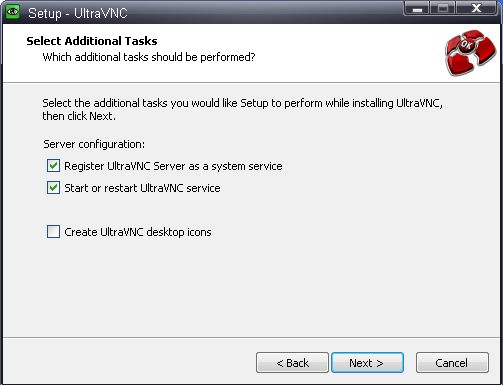
We put these checkboxes to install UltraVNC server as a system service and start it immediately after installation. Click Next> .
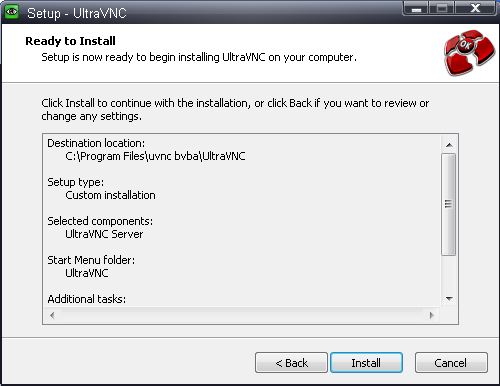
We look at this screen with a smart view, then click Install .
There is only one button to press. We press on it.

Remove the check mark in order not to watch any recent versions, and click Finish .
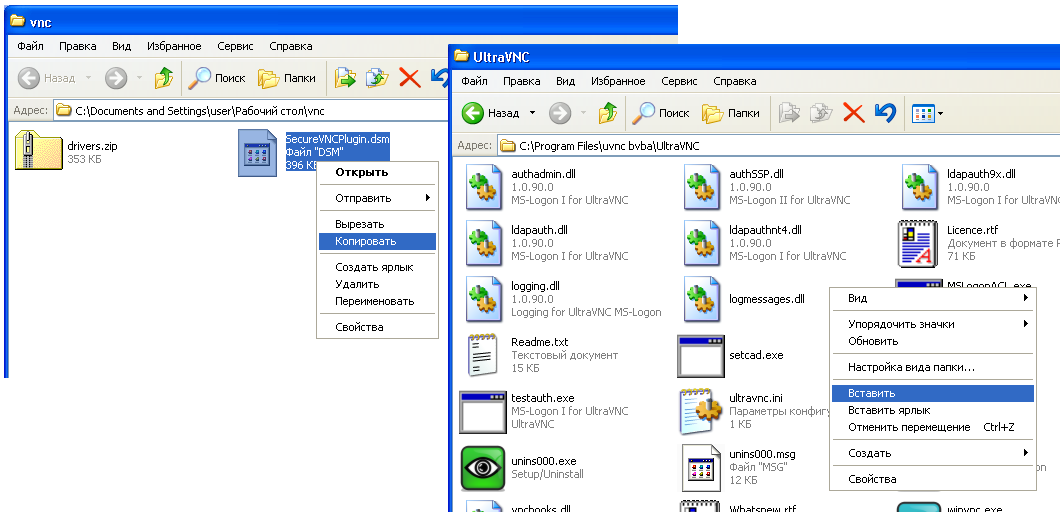
The button part of the mission is over. Now you need to install the necessary components and configure the server. Copy the security plugin into the UltraVNC folder.
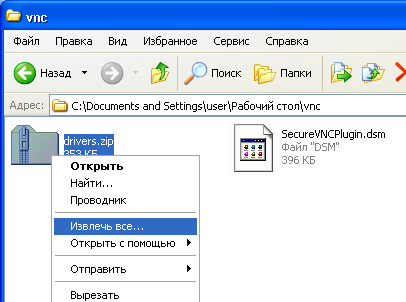
Unpack the folder with the driver.
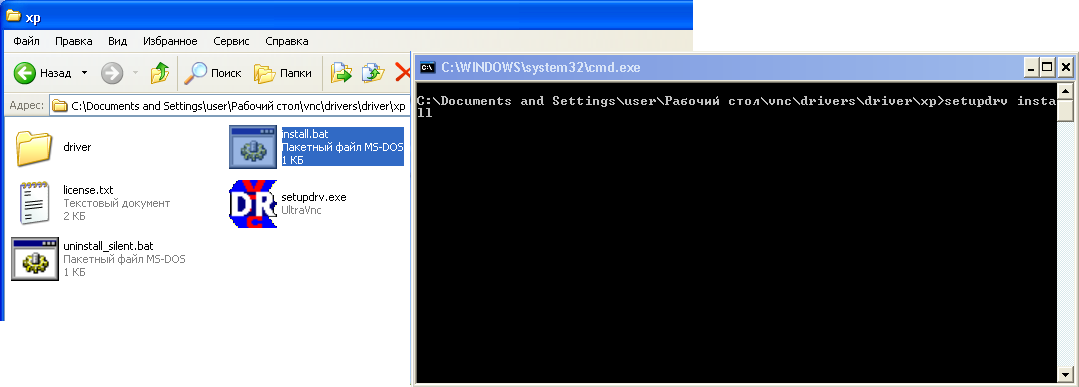
Go to the folder with the appropriate driver and install it by running install.bat.
Attention! Driver installation must be done with administrative rights. Moreover, it will not be possible to run only install.bat as an administrator, because it starts another program and it will not work as an administrator. Therefore, run the console from the administrator, go to the driver installation folder and run install.bat from there.
I ran a test build on XP with administrator rights, so I did not need it.
Run the VNC server settings - uvnc_settings.exe.

Go to the Security tab.
- In the Authentication section, set two passwords. Passwords must be the same, consist of numbers and small and small Latin letters, no more than 8 characters in length .
- In the Encryption section, tick the Use checkbox, select our plugin from the drop-down list, and click on the Configuration button.
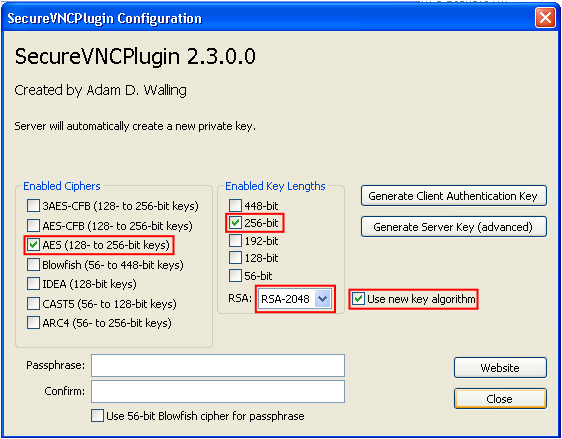
Checkboxes should be as shown in the screenshot. If everything is correct, close the window by clicking the Close button.
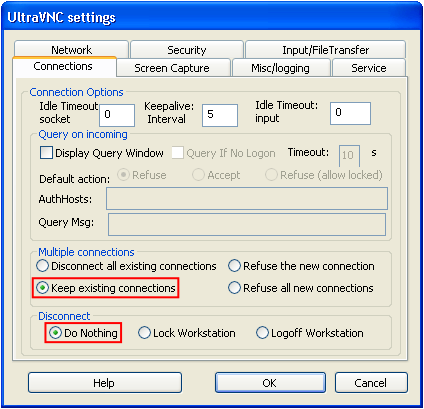
Go to the Connection tab.
- In the Multiple connections section, select Keep existing connections .
- In the Disconnect section, select Do Nothing .
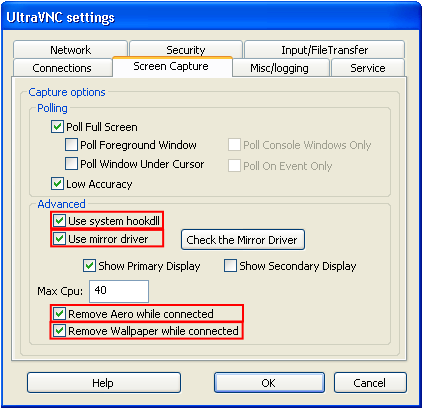
Go to the Screen Capture tab.
- In the Advanced section, select Use system hookdll, Use mirror driver, Remove Aero while connected and Remove wallpaper while connected .
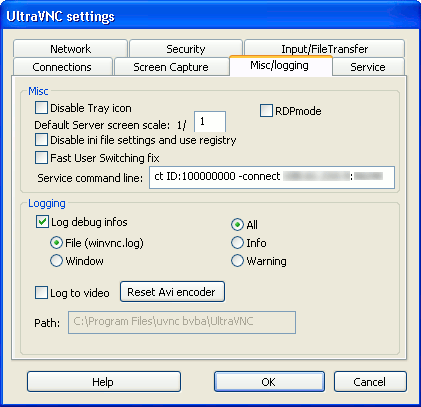
Go to the tab Misc / logging .
- In the field Service command line we drive in the most important line. This line contains the ID and address and data of the repeater for the connection. It looks like this:
-autoreconnect ID: XXXXXXXX -connect <repeater_external_address>: <repeater_port>
The ID is obtained using the script as described below.

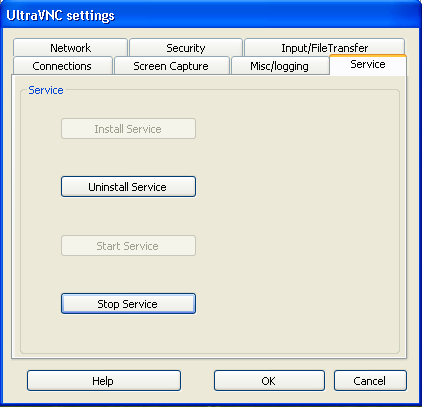
After all the actions done, click OK to save the settings. Then run the settings again and go to the Service tab. On it, by pressing the appropriate buttons, first stop, then start the service.
Generating a unique ID
Script for obtaining an 8-digit ID number. Written in php, because it was the easiest. Comments were used as a source of inspiration. How it works, I think, no need to explain. Why the generation script and why exactly by MAC? Because the repeater will not allow two servers to connect with the same ID, and it was extremely lazy to keep logs with ID lists. And since the MAC addresses are unique, we are almost guaranteed to get a unique number with a fairly low probability of a collision.
<?php $mac = 'B6-B6-13-18-FF-FF'; $mac = str_split(str_replace([':', '-'], '', $mac)); $sum = 0; foreach($mac as $part) { $number = hexdec($part); $sum = (($sum * 16) + $number) % 99999999; if($sum < 10000000) $sum += 10000000; } echo("$sum\n"); ?> It is important to remember that a collision can only be detected by the corresponding repeater logs. The service will start as if nothing had happened. Therefore, when adding a number, it is better to still look at the logs.
Installing and configuring UltraVNC Viewer
Download the necessary components from the links. Components must have an architecture (x86 and x64) corresponding to the architecture of the computer on which the Viewer is installed.
- UltraVNC Viewer
- SecureVNC Plugin: x86 , x64 .
We start the installation.

Carefully read the strange and click Next> .
Select the installation folder and click Next> .

Select only the UltraVNC Viewer component and click Next >.
We leave everything here as it is and just click Next> .
We tick the way you want and click Next> .

Turning off viewing the latest versions by unchecking the boxes and clicking the Finish button.
Now download the plugin file using the link above and move it to the program folder. After that, run the Viewer.
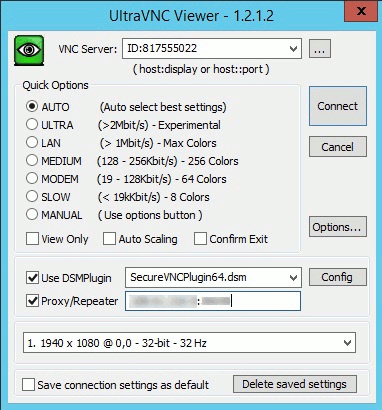
We set all the settings in the same way as on the screenshot. Server ID to connect is entered in this format, that is, ID: XXXXXXXX . The IP and port of the repeater are entered as they were assigned during the installation of the repeater.
Everything, you can connect and enjoy life.
Usage Notes
- Do not forget to install the security plugin when connecting . If it does not exist, the connection will still occur, only without encryption. I have not managed to force UltraVNC Server to require encryption.
- Tune out the service when installing the UltraVNC server . During use, it was noted that the server service sometimes falls. In order not to lose contact with the machine at the right time, it is recommended to set its automatic restart in the service settings in the service settings.
See you in the next episodes
Yes, UltraVNC, this is not for you. In a sense, it is simpler in terms of functionality, it has all the hallmarks of free software, and indeed, wherever it has been seen ... But I think that as a tool, it fully has the right to life if it meets the requirements for security and the service provided. In the future, I would like to screw Single Click to it, but so far this is enough.
PS I hope someone will come in handy. I will be glad to your comments.
Source: https://habr.com/ru/post/330450/
All Articles