Continuous Integration (CI) for GitHub C / C ++ projects with CMake build
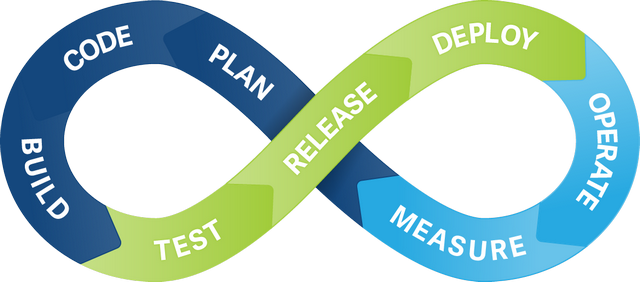
Probably, everyone has heard about continuous integration and its healing properties - I will not repeat what was written in numerous introductory articles and reviews and tell you what continuous integration is and how it simplifies the life of developers, release engineers and managers. It is assumed that the reader himself is well aware that CI, regardless of the programming languages used in the project, is absolutely the right approach , but ... But now, for practical reasons, it has not reached its practical implementation yet.
This article is a tutorial on screwing basic continuous integration (build-test-deploy) to gitkhabovsky C / C ++ projects with a CMake build — for some unknown reason, this has not yet been the case at Habré. However, if my Google Fu let me down, and still slipped - it does not matter. An extra tutorial that describes everything from a slightly different angle and warns against a unique set of cones stuffed by the author will definitely not hurt.
We select services
I had a few selection criteria (as I naively thought).
- Support for mainstream desktop platforms:
- Windows
- Linux
- Mac os x
- Cloud hosting - so that you do not need to raise and configure your server
- Out-of-box integration with GitHub
- Free
- The size and activity of the user base
Contrary to my expectations, there was no service alone covering all these requirements. Strange. Well, that's okay - the next couple of services is enough:
1) Travis CI - for Linux and Mac OS X
2) AppVeyor - for Windows
General plan
Both Travis CI and AppVeyor allow you to run virtual machines with pre-installed tools, which will be used for building, testing and deploying.
Strictly speaking, Travis is able to work from both a full-featured virtual machine and a Docker container. In theory, this reduces the time between git push and the start of the build by about one minute. Unfortunately, in practice, this acceleration will have to be paid by losing the ability to do sudo , and this, in turn, leads to restrictions when installing the necessary dependencies. After a short dance with a tambourine in an attempt to put 32-bit libraries for cross-compilation into container Travis, I said to myself: just one minute to speed up the build - and only on one of the three platforms, since Docker containers in Travis are available only for Linux! - just not worth the difficulties.
How exactly to build, test and deploy the project is described by us in a special configuration file in the YAML language. This file should be in the root of the repository and have the name .travis.yml or appveyor.yml (allowed .appveyor.yml ) - for Travis CI and AppVeyor, respectively. We want to use both services at the same time, and therefore there will be two files.
A caution for those who have never used YAML before. YAML is a syntactic structuring language using indentation (like, for example, Python), but tabs are not allowed . Therefore, you have to either set up your text editor on expand-tabs-to-spaces for .yml files, or not use tabs in general and fill in indents with spaces.
After the YAML files are added to the repository, you will need to enable continuous integration for the specified project on the Travis and AppVeyor sites. This is done very simply. We go to https://travis-ci.org under our GitHub account, agree with the access requested by Travis CI (he will need to receive notifications about new commits), synchronize the list of his projects, select the desired one and click on the switch. Is done. Then we repeat the same process on the site https://ci.appveyor.com
From this point on, every git push into your repository will launch a continuous integration process: Travis and AppVeyor services will bring up a virtual machine, set up an environment, install dependencies, download your project, compile and test it, and, if desired, lay out installers, archives with source files and documentation - all according to the specification in YAML files.
Actually, in the creation of YAML-files will be our main work.
Structure .travis.yml
Consider an example of a .travis.yml file with comments:
dist: trusty # Ubuntu 14.04 Trusty Tahr ( 12.02 Precise Pangolin) sudo: required # Virtual Machine ( Docker container) language: cpp # C++ # , , python -- . cpp. os: # CI Linux, Mac OS X... - linux - osx compiler: # ... GCC, Clang - gcc - clang env: # , : - TARGET_CPU=amd64 BUILD_CONFIGURATION=Debug - TARGET_CPU=amd64 BUILD_CONFIGURATION=Release - TARGET_CPU=x86 BUILD_CONFIGURATION=Debug - TARGET_CPU=x86 BUILD_CONFIGURATION=Release matrix: exclude: # : - os: osx compiler: gcc - os: osx env: TARGET_CPU=x86 BUILD_CONFIGURATION=Debug - os: osx env: TARGET_CPU=x86 BUILD_CONFIGURATION=Release install: # : - source ci/travis/install-$TRAVIS_OS_NAME.sh script: # : - mkdir build - cd build - cmake .. -DCMAKE_BUILD_TYPE=$BUILD_CONFIGURATION -DTARGET_CPU=$TARGET_CPU - cmake --build . - ctest --output-on-failure deploy: # tagged- GitHub Releases: provider: releases file: <package-file> skip_cleanup: true overwrite: true api_key: secure: <encrypted-github-token> on: tags: true The installation and deployment scripts require explanations - they will be given below. First, let us dwell on one of the key concepts of continuous integration - the build matrix.
We are all familiar with the situation when we made minimal changes to the project, collected, launched, checked - everything works. Made a release, and - BAM! He immediately fell on the target machine. We check it again - it works, the dog! There is a special acronym in English in this regard:
IWOMM - It works on my machine!
The difference that leads to the problem can lurk anywhere — different versions of the compiler from the developer and on the build machine, a different version of the library on the target, tested on one OS, and launched on another - but what else!
There can be only one way to deal with this dirty phenomenon - to assemble and test using an extensive assembly matrix , that is, immediately on a variety of possible configurations . This, coupled with sufficient coverage of the source code with automatic tests , can significantly reduce the likelihood of IWOMM.
A C / C ++ project on Travis CI makes sense to drive at least the following matrix:
- OS
- Linux
- Mac os x
- Compiler
- Gcc
- Clang
- Target CPU
- amd64
- x86
- Configuration
- Debug
- Release
Unfortunately, Travis offers a choice of only two Linux distributions - Ubuntu 12.04 Precise Pangolin (default) and Ubuntu 14.04 Trusty Tahr . Even apart from the absence of any alternatives to Ubuntu, let me remind you that the current LTS (long-term-support) version of Ubuntu is Ubuntu 16.04 Yakkety Yak , and the current non-LTS version is Ubuntu 17.04 Zesty Zapus . In other words, in May 2017, we are offered the default version of Ubuntu, released in 2012 and lagging behind 5 major releases. Hmm. Well, let's play cards, which is on hand.
Be that as it may, this matrix contains 16 configurations. We throw away x86 under Mac OS X from here - the target machine will definitely be 64-bit there. We also throw out GCC under Mac OS X - GCC under Mac is nothing more than an adapter for GCC-specific command line options, the real compiler will still be Clang. Exclusion of elements from the assembly matrix is performed in the section
matrix: exclude: Caution: if the excluded elements are described using environment variables (as is the case with TARGET_CPU ), then you have to copy the entire line entirely:
env: TARGET_CPU=x86 BUILD_CONFIGURATION=Debug The seemingly logical env: TARGET_CPU=x86 will not be enough.
So there are 12 configurations left for each git push . Agree, it is much better than one or two, as is usually the case when testing manually, without using continuous integration?
In the terminology of Travis CI, it all sounds like this. Each commit leads to the launch of a build (build), which consists of a set of jobs (jobs) - one for each configuration in the build matrix.
Structure .appveyor.yml
The YAML file in AppVeyor looks very similar, corrected for section names - everything is called a little differently:
image: Visual Studio 2015 # VM- Visual Studio 2008 2015 init: # , # , ( ), # , , : - git config --global core.autocrlf input clone_folder: c:\projects\my-prj # shallow_clone: true # , (git clone --depth 1) matrix: fast_finish: false # - platform: # CI amd64 x86... - x64 - x86 configuration: # ... , ... - Debug - Release environment: matrix: # ... (2010, 2012, 2015) - TOOLCHAIN: msvc10 - TOOLCHAIN: msvc12 - TOOLCHAIN: msvc14 install: # : - call ci\appveyor\set-env.bat %TOOLCHAIN% %PLATFORM% - appveyor DownloadFile <url> -FileName <local-file> - 7z e -y <local-file> -o<local-dir> - ... build_script: # : - mkdir build - cd build - cmake .. %CMAKE_CONFIGURE_FLAGS% - cmake --build . %CMAKE_BUILD_FLAGS% test_script: # : - ctest -C %CONFIGURATION% --output-on-failure artifacts: - path: <local-package-path> name: package_name deploy: # tagged- GitHub Releases: description: '$(APPVEYOR_REPO_TAG_NAME)' provider: GitHub auth_token: secure: <encrypted-github-token> artifact: package_name force_update: true on: appveyor_repo_tag: true The concept of the matrix assembly is fully applicable here. At a minimum, it is worth running CI for two x86/amd64 architectures, both under Debug/Release . In addition, I would also recommend adding Visual Studio to the build matrix and version - you don’t know which studio the cloner uses at random?
To use Visual Studio 2017, you need to connect a separate VM image - which, alas, lacks most of the libraries and tools available on the image for Visual Studio 2015. If you need to still run CI for VS 2017, add to the assembly matrix:
- TOOLCHAIN: msvc15 APPVEYOR_BUILD_WORKER_IMAGE: Visual Studio 2017 I decided to limit myself to the range of VS 2010 - VS 2015. Perhaps over time, AppVeyor developers will fix the situation with VS 2017 for the better.
- Toolchain
- Visual studio 2010
- Visual Studio 2012
- Visual Studio 2015
- Target CPU
- amd64
- x86
- Configuration
- Debug
- Release
In sum, this gives us a nice matrix of 12 configurations .
Please note that in YAML files for both AppVeyor and Travis, the install scripts refer to external shell files ( .sh/.bat ). The question arises: is it possible to do with YAML files alone, without supporting scripts? Unfortunately, the answer is likely to be no.
Auxiliary scripts
The problem is that the shell commands specified in the YAML files are executed line by line . Need if-then-else or for ? Be kind enough to fit everything in one line. It is clear that in theory you can ram anything into one line. In practice, this applies only to the simplest cases. All nontrivial multi-line logic remains to be put into separate shell scripts and to call them from YAML already.
Therefore, I organized everything for myself as follows. The project has a ci (continuous integration) folder with two travis and appveyor , which appveyor shell scripts:
ci/ travis/ install-linux.sh install-osx.sh ... appveyor/ install.bat set-env.bat ... In YAML files, however, only single-line commands of the type are used:
- source ci/travis/install.sh Let us single out the three main stages of continuous integration on the Travis and AppVeyor services and consider them in more detail.
- Install - setting up a virtual environment, installing tools for building, libraries and other dependencies
- Build & Test - build and test a project (usually performed together)
- Deploy - laying out the collected packages / documentation in the specified locations (for the examples I will use GitHub Releases)
Install
The script for installing dependencies, of course, will greatly depend on the requirements of a particular project. The following are general guidelines only.
Travis with his prehistoric Eubunta offers CMake 3.2 and GCC 4.8.4 out of the box - most likely, this will not be enough for modern projects. To get GCC, which is able to digest C ++ 14, in install-linux.sh we write:
sudo add-apt-repository -y ppa:ubuntu-toolchain-r/test sudo apt-get update -qq sudo apt-get install -qq g++-5 sudo update-alternatives --install /usr/bin/g++ g++ /usr/bin/g++-5 90 An adequate version of CMake will have to be downloaded and installed manually. Add to the same install-linux.sh :
CMAKE_VERSION=3.3.2 CMAKE_VERSION_DIR=v3.3 CMAKE_OS=Linux-x86_64 CMAKE_TAR=cmake-$CMAKE_VERSION-$CMAKE_OS.tar.gz CMAKE_URL=http://www.cmake.org/files/$CMAKE_VERSION_DIR/$CMAKE_TAR CMAKE_DIR=$(pwd)/cmake-$CMAKE_VERSION wget --quiet $CMAKE_URL mkdir -p $CMAKE_DIR tar --strip-components=1 -xzf $CMAKE_TAR -C $CMAKE_DIR export PATH=$CMAKE_DIR/bin:$PATH For my CMake projects, version 3.3 is enough, but there is no 3.2 available by default (in 3.3 there were several critical fixes at once). If your projects need something fresher - change the CMAKE_VERSION and CMAKE_VERSION_DIR .
To support amd64->x86 cross-compilation amd64->x86 you must also install multilib :
if [ "$TARGET_CPU" == "x86" ]; then sudo dpkg --add-architecture i386 sudo apt-get -qq update # 32- sudo apt-get install -y liblua5.2-dev:i386 sudo apt-get install -y libusb-1.0:i386 # ... # g++-multilib , i386-! sudo apt-get install -y g++-5-multilib fi Both Clang and CMake under Mac are not as old as Ubuntu, so install-osx.sh consists only of installing project-specific dependencies. This is done using homebrew . For example, to install ragel , add to install-osx.sh :
brew update brew install ragel But the install script in AppVeyor will look more frightening - at a minimum, you need to properly configure the CMake generator in accordance with the version of Visual Studio and the target platform.
We ci/appveyor/set-env.bat something like ci/appveyor/set-env.bat in the auxiliary script:
@echo off :loop if "%1" == "" goto :finalize if /i "%1" == "msvc10" goto :msvc10 if /i "%1" == "msvc12" goto :msvc12 if /i "%1" == "msvc14" goto :msvc14 if /i "%1" == "msvc15" goto :msvc15 if /i "%1" == "x86" goto :x86 if /i "%1" == "i386" goto :x86 if /i "%1" == "amd64" goto :amd64 if /i "%1" == "x86_64" goto :amd64 if /i "%1" == "x64" goto :amd64 echo Invalid argument: '%1' exit -1 :msvc10 set TOOLCHAIN=msvc10 set CMAKE_GENERATOR=Visual Studio 10 2010 shift goto :loop :msvc12 set TOOLCHAIN=msvc12 set CMAKE_GENERATOR=Visual Studio 12 2013 shift goto :loop :msvc14 set TOOLCHAIN=msvc14 set CMAKE_GENERATOR=Visual Studio 14 2015 shift goto :loop :msvc15 set TOOLCHAIN=msvc15 set CMAKE_GENERATOR=Visual Studio 15 2017 shift goto :loop :x86 set TARGET_CPU=x86 set CMAKE_GENERATOR_SUFFIX= set OPENSSL_DIR=C:\OpenSSL-Win32 shift goto :loop :amd64 set TARGET_CPU=amd64 set CMAKE_GENERATOR_SUFFIX= Win64 set OPENSSL_DIR=C:\OpenSSL-Win64 shift goto :loop :finalize if "%TOOLCHAIN%" == "" goto :msvc14 if "%TARGET_CPU%" == "" goto :amd64 if "%CONFIGURATION%" == "" (set CONFIGURATION=Release) set CMAKE_CONFIGURE_FLAGS=-G "%CMAKE_GENERATOR%%CMAKE_GENERATOR_SUFFIX%" set CMAKE_BUILD_FLAGS= ^ --config %CONFIGURATION% ^ -- ^ /nologo ^ /verbosity:minimal ^ /consoleloggerparameters:Summary Then we call this script from .appveyor.yml :
install: - call ci\appveyor\set-env.bat %TOOLCHAIN% %PLATFORM% If you need to download and install platform-specific dependencies, this is done using the appveyor utility, available on all AppVeyor virtual machines. For example, to install ragel, you need to add to ci/appveyor/install.bat :
set DOWNLOAD_DIR=c:\downloads mkdir %DOWNLOAD_DIR% set RAGEL_DOWNLOAD_URL=http://downloads.yorickpeterse.com/files/ragel-68-visualstudio2012.7z mkdir %DOWNLOAD_DIR%\ragel appveyor DownloadFile %RAGEL_DOWNLOAD_URL% -FileName %DOWNLOAD_DIR%\ragel\ragel.7z 7z e -y %DOWNLOAD_DIR%\ragel\ragel.7z -o%DOWNLOAD_DIR%\ragel set PATH=%DOWNLOAD_DIR%\ragel;%PATH% I also recommend deleting the following files - they are not needed for C ++ projects, but they lead to a lot of garbage messages in the build logs:
del "c:\Program Files (x86)\MSBuild\14.0\Microsoft.Common.targets\ImportAfter\Xamarin.Common.targets" del "c:\Program Files (x86)\MSBuild\4.0\Microsoft.Common.targets\ImportAfter\Xamarin.Common.targets" Build & test
This stage is much simpler than the previous one - for it, most likely, it does not even need a dedicated shell script. Perhaps the only trick is to configure cross-compilation for Linux on Travis CI. To support amd64->x86 cross-compiling amd64->x86 add the following to the root CMakeLists.txt :
if ("${TARGET_CPU}" STREQUAL "amd64") set (CMAKE_SIZEOF_VOID_P 8) set_property (GLOBAL PROPERTY FIND_LIBRARY_USE_LIB64_PATHS TRUE) set_property (GLOBAL PROPERTY FIND_LIBRARY_USE_LIB32_PATHS FALSE) elseif ("${TARGET_CPU}" STREQUAL "x86") set (CMAKE_SIZEOF_VOID_P 4) set_property (GLOBAL PROPERTY FIND_LIBRARY_USE_LIB64_PATHS FALSE) set_property (GLOBAL PROPERTY FIND_LIBRARY_USE_LIB32_PATHS TRUE) if (GCC) set (CMAKE_CXX_FLAGS "${CMAKE_CXX_FLAGS} -m32") set (CMAKE_C_FLAGS "${CMAKE_C_FLAGS} -m32") endif () else () message (FATAL_ERROR "Unsupported CPU: ${TARGET_CPU}") endif () Next, we act as usual. CMake projects are built in a dedicated build folder in two stages: Configure and Build . Inside travis.yml it will look like this:
script: - mkdir build - cd build - cmake .. -DCMAKE_BUILD_TYPE=$BUILD_CONFIGURATION -DTARGET_CPU=$TARGET_CPU - cmake --build . We test the project using CTest right after the end of the build - of course, this step makes sense only if your project contains tests added using the CMake-commands enable_testing () and add_test (...) :
- ctest --output-on-failure I recommend running ctest with the --output-on-failure flag - in this case, if the test fails, the exhaust of the test program will be visible in the build log.
Under AppVeyor, everything is similar, with the following minor differences. First, the cross-compilation is not done using the C ++ compiler flags, but by selecting the correct CMake generator (we process this in set-env.bat ). Secondly, Visual Studio generators, unlike Unix Makefiles, are so-called. multi-configuration generators, which means that the Debug/Release configuration is not specified at the CMake-configure stage, but at the Build stage. However, everything still fits into the same laconic 4 lines:
build_script: - mkdir build - cd build - cmake .. %CMAKE_CONFIGURE_FLAGS% # CMake- - cmake --build . %CMAKE_BUILD_FLAGS% # Debug/Release # msbuild.exe For testing, add the test_script section:
test_script: - ctest -C %CONFIGURATION% --output-on-failure Please note that you need to explicitly specify the Debug/Release configuration using the -C switch.
Hooray! The project is assembled and tested under 24 configurations for each git-push . Rather, we are going to add status badges to the README file!
Go to the project page on the Travis CI website at:
https://travis-ci.org/<user-name>/<project-name> Click on the build|passing badge on the build|passing logs page - a window opens with a link to the dynamic image. Copy the link and paste it into the README.rst :
.. image:: https://travis-ci.org/<user-name>/<project-name>.svg?branch=master :target: https://travis-ci.org/<user-name>/<project-name> I heard, or someone said README.md ? Never! reStructuredText FTW!
We do the same with the AppVeyor badge. Badge links are available at:
https://ci.appveyor.com/project/<user-name>/<project-name>/settings/badges Copy the desired line and paste it side by side:
.. image:: https://ci.appveyor.com/api/projects/status/<gibberish-code>?svg=true :target: https://ci.appveyor.com/project/<user-name>/<project-name> Make a commit for the updated README.rst and enjoy the result:

Deploy
Let's show how to use deployment mechanisms using the example of GitHub Releases .
First of all, you need to authorize the services of Travis and AppVeyor so that they can create releases in your GitHub projects. Login to GitHub, go to Profile->Settings->Developer settings->Personal access tokens . Click on Generate new token , call the token, for example, CI Deploy Token and set the only flag public_repo (allow the token carrier to access the public repositories). Copy the generated token to some temporary location (it can be deleted soon).
Using this token, you can both create releases and push to all of your public repositories . Captain Obvious hints that it is undesirable to spread such a token to public access in open form. It is necessary to encrypt it so that only the Travis CI and AppVeyor services have the decryption key .
To encrypt the token for Travis, you need to install the Ruby utility travis :
gem install travis After this, run in the project folder:
travis encrypt <github-token> The utility encrypts the token using asymmetric encryption, so the private key for decryption — created at the time of connecting the project to the Travis CI service — will be available only to Travis CI itself. The utility output can be safely inserted into .travis.yml .
Similarly, the token is asymmetrically encrypted for AppVeyor. Here, however, you do not need to install any auxiliary utilities - everything can be done directly from the site https://ci.appveyor.com via Account->Tools->Encrypt Data .
Next, you need to decide which files will be laid out for universal access. In terms of GitHub Releases, these files are called release artifacts. These can be installers, archives or just executable files. The most logical approach to generating archives or installers for a project with a CMake build is using CPack , but obviously, the set of release artifacts and the way they are generated may differ from project to project.
Anyway, for example, during the build process, we generated output files file1.pkg , file2.pkg , etc. and we want to attach them as release artifcats to the releases of our GitHub project.
In .travis.yml create the deploy section:
deploy: provider: releases # GitHub Releases api_key: secure: encrypted-github-token # , `travis encrypt` file: # - file1.pkg - file2.pkg - ... skip_cleanup: true # on: tags: true # deploy tagged-commit In .appveyor.yml similar functionality is achieved by:
artifacts: # - # AppVeyor "push artifacts" - path: file1.pkg - path: file2.pkg - ... deploy: provider: GitHub # GitHub Releases description: '$(APPVEYOR_REPO_TAG_NAME)' # tag ( Travis ) auth_token: secure: <secret-github-token> # , appveyor.ci artifact: /.*\.pkg/ # , force_update: true # , on: appveyor_repo_tag: true # deploy tagged-commit tagged-commit :
git add --all git commit --message "release 1.0.0" git tag project-name-1.0.0 git push git push origin project-name-1.0.0 , , GitHub :

Conclusion
C++/CMake GitHub. , , Travis CI & AppVeyor:
https://docs.travis-ci.com
https://www.appveyor.com/docs
, , , , :
https://github.com/vovkos/jancy
https://github.com/vovkos/doxyrest
https://github.com/vovkos/llvm-package-travis
https://github.com/vovkos/llvm-package-windows
.
')
Source: https://habr.com/ru/post/329264/
All Articles