How to create a modern CI / CD chain using free cloud services


The solution to the task of the developer can be difficult to find. But as soon as it is received, the author immediately wants to share it with the whole world, it’s so great to “ship” the code. An unused program is nothing more than digital junk. In order not to waste time on the unnecessary software, the modern developers supply the functionality in small portions, breaking the process into short iterations.
This way of creating software is used in the Continuous Integration (Continuous Integration) and Continuous Deployment (Continuous Deployment) processes, or the CI / CD chain. In this article we will go through all the steps of setting up such a chain, using free cloud services to build it.
We will do the following:
- Let's write a small program in Python (not Hello World).
- Create several automated tests.
- Post the code on github.
- Configure Travis CI to run automated tests all the time.
- We will set up the Better Code Hub for constant code quality check.
- Let's turn a Python program into a web application.
- Create a Docker image for the application.
- Let's place a Docker image on Docker Hub.
- Deploy the Docker image to Heroku.
In this article, I aim to demonstrate to the reader the main components of the modern software development chain, as well as how these components are combined into a single whole. The text is not accented in any programming language or development methodology. Some components may not match those used in your technology stack. But even in this case, I would advise to go through all the proposed steps. Having a common understanding of how a chain works from beginning to end, it will be much easier to tune it for yourself.
To be completely honest with readers, I must announce that I am one of the developers of Better Code Hub.
Step number 1: we write a fashionable phrase generator
So, we need a small program that we will run through all the stages of the chain - from laptop to cloud. For this purpose, we will write in Python a generator of fashionable CI / CD phrases.
Create a new directory 'cicd-buzz', inside - another one called 'buzz', and in it - the file 'generator.py', containing the code below.
import random buzz = ('continuous testing', 'continuous integration', 'continuous deployment', 'continuous improvement', 'devops') adjectives = ('complete', 'modern', 'self-service', 'integrated', 'end-to-end') adverbs = ('remarkably', 'enormously', 'substantially', 'significantly', 'seriously') verbs = ('accelerates', 'improves', 'enhances', 'revamps', 'boosts') def sample(l, n = 1): result = random.sample(l, n) if n == 1: return result[0] return result def generate_buzz(): buzz_terms = sample(buzz, 2) phrase = ' '.join([sample(adjectives), buzz_terms[0], sample(adverbs), sample(verbs), buzz_terms[1]]) return phrase.title() if __name__ == "__main__": print generate_buzz() Also create an empty ' init .py' file in this directory. Now the project structure should look like this:
cicd-buzz/ buzz/ __init__.py generator.py Go to the 'buzz' directory and run the script:
[cicd-buzz/buzz] $ python generator.py End-To-End Devops Enormously Boosts Continuous Testing Try several times - it's fun:
[cicd-buzz/buzz] $ python generator.py Complete Continuous Improvement Enormously Improves Devops [cicd-buzz/buzz] $ python generator.py Modern Devops Remarkably Improves Continuous Testing Step # 2: Create Automated Tests
Continuous Delivery chains are needed only when many automated tests are written that help avoid the continuous shipment of poorly performing software. To place unit tests, create the 'tests' folder in the project root directory. Save the following code to the 'test_generator.py' file:
import unittest from buzz import generator def test_sample_single_word(): l = ('foo', 'bar', 'foobar') word = generator.sample(l) assert word in l def test_sample_multiple_words(): l = ('foo', 'bar', 'foobar') words = generator.sample(l, 2) assert len(words) == 2 assert words[0] in l assert words[1] in l assert words[0] is not words[1] def test_generate_buzz_of_at_least_five_words(): phrase = generator.generate_buzz() assert len(phrase.split()) >= 5 We will run the tests using the 'pytest' framework. To install it, you need a Python Virtual Environment ('virtualenv'). Don't worry, it's easier to say than to say. First , virtualenv . Next, run the following command in the project root directory:
[cicd-buzz] $ virtualenv venv As a result, a new directory 'venv' will be created. To start using this environment, run:
[cicd-buzz] $ source venv/bin/activate (venv) [cicd-buzz] $ Next, create a file called 'requirements.txt' and list the dependency on pytest there:
pytest==3.0.6 To load the requirements listed in the requirements.txt, issue the 'pip' command:
(venv) [cicd-buzz] $ pip install -r requirements.txt The project root directory should look like this:
cicd-buzz/ buzz/ requirements.txt tests/ venv/ Now, using the virtual environment, we can run tests from 'test_generator.py':
(venv) [cicd-buzz] $ python -m pytest -v tests/test_generator.py The output should look something like this:
========== test session starts ========== platform darwin -- Python 2.7.10, pytest-3.0.6, py-1.4.32, pluggy-0.4.0 -- /Users/rob/projects/workspace/cicd-buzz/venv/bin/python cachedir: .cache rootdir: /Users/rob/projects/workspace/cicd-buzz, inifile: collected 3 items tests/test_generator.py::test_sample_single_word PASSED tests/test_generator.py::test_sample_multiple_words PASSED tests/test_generator.py::test_generate_buzz_of_at_least_five_words PASSED ========== 3 passed in 0.02 seconds ========== Step 3: Post the code on GitHub
Log in to GitHub ( register if you don't have an account yet), and create a new public repository 'cicd-buzz'.
In the root directory of the project, create a '.gitignore' file containing one line:
venv This is to ensure that git does not add virtualenv to the repository. And now it is time to locally initialize Git and send the code to GitHub:
[cicd-buzz] $ git init [cicd-buzz] $ git add * [cicd-buzz] $ git commit -m "Initial commit" [cicd-buzz] $ git remote add origin git@github.com:<YOUR_GITHUB_USERNAME>/cicd-buzz.git [cicd-buzz] $ git push -u origin master Step 4: to perform tests after each commit we connect Travis CI
Travis CI is a Continuous Integration cloud service. For public GitHub repositories it is free. To get an account on Travis CI, just visit https://travis-ci.org and log in using your GitHub credentials.
It is very easy to enable assembly for each Push and Pull repository requests in Travis CI. To do this, just move the switch opposite the cicd-buzz repository (click on the 'Sync account' if the repository is not already in the list):

The final step in the activation procedure for Travis CI is to add the '.travis.yml' file to the project root directory. For our buzz generator, it should contain:
language: python script: - python -m pytest -v Add this file to Git, commit and send the changes to Github:
[cicd-buzz] $ git add .travis.yml [cicd-buzz] $ git commit -m "Add Travis CI configuration" [cicd-buzz] $ git push Go to the Travis CI toolbar . Soon Travis will notify you of the code change and will begin to build / test the code. In the output log you can see the results of unit tests:

Step 5: Add Better Code Hub to the chain
Now that we have a well-oiled mechanism that constantly checks the performance of the code using automated tests, I really want to focus on the functionality and forget about the quality of the code. Better Code Hub is a cloud service that checks the quality of the code according to 10 recommendations for creating supported modern code. Better Code Hub constantly monitors development results (literally every push on GitHub) and reports situations where the quality of the code is at risk.
Better Code Hub, like Travis CI, seamlessly integrates with GitHub. To attach it to the repository, go to https://bettercodehub.com and select the login button labeled 'Free'.
Once you are logged in with your GitHub credentials, a list of your GitHub repositories will open. Find 'cicd-buzz' and click the 'Play' button. Better Code Hub will ask whether to launch the analysis with standard settings. Click 'Go' and wait a few seconds, after which a report should appear on the screen.
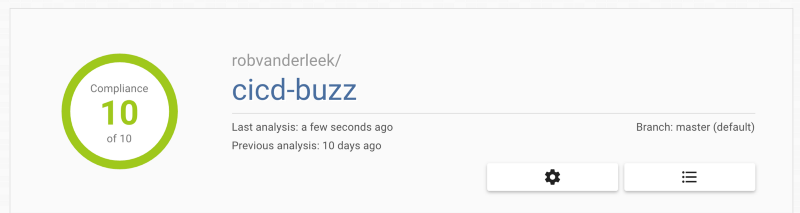
Top of the report on the Better Code Hub
If you want the Better Code Hub to analyze after each Push and Pull requests (like Travis CI), click on the gear icon and slide the switch:
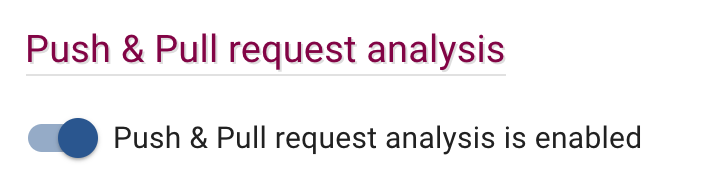
')
Step 6: Turn the buzz generator into a simple web application
Fine! Now we have a continuous integration chain that checks the performance and quality of the code. Next, you need to configure the continuous deployment of the passed test code.
Since we will be deploying a web application on Heroku, to teach the buzz generator to accept HTTP requests and output HTML, we will make a wrapper for it in Python Flask. Add the file 'app.py' to the root directory of the project, containing the following code:
import os import signal from flask import Flask from buzz import generator app = Flask(__name__) signal.signal(signal.SIGINT, lambda s, f: os._exit(0)) @app.route("/") def generate_buzz(): page = '<html><body><h1>' page += generator.generate_buzz() page += '</h1></body></html>' return page if __name__ == "__main__": app.run(host='0.0.0.0', port=os.getenv('PORT')) # port 5000 is the default Also add another line to 'requirements.txt':
pytest==3.0.6 Flask==0.12 And install a new dependency:
(venv) [cicd-buzz] $ pip install -r requirements.txt Now the web application can be launched with the following command:
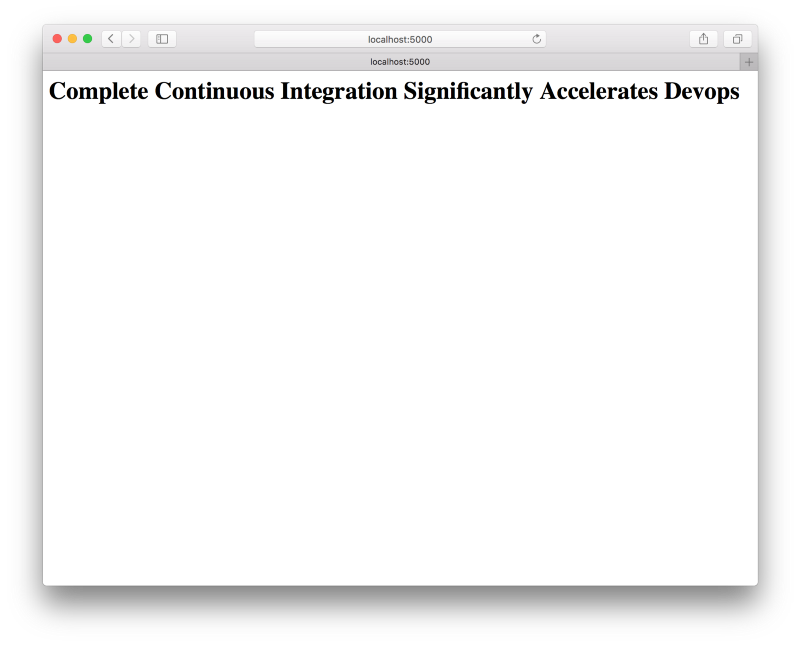
[cicd-buzz] $ python app.py * Running on http://0.0.0.0:5000/ (Press CTRL+C to quit) Open http: // localhost: 5000 in your browser and enjoy the results of your work. To have a little fun, refresh the page several times.

Finally, don't forget to add commits and submit changes to GitHub:
[cicd-buzz] $ git add app.py [cicd-buzz] $ git add requirements.txt [cicd-buzz] $ git commmit -m "Step 5" [cicd-buzz] $ git push Now you can enjoy watching the Travis CI and Better Code Hub catch these changes and check the code.
Step 7: Contain the application with docker
Docker helps to make an easily deployable container out of our application. For simple Python and Flask programs, this may seem redundant, but deploying code in the form of containers provides many benefits that become apparent as the project progresses and grows.
If you already have a Docker installed , add to the root directory of the project 'Dockerfile' with the following contents:
FROM alpine:3.5 RUN apk add --update python py-pip COPY requirements.txt /src/requirements.txt RUN pip install -r /src/requirements.txt COPY app.py /src COPY buzz /src/buzz CMD python /src/app.py Following these instructions, docker will take a basic alpine image, install Python and pip, and install our web application. The last line instructs the docker to start the web application when the container is started.
Now the Docker image should be assembled and run without any problems:
[cicd-buzz] $ docker build -t cicd-buzz . [cicd-buzz] $ docker run -p 5000:5000 --rm -it cicd-buzz Admire the results:
CI / CD buzz generator running in a Docker container
Again, don't forget to commit and submit changes to GitHub:
[cicd-buzz] $ git add Dockerfile [cicd-buzz] $ git commmit -m "Step 6" [cicd-buzz] $ git push Step 8: Posting on Docker Hub
Publishing Docker images in the registry, such as Docker Hub, makes it easy to deploy containers in different environments and roll back to previous versions. To perform this step, you will need an account at https://docker.com , as well as the file 'deploy_dockerhub.sh' in the new '.travis' directory in the project root:
#!/bin/sh docker login -e $DOCKER_EMAIL -u $DOCKER_USER -p $DOCKER_PASS if [ "$TRAVIS_BRANCH" = "master" ]; then TAG="latest" else TAG="$TRAVIS_BRANCH" fi docker build -f Dockerfile -t $TRAVIS_REPO_SLUG:$TAG . docker push $TRAVIS_REPO_SLUG Travis CI will execute this script at the end of each assembly, thus creating its Docker image. Note the 3 environment variables. They can be defined in the 'cicd-buzz' settings tab of the Travis CI repository:
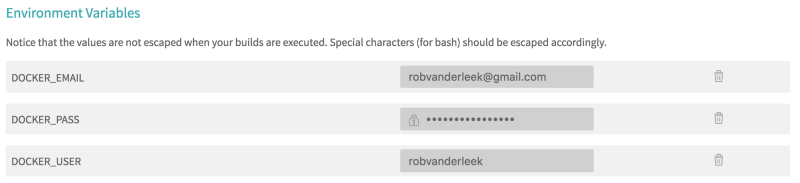
Environment Variables for Docker in Travis CI
To have Travis CI publish an image on the Docker Hub after each commit to the GitHub repository, change the '.travis.yml' as follows:
sudo: required services: - docker language: python script: - python -m pytest -v after_success: - sh .travis/deploy_dockerhub.sh After creating a commit and sending these changes to GitHub (as well as waiting until Travis CI finishes its work) you will be able to launch a container with a buzz generator directly from the Docker Hub:
[cicd-buzz] $ docker run -p5000:5000 --rm -it <YOUR_DOCKER_USERNAME>/cicd-buzz:latest Step # 9: Deploy to Heroku
Heroku is a cloud platform for hosting small, scalable web applications. The service offers a free tariff plan, so go to https://signup.heroku.com and register, if you have not done so before.
Install the Heroku Toolbelt console application and run the following commands in the project root directory:
[cicd-buzz] $ heroku login [cicd-buzz] $ heroku create Creating app… done, ⬢ fathomless-inlet-53225 https://fathomless-inlet-53225.herokuapp.com/ | https://git.heroku.com/fathomless-inlet-53225.git [cicd-buzz] $ heroku plugins:install heroku-container-registry [cicd-buzz] $ heroku container:login [cicd-buzz] $ heroku container:push web [cicd-buzz] $ heroku ps:scale web=1 After that, you should be able to access the application at the URL derived by the heroku create command.
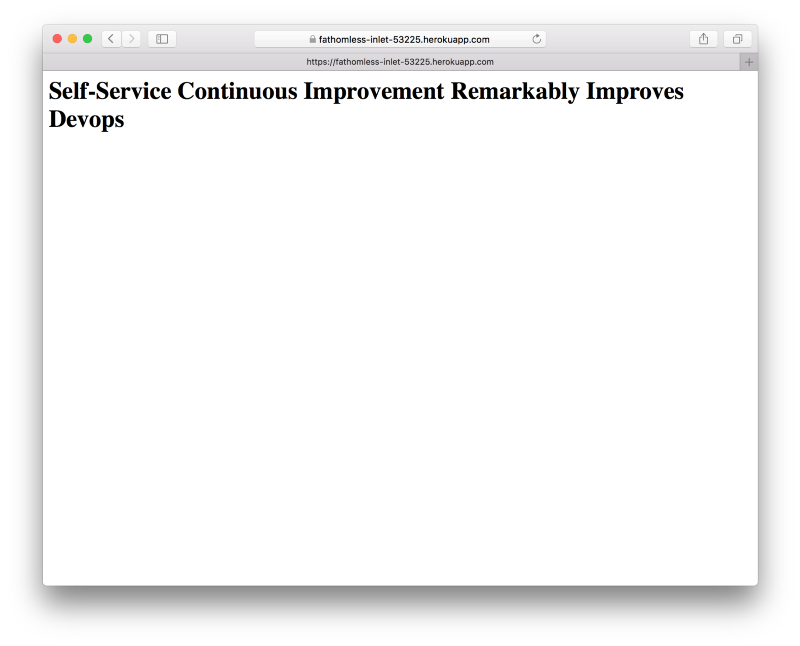
CI / CD buzz generator running on Heroku
Notice that the heroku container:push web command places on Heroku the same container that we posted on the Docker Hub.
To automate the process of deploying each build of the master branch of our project, add the file 'deploy_heroku.sh' to the '.travis' directory:
#!/bin/sh wget -qO- https://toolbelt.heroku.com/install-ubuntu.sh | sh heroku plugins:install heroku-container-registry docker login -e _ -u _ --password=$HEROKU_API_KEY registry.heroku.com heroku container:push web --app $HEROKU_APP_NAME Also add the following line to the '.travis.yml' file:
after_success: — sh .travis/deploy_dockerhub.sh — test “$TRAVIS_BRANCH” = “master” && sh .travis/deploy_heroku.sh Finally, add two more environment variables in the Travis CI. The Heroku API can be found in 'Account Settings', and the heroku App name is found in the output of the heroku create command.

Create a commit and submit the changes to GitHub. A new Docker image after a successful build should immediately get to the Docker Hub and Heroku.
Step number 10: CI / CD to win!
Now that we have a modern development chain set up, we can begin to deliver the functionality in small portions, performing short iterations. For example, if we decide to make the landing page more attractive, a typical workflow will look like this:
- Start by creating a new task: https://github.com/robvanderleek/cicd-buzz/issues/1 .
- Create a feature-branch for this task: https://github.com/robvanderleek/cicd-buzz/tree/issue-1 .
- Here is the magic of coding .
- Follow Travis CI and Better Code Hub: https://github.com/robvanderleek/cicd-buzz/commits/issue-1 .
- Test your application locally by running the most recent Docker image:
docker run --rm -p5000:5000 -it robvanderleek/cicd-buzz:issue-1. You can share this image with other people. - If you are satisfied with the new functionality, open the pull request. Now your code is ready to be delivered to production via the CI / CD chain: https://github.com/robvanderleek/cicd-buzz/pull/2 .

Buzz generator repository branch in a local Docker container
Happy coding and shipping to production!
References:
Source: https://habr.com/ru/post/329262/
All Articles