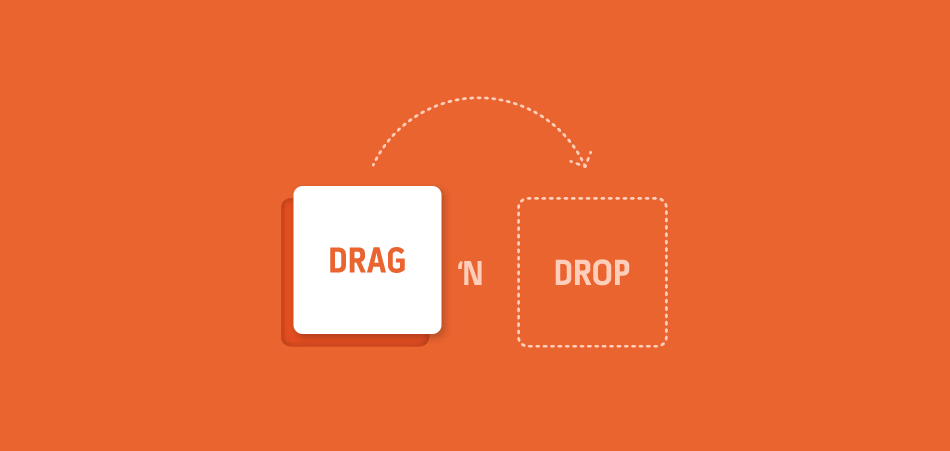
Implementing drag & drop functionality in an iOS application
Dragging the interface elements with your finger has become so natural part of the gesture control that a rare application does without it. However, properly writing such a function in the code is not always a trivial task. The partner company Music Breath will tell readers about some specific points of the technical implementation of drag & drop on Objective-C.
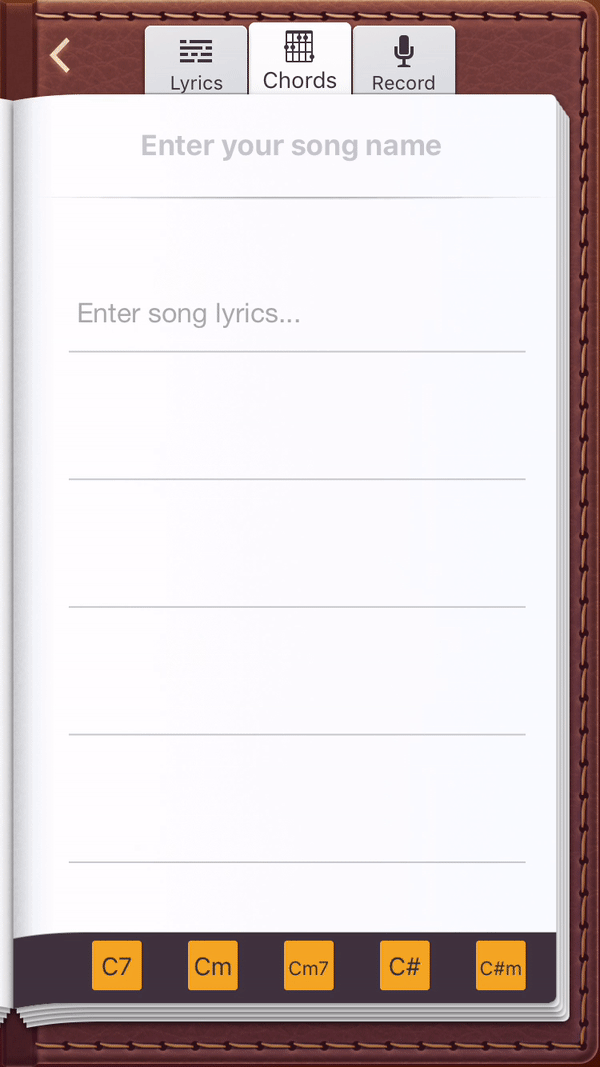
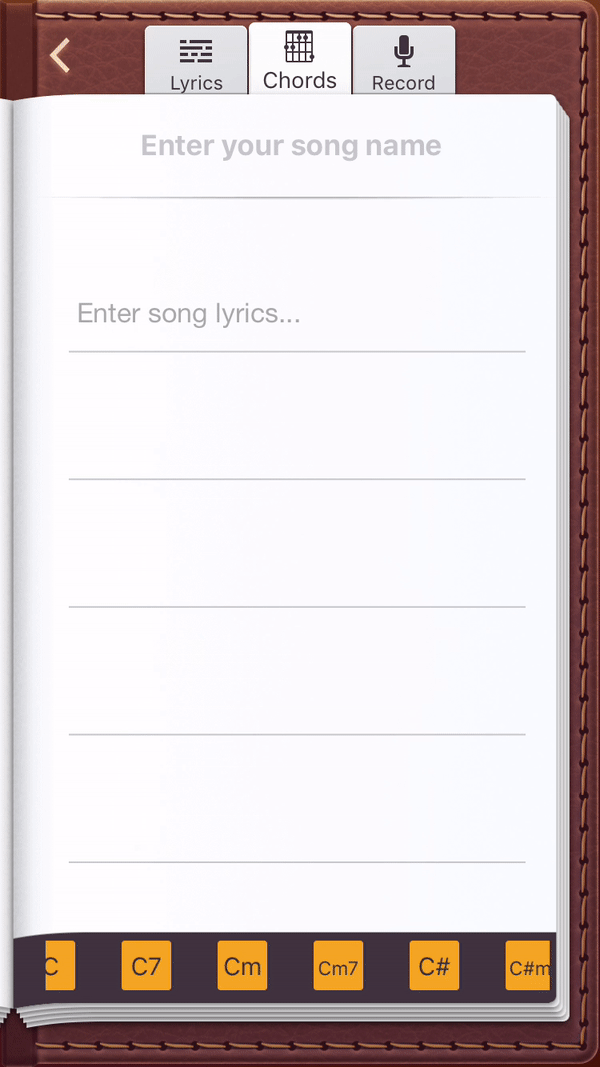
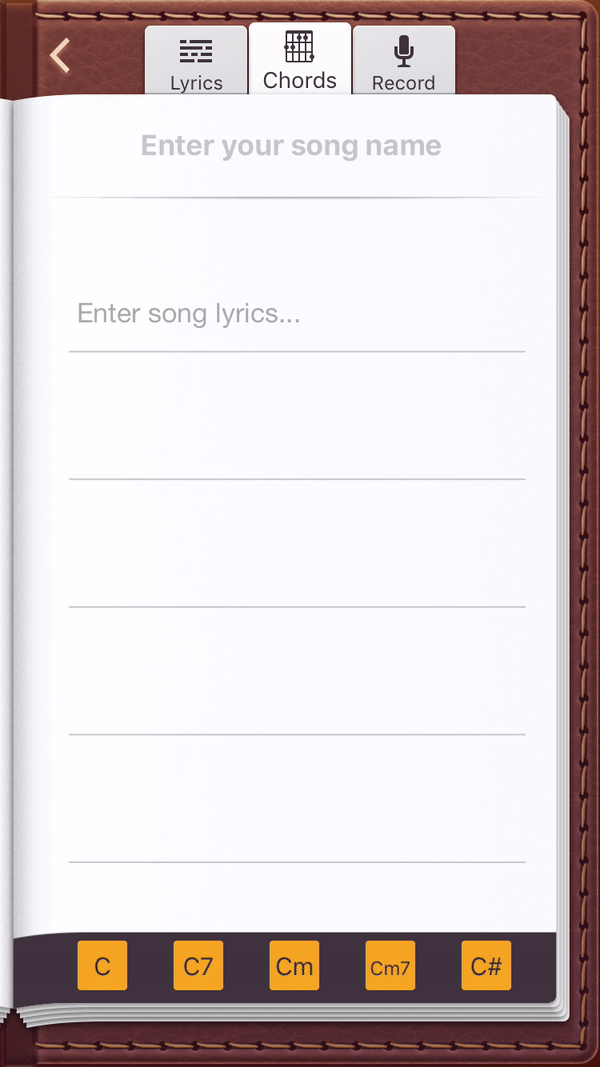
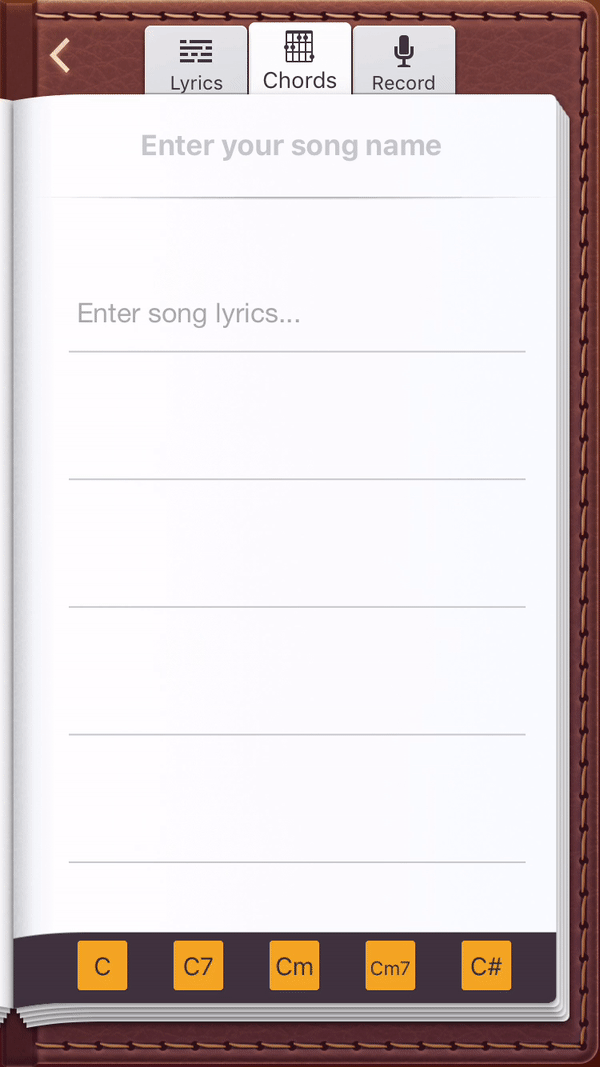
“One of the projects that we are currently actively working on is Song Writer - Lyrics Memo Pad , a kind of notebook for musicians, into which you can add an idea, a good string or even chords at any time. For the latter, it was required to embed the insert and drag-and-drop image into the application, which we decided to perform using the classic method Drag & amp; Today we will tell how to implement it, rewriting the application from Unity to Native, and what difficulties we encountered in the process.
We started, naturally, with a search for a ready-made solution: we re-read many articles, spent several days in Google and went through a lot of options for implementing this feature. However, they were all created to transfer objects from a UIView to a UIScrollView or from a UIView to a UIView. Our task at that time included moving from UIScrollView to UIScrollView (it later turned out that the transfer will occur from UIScrollView to UIView, which is located in UIScrollView). It turned out to be not so simple: we faced a number of problems, the overcoming of which will be discussed below.
')
To implement Drag '&' Drop, we chose UIPanGestureRecognizer. The following problems arose with this method:
Items 2 and 3 can be combined. So, let's analyze both blocks of problems in more detail.
1. UIPanGestureRecognizer intercepts UIScrollView events.
The essence of the problem :
Since the UIScrollView, from which we want to move the UIImageView, has more elements than is displayed on the screen (in other words, contentSize is larger than the frame), and UIPanGestureRecognizer intercepts UIScrollView events, when scrolling right / left we cannot get to other elements UIPanGestureRecognizer is called all the time.
Solution :
To solve this problem, we used the category for UIPanGestureRecognizer, which was found in the stackoverflow. We needed it in order to set the direction for the UIPanGestureRecognizer - to make the element move only up / down.
How it looked in the code:
Now we can set a specific direction for the UIPanGestureRecognizer. In this way:
where panRecg.direction = DirectionPangestureRecognizerVertical defines the direction for our Drag '&' Drop.
A little bit about UIPanGestureRecognizer:
UIPanGestureRecognizer has three events for moving an object:
To carry out the transfer of the object, we catch all the events.
2) Converting a coordinate system from one UIScrollView to another. Copy object
The essence of the problem :
In our case, implementing Drag '&' Drop required recalculation of coordinate systems. The difficulty was that inside the UIScrollView, the coordinates are not static: when scrolling up, right, left and down, they change.
Solution :
To begin with, we needed to determine that we move the UIImageView and that we move a specific UIImageView, that is, we needed information about its coordinates, width and height and the actual image (UIImage). And then it was necessary to determine the center where the UIImageView is located in self.view
This procedure is performed before each of the UIPanGestureRecognizer events.
Recall that we wanted to not only move the object, but copy it so that it appeared in one UIScrollView, without disappearing from the other. In addition, the process of moving must be visible to the user.
Consider all the events UIPanGestureRecognizer.
2.1. UIGestureRecognizerStateBegan
The magic here is that we create a picture on our self.view. But this is only the beginning. Now we need to recalculate the coordinates of the UIImageView, which we move to self.view, and add it exactly where we start moving. At the same place, it should appear then, so that the user has the illusion that he is dragging exactly this picture.
Let's break the whole code into several parts:
a) Conversion
CGRect rect = [self.view convertRect: [imageView frame] fromView: [imageView superview]];
We convert the size of our movable object from its superview to self.view and get the coordinates to self.view.
Next, set the frame of the new UIImageView, which we add to self.view. At the same time, we do not forget that the dimensions will be strictly necessary, so we take static values, 28x28.
b) Picture task
Another complication was that we simply cannot take the name of the picture: we need to move a UIImage different from the one we are dragging (a different color, rounded edges, etc.). To do this, when constructing an array with a UIImageView, we set each accessibilityLabel so that it can be easily named.
c) Adding the required item
The main thing here is not to forget to assign userInteractionEnabled = YES, otherwise the events will not be recognized when taped on UIImageVIew. We first implemented this when we built an array with a UIImageView. Then, since in the future it will be possible to move and what is added to another UIScrollView, we did the same for it:
d) Setting the starting point
Finally, we need to know where we want to start moving.
This is the center of our new facility. We take exactly imageView: so when we start moving an element, it will be right under the finger. If we used viewImage.center, then the object being moved would be higher and more to the left (perhaps there is no refinement, and it can be easier, but we will simply recalculate the coordinates in the future).
So, we did everything that was required to start moving. Now you can go further.
2.2. UIGestureRecognizerStateChanged
Now we need to implement the process of movement itself, and so that it occurs in front of the user. To do this, when handling the UIGestureRecognizerStateChanged event, we do the following:
Here the magic trick with recalculation of coordinate systems is repeated. At the exit, we have an object that moves right after the finger: the picture does not move anywhere, and at each stage of the path is where it should be.
Now the most difficult thing is to add the object to where we would like to see it in the end. Complicating matters is that we move not just to UIScrollView, but to UIView, which is inside it.
Everything happens in the UIGestureRecognizerStateEnded event.
2.3. UIGestureRecognizerStateEnded
To begin with, we find 2 CGRects: a moving picture and a UIView, and we insert there:
When you release your finger (that is, at the moment when the movement is completed), we will convert our viewImage and similarly convert the location where we want to insert it. In fact, here we are working on a template: we used to insert into the UIScrollView, now we just as well insert into the UIView, which is in the UIScrollView.
Having received two converted CGRects, we can check whether we got to the right place.
If it turns out that it is not, then we simply delete the created UIImageView to move with our self.view

If everything went well, do the following:
Here we find the point, already inside the UIView, to which we will move the object.
Next, you need to put UIImageVew clearly in the center along the Y axis, for this we set a new coordinate. We look, that turned out, and we see that the picture was duplicated where we wanted, while remaining in the old UIScrollView.
On this today's session of black magic Drag '&' Drop ends.
Summing up, the whole difficulty was to understand what and where to convert. Perhaps, over time, we will develop a simpler algorithm, but at the moment we will just be glad that everything works and is beautifully copied from one place to another, as planned. ”
“One of the projects that we are currently actively working on is Song Writer - Lyrics Memo Pad , a kind of notebook for musicians, into which you can add an idea, a good string or even chords at any time. For the latter, it was required to embed the insert and drag-and-drop image into the application, which we decided to perform using the classic method Drag & amp; Today we will tell how to implement it, rewriting the application from Unity to Native, and what difficulties we encountered in the process.
We started, naturally, with a search for a ready-made solution: we re-read many articles, spent several days in Google and went through a lot of options for implementing this feature. However, they were all created to transfer objects from a UIView to a UIScrollView or from a UIView to a UIView. Our task at that time included moving from UIScrollView to UIScrollView (it later turned out that the transfer will occur from UIScrollView to UIView, which is located in UIScrollView). It turned out to be not so simple: we faced a number of problems, the overcoming of which will be discussed below.
')
Problems with Drag '&' Drop
To implement Drag '&' Drop, we chose UIPanGestureRecognizer. The following problems arose with this method:
- UIPanGestureRecognizer intercepts UIScrollView events.
- We needed not to transfer the object, but to copy it. Strictly speaking, this problem is not directly related to Drag '&' Drop, but we encountered it in the process of implementation.
- It is necessary to convert the coordinate system from one UIScrollView to another.
Items 2 and 3 can be combined. So, let's analyze both blocks of problems in more detail.
1. UIPanGestureRecognizer intercepts UIScrollView events.
The essence of the problem :
Since the UIScrollView, from which we want to move the UIImageView, has more elements than is displayed on the screen (in other words, contentSize is larger than the frame), and UIPanGestureRecognizer intercepts UIScrollView events, when scrolling right / left we cannot get to other elements UIPanGestureRecognizer is called all the time.
Solution :
To solve this problem, we used the category for UIPanGestureRecognizer, which was found in the stackoverflow. We needed it in order to set the direction for the UIPanGestureRecognizer - to make the element move only up / down.
How it looked in the code:
- (void)touchesMoved:(NSSet *)touches withEvent:(UIEvent *)event { [super touchesMoved:touches withEvent:event]; if (self.state == UIGestureRecognizerStateFailed) return; CGPoint nowPoint = [[touches anyObject] locationInView:self.view]; CGPoint prevPoint = [[touches anyObject] previousLocationInView:self.view]; _moveX += prevPoint.x - nowPoint.x; _moveY += prevPoint.y - nowPoint.y; if (!_drag) { if (abs(_moveX) > kDirectionPanThreshold) { if (_direction == DirectionPangestureRecognizerVertical) { self.state = UIGestureRecognizerStateFailed; }else { _drag = YES; } }else if (abs(_moveY) > kDirectionPanThreshold) { if (_direction == DirectionPanGestureRecognizerHorizontal) { self.state = UIGestureRecognizerStateFailed; }else { _drag = YES; } } } } Now we can set a specific direction for the UIPanGestureRecognizer. In this way:
for (int i =0; i < _scrollChords.imageArray.count; i++) { DirectionPanGestureRecognizer *panRecg = [[DirectionPanGestureRecognizer alloc]initWithTarget:self action:@selector(labelDragged:)]; panRecg.direction = DirectionPangestureRecognizerVertical; [[_scrollChords.imageArray objectAtIndex:i] addGestureRecognizer:panRecg]; } where panRecg.direction = DirectionPangestureRecognizerVertical defines the direction for our Drag '&' Drop.
A little bit about UIPanGestureRecognizer:
UIPanGestureRecognizer has three events for moving an object:
- UIGestureRecognizerStateBegan - the event returns at the beginning of the movement, when we were just taped on the object.
- UIGestureRecognizerStateChanged - the event is returned as the object is being moved.
- UIGestureRecognizerStateEnded — the event returns when the move is completed, that is, when we have already released the finger.
To carry out the transfer of the object, we catch all the events.
2) Converting a coordinate system from one UIScrollView to another. Copy object
The essence of the problem :
In our case, implementing Drag '&' Drop required recalculation of coordinate systems. The difficulty was that inside the UIScrollView, the coordinates are not static: when scrolling up, right, left and down, they change.
Solution :
To begin with, we needed to determine that we move the UIImageView and that we move a specific UIImageView, that is, we needed information about its coordinates, width and height and the actual image (UIImage). And then it was necessary to determine the center where the UIImageView is located in self.view
UIImageView *imageView=(UIImageView *)[recognizer view]; CGPoint newCenter = [recognizer translationInView:self.view]; This procedure is performed before each of the UIPanGestureRecognizer events.
Recall that we wanted to not only move the object, but copy it so that it appeared in one UIScrollView, without disappearing from the other. In addition, the process of moving must be visible to the user.
Consider all the events UIPanGestureRecognizer.
2.1. UIGestureRecognizerStateBegan
if (recognizer.state==UIGestureRecognizerStateBegan) { viewImage = [[UIImageView alloc] init]; CGRect rect = [self.view convertRect:[imageView frame] fromView:[imageView superview]]; viewImage.frame = CGRectMake(rect.origin.x, rect.origin.y, 28, 28); viewImage.image = [UIImage imageNamed:[NSString stringWithFormat:@"%@copy",imageView.accessibilityLabel]]; viewImage.contentMode = UIViewContentModeScaleAspectFill; viewImage.userInteractionEnabled = YES; [self.view addSubview:viewImage]; beginX = imageView.center.x; beginY = imageView.center.y; } The magic here is that we create a picture on our self.view. But this is only the beginning. Now we need to recalculate the coordinates of the UIImageView, which we move to self.view, and add it exactly where we start moving. At the same place, it should appear then, so that the user has the illusion that he is dragging exactly this picture.
Let's break the whole code into several parts:
a) Conversion
CGRect rect = [self.view convertRect: [imageView frame] fromView: [imageView superview]];
We convert the size of our movable object from its superview to self.view and get the coordinates to self.view.
viewImage.frame = CGRectMake(rect.origin.x, rect.origin.y, 28, 28); viewImage.image = [UIImage imageNamed:[NSString stringWithFormat:@"%@copy",imageView.accessibilityLabel]]; Next, set the frame of the new UIImageView, which we add to self.view. At the same time, we do not forget that the dimensions will be strictly necessary, so we take static values, 28x28.
b) Picture task
Another complication was that we simply cannot take the name of the picture: we need to move a UIImage different from the one we are dragging (a different color, rounded edges, etc.). To do this, when constructing an array with a UIImageView, we set each accessibilityLabel so that it can be easily named.
viewImage.contentMode = UIViewContentModeScaleAspectFill; viewImage.userInteractionEnabled = YES; [self.view addSubview:viewImage]; c) Adding the required item
The main thing here is not to forget to assign userInteractionEnabled = YES, otherwise the events will not be recognized when taped on UIImageVIew. We first implemented this when we built an array with a UIImageView. Then, since in the future it will be possible to move and what is added to another UIScrollView, we did the same for it:
viewImage.userInteractionEnabled = YES; d) Setting the starting point
Finally, we need to know where we want to start moving.
beginX = imageView.center.x; beginY = imageView.center.y; This is the center of our new facility. We take exactly imageView: so when we start moving an element, it will be right under the finger. If we used viewImage.center, then the object being moved would be higher and more to the left (perhaps there is no refinement, and it can be easier, but we will simply recalculate the coordinates in the future).
So, we did everything that was required to start moving. Now you can go further.
2.2. UIGestureRecognizerStateChanged
Now we need to implement the process of movement itself, and so that it occurs in front of the user. To do this, when handling the UIGestureRecognizerStateChanged event, we do the following:
newCenter.x = ( newCenter.x + beginX ); newCenter.y = ( newCenter.y + beginY ); newCenter = [self.view convertPoint:newCenter fromView:imageView.superview]; viewImage.center = newCenter; Here the magic trick with recalculation of coordinate systems is repeated. At the exit, we have an object that moves right after the finger: the picture does not move anywhere, and at each stage of the path is where it should be.
Now the most difficult thing is to add the object to where we would like to see it in the end. Complicating matters is that we move not just to UIScrollView, but to UIView, which is inside it.
Everything happens in the UIGestureRecognizerStateEnded event.
2.3. UIGestureRecognizerStateEnded
To begin with, we find 2 CGRects: a moving picture and a UIView, and we insert there:
CGRect rect = [self.view convertRect:[viewImage frame] fromView:[viewImage superview]]; CGRect rectNewView = [self.view convertRect:[[_customfield.viewArray objectAtIndex:j] frame] fromView:[[_customfield.viewArray objectAtIndex:j] superview]]; When you release your finger (that is, at the moment when the movement is completed), we will convert our viewImage and similarly convert the location where we want to insert it. In fact, here we are working on a template: we used to insert into the UIScrollView, now we just as well insert into the UIView, which is in the UIScrollView.
Having received two converted CGRects, we can check whether we got to the right place.
if (CGRectIntersectsRect(rect,rectNewView)) { } else { [viewImage removeFromSuperview]; } If it turns out that it is not, then we simply delete the created UIImageView to move with our self.view
If everything went well, do the following:
newCenter = [[_customText.viewArray objectAtIndex:j] convertPoint:newCenter fromView:viewImage.superview]; viewImage.center = CGPointMake(newCenter.x,[[_customText.viewArray objectAtIndex:j] frame].size.height/2); [[_customText.viewArray objectAtIndex:j] addSubview:viewImage]; Here we find the point, already inside the UIView, to which we will move the object.
Next, you need to put UIImageVew clearly in the center along the Y axis, for this we set a new coordinate. We look, that turned out, and we see that the picture was duplicated where we wanted, while remaining in the old UIScrollView.
On this today's session of black magic Drag '&' Drop ends.
Summing up, the whole difficulty was to understand what and where to convert. Perhaps, over time, we will develop a simpler algorithm, but at the moment we will just be glad that everything works and is beautifully copied from one place to another, as planned. ”
Source: https://habr.com/ru/post/328952/
All Articles