Guide React Native - create an application for iOS. Part 1.4 - 1.5
→ Transfer from here
→ Continued. Previous issues:
In this section, we will select a certain number of random wallpapers from a given category. This section is more about JS than React Native. We will create a new module (file) that will generate a random number. If the notion of “module” is unfamiliar to you, I recommend referring to the Node.js documentation on modules .
Find the line declaring the class
and above it add the following line. In this line we will declare a constant in which the number of randomly generated wallpapers will be stored, which we will show:
Now we will create a module that will generate a random number. The module will have two functions. Let's look at them:
We could combine these functions, but I am committed to quality code, so I follow the principle of The Single Responsibility Principle, SRP (Principle of Responsibility - Wiki ). SRP says that each function should do one thing well and nothing more. Following good programming principles will save you from headaches in the future.
Create a new file in the same directory as the index.ios.js file. We could create functions directly in this file, but highlighting them in a separate file will allow us to use them in any other project where we need to generate random numbers. In addition, it will not litter the code of the index.ios.js file.
We will name the new file RandManager.js . Its contents are shown below:
Save the file. Now we need to import our module into the index.ios.js file. To do this, add a module call after `use strict`:
Now we need to change our function to get the
As soon as we get the JSON data, we generate random numbers and put them into the randomIds array. Then we iterate over our random numbers and put the wallpaper with the corresponding id into the walls array.
Then we update the state variables: isLoading to false, since the data is loaded and wallsJSON in walls.
To see the result, change the renderResults () function:
In the first line of the renderResults () function, we used the restructuring from ES2015. Thanks to this, we managed:
replaced by:
ES2015 is cool, I told you so.
In View, we iterate through the array of wallsJSON using map () .
Going through the array (or collection) of wallpaper when rendering, we need to pass a unique key (id) for each element. Therefore, we see the key property:
After updating the emulator, we should see the following:

We see 5 random id wallpapers. If you change {wallpaper.id} to {wallpaper.author} in the renderResults () function, we should see the following:
Great, we learned how to randomly extract a certain amount of wallpaper (5 in this case) from the API. High five!
In this section, we will add a Swiper component. This component allows us to display wallpapers in a container that can be flipped sideways ( Youtube (en)).
We will learn how to connect third-party React Native components to our application. RN has a good community and on GitHub you will find a rich collection of various third-party components.
For our purposes, we will use react-native-swiper .
Go to the project directory in the terminal and type the following command:
Now import the new component by adding the following line:
Let's try out the Swiper.
Switch to the renderResults () method and replace View with Swiper. After that, the renderResults () method should look like this:
Run in emulator:
Instead of displaying the names of the authors of the wallpapers as a list, we put them on different
screens that we can flip left and right (cool! - approx. translator).
Now we need to add a couple of attributes:
We changed:
On this we come to the end of the first part. What an interesting journey!
To be frank, at the moment our application is not very interesting. I know. In the next part, we will add the wallpaper images instead of the authors' names. In addition, we will add a double tap handler (double-tap - I don’t know how to accurately translate, as I understand it is a double tap on the screen with a finger, but can it be called a double click or not? - interpreter note) using the PanHandler component. We will learn to import libraries into Xcode and give our application access to the Camera Roll (apparently an analogue of the “Gallery” in Android - comment of the translator). In addition, we will create our own component and much more. Sounds interesting? See you in the next part.
Ps. How to determine where to insert the cat?
→ Continued. Previous issues:
4. Filtering and selecting random wallpapers.
In this section, we will select a certain number of random wallpapers from a given category. This section is more about JS than React Native. We will create a new module (file) that will generate a random number. If the notion of “module” is unfamiliar to you, I recommend referring to the Node.js documentation on modules .
Find the line declaring the class
class SplashWalls extends Component{/* ... */}; and above it add the following line. In this line we will declare a constant in which the number of randomly generated wallpapers will be stored, which we will show:
const NUM_WALLPAPERS = 5; Now we will create a module that will generate a random number. The module will have two functions. Let's look at them:
uniqueRandomNumbers():- the function takes 3 arguments. The first is the number of random numbers that will be returned. The second and third are the lower (lowerLimit) and upper (upperLimit) limits of the generated numbers,upperLimit. If we call a function with argumentsuniqueRandomNumbers(5, 10, 20);, we get an array of 5 unique numbers,
from 10 to 20.randomNumberInRange():- the function takes two arguments, the lower and upper limits of the generated numbers, respectively. For example, as a result of calling the functionrandomNumberInRange(2, 10);, one number from 2 to 10 will return.
We could combine these functions, but I am committed to quality code, so I follow the principle of The Single Responsibility Principle, SRP (Principle of Responsibility - Wiki ). SRP says that each function should do one thing well and nothing more. Following good programming principles will save you from headaches in the future.
Create a new file in the same directory as the index.ios.js file. We could create functions directly in this file, but highlighting them in a separate file will allow us to use them in any other project where we need to generate random numbers. In addition, it will not litter the code of the index.ios.js file.
We will name the new file RandManager.js . Its contents are shown below:
module.exports = { uniqueRandomNumbers(numRandomNumbers, lowerLimit, upperLimit) { var uniqueNumbers = []; while( uniqueNumbers.length != numRandomNumbers ) { var currentRandomNumber = this.randomNumberInRange(lowerLimit, upperLimit); if( uniqueNumbers.indexOf(currentRandomNumber) === -1 ) uniqueNumbers.push(currentRandomNumber); } return uniqueNumbers; }, randomNumberInRange(lowerLimit, upperLimit) { return Math.floor( Math.random() * (1 + upperLimit - lowerLimit) ) + lowerLimit; } }; Save the file. Now we need to import our module into the index.ios.js file. To do this, add a module call after `use strict`:
'use strict'; /***/ var RandManager = require('./RandManager.js'); /***/ Now we need to change our function to get the
fetchWallsJSON() wallpaper: fetchWallsJSON() { var url = 'http://unsplash.it/list'; fetch(url) .then( response => response.json() ) .then( jsonData => { /***/ var randomIds = RandManager.uniqueRandomNumbers(NUM_WALLPAPERS, 0, jsonData.length); var walls = []; randomIds.forEach(randomId => { walls.push(jsonData[randomId]); }); this.setState({ isLoading: false, wallsJSON: [].concat(walls) }); /***/ }) .catch( error => console.log('JSON Fetch error : ' + error) ); } As soon as we get the JSON data, we generate random numbers and put them into the randomIds array. Then we iterate over our random numbers and put the wallpaper with the corresponding id into the walls array.
Then we update the state variables: isLoading to false, since the data is loaded and wallsJSON in walls.
To see the result, change the renderResults () function:
renderResults() { /***/ var {wallsJSON, isLoading} = this.state; if( !isLoading ) { return ( . <View> {wallsJSON.map((wallpaper, index) => { return( <Text key={index}> {wallpaper.id} </Text> ); })} .</View> ); } /***/ } In the first line of the renderResults () function, we used the restructuring from ES2015. Thanks to this, we managed:
var wallsJSON = this.state.wallsJSON, isLoading = this.state.isLoading; replaced by:
var {wallsJSON, isLoading} = this.state; ES2015 is cool, I told you so.
In View, we iterate through the array of wallsJSON using map () .
Going through the array (or collection) of wallpaper when rendering, we need to pass a unique key (id) for each element. Therefore, we see the key property:
<Text key={index}> After updating the emulator, we should see the following:
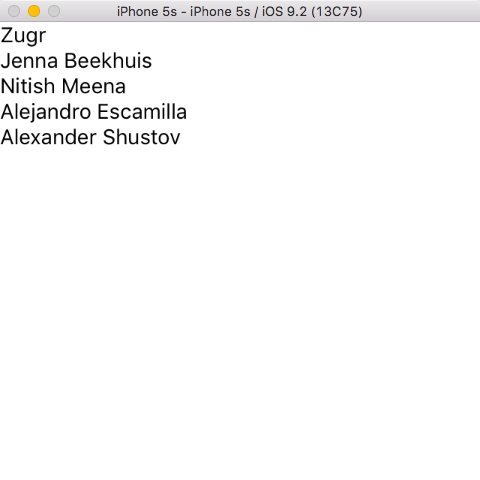
We see 5 random id wallpapers. If you change {wallpaper.id} to {wallpaper.author} in the renderResults () function, we should see the following:
Great, we learned how to randomly extract a certain amount of wallpaper (5 in this case) from the API. High five!
5. Add Swiper Component
In this section, we will add a Swiper component. This component allows us to display wallpapers in a container that can be flipped sideways ( Youtube (en)).
We will learn how to connect third-party React Native components to our application. RN has a good community and on GitHub you will find a rich collection of various third-party components.
For our purposes, we will use react-native-swiper .
Go to the project directory in the terminal and type the following command:
npm install react-native-swiper --save Now import the new component by adding the following line:
`use strict` /***/ var Swiper = require('react-native-swiper'); /***/ Let's try out the Swiper.
Switch to the renderResults () method and replace View with Swiper. After that, the renderResults () method should look like this:
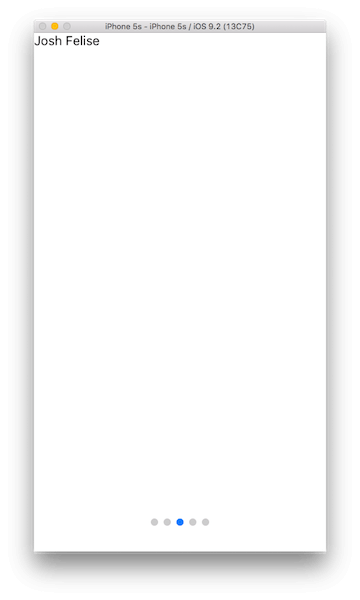
renderResults() { var {wallsJSON, isLoading} = this.state; if( !isLoading ) { return ( /***/ <Swiper> /***/ {wallsJSON.map((wallpaper, index) => { return( <Text key={index}> {wallpaper.author} </Text> ); })} /***/ </Swiper> /***/ ); } } Run in emulator:
Instead of displaying the names of the authors of the wallpapers as a list, we put them on different
screens that we can flip left and right (cool! - approx. translator).
Now we need to add a couple of attributes:
<Swiper /***/ dot.{<View style={{backgroundColor:'rgba(255,255,255,.4)', width: 8, height: 8,borderRadius: 10, marginLeft: 3, marginRight: 3, marginTop: 3, marginBottom: 3,}} />} activeDot.{<View style={{backgroundColor: '#fff', width: 13, height: 13, borderRadius: 7, marginLeft: 7, marginRight: 7}} />} loop={false} onMomentumScrollEnd={this.onMomentumScrollEnd} /***/ > {wallsJSON.map((wallpaper, index) => { return( <Text key={index}> {wallpaper.author} </Text> ); })} </Swiper> We changed:
- The navigation points at the bottom of the screen have turned white and increased in size.
- Disabled flipping in a circle (loop = {false}). That is, when you reach the last page and try to flip further, you will not get to the first page.
- Run onMomentumScrollEnd (which you will learn about later) every time we turn the page
On this we come to the end of the first part. What an interesting journey!
Let's sum up
- In the first section, we learned how to create an empty RN project in Xcode.
- In the second section, we talked about ES2015 and why it is desirable to use the new syntax, we also learned how to create state variables and extract JSON data from the API.
- In the third section, we studied the dynamic rendering of the application, depending on the value of the state variable (state). And a little acquainted with the flexbox positioning.
- In the fourth section, we created our own module for generating random numbers and learned how to import it into the application.
- In the fifth section, we installed a third-party module in our application, which was easy, thanks to Node.
To be frank, at the moment our application is not very interesting. I know. In the next part, we will add the wallpaper images instead of the authors' names. In addition, we will add a double tap handler (double-tap - I don’t know how to accurately translate, as I understand it is a double tap on the screen with a finger, but can it be called a double click or not? - interpreter note) using the PanHandler component. We will learn to import libraries into Xcode and give our application access to the Camera Roll (apparently an analogue of the “Gallery” in Android - comment of the translator). In addition, we will create our own component and much more. Sounds interesting? See you in the next part.
Ps. How to determine where to insert the cat?
')
Source: https://habr.com/ru/post/328904/
All Articles