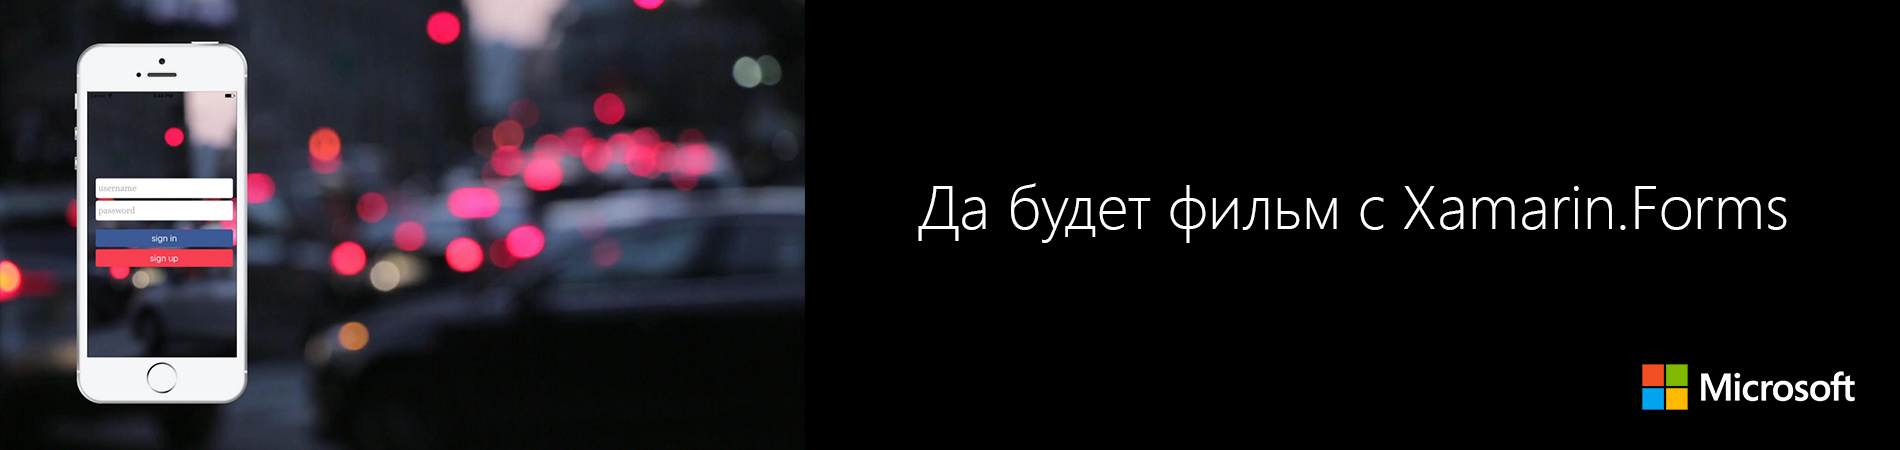
Let there be a movie with Xamarin.Forms
One of the coolest trends in mobile user interface design can safely be called the use of video as a background for rendering. As an example, the Tumblr, Spotify, and Vine apps. In this article we will analyze how to implement a similar solution in the Xamarin.Forms application, and in the end we will talk about the measures to be taken soon in St. Petersburg. All we need is to implement two custom renderers for Android and for iOS separately.
Let's first create a new project Xamarin.Forms PCL and call it
In order not to complicate the description, we will try to create this control with simple requirements.
')
In order to specify which video will be displayed, we need a binding property. I will call it the
The next thing we need is a logical value to determine if the video is required in a loop or not. Let's call this property
Finally, we need a callback that will trigger when the video ends. For simplicity, I use an
After creating this class, you need to implement custom renderers for iOS and Android.
First of all, you need to create a custom renderer class called
To start the iOS video player, you need to check whether there is a video from the
If there is a video file, then you need to create
In addition, we will probably have one video file for any resolution. We do not need to make the video look stretched on some device, right? In order for the video resolution to always be correct, we need to install
We also have a
Finally, in order for the video player to play the file, we call the
The rest of the work with the code is to override the
Now that the iOS implementation is complete, let's consider the Android project.
Create a new custom renderer in the Android project and also name it
One of the difficulties in implementing an Android renderer is that we need two types of views if we also want to cover older versions of Android. If you just want to cover the modern OS from Android Ice Cream Sandwich and above, you can just focus on the
Please note that the implementation of
And now, before deciding which video container is better to use, you must first implement the video player itself. Android already has the class we need -
We need to set the
Something here is different from the implementation of the renderer in the case of iOS - there is not such a simple set of properties for displaying video in different resolutions, like fills in proportions! So, we need to implement our own method in a custom function called
Now that we have a video player object, our next task is to create a function that plays the video from the
If the file does not exist, then the function will
If the file exists, we just need to reset the video player and then set the data source based on the previous step. We can't just play the video directly, so we need to first prepare it. After preparation is completed, the
As mentioned above, Android does not provide us with easy properties for scaling video by aspect ratio. You probably know that Android devices have a lot of screen resolution options, so saving the video in its original form is not an option at all. We need to scale it correctly so that it does not look stretched.
The good news is that we, in general, can achieve this if we use
The idea of getting the video to scale correctly is to use a matrix to scale the contents of the
As mentioned earlier, if we want to support a wide range of Android OSs, we need to implement this in
The following code snippet shows how to implement it in a custom renderer. As you can see, the code is quite similar to the one we used when implementing the renderer for iOS, except for creating containers and playing videos.
Since we use
When using TextureView, you must implement the
When using
For Android, that was all we needed. Now that we have everything we need, we can test this control on the Xamarin.Forms page.
Before creating a test page, it is recommended to prepare your own video file. It is better to use vertical video to effectively use the space.
If you don’t have a video to test, you can download it for free from Coverr . There are no vertical videos, but we can still get what we need. For example, you can either trim the video vertically, or use it as it is, since we already process the aspect scaling when filling in the code.
So you can use any video that is at hand. I recommend using any mp4 video file with h264 encoding. In this example, I’m using a video from Coverr called Orchestra .
Help: For some Android and iOS devices, especially older models, you need to make a reservation that they probably may not be able to play MP4 files. This is mainly due to the lack of support for the base profile. To get around this point, you can transcode the video with a tool like
If you already have a video file, place it in the appropriate folders for each OS. On Android, it should be placed in the
After the files are placed in the correct folders, you need to create a page in the Xamarin.Forms PCL project.
This is a simple page with a minimum of components. We will create a home page with a background video, two text boxes for the username and password, as well as buttons for login and registration. There is no logic here, I just want to show you how a beautiful home page is made.
For better placement of controls, I use the grid as a container. The following snippet presents the corresponding XAML code completely.
. , ,
, , , , iOS. , . .
iOS, , Android. iOS. , - , — , iOS.
, , .
, , — . , (, , ), .
, , , Android , , . , .
, .
GitHub .
 — Xamarin-, . .NET- 2012 . Digamma. C 2015 Xamarin. StecPoint iOS .
XamDev.ru «Xamarin Developers» : VK , Facebook , Telegram .
20 - Xamarin Dev Days . Xamarin, .
Schedule:
09:00 – 09:30
09:30 – 10:10 Xamarin
10:20 – 11:00 UI Xamarin.Forms
11:10 – 11:50 Azure
12:00 – 13:00
13:00 – 16:00
.
Creating a background video control for Xamarin.Forms
Let's first create a new project Xamarin.Forms PCL and call it
BackgroundVideo . Now let's go to the PCL library and create a new class named Video , inherited from Xamarin.Forms.View . using System; using Xamarin.Forms; namespace BackgroundVideo.Controls { public class Video : View { } } In order not to complicate the description, we will try to create this control with simple requirements.
')
In order to specify which video will be displayed, we need a binding property. I will call it the
Source property. This is a string to determine which video file to play. In iOS, the Source property is related to the Resources directory, whereas in Android it refers to the Assets directory. public static readonly BindableProperty SourceProperty = BindableProperty.Create( nameof(Source), typeof(string), typeof(Video), string.Empty, BindingMode.TwoWay); public string Source { get { return (string)GetValue(SourceProperty); } set { SetValue(SourceProperty, value); } The next thing we need is a logical value to determine if the video is required in a loop or not. Let's call this property
Loop . Initially, this value is set to true , so when you set the video Source property - Source this property will loop by default.Finally, we need a callback that will trigger when the video ends. For simplicity, I use an
Action class called OnFinishedPlaying . You can change it to an event or something that is convenient. public static readonly BindableProperty LoopProperty = BindableProperty.Create( nameof(Loop), typeof(bool), typeof(Video), true, BindingMode.TwoWay); public bool Loop { get { return (bool)GetValue(LoopProperty); } set { SetValue(LoopProperty, value); } } public Action OnFinishedPlaying { get; set; } After creating this class, you need to implement custom renderers for iOS and Android.
Customizable iOS renderer for managing background video
First of all, you need to create a custom renderer class called
VideoRenderer , which will inherit from ViewRenderer<Video, UIView> . The idea is to use the native iOS video player using the MPMoviePlayerController class and set its native control to our custom Video view. We will also need NSObject to analyze the event from the video player, determining whether it ended or not. using System; using System.IO; using BackgroundVideo.Controls; using BackgroundVideo.iOS.Renderers; using Foundation; using MediaPlayer; using UIKit; using Xamarin.Forms; using Xamarin.Forms.Platform.iOS; [assembly: ExportRenderer(typeof(Video), typeof(VideoRenderer))] namespace BackgroundVideo.iOS.Renderers { public class VideoRenderer : ViewRenderer<Video, UIView> { MPMoviePlayerController videoPlayer; NSObject notification = null; } } To start the iOS video player, you need to check whether there is a video from the
Source in the Resources node or not. If it is not there, then an empty view will be displayed.If there is a video file, then you need to create
MPMoviePlayerController and interpret the location of the video file as NSUrl . To make the user control clear, without a border or anything else, you need to set ControlStyle to MPMovieControlStyle.None , and set the background color to UIColor.Clear .In addition, we will probably have one video file for any resolution. We do not need to make the video look stretched on some device, right? In order for the video resolution to always be correct, we need to install
ScalingMode from the video player on MPMovieScalingMode.AspectFill .We also have a
Loop property, which determines whether video playback will be looped or not. To set the loop, you need to change the RepeatMode the video player to MPMovieRepeatMode.One . Otherwise, set it to MPMovieRepeatMode.None .Finally, in order for the video player to play the file, we call the
PrepareToPlay() function. To display a video in a user control, you must use the SetNativeControl() function. void InitVideoPlayer() { var path = Path.Combine(NSBundle.MainBundle.BundlePath, Element.Source); if (!NSFileManager.DefaultManager.FileExists(path)) { Console.WriteLine("Video not exist"); videoPlayer = new MPMoviePlayerController(); videoPlayer.ControlStyle = MPMovieControlStyle.None; videoPlayer.ScalingMode = MPMovieScalingMode.AspectFill; videoPlayer.RepeatMode = MPMovieRepeatMode.One; videoPlayer.View.BackgroundColor = UIColor.Clear; SetNativeControl(videoPlayer.View); return; } // Load the video from the app bundle. NSUrl videoURL = new NSUrl(path, false); // Create and configure the movie player. videoPlayer = new MPMoviePlayerController(videoURL); videoPlayer.ControlStyle = MPMovieControlStyle.None; videoPlayer.ScalingMode = MPMovieScalingMode.AspectFill; videoPlayer.RepeatMode = Element.Loop ? MPMovieRepeatMode.One : MPMovieRepeatMode.None; videoPlayer.View.BackgroundColor = UIColor.Clear; foreach (UIView subView in videoPlayer.View.Subviews) { subView.BackgroundColor = UIColor.Clear; } videoPlayer.PrepareToPlay(); SetNativeControl(videoPlayer.View); } The rest of the work with the code is to override the
OnElementChanged and OnElementPropertyChanged so that the code can be functionally operated from the Xamarin.Forms project. In OnElementChanged we have to wait for the event of the end of playing the video player and call the OnFinishedPlaying command. The following snippet is the simplest code necessary for this to work. protected override void OnElementChanged(ElementChangedEventArgs<Video> e) { base.OnElementChanged(e); if (Control == null) { InitVideoPlayer(); } if (e.OldElement != null) { // Unsubscribe notification?.Dispose(); } if (e.NewElement != null) { // Subscribe notification = MPMoviePlayerController.Notifications.ObservePlaybackDidFinish((sender, args) => { /* Access strongly typed args */ Console.WriteLine("Notification: {0}", args.Notification); Console.WriteLine("FinishReason: {0}", args.FinishReason); Element?.OnFinishedPlaying?.Invoke(); }); } } protected override void OnElementPropertyChanged(object sender, System.ComponentModel.PropertyChangedEventArgs e) { base.OnElementPropertyChanged(sender, e); if (Element == null || Control == null) return; if (e.PropertyName == Video.SourceProperty.PropertyName) { InitVideoPlayer(); } else if (e.PropertyName == Video.LoopProperty.PropertyName) { var liveImage = Element as Video; if (videoPlayer != null) videoPlayer.RepeatMode = Element.Loop ? MPMovieRepeatMode.One : MPMovieRepeatMode.None; } } Now that the iOS implementation is complete, let's consider the Android project.
Custom video renderer for Android
Create a new custom renderer in the Android project and also name it
VideoRenderer . We inherit this renderer using ViewRenderer<Video, FrameLayout> , and this means that it will be displayed as FrameLayout in the native Android control.One of the difficulties in implementing an Android renderer is that we need two types of views if we also want to cover older versions of Android. If you just want to cover the modern OS from Android Ice Cream Sandwich and above, you can just focus on the
TextureView implementation, if this is not enough for you, then you will also need to implement it using VideoView .Please note that the implementation of
VideoView is not optimal here. You may notice some flicker. That's why I added an empty view called _placeholder . It will be displayed when the video does not play or when the video source changes. If the video file is ready to play and display, then the _placeholder will be hidden. using System; using Android.Graphics; using Android.Graphics.Drawables; using Android.Media; using Android.OS; using Android.Runtime; using Android.Views; using Android.Widget; using BackgroundVideo.Controls; using BackgroundVideo.Droid.Renderers; using Xamarin.Forms; using Xamarin.Forms.Platform.Android; [assembly: ExportRenderer(typeof(Video), typeof(VideoRenderer))] namespace BackgroundVideo.Droid.Renderers { public class VideoRenderer : ViewRenderer<Video, FrameLayout>, TextureView.ISurfaceTextureListener, ISurfaceHolderCallback { private bool _isCompletionSubscribed = false; private FrameLayout _mainFrameLayout = null; private Android.Views.View _mainVideoView = null; private Android.Views.View _placeholder = null; } } And now, before deciding which video container is better to use, you must first implement the video player itself. Android already has the class we need -
MediaPlayer . We should use this object and make sure that it is created only once. We can reuse the same object as the video source changes.We need to set the
Completion event to implement the OnFinishedPlaying . In addition, you must set the Looping value for the Loop custom property.Something here is different from the implementation of the renderer in the case of iOS - there is not such a simple set of properties for displaying video in different resolutions, like fills in proportions! So, we need to implement our own method in a custom function called
AdjustTextureViewAspect() . This function will be called in the VideoSizeChanged . We will talk about this implementation later. private MediaPlayer _videoPlayer = null; internal MediaPlayer VideoPlayer { get { if (_videoPlayer == null) { _videoPlayer = new MediaPlayer(); if (!_isCompletionSubscribed) { _isCompletionSubscribed = true; _videoPlayer.Completion += Player_Completion; } _videoPlayer.VideoSizeChanged += (sender, args) => { AdjustTextureViewAspect(args.Width, args.Height); }; _videoPlayer.Info += (sender, args) => { Console.WriteLine("onInfo what={0}, extra={1}", args.What, args.Extra); if (args.What == MediaInfo.VideoRenderingStart) { Console.WriteLine("[MEDIA_INFO_VIDEO_RENDERING_START] placeholder GONE"); _placeholder.Visibility = ViewStates.Gone; } }; _videoPlayer.Prepared += (sender, args) => { _mainVideoView.Visibility = ViewStates.Visible; _videoPlayer.Start(); if (Element != null) _videoPlayer.Looping = Element.Loop; }; } return _videoPlayer; } } private void Player_Completion(object sender, EventArgs e) { Element?.OnFinishedPlaying?.Invoke(); } Now that we have a video player object, our next task is to create a function that plays the video from the
Source property. Please remember that the video file on Android must be stored in the Assets directory. This file can be opened using the Assets.OpenFd(fullPath) function.If the file does not exist, then the function will
Java.IO.IOException . This means that nothing needs to be displayed in the video container.If the file exists, we just need to reset the video player and then set the data source based on the previous step. We can't just play the video directly, so we need to first prepare it. After preparation is completed, the
Prepared event is triggered and the video is displayed in one of the video presentations implemented in the previous stage. private void PlayVideo(string fullPath) { Android.Content.Res.AssetFileDescriptor afd = null; try { afd = Context.Assets.OpenFd(fullPath); } catch (Java.IO.IOException ex) { Console.WriteLine("Play video: " + Element.Source + " not found because " + ex); _mainVideoView.Visibility = ViewStates.Gone; } catch (Exception ex) { Console.WriteLine("Error openfd: " + ex); _mainVideoView.Visibility = ViewStates.Gone; } if (afd != null) { Console.WriteLine("Lenght " + afd.Length); VideoPlayer.Reset(); VideoPlayer.SetDataSource(afd.FileDescriptor, afd.StartOffset, afd.Length); VideoPlayer.PrepareAsync(); } } As mentioned above, Android does not provide us with easy properties for scaling video by aspect ratio. You probably know that Android devices have a lot of screen resolution options, so saving the video in its original form is not an option at all. We need to scale it correctly so that it does not look stretched.
The good news is that we, in general, can achieve this if we use
TextureView . The bad news is that at the moment I do not know how to implement it with VideoView . But it's better than nothing, right?The idea of getting the video to scale correctly is to use a matrix to scale the contents of the
TextureView . Thus, video scaling occurs at the top or at the bottom, depending on the video size and presentation. Then, after scaling, the video is located in the center of the view.As mentioned earlier, if we want to support a wide range of Android OSs, we need to implement this in
TextureView and VideoView . This will be done as part of the OnElementChanged function. In the case of both implementations, the same properties are used. We will make the background color transparent and adjust the layout parameters to match the parent element. Thus, the background will not have a color that could be displayed in the absence of video, and this background will fill the entire container. private void AdjustTextureViewAspect(int videoWidth, int videoHeight) { if (!(_mainVideoView is TextureView)) return; if (Control == null) return; var control = Control; var textureView = _mainVideoView as TextureView; var controlWidth = control.Width; var controlHeight = control.Height; var aspectRatio = (double)videoHeight / videoWidth; int newWidth, newHeight; if (controlHeight <= (int)(controlWidth * aspectRatio)) { // limited by narrow width; restrict height newWidth = controlWidth; newHeight = (int)(controlWidth * aspectRatio); } else { // limited by short height; restrict width newWidth = (int)(controlHeight / aspectRatio); newHeight = controlHeight; } int xoff = (controlWidth - newWidth) / 2; int yoff = (controlHeight - newHeight) / 2; Console.WriteLine("video=" + videoWidth + "x" + videoHeight + " view=" + controlWidth + "x" + controlHeight + " newView=" + newWidth + "x" + newHeight + " off=" + xoff + "," + yoff); var txform = new Matrix(); textureView.GetTransform(txform); txform.SetScale((float)newWidth / controlWidth, (float)newHeight / controlHeight); txform.PostTranslate(xoff, yoff); textureView.SetTransform(txform); } The following code snippet shows how to implement it in a custom renderer. As you can see, the code is quite similar to the one we used when implementing the renderer for iOS, except for creating containers and playing videos.
protected override void OnElementChanged(ElementChangedEventArgs<Video> e) { base.OnElementChanged(e); if (Control == null) { _mainFrameLayout = new FrameLayout(Context); _placeholder = new Android.Views.View(Context) { Background = new ColorDrawable(Xamarin.Forms.Color.Transparent.ToAndroid()), LayoutParameters = new LayoutParams( ViewGroup.LayoutParams.MatchParent, ViewGroup.LayoutParams.MatchParent), }; if (Build.VERSION.SdkInt < BuildVersionCodes.IceCreamSandwich) { Console.WriteLine("Using VideoView"); var videoView = new VideoView(Context) { Background = new ColorDrawable(Xamarin.Forms.Color.Transparent.ToAndroid()), Visibility = ViewStates.Gone, LayoutParameters = new LayoutParams( ViewGroup.LayoutParams.MatchParent, ViewGroup.LayoutParams.MatchParent), }; ISurfaceHolder holder = videoView.Holder; if (Build.VERSION.SdkInt < BuildVersionCodes.Honeycomb) { holder.SetType(SurfaceType.PushBuffers); } holder.AddCallback(this); _mainVideoView = videoView; } else { Console.WriteLine("Using TextureView"); var textureView = new TextureView(Context) { Background = new ColorDrawable(Xamarin.Forms.Color.Transparent.ToAndroid()), Visibility = ViewStates.Gone, LayoutParameters = new LayoutParams( ViewGroup.LayoutParams.MatchParent, ViewGroup.LayoutParams.MatchParent), }; textureView.SurfaceTextureListener = this; _mainVideoView = textureView; } _mainFrameLayout.AddView(_mainVideoView); _mainFrameLayout.AddView(_placeholder); SetNativeControl(_mainFrameLayout); PlayVideo(Element.Source); } if (e.OldElement != null) { // Unsubscribe if (_videoPlayer != null && _isCompletionSubscribed) { _isCompletionSubscribed = false; _videoPlayer.Completion -= Player_Completion; } } if (e.NewElement != null) { // Subscribe if (_videoPlayer != null && !_isCompletionSubscribed) { _isCompletionSubscribed = true; _videoPlayer.Completion += Player_Completion; } } } protected override void OnElementPropertyChanged(object sender, System.ComponentModel.PropertyChangedEventArgs e) { base.OnElementPropertyChanged(sender, e); if (Element == null || Control == null) return; if (e.PropertyName == Video.SourceProperty.PropertyName) { Console.WriteLine("Play video: " + Element.Source); PlayVideo(Element.Source); } else if (e.PropertyName == Video.LoopProperty.PropertyName) { Console.WriteLine("Is Looping? " + Element.Loop); VideoPlayer.Looping = Element.Loop; } } Since we use
TextureView and VideoView , here it is necessary to implement some functions from the interfaces. One of them is designed to remove the video when the texture (texture) or surface (surface) is destroyed. To do this, we need to set the visibility> _placeholder to visible. private void RemoveVideo() { _placeholder.Visibility = ViewStates.Visible; } When using TextureView, you must implement the
TextureView.ISurfaceTextureListener interface. We set the surface of the video player in case the texture is available and indicated the surface hiding when destroying the texture. The following excerpt shows how to implement this. #region Surface Texture Listener public void OnSurfaceTextureAvailable(SurfaceTexture surface, int width, int height) { Console.WriteLine("Surface.TextureAvailable"); VideoPlayer.SetSurface(new Surface(surface)); } public bool OnSurfaceTextureDestroyed(SurfaceTexture surface) { Console.WriteLine("Surface.TextureDestroyed"); RemoveVideo(); return false; } public void OnSurfaceTextureSizeChanged(SurfaceTexture surface, int width, int height) { Console.WriteLine("Surface.TextureSizeChanged"); } public void OnSurfaceTextureUpdated(SurfaceTexture surface) { Console.WriteLine("Surface.TextureUpdated"); } #endregion When using
VideoView you must implement the ISurfaceHolderCallback interface. Similar to TextureView , we set the video player display to create the surface and indicated its concealment when the surface was destroyed. The full implementation of this interface can be seen in the following fragment. #region Surface Holder Callback public void SurfaceChanged(ISurfaceHolder holder, [GeneratedEnum] Format format, int width, int height) { Console.WriteLine("Surface.Changed"); } public void SurfaceCreated(ISurfaceHolder holder) { Console.WriteLine("Surface.Created"); VideoPlayer.SetDisplay(holder); } public void SurfaceDestroyed(ISurfaceHolder holder) { Console.WriteLine("Surface.Destroyed"); RemoveVideo(); } #endregion For Android, that was all we needed. Now that we have everything we need, we can test this control on the Xamarin.Forms page.
Testing at Xamarin.Forms
Before creating a test page, it is recommended to prepare your own video file. It is better to use vertical video to effectively use the space.
If you don’t have a video to test, you can download it for free from Coverr . There are no vertical videos, but we can still get what we need. For example, you can either trim the video vertically, or use it as it is, since we already process the aspect scaling when filling in the code.
So you can use any video that is at hand. I recommend using any mp4 video file with h264 encoding. In this example, I’m using a video from Coverr called Orchestra .
Help: For some Android and iOS devices, especially older models, you need to make a reservation that they probably may not be able to play MP4 files. This is mainly due to the lack of support for the base profile. To get around this point, you can transcode the video with a tool like
ffmpeg and change the base profile to your liking. Refer to the following table to verify compatibility of basic profiles with iOS. Read also the material Supported media formats from the official Android manual.If you already have a video file, place it in the appropriate folders for each OS. On Android, it should be placed in the
Assets directory. On iOS, it should be placed in the Resources directory. In this example, I placed the file in the Assets/Videos section of Android and in Resources/Videos of iOS.After the files are placed in the correct folders, you need to create a page in the Xamarin.Forms PCL project.
This is a simple page with a minimum of components. We will create a home page with a background video, two text boxes for the username and password, as well as buttons for login and registration. There is no logic here, I just want to show you how a beautiful home page is made.
For better placement of controls, I use the grid as a container. The following snippet presents the corresponding XAML code completely.
<?xml version="1.0" encoding="utf-8"?> <ContentPage xmlns="http://xamarin.com/schemas/2014/forms" xmlns:x="http://schemas.microsoft.com/winfx/2009/xaml" xmlns:local="clr-namespace:BackgroundVideo" xmlns:controls="clr-namespace:BackgroundVideo.Controls" x:Class="BackgroundVideo.BackgroundVideoPage"> <Grid Padding="0" RowSpacing="0" ColumnSpacing="0"> <controls:Video x:Name="video" Source="Videos/Orchestra.mp4" Loop="true" HorizontalOptions="Fill" VerticalOptions="Fill" /> <StackLayout VerticalOptions="Center" HorizontalOptions="FillAndExpand" Padding="20,10,10,20"> <Entry Placeholder="username" FontSize="Large" FontFamily="Georgia" HeightRequest="50"> <Entry.PlaceholderColor> <OnPlatform x:TypeArguments="Color" Android="Silver" /> </Entry.PlaceholderColor> <Entry.TextColor> <OnPlatform x:TypeArguments="Color" Android="White" /> </Entry.TextColor> </Entry> <Entry Placeholder="password" FontSize="Large" FontFamily="Georgia" HeightRequest="50" IsPassword="true"> <Entry.PlaceholderColor> <OnPlatform x:TypeArguments="Color" Android="Silver" /> </Entry.PlaceholderColor> <Entry.TextColor> <OnPlatform x:TypeArguments="Color" Android="White" /> </Entry.TextColor> </Entry> <BoxView Color="Transparent" HeightRequest="10" /> <Button Text="sign in" BackgroundColor="#3b5998" TextColor="#ffffff" FontSize="Large" /> <Button Text="sign up" BackgroundColor="#fa3c4c" TextColor="#ffffff" FontSize="Large" /> </StackLayout> </Grid> </ContentPage> . , ,
Loop . - , OnFinishedPlaying C#. , ., , , , iOS. , . .
iOS, , Android. iOS. , - , — , iOS.
, , .
Total
, , — . , (, , ), .
, , , Android , , . , .
, .
GitHub .
— Xamarin-, . .NET- 2012 . Digamma. C 2015 Xamarin. StecPoint iOS .XamDev.ru «Xamarin Developers» : VK , Facebook , Telegram .
Xamarin Dev Days -
20 - Xamarin Dev Days . Xamarin, .
Schedule:
09:00 – 09:30
09:30 – 10:10 Xamarin
10:20 – 11:00 UI Xamarin.Forms
11:10 – 11:50 Azure
12:00 – 13:00
13:00 – 16:00
.
Source: https://habr.com/ru/post/328732/
All Articles