Ruby on Rails application in Docker with Mina
Introduction
This guide is primarily intended for beginners who want to learn the basics of deployment and become familiar with the algorithm for working on a remote unix system locally; we will use the Ubuntu image run in Docker as a remote server.
So what is Mina? It is a tool for deploying and automating operations on a remote server. The advantage of this solution, first of all, is the speed of execution. Mina works very quickly, because the bash script is deployed on a remote server from your deploy.rb file and subsequently executed.
')
Capistrano, for example, executes each command separately, in its ssh session, and therefore inferior in speed at times, mina performs everything in one bash script, which requires only one session.
Requirements
In this guide, it is assumed that you are using Ubuntu and you already have the following software installed:
Preparing Rails Applications
I will not go into details on how to create a Rails application, since the best option would be to have your own application that you would like to use. Or you can use the test case github.com/rails-guides/mina-deploy-example
Installing SSH / Rbenv / Ruby & Rails
So, you have Docker installed and have a Ubuntu image. If everything is done correctly, then when calling the docker images command you should see the following information:
root@root:~$ docker images | grep ubuntu ubuntu latest 0ef2e08ed3fa 6 weeks ago 130MB Run this sequence of operations in the console:
docker run -d -it -p 2222:22 ubuntu:16.04 docker ps // container_id docker attach container_id The first command will launch the Ubuntu image in the background and an open port for ssh connectivity. Next, we connect to the system via attach using a unique container identifier.
Once you are logged in as root, you need to get the latest updates, install an ssh server, and start it.
apt-get update apt-get install openssh-server service ssh start Add the user deployer to the system, we will use it when setting up mina.
adduser deployer The system will ask you to fill in some data (first_name, etc.), these steps can be skipped. Use 123 as a password. Then connect via ssh to make sure everything is done correctly.
ssh -p 2222 deployer@0.0.0.0 ! If you get the warning `WARNING: REMOTE HOST IDENTIFICATION HAS CHANGED`
Delete the keys from the file known_host with the specified socket (0.0.0.0:2222).
ssh-keygen -f "/home/USER/.ssh/known_hosts" -R [0.0.0.0]:2222 After that, reconnect again and you will see the following:
deployer@e2cad98fb69d:~$ SSH works, great! Returning to our root user, we still need to install rbenv / ruby / rails. First of all we need git to install rbenv.
apt-get install git Follow the steps described in the official documentation for installation.
github.com/rbenv/rbenv#installation
To work with ruby, we need to preinstall the following libraries:
apt-get install bzip2 apt-get install -y libssl-dev libreadline-dev zlib1g-dev apt-get install build-essential I will need ruby version 2.3.1 and RoR 4.2.7.1. Remember to determine your Ruby version globally.
rbenv install -v 2.3.1 rbenv global 2.3.1 gem install rails -v 4.2.7.1 Installing Postgres / Nginx
apt-get install postgresql postgresql-contrib service postgresql start Define the password for the postgres user (the same 123)
su - postgres psql \password create database mina_deploy_example; // Nginx is a web server and mail proxy server running on Unix-like operating systems.
apt-get install nginx After installation, change the configuration file to the following.
nano /etc/nginx/sites-available/default upstream mysite { server unix:///home/deployer/mina-deploy-example/shared/tmp/sockets/puma.sock fail_timeout=0; } server { listen 80; listen [::]:80; root /home/deployer/mina-deploy-example/current/public; location ~ ^/assets/ { expires max; gzip_static on; gzip_vary on; add_header Cache-Control public; break; } location ~ ^/system/ { expires max; gzip_static on; gzip_vary on; add_header Cache-Control public; break; } location / { proxy_pass http://mysite; # match the name of upstream directive which is defined above proxy_set_header Host $host; proxy_set_header X-Forwarded-For $proxy_add_x_forwarded_for; } location ~ ^/(500|404|422).html { root /home/deployer/mina-deploy-example/current/public; } error_page 500 502 503 504 /500.html; error_page 404 /404.html; error_page 422 /422.html; client_max_body_size 4G; keepalive_timeout 10; } Setting up a git repository
To deploy via mina, you need to create a repository on github, configure the user's git, generate an ssh key and add it to your repository. For example, I will use github
ssh -p 2222 deployer@0.0.0.0 git config --global user.name "Some User" git config --global user.email "someuser@example.com" ssh-keygen -t rsa -b 4096 -C "someuser@example.com" ssh -T git@github.com Copy the public key
cat ~/.ssh/id_rsa.pub Go to github → your repository → settings → on the left select Deploy keys → click Add deploy key and paste the copied value.
Deploy with mina
Go to the project directory, add to the Gemfile
gem 'mina' gem 'mina-puma', require: false gem 'mina-nginx', require: false In the config folder, create the file deploy.rb, it will be used by mina when deploying the application. The configuration file consists of several main parts.
require 'mina/bundler' require 'mina/rails' require 'mina/git' require 'mina/rbenv' require 'mina/nginx' require 'mina/puma' set :application_name, 'mina-deploy-example' set :domain, '127.0.0.1' set :port, '2222' set :user, 'deployer' set :shared_dirs, fetch(:shared_dirs, []).push('tmp', 'log', 'public/uploads', 'public/system') set :shared_files, fetch(:shared_files, []).push('config/puma.rb', 'config/database.yml', 'config/secrets.yml') set :deploy_to, '/home/deployer/mina-deploy-example' set :repository, 'git@github.com:rails-guides/mina-deploy-example.git' set :branch, 'master' set :rails_env, 'production' In the upper part, we connect the dependencies, set the application domain, port and user through which the bash script will be created and the commands will be executed. A symbolic link will be created for files and directories declared in shared_dirs and shared_files.
This part defines the commands that will be executed when mina setup is called.
task :environment do invoke :'rbenv:load' end task setup: :environment do command %{mkdir -p "#{fetch(:shared_path)}/log"} command %{chmod g+rx,u+rwx "#{fetch(:shared_path)}/log"} command %{mkdir -p "#{fetch(:shared_path)}/config"} command %{chmod g+rx,u+rwx "#{fetch(:shared_path)}/config"} command %{touch "#{fetch(:shared_path)}/config/puma.rb"} command %{touch "#{fetch(:shared_path)}/config/database.yml"} command %{touch "#{fetch(:shared_path)}/config/secrets.yml"} command %{mkdir -p "#{fetch(:shared_path)}/tmp/sockets"} command %{chmod g+rx,u+rwx "#{fetch(:shared_path)}/tmp/sockets"} command %{mkdir -p "#{fetch(:shared_path)}/tmp/pids"} command %{chmod g+rx,u+rwx "#{fetch(:shared_path)}/tmp/pids"} end And the main part, that will be executed every time at application.
task deploy: :environment do deploy do invoke :'git:clone' invoke :'deploy:link_shared_paths' on :build do invoke :'bundle:install' invoke :'rails:db_migrate' invoke :'rails:assets_precompile' invoke :'deploy:cleanup' end on :launch do invoke :'puma:restart' end end end In the project directory, in the config folder, you need to create a puma.rb file.
directory '/home/deployer/mina-deploy-example/current' rackup '/home/deployer/mina-deploy-example/current/config.ru' environment 'production' daemonize true pidfile '/home/deployer/mina-deploy-example/shared/tmp/pids/puma.pid' state_path '/home/deployer/mina-deploy-example/shared/tmp/sockets/puma.state' bind 'unix:///home/deployer/mina-deploy-example/shared/tmp/sockets/puma.sock' activate_control_app 'unix:///home/deployer/mina-deployexample/shared/tmp/sockets/pumactl.sock' This config allows you to start the server in the background and in a production environment by tying the server to a unix socket. A good explanation of the commands for setting up puma can be found in this repository and official documentation github.com/puma/puma/blob/master/examples/config.rb .
Create database.yml and secrets.yml in the / home / deployer / mina-deploy-example / shared / config folder
production: host: localhost database: mina_deploy_example adapter: postgresql encoding: unicode username: postgres password: 123 production: secret_key_base: SECRET_KEY_BASE In order not to look at how your bundler constantly swears that you do not have certain dependencies, install the following gems and libraries:
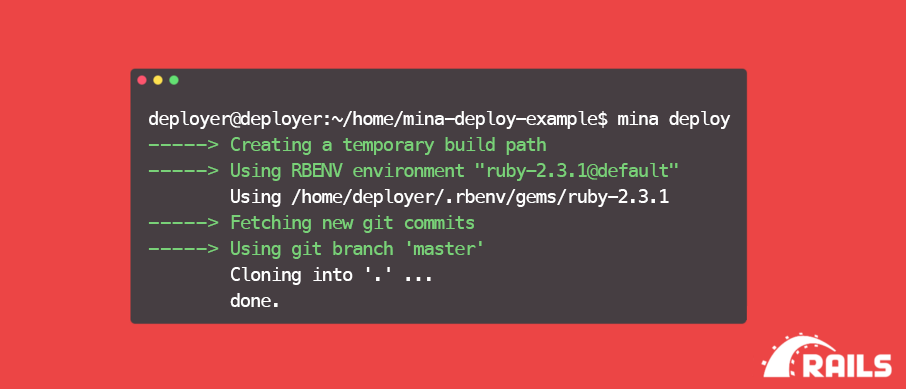
gem install bundler apt-get install ruby-dev gem install json -v '1.8.6' gem install pg -v '0.20.0' apt-get install postgresql postgresql-contrib libpq-dev gem install uglifier apt-get install nodejs apt-get install imagemagick Next, deploy the application and run puma
mina deploy mina puma:start Throw ssh tunnel on nginx port
sudo ssh -f -N -L 80:localhost:80 deployer@0.0.0.0 -p 2222 When you go to http: // localhost: 80, you will see the inscription New article. If all steps are done correctly, then when creating new articles and adding images, everything will be displayed correctly.
Source: https://habr.com/ru/post/328582/
All Articles