Using NES-game research tools on the example of parsing the Felix The Cat compression format
In this article I will explain how to use the tools described in the previous article for researching the Felix The Cat for NES game . My initial goal was, as usual, to parse the format of the levels of the game and add it to my universal level editor CadEditor , but during the study of the game it was found that the description of the levels is compressed (this is rare for NES games!), So I also took apart the format of data compression , and wrote a compressor that allows you to compress the edited levels in the same way as the game developers did.
First we check which blocks are used in the game. To do this, you can use the utility of automatic search for NesBlockFinder blocks. All that needs to be done is to feed her with a dump of video memory of the loaded level ( detailed instructions on how to do this, I will not dwell on the article in more detail, in order to quickly get to the main topic - parsing compression). NesBlockFinder produces the following results:

')
As you can see, the program found blocks of 2x2 in size in the ROM file, described by 4 separate arrays of 128 bytes each , and suggested the address of the beginning of the first array 0x17D2D .
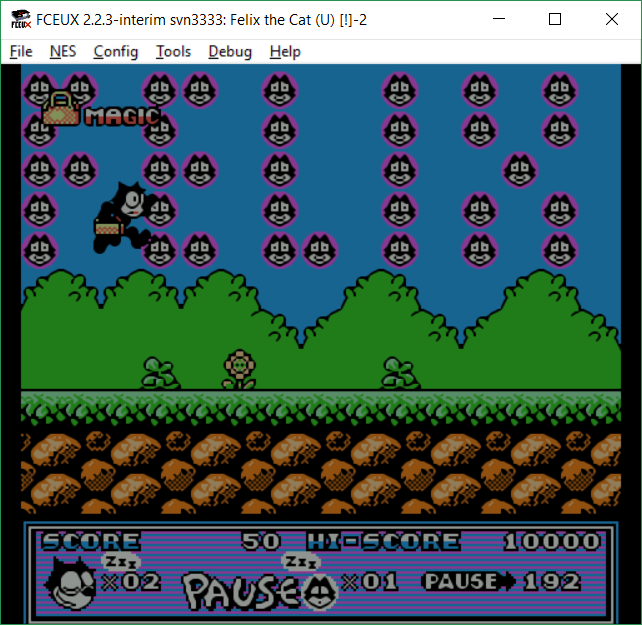
Now you can change the bytes that make up one of the blocks entirely in the emulator to make sure that the blocks on the screen change:

It can be clearly seen that the green block inside the bushes has changed.
The next step is to mark the beginning and end of the block description arrays. To do this, you can simply change the bytes before the detected block, and also take into account the fact that in most games the first block consists of only zeros (there is no special reason for this, but this is found in almost all games). This is how the address of the beginning of the block description arrays is detected - 0x17D2A (and, respectively, the addresses 0x17DAA, 0x17E2A, 0x17EAA for arrays of the next quarters of blocks). The end of the array is also easily calculated - the size of each of the parts is known (128 bytes), so the end of the last array will be located at address 0x17F2A .
The graphics on the NES are designed in such a way that, in addition to describing block numbers, developers need to store block attributes (color indexes of the palette), so you should always carefully study the data before the block array and immediately after it - most often block attributes will be described there. This is also true for our Felix The Cat , behind an array of block descriptions lies an array of 128 bytes, in which for each block its attributes of the palette are indicated (in the upper two bits) and physical properties (in the lower six bits). This is shown in the screenshot:

On it the area of attributes is highlighted and the high bits are changed in order to change the color of the test block.
Using the obtained addresses, you can take a dump of video memory and a palette (for details, how to do this in the article , section “Step 6. Finding the address of a video memory bank and level palette”) to build all the blocks used in the level.
To draw all the blocks, I used Python and Jupyter laptops, as well as C # modules for building NES graphics from the CadEditor editor (for Python and C # gluing, I took the clr module, which allows you to load .NET assemblies from Python and call code from them).
The basic block building code looks simple:
We get the following result:

→ Commented laptop
Now that we have blocks, we need to find out how the level is going from them. To do this, use the NesAutoCorrupter script. On working with the old version of the script, I wrote a whole article on Habré , since then I have significantly improved it (now it works ten times faster and requires only two saves of the game, without the need for manual calculations), but detailed documentation on the new version has not yet prepared, therefore, I will limit myself to a brief description of working with him.
You need to run the autocorrupter4.lua script in the FCEUX emulator, prepare 2 save files (just before loading the level and immediately after loading) and just press the "E" key to get started. The script gets all the necessary data from these files and alternately changes each byte that was used between the two saves, and then checks if the image on the screen has changed. The modified version of the script saves to files in the name of which the address of the modified byte is indicated.
Consider the result of the script for Felix The Cat . Pictures of change bytes with addresses 0x1B940, 0x1B942, 0x1B944 , etc. with step 2, I have collected for clarity in a gif-picture:
It implies that the level is described by vertical lines, and a step of 2 bytes indicates that not just indices go to these addresses, but addresses (pointers) on the line.
Also of interest is the address 0x1A904 , the change of which leads to the change of exactly one block in the second line, therefore, this is the area of the array description of the lines themselves:

Now, poking at the bytes in the vicinity of these addresses and analyzing the result, we come to such interesting conclusions about the structure of the level:
For example, consider the first line decompression.
Compressed line description:

Thus, you can already write the decompression of all lines:
And display them in the CadEditor level editor :

We were able to unpack the level and edit it, but to insert it back into the game, we also need an inverse algorithm that will compress the data, and it will do it no worse than the compressor from the developers, otherwise they will not fit in the allotted space. You can, of course, modify pointers for data in order to place them in a separate bank and not use compression at all, but this is not always possible, and competition for compression quality with game developers is too interesting a task to pass by - if for decrypting the decompressor, you can use a ready-made dictionary obtained in an unknown way, then for the compressor it is necessary to learn how to make the compression dictionary yourself.
The first idea of compiling a dictionary that came to my mind was simply to write down a list of all the RLE chains found and sort it by replacement value . The replacement value is quite simple to calculate: it is necessary to calculate how many bytes will be saved on one replacement (chain length minus 1 byte) and multiplied by the number of possible replacements.
Such an algorithm gave a result of 3879 bytes versus 3740 bytes in the original (~ 2% loss). It seemed to me not enough, and I began to think about how the developers got better.
The second idea was, after each replacement of the most advantageous chain, immediately insert a word from the dictionary in its place . The result was 4695 bytes, much worse than it was. I realized that it is impossible to replace the chain until the dictionary is completely filled - perhaps in the future there will be a more profitable replacement in the specific case (but less valuable from the point of view of the entire archive).
Thus, it is necessary to cross both algorithms - keep a full dictionary in memory, but in a real replacement, update the value of all other replacements and re-sort it by the updated value (if we replaced, for example, a string of 16 zeros with a word in the dictionary, then all shorter chains of zeros will now occur 1 time less).
However, such an implementation seemed to me too complex and instead I simply made the algorithm iterative — at every step a complete possible dictionary is compiled, and then the data is compressed with notes, which word was actually used many times. After this, the dictionary is sorted by real, not perceived value, and a forbidden dictionary is made from it from words that have never been used (or their use has brought the least value). Then the cycle repeats, but so that words from the forbidden dictionary no longer fall into the potential dictionary. The improvement operation can be repeated until the forbidden dictionary is no longer replenished. Then it remains only to take from the real dictionary the maximum allowable number of values (128 words) - this will be the best dictionary for compression. Thus, finally, it turned out to “catch up” with the developers, and get the same 3740 compressed data as they have. The situation repeated with the other levels - the results of the compressed data completely coincided with the original ones, although my dictionary was somewhat different.
The final dictionary building function (somewhat confusing because I experimented with different parameters and dynamic replacement value). The forbidden values dictionary is passed to the forbiddenArr parameter.
It is a little disappointing that after various experiments and improvements in the algorithm, I came across the optimal method that the developers used, but at least my compressor worked no worse than theirs. For all levels except the second one, the clamping results turned out to be the same, but with the second one an interesting moment was revealed - the decompressor broke on it. It turned out that the authors of the game for the level inside the pyramid (2-2 and 2-3), used to compress the mosaic on the walls of the pyramids an additional kind of compression, which is to use the " baselines ".
The last 4 values of the 0xFC-0xFF blocks are used to encode special commands.
In this case, a command of two bytes ( baseline_number, number of blocks from the baseline ) can be used at the beginning of the line. The level uses 4 baselines (their numbers are encoded from 0xFC to 0xFF ). The first few blocks are taken from this line, and then the bottom part is drawn in the usual way.
An example of such lines began on the screenshot:

On it are highlighted with repeating base lines. This compression method works on other levels, but the baselines are not described for them (common tops of the lines), so the developers did not use it, but it would save a few more bytes that do not give practical use, but symbolic in the mental competition with the game developers .
The final commented laptop with decompression and compression tests for all levels, which can be used for direct data compression and insertion into a ROM file.
Thus, the use of compression with the help of the RLE-dictionary, as well as the preservation of the indices of repeating lines, allow compressing descriptions of levels of 18 kilobytes (256 x 3 x 24 blocks) to 4-5 kilobytes.
Block Search
First we check which blocks are used in the game. To do this, you can use the utility of automatic search for NesBlockFinder blocks. All that needs to be done is to feed her with a dump of video memory of the loaded level ( detailed instructions on how to do this, I will not dwell on the article in more detail, in order to quickly get to the main topic - parsing compression). NesBlockFinder produces the following results:
')
As you can see, the program found blocks of 2x2 in size in the ROM file, described by 4 separate arrays of 128 bytes each , and suggested the address of the beginning of the first array 0x17D2D .
Now you can change the bytes that make up one of the blocks entirely in the emulator to make sure that the blocks on the screen change:
It can be clearly seen that the green block inside the bushes has changed.
The next step is to mark the beginning and end of the block description arrays. To do this, you can simply change the bytes before the detected block, and also take into account the fact that in most games the first block consists of only zeros (there is no special reason for this, but this is found in almost all games). This is how the address of the beginning of the block description arrays is detected - 0x17D2A (and, respectively, the addresses 0x17DAA, 0x17E2A, 0x17EAA for arrays of the next quarters of blocks). The end of the array is also easily calculated - the size of each of the parts is known (128 bytes), so the end of the last array will be located at address 0x17F2A .
The graphics on the NES are designed in such a way that, in addition to describing block numbers, developers need to store block attributes (color indexes of the palette), so you should always carefully study the data before the block array and immediately after it - most often block attributes will be described there. This is also true for our Felix The Cat , behind an array of block descriptions lies an array of 128 bytes, in which for each block its attributes of the palette are indicated (in the upper two bits) and physical properties (in the lower six bits). This is shown in the screenshot:
On it the area of attributes is highlighted and the high bits are changed in order to change the color of the test block.
Using the obtained addresses, you can take a dump of video memory and a palette (for details, how to do this in the article , section “Step 6. Finding the address of a video memory bank and level palette”) to build all the blocks used in the level.
Render blocks
To draw all the blocks, I used Python and Jupyter laptops, as well as C # modules for building NES graphics from the CadEditor editor (for Python and C # gluing, I took the clr module, which allows you to load .NET assemblies from Python and call code from them).
The basic block building code looks simple:
# CadEditor function for loading config files from file
Globals. loadData ( romName , dumpName , configName )
# Create an instance of the plugin for drawing NES graphics
video = Video ( )
#clr does not understand overloaded functions, so we explicitly set the prototype of the function we want to call
#Bitmap [] makeObjects (byte videoPageId, byte tilesId, byte palId, float scale, MapViewType drawType, int constantSubpal = -1);
makeObjects = video. makeObjects . Overloads [ System. Byte , System. Byte , System. Byte , System. Single , MapViewType , System. Int32 ]
bb = makeObjects ( 0x90 , 0 , 0 , 2.0 , MapViewType. Tiles , - 1 )
# Some magic for converting Python arrays into a C # array
blocks = System. Array [ System. Drawing . Image ] ( bb )
fn = picPath + "blocks0.png"
# Gluing blocks into rectangular image
Utilsgdi. GlueImages ( blocks , 16 , 8 ) . Save ( fn )
# IPython function to display the saved image in a laptop
display ( Image ( filename = fn ) )
We get the following result:
→ Commented laptop
Level Description Format
Now that we have blocks, we need to find out how the level is going from them. To do this, use the NesAutoCorrupter script. On working with the old version of the script, I wrote a whole article on Habré , since then I have significantly improved it (now it works ten times faster and requires only two saves of the game, without the need for manual calculations), but detailed documentation on the new version has not yet prepared, therefore, I will limit myself to a brief description of working with him.
You need to run the autocorrupter4.lua script in the FCEUX emulator, prepare 2 save files (just before loading the level and immediately after loading) and just press the "E" key to get started. The script gets all the necessary data from these files and alternately changes each byte that was used between the two saves, and then checks if the image on the screen has changed. The modified version of the script saves to files in the name of which the address of the modified byte is indicated.
Consider the result of the script for Felix The Cat . Pictures of change bytes with addresses 0x1B940, 0x1B942, 0x1B944 , etc. with step 2, I have collected for clarity in a gif-picture:
It implies that the level is described by vertical lines, and a step of 2 bytes indicates that not just indices go to these addresses, but addresses (pointers) on the line.
Also of interest is the address 0x1A904 , the change of which leads to the change of exactly one block in the second line, therefore, this is the area of the array description of the lines themselves:
Now, poking at the bytes in the vicinity of these addresses and analyzing the result, we come to such interesting conclusions about the structure of the level:
- At the address 0x1B940 there is a large array of pointers on the line, from which all three starting levels are built (1-1, 1-2, 1-3). Using pointers rather than indexes allows you to describe more than 256 lines (namely, 256x3 = 768 lines ). To move from the pointer (pointer in the address space of the NES CPU) to the absolute address in the ROM, you must add the address of the beginning of the bank in which it lies ( 0x10010 for the first level, other levels use other banks) to the pointer.
- Pointer to the first column = 0xA8ED , translated to the absolute address - 0x1A8FD , from this address and further the description of the lines goes, the height of each line is 24 bytes (this is a constant for all levels of the game).
- Examine the description of one of the lines and note that if the block number in it is from 0x00 to 0x80 , then the block with the corresponding number is inserted directly into the final line; if the number is greater than 0x80, then a whole strip of a different number of any blocks is inserted. An interesting conclusion follows from this - the game uses RLE compression to describe chains of consecutive identical blocks, and these chains are assembled into a dictionary and are encoded with indices in this dictionary!
- Address of the RLE dictionary for the first level: 0x1B799 . At this address recorded a pair of bytes (the number of duplicate blocks, the number of block-repeat ).
For example, consider the first line decompression.
Compressed line description:
[81 30 82 07 4C 83]And the dictionary:
[(24, 0x0) (17, 0x0) (2, 0x3) (2, 0x78)]The first byte 81 encodes the first value from the dictionary “take 17 times block 0 ”, followed by block 30 , then byte 82 , which means taking the second value from the dictionary - “take 2 times block 3 ”, followed by blocks 07 and 4C , and Finally, the value 83 is the third word from the dictionary “take block 78 2 times”. The output line is:
[00 00 00 00 00 00 00 00 00 00 00 00 00 00 00 00 30 03 03 07 4C 78 78]Here is a visual explanation of this decompressed line:
Thus, you can already write the decompression of all lines:
def decompressLine ( d , addr , LINE_HEIGHT = 24 ) :
ans = [ ]
while len ( ans ) < LINE_HEIGHT:
v = d [ addr ]
# regular tile
if v < 0x80 :
ans. append ( v )
# value from RLE dictionary
else :
cv = v & 0x7F
repeatCount , repeatTile = compressedArr [ cv ]
ans. extend ( [ repeatTile ] * repeatCount )
addr + = 1
return ans
And display them in the CadEditor level editor :
Compressor
We were able to unpack the level and edit it, but to insert it back into the game, we also need an inverse algorithm that will compress the data, and it will do it no worse than the compressor from the developers, otherwise they will not fit in the allotted space. You can, of course, modify pointers for data in order to place them in a separate bank and not use compression at all, but this is not always possible, and competition for compression quality with game developers is too interesting a task to pass by - if for decrypting the decompressor, you can use a ready-made dictionary obtained in an unknown way, then for the compressor it is necessary to learn how to make the compression dictionary yourself.
The first idea of compiling a dictionary that came to my mind was simply to write down a list of all the RLE chains found and sort it by replacement value . The replacement value is quite simple to calculate: it is necessary to calculate how many bytes will be saved on one replacement (chain length minus 1 byte) and multiplied by the number of possible replacements.
Such an algorithm gave a result of 3879 bytes versus 3740 bytes in the original (~ 2% loss). It seemed to me not enough, and I began to think about how the developers got better.
The second idea was, after each replacement of the most advantageous chain, immediately insert a word from the dictionary in its place . The result was 4695 bytes, much worse than it was. I realized that it is impossible to replace the chain until the dictionary is completely filled - perhaps in the future there will be a more profitable replacement in the specific case (but less valuable from the point of view of the entire archive).
Thus, it is necessary to cross both algorithms - keep a full dictionary in memory, but in a real replacement, update the value of all other replacements and re-sort it by the updated value (if we replaced, for example, a string of 16 zeros with a word in the dictionary, then all shorter chains of zeros will now occur 1 time less).
However, such an implementation seemed to me too complex and instead I simply made the algorithm iterative — at every step a complete possible dictionary is compiled, and then the data is compressed with notes, which word was actually used many times. After this, the dictionary is sorted by real, not perceived value, and a forbidden dictionary is made from it from words that have never been used (or their use has brought the least value). Then the cycle repeats, but so that words from the forbidden dictionary no longer fall into the potential dictionary. The improvement operation can be repeated until the forbidden dictionary is no longer replenished. Then it remains only to take from the real dictionary the maximum allowable number of values (128 words) - this will be the best dictionary for compression. Thus, finally, it turned out to “catch up” with the developers, and get the same 3740 compressed data as they have. The situation repeated with the other levels - the results of the compressed data completely coincided with the original ones, although my dictionary was somewhat different.
The final dictionary building function (somewhat confusing because I experimented with different parameters and dynamic replacement value). The forbidden values dictionary is passed to the forbiddenArr parameter.
def rebuildCompress ( screen , forbiddenArr , maxCompressSize = 256 , LINE_LEN = 24 ) :
fullAns = [ ( 0 , 0 ) ] * maxCompressSize
lines = list ( chunks ( screen , LINE_LEN ) )
x = 0
while x < maxCompressSize:
ans = { }
for line in lines:
repeats = [ list ( g ) for _ , g in groupby ( line ) ]
repeats = [ ( g [ 0 ] , len ( g ) ) for g in repeats ]
for ( tileNo , tileCount ) in repeats:
#for tc in xrange (tileCount, tileCount + 1):
for tc in xrange ( 2 , tileCount + 1 ) :
compressPair = tileNo , tc
if compressPair in ans:
ans [ compressPair ] + = 1
else :
ans [ compressPair ] = 1
# calculation of replacement value - chain length * frequency of occurrence
def calcPoints ( v ) :
( t , c ) , cnt = v
return - ( c- 1 ) * cnt
ans = sorted ( ans. iteritems ( ) , key = calcPoints )
#filter and reverse values
newAns = [ ]
for a in ans:
if ( a [ 0 ] [ 0 ] ) < 0x80 :
newAns. append ( ( a [ 0 ] [ 1 ] , a [ 0 ] [ 0 ] ) )
newAns = filter ( lambda v: v not in forbiddenArr , newAns )
if len ( newAns ) == 0 :
break
#HINT !!! If you can use it all
ansValue = newAns [ 0 ] [ 1 ]
#newAns = filter (lambda x: x [1] == ansValue, newAns) #comment this for best results!
#newAns = sorted (newAns, key = lambda x: -x [0])
#print newAns
similar , maxSimilar = 0 , 256
while len ( newAns ) > 0 and x < maxCompressSize and similar < maxSimilar:
curAns = newAns [ 0 ]
lines , findAtLeastOneReplace = compressorReplace ( lines , curAns , x )
fullAns [ x ] = curAns
x + = 1
similar + = 1
newAns = newAns [ 1 : ]
return fullAns
Second type of compression
It is a little disappointing that after various experiments and improvements in the algorithm, I came across the optimal method that the developers used, but at least my compressor worked no worse than theirs. For all levels except the second one, the clamping results turned out to be the same, but with the second one an interesting moment was revealed - the decompressor broke on it. It turned out that the authors of the game for the level inside the pyramid (2-2 and 2-3), used to compress the mosaic on the walls of the pyramids an additional kind of compression, which is to use the " baselines ".
The last 4 values of the 0xFC-0xFF blocks are used to encode special commands.
In this case, a command of two bytes ( baseline_number, number of blocks from the baseline ) can be used at the beginning of the line. The level uses 4 baselines (their numbers are encoded from 0xFC to 0xFF ). The first few blocks are taken from this line, and then the bottom part is drawn in the usual way.
An example of such lines began on the screenshot:
On it are highlighted with repeating base lines. This compression method works on other levels, but the baselines are not described for them (common tops of the lines), so the developers did not use it, but it would save a few more bytes that do not give practical use, but symbolic in the mental competition with the game developers .
The final commented laptop with decompression and compression tests for all levels, which can be used for direct data compression and insertion into a ROM file.
Thus, the use of compression with the help of the RLE-dictionary, as well as the preservation of the indices of repeating lines, allow compressing descriptions of levels of 18 kilobytes (256 x 3 x 24 blocks) to 4-5 kilobytes.
Source: https://habr.com/ru/post/328516/
All Articles