Android + Gradle + CI + CD or How to set up a cat feeder

Hello dear reader. If you are unfamiliar with the concepts of Continuous Integration (CI), Continuous Delivery (CD) or you have no idea how and why they should be used, then I ask for a cat, where you can find a small description of how to configure these services in your Android project, as well as bonuses will be received in the end.
Introduction
Dear reader, if you think that there will be a lot of code in this article, then you are mistaken. The code just we will have the minimum, but it will allow to show some possibilities of CI. The main part of the article is how to configure bundles of services. I hope for Junior / Middle developers this article will be very interesting and useful.
')
Prehistory
It all started with a startup. We had quite good funding and plans for the next two years. Two people worked on the android project. Our methodology was similar to agile using gitflow. After two months of development, the code was partially covered with tests, and the process for our small project seemed to be streamlined, but something did not give rest.
I have an assumption that if you do not work in a large company, but work in a startup (of which there are countless), then you do not even think about the benefits of using CI CD services. However, they will help you save time.
I am a developer, so I will describe what is happening from this position.
I think a situation in which a cat approaches you (by this word I understand absolutely any position of non-developers in your team who are asking for a product for QA) and asks to install the latest build on his phone. At first, this is not perceived as a serious difficult task. However, this creates the following problems:
- Perhaps the most important thing is that you break away from the current task.
- Are you looking for the latest compiled apk
- Your latest compiled apk is your dev build, and you can't show it.
- You connect the cat's mobile phone through a cable and install the assembly
- And what if there are not zakomichichny changes in our current branch? (commit -a \ stash to help, but still this time)
- You spend time returning to the task you performed.
This is just the tip of the iceberg. And what if you have a lot of different cats? You are starting to spend more and more time completing secondary tasks.
Let's try to figure out a small example of how to save your and other people's time.
Running a little ahead, I’ll say that now, if it takes me more than one month to develop a project, I still set up Ci + Cd, which further leads to customer involvement and you will immediately receive feedback on development.
Goals
I was interested to build this article on the example of a queue of actions that we need to do to get the result. And each goal is to allocate a separate commit. I think it will be more interesting and easier to understand what is happening.
So far, I see three main stages of ToDo:
- Create project
- Configure CI
- Customize CD
Premature optimization is the root of all evil. (Premature optimization. D. Knuth)
Create project
I think this stage will be the easiest. Create a new repository on VCS (Github / Bitbucket). I personally choose GitHub - just a matter of habit. You can track all further changes by commits.
Next, do the first commit
Even if now we begin to do the development of a new fitch, and the cat comes up to us and asks for the latest build, we will have to roll back to the master head. In general, we come to the problem.
Customize Ci
To send something to someone, you need to collect something somewhere. And preferably with minimal abstraction from the main task of development.
As a Ci service, I prefer CircleCI . There are also alternatives and nobody forbids you to use more than one Ci service in your project.
Our goal is to move in small steps, so we set ourselves a goal to simply run the build of the repository on Ci
Let's start step by step:
1. Log in to CiCircle via GitHub
2. In the sidebar we find Project and go to our new project (if you click on the Build project, then the build will fail due to a non-customized project)

3. Go to the repository settings on GitHub in the Integrations & services category and click Add Service
4. Looking ahead, in the project settings on CiCircle I recommend to enable monitoring Pull request (PR), this will allow your colleagues not to merge non-working code into the master. (Perhaps this is another one of my troubles, but I believe that the master branch should always be collected)

5. Perhaps the most important part on setting up Ci is setting up in your project.
We need to make changes to build.gradle, add cicircle.gradle (essentially a template) and some circleci.yml (which carries the basic CI setting). I am a supporter of making any changes to the master branch only through PR, so we create a branch with Ci presets and do PR.
If everything was done correctly, then under PR we will see something similar
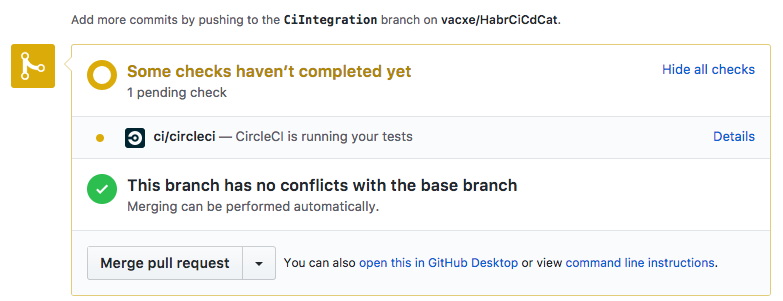
And if we go to Ci, then we will see how our project is going
After some time (usually the assembly takes no more than 5 minutes, we will most likely see a positive result)
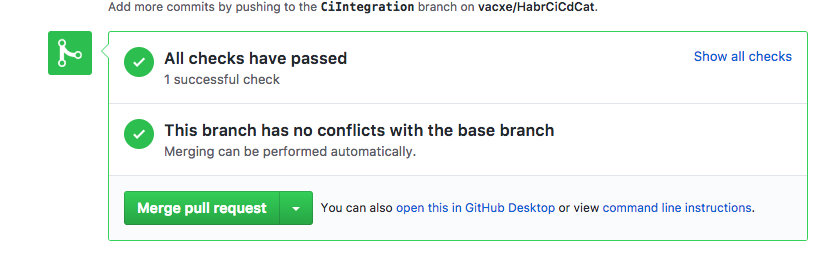
So you can continue, and feel free to click Merge! (And on Ci, the master branch build will start)
What are the advantages for ourselves?
- Assembly occurs independently of us in the cloud
- Now, every time we do a PR, we know for sure if we will have an assembly. This eliminates the opportunity to throw yourself problems with non-working builds from the wizard.
- It is possible to run tests
Great, working on!
Once the build occurs in the cloud, it is logical to assume that there are some artifacts in the form of apk.
It seems to me that a good goal for this iteration is to get apk, which could be put on the market. Thus, at each assembly of the master branch (not PR), we get a ready-made product.
1. To collect release.apk - we need to generate a signature key. This is done once through Android Studio.
2. Next, make changes to build.gradle
signingConfigs { release { def signFile = project.rootProject.file('./release.keystore') if (signFile.exists()) { storeFile signFile storePassword "qweqwe" keyAlias "habrcicdcat" keyPassword "qweqwe" } } } buildTypes { release { minifyEnabled false proguardFiles getDefaultProguardFile('proguard-android.txt'), 'proguard-rules.pro' signingConfig signingConfigs.release } } The release.keystore file is in the project folder.
3. Create a bash script that will be responsible for transferring the collected file to the artifact directory
#/bin/bash GRADLE="./gradlew" $GRADLE assembleRelease RELEASEFILE="${CIRCLE_ARTIFACTS}/habrcicdcat-release-${CIRCLE_BUILD_NUM}-${CIRCLE_SHA1}.apk" cp ./app/build/outputs/apk/app-release.apk ${RELEASEFILE} Constant data available by default.
CIRCLE_BUILD_NUM - build number
CIRCLE_SHA1 - commit key
CIRCLE_ARTIFACTS - we install it in cicircle.yml
general: artifacts: - /home/ubuntu/HabrCiCdCat/app/build/outputs/apk/ 4. Add to cicircle.yml the part responsible for deploymet
deployment: beta: branch: master commands: - cd scripts && ./build.sh Just run our script when the master branch changes
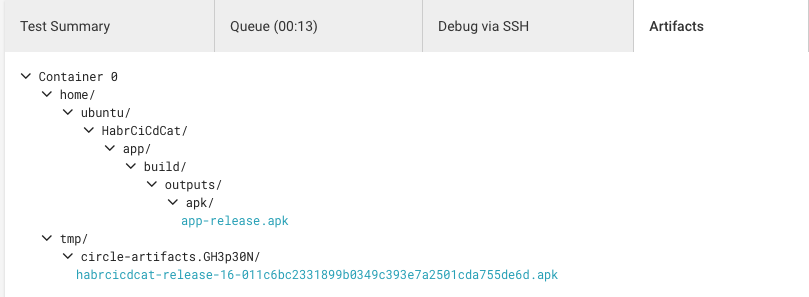
5. We do PR in the master branch, we wait that everything gathers successfully, we execute merge. If we go to the Ci console, we can see how the master branch started to assemble.

After some time, you will see that the build was successful. Through the console in Ci, you can see the collected APK
In fact, on this you can close the creation of apk. We can download and immediately download the apk to the market or send it to our cats. But something is still not enough. The main goal of the article was not implemented, and we will still be detached from the current task. A CD comes to the rescue.
Fabric Beta Setup
As a CD service, I will consider Beta from Fabric. Again, I note that there are many alternatives , but the essence of the article is not in holivars but in the description of the process.
So. When the food for our cats is ready, it remains to bring it to them. This helps us beta testing services.
Start the setup:
1. To begin, our project must register with Fabric, there are several ways, including adding a Fabric Plugin to Android Studio. You need to make changes to the build.gra files. After performing these operations in your console, a new application will appear in crashlitics.

2. In the Fabric account settings, you need to create a new organization, and get apiSecret and apiKey from it
3. Start setting up the Beta service from Fabric
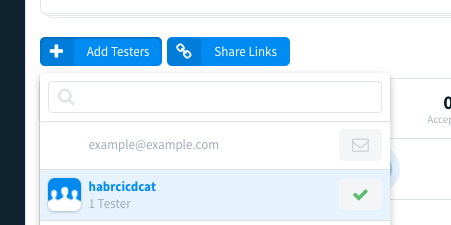
First we need to create a group of testers and add at least ourselves and
Here the main thing to remember Alias: habrcicdcat
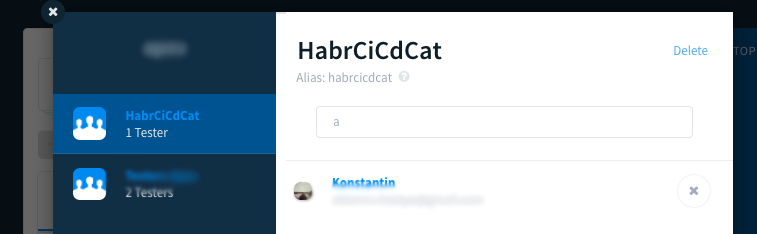
and make a bunch of organizations and a group of testers
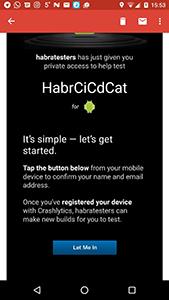
All testers from the group will receive a notification email that needs to be opened from the phone, and follow the link inside the letter to download or verify the Beta application.
Next, we will start setting up the service and application bundles.
Add Alias to buildTypes
buildTypes { release { minifyEnabled false proguardFiles getDefaultProguardFile('proguard-android.txt'), 'proguard-rules.pro' signingConfig signingConfigs.release ext.betaDistributionGroupAliases = "habrcicdcat" } } Add the fabric.properties to the app folder as follows (constants from p.2)
apiSecret=23167a9cd00cb83f9dab952b47e7350e19dd7693071ceb2abe2d56dbfc6e1318
apiKey=3915c7e9ffe661c44a4db3935d34a5a8da525b9c
Further, you can create a PR and watch the assembly master. If everything went well then you will receive a notification in the Beta application, and you can download and install it.
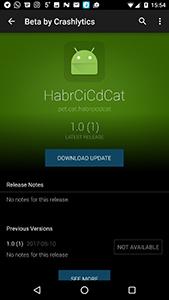
Ultimate goal achieved
The goals set at the beginning of the article are fulfilled. Now, with any change in the master branch, the application will be assembled, I send the apk to the group of cats. And we always have at hand an assembly for publication.
Now, when you will be torn from the workflow, you can always answer: “The latest build is always available in Beta” - and as a side effect, you can safely continue to work on the current task.
What is behind the scenes:
- Build flavors (to show an example how to feed several cats)
- Possible problems when creating assemblies
In this article I wanted to show that setting up CI and CD is not so terrible, but extremely useful thing. I do not consider it a problem to spend an hour to set up this system for freelancing projects because the benefit from it after 2 weeks will exceed this hour. I hope this article will bring in your project CI and CD, or at least you would be interested.
Link to the GitHub project where each iteration from this article is described step by step.
Source: https://habr.com/ru/post/328326/
All Articles