3D modeling and animation: a guide for beginners
And some more useful information from partners: this time Akadem presents a detailed tutorial for novice developers who want to learn the basics of 3D modeling and animation for future projects. Based on their own experience of creating a parkour simulator and adapting it for different platforms, the authors thoroughly analyze the process of creating an action-game character, implementing basic movements and locations.
“Hello, reader Habra! If you feel that you haven't made much progress in developing games on Unity3D, and you dream about something bigger and, most importantly, dynamic - welcome to cat. There we will talk about how to create your own character, not having the skills of 3D modeling, import it into the Unity-project and make it move.
Let's imagine that one evening after another viewing of the film "The 13th District" you suddenly wanted to make your game about crazy stunts, jumping over the precipices and wonders of acrobatics. In the history you have a couple of projects using geometric primitives, such as "3 in a row", so that some programming skills are already available, even if they are at an entry level. To implement this new idea, you will need: a character model, an environment model, and specific animations. It's simple! But here you realize that God has not endowed you with the skills of three-dimensional modeling. The most difficult thing you had to do in this area was to create a teapot model in a pirated copy of 3D Studio Max, bought for 200 rubles in the transition a couple of years ago. Then you had to spend on the whole process as much as 10 seconds of time and a few calories to lift your finger and press the "Create a kettle" button. Yeah, no good.
But do not despair, because modern technology today provides endless opportunities even to those who can not boast of skills in the relevant field. Even a novice surgeon today, by downloading the Liver Transplant 3D app, can easily operate on his friend at home. But let's not be distracted by light artistic exaggerations - let's return to our future game.
')
To create a charismatic character, we will use Adobe Fuse , as a very simple tool for working with models of this kind. “With this new application, you can easily create, modify, and customize 3D models of human characters in minutes, save them in Creative Cloud Libraries, and then add postures and animations for them,” reads the description. Great, suits us!
The Fuse environment interface will not make you feel like a nuclear safety inspector at Springfield NPP.

We assure you, the process of creating a character will be extremely simple and will bring complete pleasure. The Lord God himself would be much more comfortable creating Adam if he used such a tool.

So let's get started. Here is the main window of the program, where the main tabs for us are located above the main working area and represent the stages of building a human 3D model. The Assemble tab gives us the opportunity to create the hero's body directly, making it from separate components: torso, arms, legs and head. From this and we will begin. Expanding the Head list on the right side of the screen, we will see different initial variants in front of us. Here you will find all kinds of heads: male and female, light-skinned and dark-skinned, young and aged, and even cartoony. Recalling with a smile the creation of Matt Groening, click the mouse and choose the right one.

The Torso tab, as the name implies, provides us with the opportunity to choose a torso. Then you decide whether your character goes to the gym, is he born in Africa, does he receive a pension, or maybe she uses Lady Speed Stick at all? Choose your favorite option and move on.

Following the established logic of things, we run over the remaining two tabs. The developers tried their best and ruled out the possibility of an error, so the hands of our hero will definitely grow from the right place. In the section Legs we increase the suitable legs, in the section Hands - accordingly hands. Ultimately, our creation will be displayed in the main window, which can be rotated around its axis to make sure that we have not forgotten anything.


The next stage, which we will spend in the Customize tab, can be called the most interesting in character creation. With the help of convenient sliders, we can change such parameters as hand length, head size, body shape, skin color, eye shape, facial contour and much more. It is here that you determine whether your offspring will be a sports build tracer or a lanky black Asian who has obvious problems with cholesterol. The main thing is not to overdo it, otherwise the result may be the most unexpected.


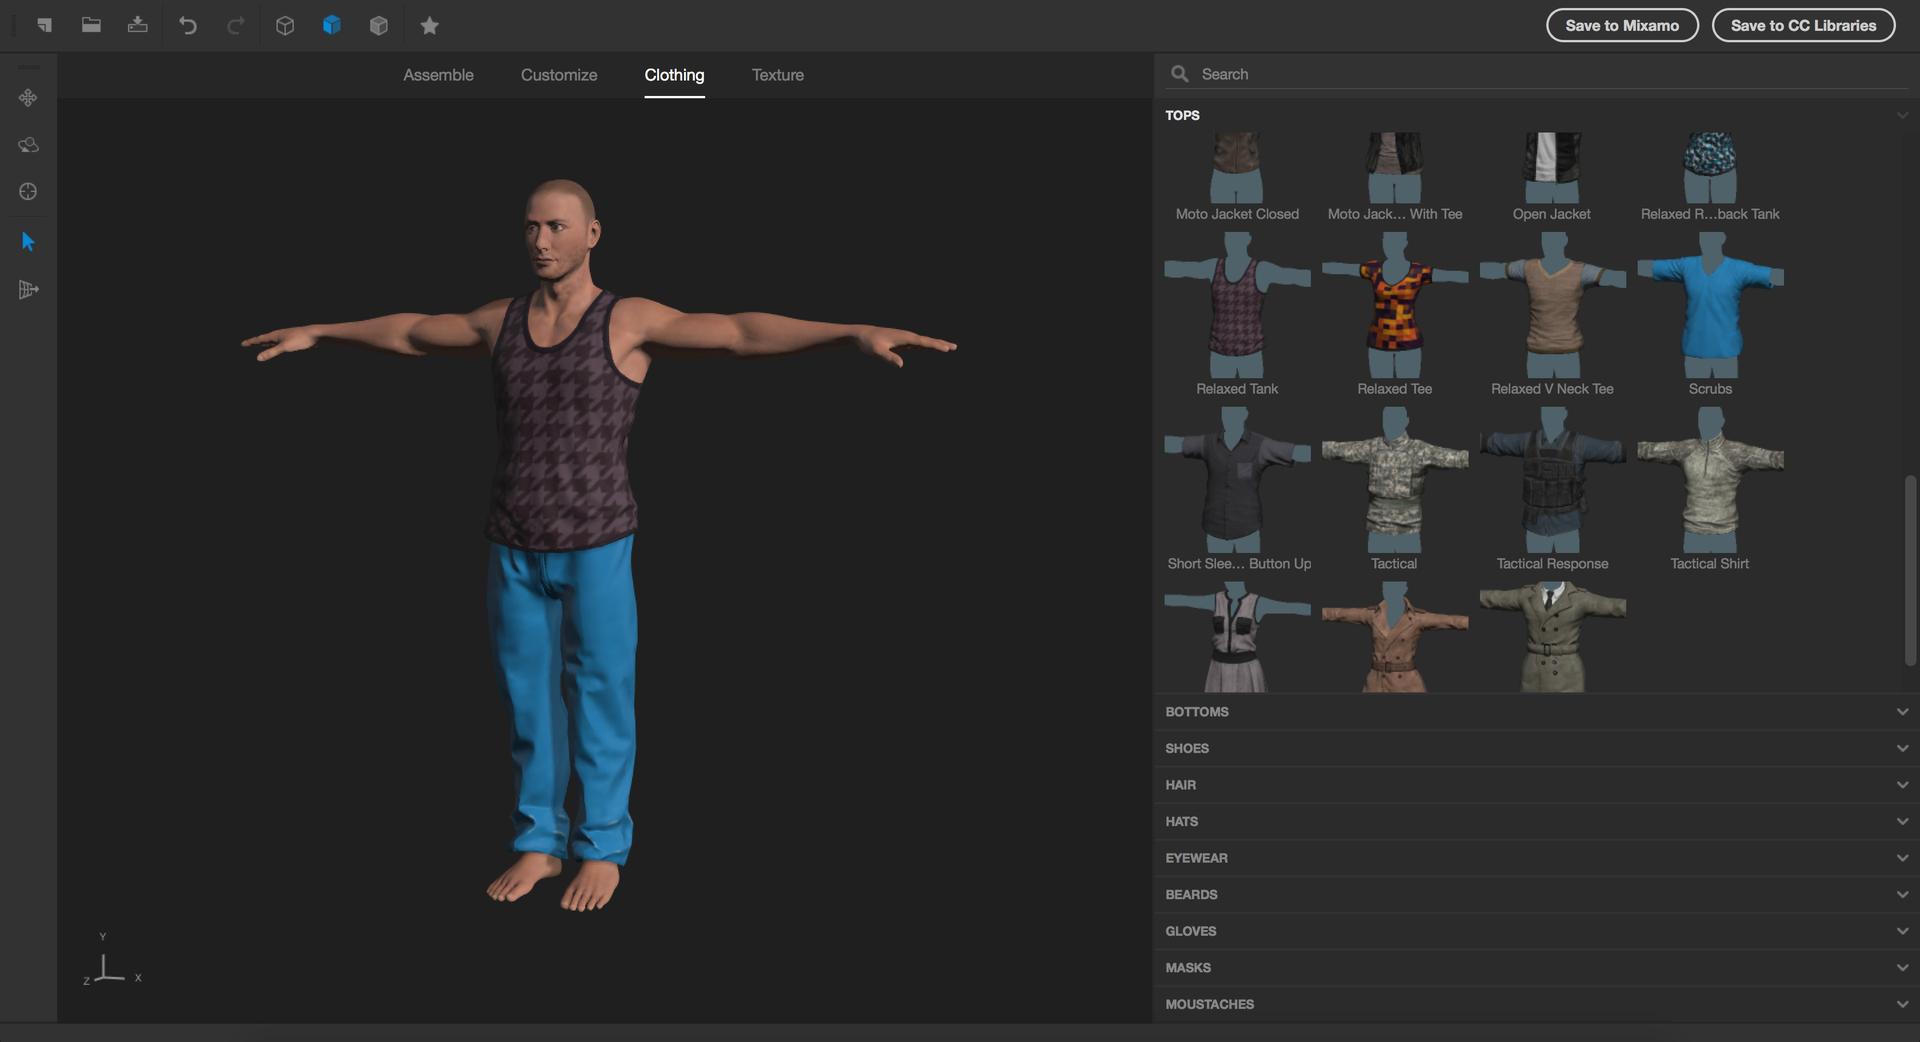
Now, as a decent father, you have to dress your son, not to run around him completely naked in the future location, attracting the excessive attention of low-poly onlookers. To do this, go to the Clothing tab, where on the right side of the screen you will see a great many sections. They can not only get hold of a stylish T-shirt, but also make a haircut, grow a beard, a mustache, fasten gloves, a hat, fashionable sneakers and so on. You will be fully able to feel yourself leading the fashion court meetings, Alexander Vasilyev, and Evelina Khromchenko herself will not be able to stand a single accusation of your creation. It does not make sense to stop now on each parameter of this section, otherwise the printed version of the article will turn into one of the volumes of the immortal work of the writer L. Tolstoy. Believe me, at this stage character customization is simple and intuitive, all the names of the parts of the body undergoing change are signed and labeled. And if you are not an expert in English, then you will be even more interesting: you will have to learn the functionality empirically by moving the sliders from one extreme position to another. Below are step-by-step illustrations of the settings of the 3D model being created.

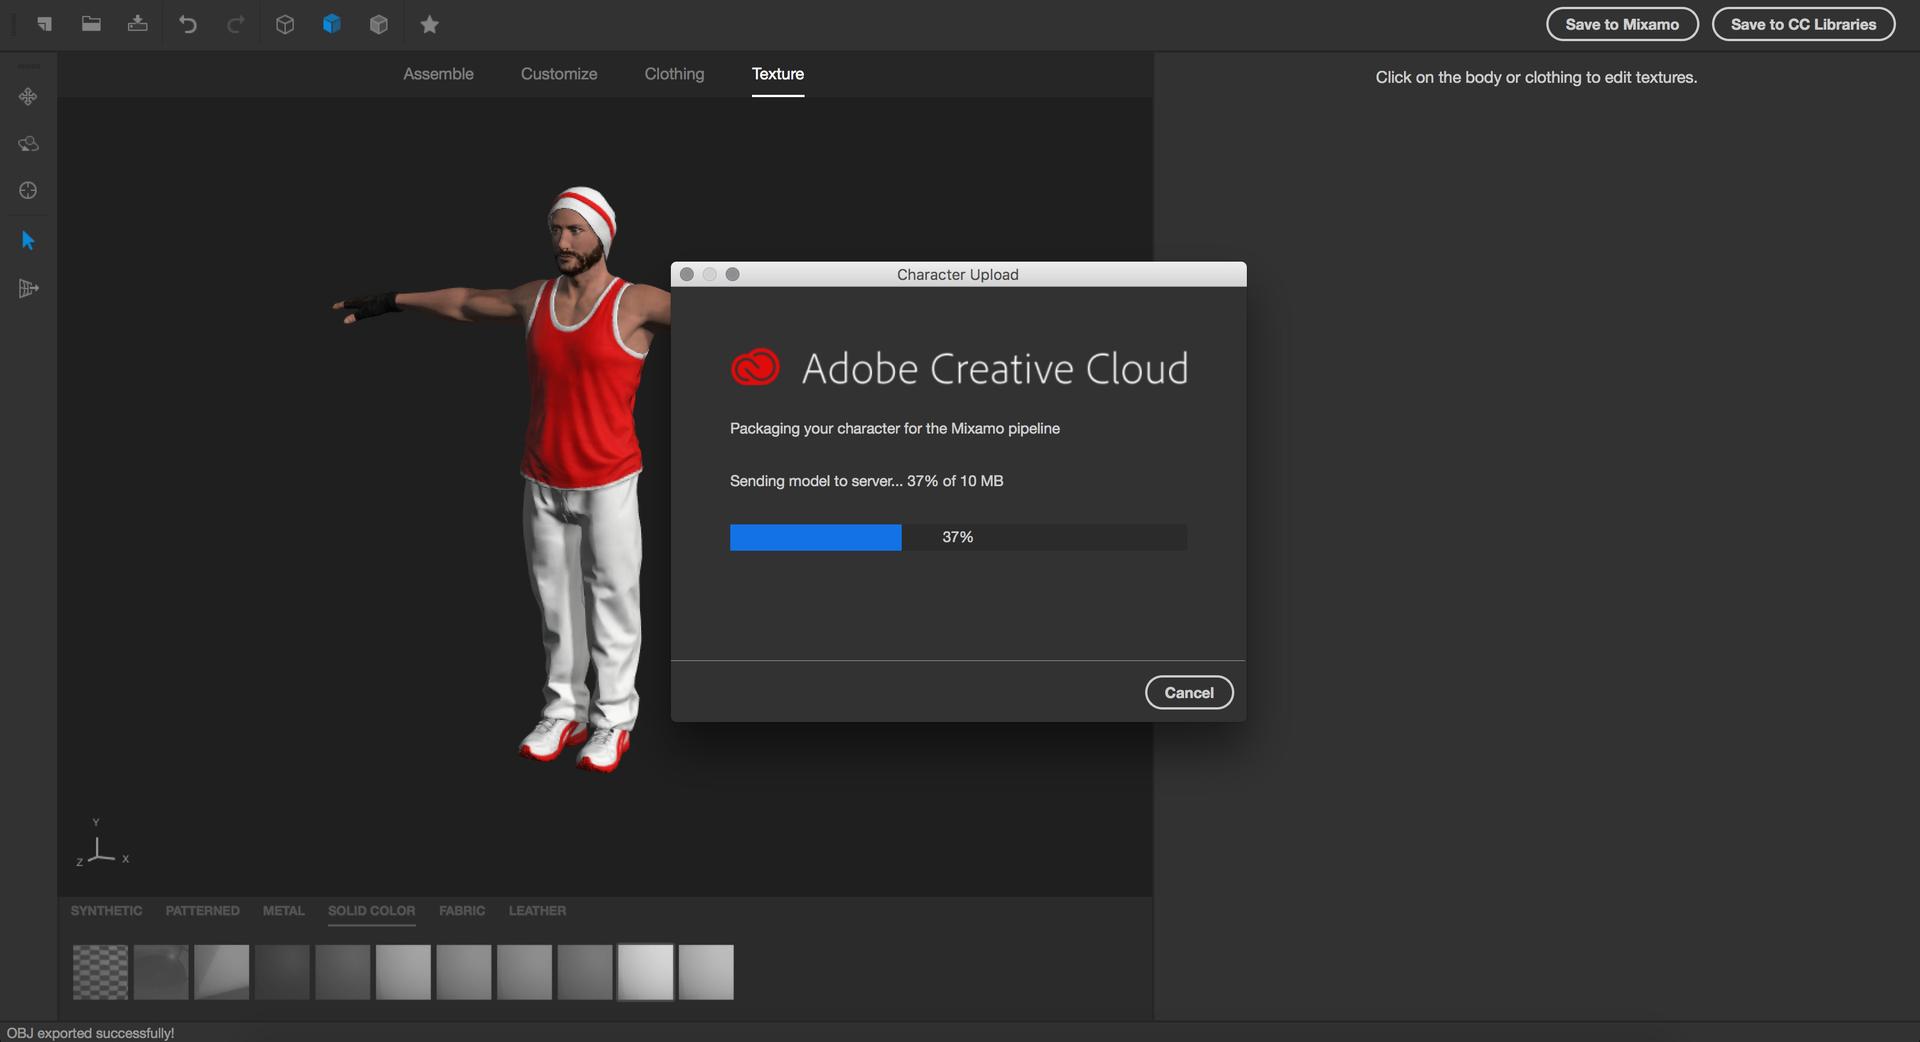
The last tab Texture is responsible for setting the exported materials of the model, including color, texture of fabrics, patterns, and more. Change the colors of the character's clothes and get a vivid image, ready for export.

To continue working with the model, it is most convenient to export it to Mixamo — an online service from Adobe that allows you to animate the hero you created. To do this, you need in the upper right corner to click on the same button "Export to Mixamo". I remind you that you must be a Creative Cloud subscriber and have your Adobe ID in order to use this feature.
The process of importing the model is complete, and now is the time to become Dr. Frankenstein, that is, turn the switch and start the hellish machine to revive your creation. To do this, go to the Mixamo page under your ID, go to the Store section in the top panel, then select the MyAssets tab in the same panel. On the downloaded page in the subsection MyCharacters you will be waited for by the newly baked model of tracer.

The loaded model is static, but this is temporary - only until we embed a Rig skeleton with bend points and snapping to limbs. What we do! To do this, let's make the very convenient Auto-Rigger function, which is in the Products menu, work. And if the model was made in the Fuse editor, as in our case, then the process of automatic creation of the skeleton becomes extremely simple and does not require additional steps. In that case, if the model was made in a different environment, then most likely you will have to indicate the points of bending of the extremities on the scheme, but this should not cause any difficulties.


In the settings of Auto-Rigger, we can specify the necessary degree of detail of the skeleton. It will only affect the fingers. The maximum degree is a palm with bending fingers, the minimum is a static palm. After confirmation, the system will inform you about the successful update of the loaded model, and now we have the opportunity to animate using basic animations. And the base, I must tell you, is very large, more than 1000 popular titles, including movements of dance, sports exercises, martial arts, acrobatics and standard human movements in space. For those involved in games, this is a very rich resource.
To start the animation process, go to the Store section of the main window in the Animations tab. Before us will open a library of all the animations that Mixamo offers us. By searching, you can find thematic movements of jumps and rolls that interest us. Select the required item and save it in a set by clicking on the button “Add to my assets” on the right side of the screen.

Once in the My Assets menu item, you will see 3 tabs:
In order to prepare an animated model for downloading, we will have to pre-configure it in the My Animation tab, if necessary. Settings are amenable to parameters such as speed, arms, legs and so on. Thus, the run animation can be made unhurried, like a Saturday morning jog before breakfast, or very fast, as if the character learned that in the supermarket there is an 80% discount on the latest iPhone model. Next, by clicking on the “Queue Download” button, we send our mobile model to the Download section, where we can proceed directly to downloading.

It is time to open Unity and load the character model into an empty project by setting import parameters. After that, clicking on the file in the asset hierarchy, in the Inspector window we will see a panel with three tabs. In the Rig panel, you must specify the Animation Type Humanoid. By this we will make it clear that the skeleton of our model has a human structure: this refinement will allow you to easily work with animations of this type and evaluate all the advantages of the Mecanim system. When you click Apply, the automatic configuration will be performed, the successful completion of which will be indicated by a small tick to the left of the “Configure” button. In the Animations panel we are interested in the following parameters:


The next step is to create and configure the Animator component to force the character to use different animations depending on the conditions. To do this, in any convenient place in the project hierarchy, right-click and select Create → Animator Controller from the list of commands. Selecting a new file and opening the Animator window, we will see an empty controller containing only 2 default states - Entry and AnyState. The state of Entry is the starting one and should flow into another one, which we will create by executing the command CreateState → Empty with the help of the right mouse button. It will be convenient for us if, by default, when the player does not enter any commands, the character will continue to run, so let's call him Run. Add a running animation in the Motion field in the created state by selecting it from the list or dragging it with the mouse, and slightly increase the playback speed in the Speed field. From the Entry state, create a transition to the Run state using the context menu of the first one. The item Make Transition will create a pointer, which we will manually attach to the new state.
Now we will create 2 more states for the jump and rolling - Jump and Slide, respectively. Assign them the same animation, as well as transitions with the Run state, both direct and reverse. Transitions will serve us not only as a useful tool for smoothing out two flowing animations, but also indicate the conditions for changing states. To manage transitions, you have to create two Boolean variables, jump and slide, in the parameters of the animator. To do this, in the Parameters tab of the Animator window, click on the “+” symbol.

Selecting the arrow on the branch in the Inspector window, we will see a field with animation curves, where we can specify the transition gap for mixing them. In the Conditions field, specify the conditions for the transition.


Now it's time to feel like a little architect, creating a simple location. To do this, we are perfectly suited sets of free assets in the Asset Store:
After importing the packages, it will not be difficult to find exactly which directory the models are in and load them onto your empty stage. Having rummaged in the content, we determine the necessary elements for ourselves and construct the location so as to provide the future character with the opportunity to run forward. We have created several elements for seamless generation of the environment in front of the player.

For simplicity, we combine the constructed blocks in order to create a solid segment of the street, set the character to the starting position and fix the camera after him, having previously adjusted the angle of display. Assign the character two simplest script, one of which allows him to run exactly along the Z axis without deviations, the second - gives control over the performance of tricks rolled and jump.
Alignment Script:
Management Script:
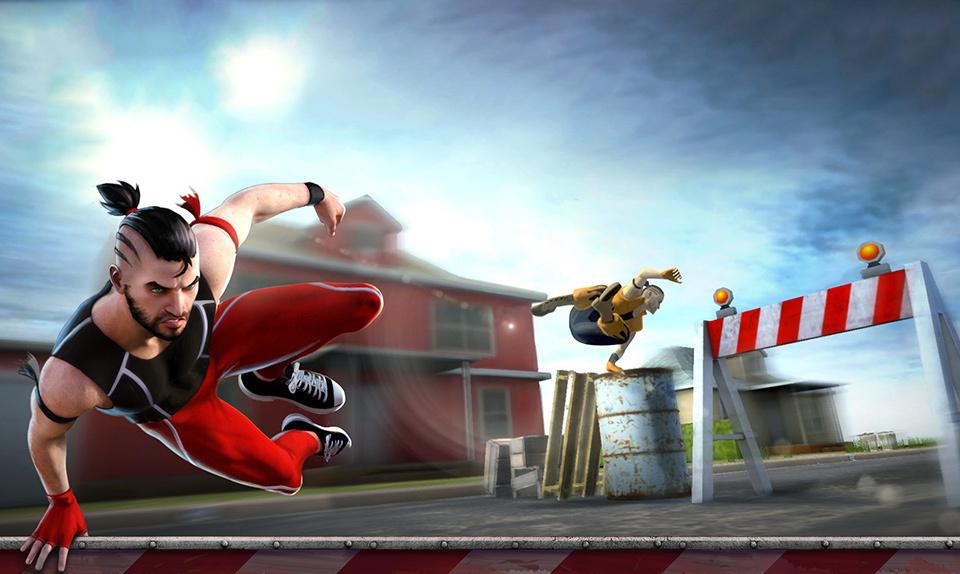
And now let's take a look at the result !
It looks very impressive, isn't it? Surely, if you saw such a picture somewhere on the Internet, you would think that this is a new game from DICE about a cool Chinese food delivery boy.
In conclusion, I would like to express the main idea of this post: do not be afraid of anything new and seemingly difficult! We have clearly shown how modern technologies can give you a great opportunity to create a beautiful and realistic preparation of a future game without extra financial costs, having only a starting experience in programming. Successes! ”
“Hello, reader Habra! If you feel that you haven't made much progress in developing games on Unity3D, and you dream about something bigger and, most importantly, dynamic - welcome to cat. There we will talk about how to create your own character, not having the skills of 3D modeling, import it into the Unity-project and make it move.
Let's imagine that one evening after another viewing of the film "The 13th District" you suddenly wanted to make your game about crazy stunts, jumping over the precipices and wonders of acrobatics. In the history you have a couple of projects using geometric primitives, such as "3 in a row", so that some programming skills are already available, even if they are at an entry level. To implement this new idea, you will need: a character model, an environment model, and specific animations. It's simple! But here you realize that God has not endowed you with the skills of three-dimensional modeling. The most difficult thing you had to do in this area was to create a teapot model in a pirated copy of 3D Studio Max, bought for 200 rubles in the transition a couple of years ago. Then you had to spend on the whole process as much as 10 seconds of time and a few calories to lift your finger and press the "Create a kettle" button. Yeah, no good.
But do not despair, because modern technology today provides endless opportunities even to those who can not boast of skills in the relevant field. Even a novice surgeon today, by downloading the Liver Transplant 3D app, can easily operate on his friend at home. But let's not be distracted by light artistic exaggerations - let's return to our future game.
')
To create a charismatic character, we will use Adobe Fuse , as a very simple tool for working with models of this kind. “With this new application, you can easily create, modify, and customize 3D models of human characters in minutes, save them in Creative Cloud Libraries, and then add postures and animations for them,” reads the description. Great, suits us!
The Fuse environment interface will not make you feel like a nuclear safety inspector at Springfield NPP.
We assure you, the process of creating a character will be extremely simple and will bring complete pleasure. The Lord God himself would be much more comfortable creating Adam if he used such a tool.
So let's get started. Here is the main window of the program, where the main tabs for us are located above the main working area and represent the stages of building a human 3D model. The Assemble tab gives us the opportunity to create the hero's body directly, making it from separate components: torso, arms, legs and head. From this and we will begin. Expanding the Head list on the right side of the screen, we will see different initial variants in front of us. Here you will find all kinds of heads: male and female, light-skinned and dark-skinned, young and aged, and even cartoony. Recalling with a smile the creation of Matt Groening, click the mouse and choose the right one.
The Torso tab, as the name implies, provides us with the opportunity to choose a torso. Then you decide whether your character goes to the gym, is he born in Africa, does he receive a pension, or maybe she uses Lady Speed Stick at all? Choose your favorite option and move on.
Following the established logic of things, we run over the remaining two tabs. The developers tried their best and ruled out the possibility of an error, so the hands of our hero will definitely grow from the right place. In the section Legs we increase the suitable legs, in the section Hands - accordingly hands. Ultimately, our creation will be displayed in the main window, which can be rotated around its axis to make sure that we have not forgotten anything.
The next stage, which we will spend in the Customize tab, can be called the most interesting in character creation. With the help of convenient sliders, we can change such parameters as hand length, head size, body shape, skin color, eye shape, facial contour and much more. It is here that you determine whether your offspring will be a sports build tracer or a lanky black Asian who has obvious problems with cholesterol. The main thing is not to overdo it, otherwise the result may be the most unexpected.
Now, as a decent father, you have to dress your son, not to run around him completely naked in the future location, attracting the excessive attention of low-poly onlookers. To do this, go to the Clothing tab, where on the right side of the screen you will see a great many sections. They can not only get hold of a stylish T-shirt, but also make a haircut, grow a beard, a mustache, fasten gloves, a hat, fashionable sneakers and so on. You will be fully able to feel yourself leading the fashion court meetings, Alexander Vasilyev, and Evelina Khromchenko herself will not be able to stand a single accusation of your creation. It does not make sense to stop now on each parameter of this section, otherwise the printed version of the article will turn into one of the volumes of the immortal work of the writer L. Tolstoy. Believe me, at this stage character customization is simple and intuitive, all the names of the parts of the body undergoing change are signed and labeled. And if you are not an expert in English, then you will be even more interesting: you will have to learn the functionality empirically by moving the sliders from one extreme position to another. Below are step-by-step illustrations of the settings of the 3D model being created.
The last tab Texture is responsible for setting the exported materials of the model, including color, texture of fabrics, patterns, and more. Change the colors of the character's clothes and get a vivid image, ready for export.
To continue working with the model, it is most convenient to export it to Mixamo — an online service from Adobe that allows you to animate the hero you created. To do this, you need in the upper right corner to click on the same button "Export to Mixamo". I remind you that you must be a Creative Cloud subscriber and have your Adobe ID in order to use this feature.
The process of importing the model is complete, and now is the time to become Dr. Frankenstein, that is, turn the switch and start the hellish machine to revive your creation. To do this, go to the Mixamo page under your ID, go to the Store section in the top panel, then select the MyAssets tab in the same panel. On the downloaded page in the subsection MyCharacters you will be waited for by the newly baked model of tracer.
The loaded model is static, but this is temporary - only until we embed a Rig skeleton with bend points and snapping to limbs. What we do! To do this, let's make the very convenient Auto-Rigger function, which is in the Products menu, work. And if the model was made in the Fuse editor, as in our case, then the process of automatic creation of the skeleton becomes extremely simple and does not require additional steps. In that case, if the model was made in a different environment, then most likely you will have to indicate the points of bending of the extremities on the scheme, but this should not cause any difficulties.
In the settings of Auto-Rigger, we can specify the necessary degree of detail of the skeleton. It will only affect the fingers. The maximum degree is a palm with bending fingers, the minimum is a static palm. After confirmation, the system will inform you about the successful update of the loaded model, and now we have the opportunity to animate using basic animations. And the base, I must tell you, is very large, more than 1000 popular titles, including movements of dance, sports exercises, martial arts, acrobatics and standard human movements in space. For those involved in games, this is a very rich resource.
To start the animation process, go to the Store section of the main window in the Animations tab. Before us will open a library of all the animations that Mixamo offers us. By searching, you can find thematic movements of jumps and rolls that interest us. Select the required item and save it in a set by clicking on the button “Add to my assets” on the right side of the screen.
Once in the My Assets menu item, you will see 3 tabs:
- My Characters - character models saved in a set from the library or downloaded from an external resource;
- My Animations - animations from the library saved to the set;
- Downloads - files prepared for download.
In order to prepare an animated model for downloading, we will have to pre-configure it in the My Animation tab, if necessary. Settings are amenable to parameters such as speed, arms, legs and so on. Thus, the run animation can be made unhurried, like a Saturday morning jog before breakfast, or very fast, as if the character learned that in the supermarket there is an 80% discount on the latest iPhone model. Next, by clicking on the “Queue Download” button, we send our mobile model to the Download section, where we can proceed directly to downloading.
It is time to open Unity and load the character model into an empty project by setting import parameters. After that, clicking on the file in the asset hierarchy, in the Inspector window we will see a panel with three tabs. In the Rig panel, you must specify the Animation Type Humanoid. By this we will make it clear that the skeleton of our model has a human structure: this refinement will allow you to easily work with animations of this type and evaluate all the advantages of the Mecanim system. When you click Apply, the automatic configuration will be performed, the successful completion of which will be indicated by a small tick to the left of the “Configure” button. In the Animations panel we are interested in the following parameters:
- Loop Time - looping animation. For running animation, cycling is very important, the character must repeat the same movements over and over again.
- Root Transform Rotation Bake Into Pose - preservation of the root vector of rotation of the model relative to the movement of the bones. Simply speaking, performing various animations, the character must continue to move in one direction, in our case, along the Z axis.
- Root Transform Rotation Offset - rotation vector shift for alignment. Manually align the running direction of the model.
- Root Transform PositionY Bake Into Pose - fixing the Y position of the root point. If we want the model to move with a constant Y-coordinate (for example, to eliminate camera shaking), then it is necessary to check the box here.
The next step is to create and configure the Animator component to force the character to use different animations depending on the conditions. To do this, in any convenient place in the project hierarchy, right-click and select Create → Animator Controller from the list of commands. Selecting a new file and opening the Animator window, we will see an empty controller containing only 2 default states - Entry and AnyState. The state of Entry is the starting one and should flow into another one, which we will create by executing the command CreateState → Empty with the help of the right mouse button. It will be convenient for us if, by default, when the player does not enter any commands, the character will continue to run, so let's call him Run. Add a running animation in the Motion field in the created state by selecting it from the list or dragging it with the mouse, and slightly increase the playback speed in the Speed field. From the Entry state, create a transition to the Run state using the context menu of the first one. The item Make Transition will create a pointer, which we will manually attach to the new state.
Now we will create 2 more states for the jump and rolling - Jump and Slide, respectively. Assign them the same animation, as well as transitions with the Run state, both direct and reverse. Transitions will serve us not only as a useful tool for smoothing out two flowing animations, but also indicate the conditions for changing states. To manage transitions, you have to create two Boolean variables, jump and slide, in the parameters of the animator. To do this, in the Parameters tab of the Animator window, click on the “+” symbol.
Selecting the arrow on the branch in the Inspector window, we will see a field with animation curves, where we can specify the transition gap for mixing them. In the Conditions field, specify the conditions for the transition.
Now it's time to feel like a little architect, creating a simple location. To do this, we are perfectly suited sets of free assets in the Asset Store:
After importing the packages, it will not be difficult to find exactly which directory the models are in and load them onto your empty stage. Having rummaged in the content, we determine the necessary elements for ourselves and construct the location so as to provide the future character with the opportunity to run forward. We have created several elements for seamless generation of the environment in front of the player.
For simplicity, we combine the constructed blocks in order to create a solid segment of the street, set the character to the starting position and fix the camera after him, having previously adjusted the angle of display. Assign the character two simplest script, one of which allows him to run exactly along the Z axis without deviations, the second - gives control over the performance of tricks rolled and jump.
Alignment Script:
public class ZAxisAnchor : MonoBehaviour { Transform currentTransform; float posX, posY; Vector3 tempVector; void Start () { currentTransform = transform; posX = currentTransform.position.x; posY= currentTransform.position.y; tempVector = new Vector3 (posX, posY, currentTransform.position.z); } void Update () { tempVector.z = currentTransform.position.z; currentTransform.position = Vector3.Lerp (currentTransform.position, tempVector, 10); } } Management Script:
public class Control : MonoBehaviour { Animator playerAnimator; AnimatorStateInfo stateAnimator; void Start () { playerAnimator = GetComponent<Animator> (); } void Update () { Controller (); } void Controller () { stateAnimator = playerAnimator.GetCurrentAnimatorStateInfo (0); if (stateAnimator.IsName ("Run")) { if (Input.GetKeyDown (KeyCode.DownArrow)) { playerAnimator.SetBool ("slide", true); Invoke ("Clear", 1); } else if (Input.GetKeyDown (KeyCode.UpArrow)) { playerAnimator.SetBool ("jump", true); Invoke ("Clear", 1); } } } void Clear () { playerAnimator.SetBool ("slide", false); playerAnimator.SetBool ("jump", false); } } And now let's take a look at the result !
It looks very impressive, isn't it? Surely, if you saw such a picture somewhere on the Internet, you would think that this is a new game from DICE about a cool Chinese food delivery boy.
In conclusion, I would like to express the main idea of this post: do not be afraid of anything new and seemingly difficult! We have clearly shown how modern technologies can give you a great opportunity to create a beautiful and realistic preparation of a future game without extra financial costs, having only a starting experience in programming. Successes! ”
Source: https://habr.com/ru/post/328064/
All Articles