We increase the potential of the network storage abandoned by the manufacturer
During the operation of a smart device, users often face a number of problems that only the manufacturer can solve. The solution, it would seem, is near: we inform via official channels about the found bug, the manufacturer fixes, uploads new firmware, gives instructions for updating, updating and everyone is happy.
In practice, everything is not so fabulous, and it is often difficult or even impossible to reach the manufacturer. And it may be trite to end the period of support for this model of device, then no one will be sure to fix it.
This story is about what you can do yourself, having the initial skills, desire and time to understand the process of updating the software for embedded devices.

For the impatient: in the end turned out to be a full-fledged device with the current version of the U-Boot loader,  Debian jessie and
  OpenMediaVault on board.
Content:
Device
Meet the test subject - D-Link DNS-325 .
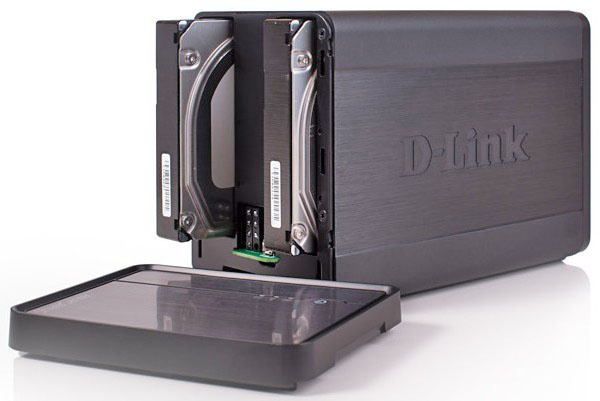
The device has an ARM processor Marvell Kirkwood 88F6281 (EABI) architecture armel, 128MB NAND memory, 256MB RAM. Equipped with two bays for HDD, network and USB connector on the rear panel.
The thing is not very powerful, but even in the framework of home use, complaints have accumulated, with which further use with regular firmware has become unpleasant.
Glitches
In descending order of importance:
Glitches UPnP AV media server. A media server is set up in the storage, which indexes audio and video materials and distributes them via the DLNA protocol. The problem is that some files added to the hard disk are not automatically indexed and are not displayed when entering from a TV / other DLNA compatible device. Manual switching of the media server mode helps, then the base is created from scratch, but it takes a couple of hours. Not the best solution when you want to download and watch a movie.
A sudden waking up from the state of "sleep" in the middle of the night (the rustling of the disc, the fan noise) creates discomfort. And not a line in the log about what kind of service task was launched. Fan event only:
Apr 20 03:55:09 Set Fan Speed To "LOW".Web interface. There are hangs, dumps of the session, etc.
Additions. There are both official and unofficial . The problem is that no one maintains the relevance of the software. In this form of correcting errors and vulnerabilities, you should not wait either.
The logging system is just awful. Not only is it uninformative, but also with some mythical artifacts.
Linux As the basis of many
modern coffee makersembedded devices, based on Linux. This means that there are some issues of stability, vulnerabilities, etc. In the stock firmware, the Linux 2.6 kernel spins, and Linux 4.11 is already in the yard.- Strange bug with usb printer. The storage is equipped with a USB port for connecting flash drives, USB drives, printers and scanners. And my USB printer was perfectly shared over the network, while inside it was installed 1 HDD for 2 TB. As soon as I inserted a 3 TB HDD case, the printer stopped working. After a series of tests with various combinations of different disks, I found out that it works with only one installed in the left case.
Choosing an alternative OS
Alt-f
The first that was found from the adapted alternatives was the open firmware Alt-F. The functionality is not inferior to proprietary firmware, minimalistic web interface, updates are stable. There is even support for plugins fun_plug.
 FreeNAS and
  NAS4Free
Projects are interesting, but cumbersome. Based on FreeBSD. System requirements are too high.
For example, the system requirements for FreeNAS 10 "Corral" :
- 64-bit processor
- system with boot support via legacy BIOS or EFI
- 8 GB RAM
- 8 GB USB flash drive or other drive
- at least one data storage disk
- Ethernet port for network exchange
By the way, the recent release of FreeNAS 10 "Corral" was recalled , incl. and due to increased system requirements.
OpenMediaVault
OMV is an open source NAS system. It is an offshoot from FreeNAS , but adapted for Debian Linux, as a result of which it is multiplatform. In combination with relatively low system requirements, it makes itself the only suitable candidate. The functionality is more than sufficient, extended by its plug-ins, but most importantly, a full-featured Debian gives access to the repositories , which means you can install anything by installing a couple of packages.
For this model, there is an easy way to start Debian using a hack with fun_plug , but this is just a real-time extension, and you won’t be able to launch a Debian version older than Wheezy.
Unfortunately, OMV does not have a ready-made Debian build with its package for the armel architecture. Moreover, developers have so far recognized only i386 and amd64 assemblies as stable. ARM experimental support:
Support for OpenMediaVault on Arm is experimental. You must install the Debian Wheezy on you device.
Device preparation
The built-in NAND memory is not suitable for our idea - it is too small. There is no desire to store the system on the drives inserted into the storage. It turns out the mixing of the brain device with peripheral components. And if I want to change the disk or it will break?
The only adequate option left is to install a USB flash drive, on which the entire system will be installed. With this approach, it is easier to make backup copies of the system, and a flash drive in case of a breakdown is easy to replace.
For USB devices, it was decided to take a separate USB Network Hub , still one slot is not enough :)
Extra iron
To access the brain from the outside, there is a serial UART port on the board. Instead of flashing the ROM with special programmers, you can connect to the contacts on the board and, via a special converter, communicate with the device via a terminal emulator.
The topic of UART in embedded devices is quite extensive, who are interested, you can read a good overview article: https://geektimes.ru/post/253786/
The following components were selected and purchased:
- USB Converter - UART to PL2303HX
- Wires "mother-mother" 20cm, 20 pcs.
- Plug the pin PLS-40 (DS1021-1x40), straight black
- SanDisk Ultra Fit USB 3.0 16GB
Converter connection

Pinout such (in reverse order): {RXD, (empty), 3.3v, GND, TXD}

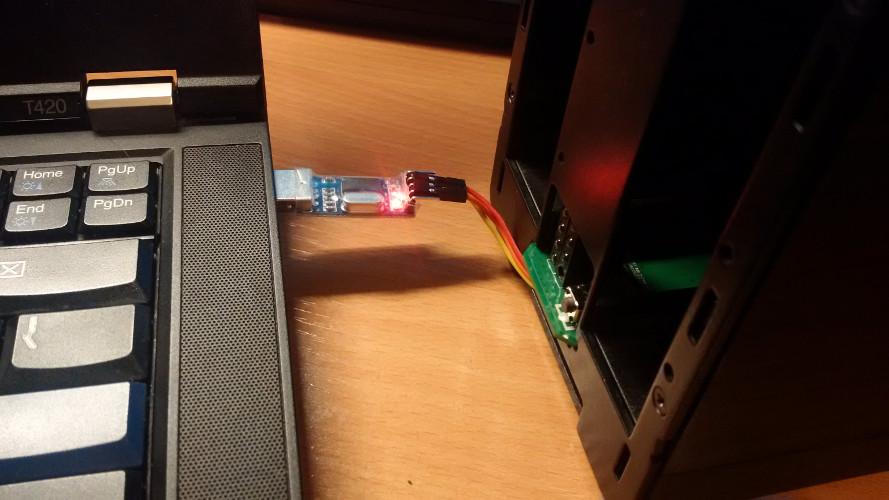
Now, in order to access the built-in microcomputer, you will not need to get a board - the wires have already been removed, it remains to remove the front cover of the network storage.
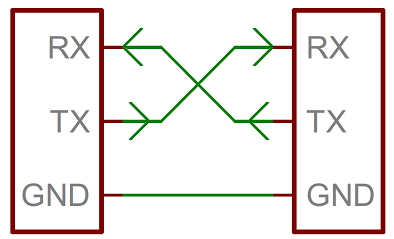
Since this is a serial port, we connect them in series.
On this all the mechanical work with the equipment is finished.
Trial run
To communicate using the UART protocol, we will need:
kwboot - utility to run the bootloader on the device "on the fly"
minicom - terminal emulator for UART protocol
Run minicom on the host system:
# minicom -D /dev/ttyAMA0 -b 115200 -8 We connect the power supply, turn on the device, enjoy the output of the download log in the console:
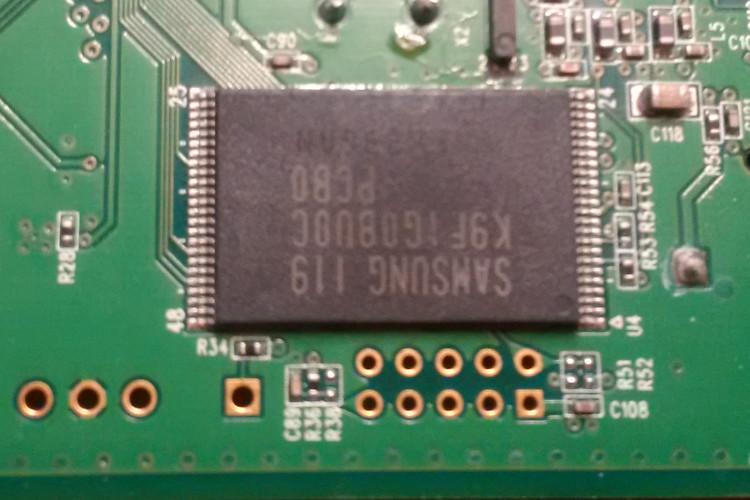
** MARVELL BOARD: DB-88F6281A-BP LE U-Boot 1.1.4 (Jan 21 2011 - 09:42:39) Marvell version: 3.4.14.DNS-325.02 U-Boot code: 00600000 -> 0067FFF0 BSS: -> 006CEE80 Soc: MV88F6281 Rev 3 (DDR2) CPU running @ 1200Mhz L2 running @ 400Mhz SysClock = 400Mhz , TClock = 200Mhz DRAM CAS Latency = 5 tRP = 5 tRAS = 18 tRCD=6 DRAM CS[0] base 0x00000000 size 256MB DRAM Total size 256MB 16bit width Flash: 0 kB Addresses 8M - 0M are saved for the U-Boot usage. Mem malloc Initialization (8M - 7M): Done NAND:128 MB *** NAND read: device 0 offset 0x100000, size 0x300000 load addr .... =a00000 3145728 bytes read: OK NAND read: device 0 offset 0x600000, size 0x300000 load addr .... =f00000 3145728 bytes read: OK ## Booting image at 00a00000 ... Image Name: Linux-2.6.31.8 Created: 2012-06-26 3:38:43 UTC Image Type: ARM Linux Kernel Image (uncompressed) Data Size: 2565784 Bytes = 2.4 MB Load Address: 00008000 Entry Point: 00008000 Verifying Checksum ... OK OK ## Loading Ramdisk Image at 00f00000 ... Image Name: Ramdisk Created: 2014-01-21 4:33:41 UTC Image Type: ARM Linux RAMDisk Image (gzip compressed) Data Size: 1581012 Bytes = 1.5 MB Load Address: 00e00000 Entry Point: 00e00000 Verifying Checksum ... OK Starting kernel ... Uncompressing Linux............................................................. **Linux version 2.6.31.8** (jack@swtest6) (gcc version 4.2.1) #8 Tue Jun 26 11:38:42 CPU: Feroceon 88FR131 [56251311] revision 1 (ARMv5TE), cr=00053977 CPU: VIVT data cache, VIVT instruction cache Machine: Feroceon-KW Using UBoot passing parameters structure Memory policy: ECC disabled, Data cache writeback Built 1 zonelists in Zone order, mobility grouping off. Total pages: 65024 Kernel command line: root=/dev/ram console=ttyS0,115200 :::DB88FXX81:egiga0:none PID hash table entries: 1024 (order: 10, 4096 bytes) Dentry cache hash table entries: 32768 (order: 5, 131072 bytes) Inode-cache hash table entries: 16384 (order: 4, 65536 bytes) Memory: 256MB = 256MB total Memory: 246528KB available (4828K code, 323K data, 136K init, 0K highmem) *** NAND device: Manufacturer ID: 0xec, Chip ID: 0xf1 (Samsung NAND 128MiB 3,3V 8-b) Scanning device for bad blocks Using static partition definition Creating 6 MTD partitions on "nand_mtd": 0x000000000000-0x000000100000 : "u-boot" 0x000000100000-0x000000600000 : "uImage" 0x000000600000-0x000000b00000 : "ramdisk" 0x000000b00000-0x000007100000 : "image" 0x000007100000-0x000007b00000 : "mini firmware" 0x000007b00000-0x000008000000 : "config" If interested, here is the full conclusion:
https://pastebin.com/6SRA6Qgq
Build and update
All build actions will be performed on the main (host) system running Debian Stretch (amd64).
We will collect and update:
- Boot Loader - U-Boot
- Kernel - Linux Kernel 4.10
- Debian Jessie root file system
- System initialization image - Initramfs
Basic assembly tools:
- Cross compiler for armel architecture. In Debian, this is the gcc-arm-linux-gnueabi package.
- Auxiliary utilities:
- git - to download the necessary versions from the project repositories
- make - to execute build scripts
- debootstrap - for downloading the root filesystem
- mkimage is a utility for reformatting files in a format understandable to the loader
- BusyBox - a set of utilities for initial system initialization
- related dependencies and libraries.
Loader
This device has a slightly truncated 2011 U-Boot boot loader installed. We will update to the current stable version.
Download:
$ git clone --branch v2017.05 git://git.denx.de/u-boot.git Customize:
$ cd u-boot $ nano u-boot/include/configs/dns325.h Add the lines:#define CONFIG_CMD_BOOTZ - to support the loading of the zImage kernel.#define CONFIG_CMD_EXT4 - to support ext4 filesystems and related bootloader console commands.
$ make dns325_defconfig # # configuration written to .config # $ make u-boot.kwb CROSS_COMPILE=arm-linux-gnueabi- At this stage, you need to know how much this file weighs:
$ printf "0x%x\n" `stat -c "%s" u-boot.kwb` 0x7315c We display the size of the image in hexadecimal number system (HEX), in this form it is useful when writing to NAND memory.
You can write the resulting U-Boot image to NAND memory from a bootloader running in memory. I decided not to do this from the current stock loader, as I first wanted to make sure that the new image was loaded on the hardware at all, and ext4 support was included earlier in the new boot image, so you can make a feint with your ears: copy this image to the USB flash drive and download from the same image with kwboot.
There are several options for transferring the file to the memory of the minicomputer: via Kermit , via TFTP , and also through physically connected drives (our choice).
kwboot allows you to start the board with the bootloader transferred to it, without physically writing anything (RAM only) and ignoring NAND memory altogether. This mechanism allows emergency loading of the device even when it has been corrupted due to NAND memory corruption or unsuccessful firmware.
Turn off the device, run kwboot, press the power button. The process of image uploading should go on and download should be interrupted.
# tools/kwboot -p -b u-boot.kwb -B115200 -t /dev/ttyUSB0 Sending boot message. Please reboot the target.../ Sending boot image... 0 % [......................................................................] 1 % [......................................................................] 3 % [......................................................................] *** 96 % [......................................................................] 98 % [...........................................] [Type Ctrl-\ + c to quit] U-Boot 2017.05-dirty (May 10 2017 - 02:56:44 +0300) D-Link DNS-325 SoC: Kirkwood 88F6281_A1 DRAM: 256 MiB WARNING: Caches not enabled NAND: 128 MiB In: serial Out: serial Err: serial Net: egiga0 IDE: ide_preinit failed Hit any key to stop autoboot: 0 => Loaded. Next you need to write our u-boot.kwb image in the NAND area. But in order to write it to NAND memory, you must first read it and write to RAM memory.
Make an ext4 flash drive and give the partition the name "rootfs" (to mount the root file system by partition name):
# mkfs.ext4 /dev/sdb1 # e2label /dev/sdb1 rootfs Copy the file to the USB flash drive, insert the USB flash drive into the NAS and initialize it:
=> usb start starting USB... USB0: USB EHCI 1.00 scanning bus 0 for devices... 2 USB Device(s) found scanning usb for storage devices... 1 Storage Device(s) found Write the image to memory. The address (offset) does not matter, the main thing is not to go beyond the RAM). In this case, will be 0x1000000.
=> ext4load usb 0:1 0x1000000 /u-boot.kwb 471388 bytes read in 77 ms (5.8 MiB/s) Clear the NAND area where the boot loader is stored:
=> nand erase 0x000000 0x7315c NAND erase: device 0 offset 0x0, size 0x7315c Erasing at 0x60000 -- 100% complete. OK (from the beginning of NAND memory to an offset equal to the size of the file, which we calculated earlier)
Write the bootloader from the RAM memory area to the NAND memory area:
=> nand write 0x1000000 0x000000 0x7315c NAND write: device 0 offset 0x0, size 0x7315c 471388 bytes written: OK 0x1000000 - from where we read in RAM
0x000000 - where we write to NAND
0x73044 - size
Everything, you can reboot and enjoy the launch of the new bootloader:
U-Boot 2017.05-dirty (May 10 2017 - 02:56:44 +0300) D-Link DNS-325 SoC: Kirkwood 88F6281_A1 DRAM: 256 MiB WARNING: Caches not enabled NAND: 128 MiB In: serial Out: serial Err: serial Net: egiga0 IDE: ide_preinit failed Hit any key to stop autoboot: 0 => If at this stage the device has turned around and refused to boot, for example, as I did at first (apparently, it was sealed when I entered the size of the bootloader image when writing from RAM memory to NAND), do not rush to panic. You can also boot the device with kwboot and repeat the recording.
Root system (stage one)
Use the debootstrap tool. Usually, the formation of rootfs for systems with a different architecture is done in 2 stages: downloading to the directory with the --foregin flag, and then setting up qemu and launching "debootstrap --second-stage" in it. I did not want to mess around with qemu, and I decided to do the second stage right away on a working NAS.
Download the contents to a USB flash drive (mounted on / mnt / usb /):
# debootstrap --variant=minbase --foreign --arch=armel --include=dbus,nano jessie /mnt/usb/ http://ftp.ru.debian.org/debian/ Rename the init file so that the half-installed system does not start:
# mv /mnt/usb/sbin/init /mnt/usb/sbin/init.bak The first stage is ready.
Core
Perhaps the most difficult stage of all. It is very important to configure the kernel so that all desired functions and programs work correctly. Otherwise, it is easy to get some nasty error with strange symptoms.
At first I was lucky to find a ready-made kernel for Kirkwood , but it strongly refused to mount the flash drive in any of the modes (OHCI, EHCI), so I still had to assemble the kernel myself.
Download:
$ git clone --branch v4.10 git://git.kernel.org/pub/scm/linux/kernel/git/arm/arm-soc.git We load the preset config for our board (ARMv5). In my case, this is mvebu_v5_defconfig.
$ make ARCH=arm mvebu_v5_defconfig # # configuration written to .config # $ make ARCH=arm menuconfig Customizable. It is necessary to configure and check everything, ideally to study each parameter and decide whether it is needed or not. I set the hostname, enabled initramfs / initrd, turned off sound and USB 3.0, turned off drivers for ext2 and ext3 (the ext4 driver can mount all earlier versions), included disk quotas, turned on support for Kirkwood, Marvell Orion. Also included are required parameters to support systemd . Most likely, there is something that I did not mention, for there are many settings. Here is my kernel config: https://pastebin.com/MZrRXnXX
Many things can come out during installation, configuration, and operation of the system and OMV. In this case, you can simply add the necessary lines, rebuild the kernel and replace the image on the flash drive.
Assembly:
$ make ARCH=arm CROSS_COMPILE=arm-linux-gnueabi- -j5 zImage kirkwood-dns325.dtb We got the zImage kernel itself and the kirkwood-dns325.dtb file. The last file - Device Tree - is needed for the correct operation of the kernel specifically with our board.
Copy these files to the / boot directory on a flash drive:
# cp arch/arm/boot/zImage arch/arm/boot/dts/kirkwood-dns325.dtb /mnt/usb/boot/ Initramfs
Next, we make a lightweight image that will be loaded into memory and initialize our system. It is not necessary to do it at all, the loader can start the kernel directly with the root directory ( root= ). However, it is useful, because in case of lack of access to the root file system, a console with a minimal set of commands will be available.
The backbone of the image will be a BusyBox gentleman's set.
Download:
$ git clone --branch 1_26_2 git://git.busybox.net/busybox/ Setup:
$ make defconfig $ make menuconfig The only thing that is better in the settings in addition is the static linking of the glibc library, so that you do not have to push it separately into the image.

Assembly:
$ make ARCH=arm Next, create the image structure, put the busybox in it:
$ mkdir -p initramfs/{bin,sbin,etc,proc,sys,newroot,usr/{bin,sbin}} $ cp busybox/bin/bisybox initramfs/bin $ ln -s initramfs/bin/busybox initramfs/bin/sh Next, you need to write an init script. This is where all the magic of device initialization and the transfer of control to Debian will occur.
#!/bin/sh /bin/busybox --install -s #Mount things needed by this script mount -t proc proc /proc mount -t sysfs sysfs /sys #Disable kernel messages from popping onto the screen echo 0 > /proc/sys/kernel/printk #Clear the screen clear #Create device nodes mknod /dev/null c 1 3 mknod /dev/tty c 5 0 #Pause bebore USB Storage init sleep 3 #Mount devices mdev -s #Defaults init="/sbin/init" #Mount the root device mount LABEL=rootfs /newroot #Check if $init exists and is executable if [ -h "/newroot/${init}" ] ; then #Unmount all other mounts so that the ram used by #the initramfs can be cleared after switch_root umount /sys /proc #Switch to the new root and execute init exec switch_root /newroot "${init}" fi #This will only be run if the exec above failed echo "Failed to switch_root, dropping to a shell" exec setsid sh exec <"${console}" >"${console}" 2>&1 exec sh We pack and transform it into a format understandable for the U-Boot:
$ cd initramfs/ $ find . | cpio -H newc -o > ../initramfs.cpio $ cd .. $ cat initramfs.cpio | gzip > initramfs.igz $ mkimage -n 'uInitramfs' -A arm -O linux -T ramdisk -C gzip -d initramfs.igz initramfs.uImage Copy the initramfs:
# cp initramfs.uImage /mnt/usb/boot/ With the assembly finished.
Installation and Setup
Loader environment variables
In the process of updating the bootloader, the configs got lost, you need to configure the boot of the new kernel, Initramfs, Device Tree, and also restore the network settings.
Boot from the minicom, run on the device in the U-Boot console:
=> setenv console ttyS0,115200 => setenv bootargs console=${console} => setenv bootcmd usb start; run load_kernel; run load_init; run load_dtree; run boot_system => setenv load_kernel ext4load usb 0:1 0x1000000 boot/zImage => setenv load_init ext4load usb 0:1 0x1800000 boot/initramfs.uImage => setenv load_dtree ext4load usb 0:1 0x2000000 boot/kirkwood-dns325.dtb => setenv boot_system bootz 0x1000000 0x1800000 0x2000000 => setenv ethaddr xx:xx:xx:xx:xx:xx => setenv ipaddr 192.168.0.32 => saveenv Everything is very simple here: set the console parameters, load the kernel, prescribe where the files will be copied (ext4load) into memory and read from where (bootz). We register ip and mac addresses (mac address can be viewed on the device label).
We insert the flash drive in the NAS, reboot.
Root system (stage two)
Having loaded, we get to BusyBox. We can complete the formation of rootfs:
# chroot /newroot # mv /sbin/init.bak /sbin/init # /debootstrap/debootstrap --second-stage # passwd Reboot the device, log in as root. From now on, we boot in full and work in Debian.
Network configuration
Next you need to configure and enable the network.
# touch /etc/systemd/network/wired.network # nano /etc/systemd/network/wired.network We write a simple config for static ip on the wired interface eth0
[Match]
Name = eth0
[Network]
Address = 192.168.0.32 / 24
Gateway = 192.168.0.1
Enable and run network services
# systemctl enable systemd-networkd # systemctl enable systemd-resolved # systemctl start systemd-networkd # systemctl start systemd-resolved The network is.
Setting the fan and buttons
Before doing high-load operations, it is necessary to set the fan for cooling. Usually, the setting is simple: using the pwmconfig command, the CPU temperature sensor is located, the fan is located, they are connected and the boundary parameters of the activation of cooling modes are set.
In the case of a home NAS, you should not do this, because the main share of heat is emitted by hard drives, not by the processor.
The problem is this: fancontrol, a service that controls the fan, allows you to monitor only the sensors that are directly on the board. This device has one fan and one temperature sensor.
There is a way out: you can fool the fancontrol by forcing it to read information from the place we need. To read data from the HDD, we use the smartmontools package.
Install:
# apt install fancontrol lm-sensors smartmontools Configuring by default:
# pwmconfig Subtleties settings can be read, for example, here .
Next, open the config / etc / fancontrol, look at the contents. The variable "FCTEMPS" is interesting - it sets the location of the temperature from which the device should correspond to:FCTEMPS=hwmon0/pwm1=hwmon1/temp1_input
The path is relative, the file itself is generated in / sys / class / hwmon / hwmon1 / temp1_input. Let's see in what format the information is stored:
# cat /sys/class/hwmon/hwmon1/temp1_input 41500 The value in Celsius multiplied by 1000 (for accuracy). So you need a file in which the temperature of the hard drives will be updated periodically. The value is allowed one, and we can have 2 hard disks. So, we will take the maximum, write to the file.
Let's write a small script:
#!/bin/bash while sleep 60 do TEMP1=`smartctl -A /dev/disk/by-id/ata-Hitachi_HDS723030ALA640_MK0311YHG1ZGJA | grep Temperature_Celsius | awk '{print $10 "000"}'` TEMP2=`smartctl -A /dev/disk/by-id/ata-WDC_WD2003FYYS-02W0B1_WD-WMAY05168428 | grep Temperature_Celsius | awk '{print $10 "000"}'` echo $(( $TEMP1 > $TEMP2 ? $TEMP1 : $TEMP2 )) > /etc/temp_hdd done Every minute SMART information is read from the HDD sensors, only the temperature value is extracted from all the information, and in the right format, the largest of the 2 is written to the / etc / temp_hdd file. I specified the disks by id, because the letters of the disks / dev / sd [az] can change depending on the order and number of inserted physical disks.
Write the script in /etc/temp_hdd.sh. Next you need to somehow start it at startup. For this, the file /etc/rc.local is just suitable.
Register right before the "exit 0" line/etc/temp_hdd.sh &
Now the process will run at system startup and run in the background.
When there is a file with the current temperature, we will enter this in the config / etc / fancontrol, while setting the temperature limit values. It turned out something like this:
# Configuration file generated by pwmconfig, changes will be lost INTERVAL=10 DEVPATH=hwmon0=devices/platform/gpio_fan hwmon1=devices/platform/ocp@f1000000/f1011000.i2c/i2c-0/0-0048 DEVNAME=hwmon0=gpio_fan hwmon1=lm75 FCTEMPS=hwmon0/pwm1=/etc/temp_hdd FCFANS= hwmon0/pwm1=hwmon0/fan1_input MINTEMP=hwmon0/pwm1=45 MAXTEMP=hwmon0/pwm1=55 MINSTART=hwmon0/pwm1=4 MINSTOP=hwmon0/pwm1=0 The reaction to the buttons is much easier to set up. Install the esekeyd package and configure it:
# apt install esekeyd # nano /etc/esekeyd.conf Put the command to shutdown and reboot:
POWER:/sbin/shutdown -h now RESTART:/sbin/reboot Save, reboot the device. Now the main important areas of the system are installed and configured, the remaining actions will relate to additional software.
OMV installation
Add the OMV repository and install the main package:
# echo "deb http://packages.openmediavault.org/public erasmus main" > /etc/apt/sources.list.d/openmediavault.list # apt update # apt install openmediavault-keyring # apt install openmediavault apt ( 457), . , .
apt collectd nginx:
dpkg: dependency problems prevent configuration of openmediavault: openmediavault depends on collectd (>= 5.1.0); however: Package collectd is not configured yet. openmediavault depends on nginx (>= 1.6.2); however: Package nginx is not configured yet. nginx /etc/nginx/sites-available/defaultlisten [::]:80 default_server;
IPv6 .
collectd hostname ip /etc/hosts. In our case127.0.1.1 dns325
:
# apt install -f . :
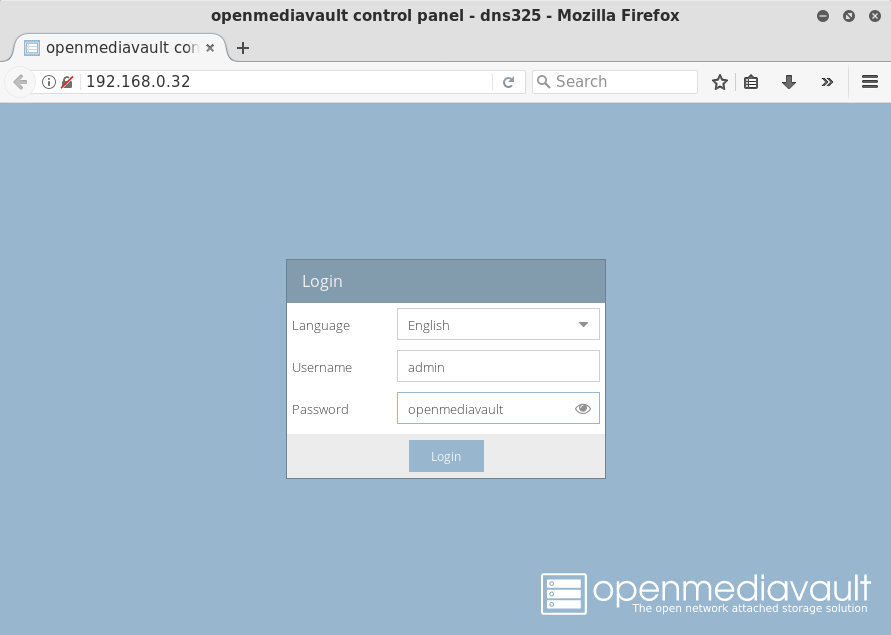
# omv-initsystem Everything! . 192.168.0.32, .
Conclusion
, , USB .
, . Linux. .
OpenMediaVault 3.x ("Erasmus"), -. , , OMV , D-Link.
. , , , .
: , , - . DLNA , . -, , , nginx + FastCGI.
Enjoy Embedding!
')
Source: https://habr.com/ru/post/327076/
All Articles