Instructions for publishing an Android application on Google Play
Following the instructions for publishing an application on the App Store, we lay out an internal rule of Live Taiping on publishing applications on Google Play, compiled by the management department with the active participation of the Android Development Team Leader Alexander Mirko . Regardless of how cool you are and experienced project manager, there is always a chance to forget something. This manual is designed to make your life easier.
So, what should PM do during the publication process:
All the details - under the cut.
')
UPD on 04/25/2017: added sections on alpha and beta testing and phased implementation, added sections "Ensuring assembly with a digital signature" and "Technical requirements for the apk-file", made a remark about ASO and made cosmetic edits.
In order to publish the application on Google Play, you need a developer account. This is a special type of account that allows you to upload an application to Google Play. You can create it using a standard Google account. A necessary part of the process is making a one-time payment for a developer agreement in the amount of $ 25.
→ Follow the link to create a developer account.
After payment you will need to fill in the data for the developer account and complete the registration.
Key points from the Google Play Software Distribution Agreement that you should be aware of:
For marketing materials there are the following requirements:
For urgent releases or MVP checks, the minimum is allowed for PMʻa - to make marketing materials that meet the requirements of the store. In other projects it is necessary to ensure that marketing materials are the maximum contribution to the success of the project.
Starting the preparation of marketing materials is with texts.
The requirements for Google Play are as follows:
The main difference between the short description from the full one is that the full one is available on the desktop, and the short one is created for mobile devices.
See the full Google Play requirements for the text and its features here (How to specify data for Google Play → About the product).
In general, the design of the application in the stores (App Store Optimization, or ASO) is a whole art, to which a separate self-educated person is allocated, and not to tell about it in a few words. There are already good materials on this topic, such as such .
The text, like any other marketing material, must be coordinated with the client. It happens this way: before the meeting, PM makes various options for materials and discusses with the client during the meeting.
This article on Appractor will help you write good text for Google Play (also suitable for the App Store).
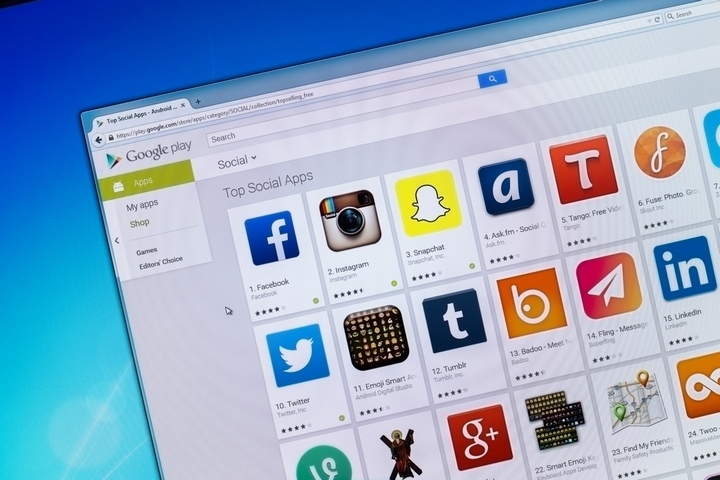
The maximum number of screenshots available for download to one application is eight. At least two. How many screenshots to download - an open question. On the one hand, we need to visually and from the advantageous side show the functional features of the application for the user. On the other hand, it is necessary to form the user's desire to download the application and see what else is there, what was not in the screenshots. Therefore, before you make the maximum number of screenshots, you need to think about their need.
To create screenshots straight from the device, there is the Clean Status Bar application. It will clear the status bar from debris: make the battery full, put 12:00 on the clock and optionally display the icons 3G and WiFi. You can install the application by the link .
Guideline requirements:
Google Play screenshots requirements are available here .
The main purpose of the screenshots is to let the user know at a glance what your application is about. Therefore, the first screenshot should be as informative and as attractive as possible. The remaining screenshots show the various functional features of the application.
If your application has a version for tablets, then you need to upload separate screenshots for seven- and ten-inch screens (thus you will prove that your application is optimized for tablets). A good solution is to make the screenshot source as large as possible (for example, ten inches) and, if necessary, make smaller copies of screenshots for small devices.
Good article with a lot of information, but images are not available.
An example of high-quality screenshots
The icon is a small image that identifies our application among the rest. If the client has a logo, it is often made an icon. Perhaps we will set a goal - to develop an icon and logo. In any case, the approach to the icon is the same as for any other marketing material: first we make options, then we go to the customer with these options and discuss.
Guideline requirements:
In the description, you need a high resolution icon with the same image as the Android application icon. When creating it, follow these guidelines .
Display icons in the store
This is an important part of the marketing company, because it allows the most profitable to present the application to the user. Adding a video is optional in itself, but if we care about the customer and users and we have the time and budget, then it is better to do it.
Google Play Requirements:
On play.google.com, videos are always located at the beginning of the description. In the Play Market application, the promo video playback button will be superimposed on the “Recommended” image at the top of the screen.
Videos should be short (from 30 seconds to 2 minutes) and demonstrate the most attractive features of the application. On a device with Android 4.4 or later, you can record video from the device using the adb shell command screenrecord.
In the picture for the “Recommended” section, you can demonstrate the graphical capabilities of the application to potential users. This image is necessary to show the application on different pages of Google Play.
Google Play banner requirements:
The picture for the “Recommended” section is located above the application information in the Play Market. If a promo clip is loaded, a button will be placed on top of it.
Example of the location of the banner on Google Play
The age limit system for games and applications takes into account the peculiarities of legislation and the culture of individual countries. This allows developers to more accurately determine content restrictions and distribute applications to the audience for which they are intended.
To set an age limit, log in to the Google Play Developer Console and fill out a questionnaire for each of your applications. Programs that are not assigned a rating may be blocked for individual users or countries.
You are required to fill out questionnaires to establish age limits and follow recommendations for assessing content. Applications that are not assigned a restriction can be removed from Google Play.
Attention! In the questionnaire, give truthful and accurate answers, otherwise the application may be deleted or blocked.
After that you can view age limits and profiles on the page Age restrictions . If you want to re-fill in the application form, click New Survey on the Age Restrictions page.
A digital signature is necessary for Google Play to identify the developer, and in the future only this developer can update / modify the application. In addition, many services are tied to a digital signature, such as the Facebook SDK, the VK SDK, and most Google services.
The digital signature is placed in the keystore (file with the .keystore or .jks extension). The following must be attached to the storage:
We consider this section important. From our experience, we learned a sad lesson that customers, especially those who order applications from outsourcers or freelancers, unknowingly pay little attention to such important things as the digital signature of the application. Therefore, the manager must undertake obligations and make sure that the application is signed and the key, along with the accompanying passwords, was not forgotten, was not lost, or did not fall into the wrong hands after publication.
Attention! Keys must be kept in a safe place. If you lose access to the repository or passwords to it, then there is no way back. And even Google will not help. You will have to publish the application with a new package name and a new key. In addition, you will need to update the description of the original application and close it to share. Loss of a file or passwords will result in a complete tragedy for your application: users will have to delete the current version and download a new version from Google Play, and you will lose statistics, downloads, audience and much more, for which you have worked so hard. In general, an unpleasant event. (see p. " Signature for the application ")
It is considered good practice to sign a group of your applications with the same digital signature. Firstly, you will not get entangled in them, and secondly you will get a number of nice bonuses. For example, you can organize secure communication between your applications through Intent, custom <user-permission> and its property android: protectionLevel = "signature". But this should already know the developer.
Sometimes the customer plans to sell content in the application, or to make the application itself paid. It should start with the fact that in your developer account after downloading the application, you can choose the type of application: paid or free.
You can make a paid application free without having to re-display the application in the store. But in order to make the free application paid, you will need to lay out the application in the store with the new package name and price indication.
To specify the price of the application, you will need to link your developer account to the Google Payments Merchant Center. This is required in order to specify tax rates.
Important: linking your account to Merchant Center can be done only once, pay attention to this. If you make a mistake when linking Google Payments Merchant Center, you will have to give $ 25 for creating a new developer account.
→ Account creation steps are described here .
After you have made a binding, you must specify the sales tax for the region. To date, we have no experience in such operations, so it would be advisable to consult with someone who has it. How to specify a sales tax for a region is indicated by reference .
If the client is Russian, everything is simpler and more difficult at the same time, because for clients from Argentina, Russia, Taiwan, India, tax deductions are made independently. Thus, we must register as an individual entrepreneur and pay taxes on the sale of the application ourselves. Based on this, we include in the price of the application ALL taxes, which we will subsequently pay ourselves. Google will not make any deductions from the sale.
Deductions Google does not produce, but carries an operating fee in the form of 30% of the net price. Net price - price minus all tax charges.
Suppose that the price of the application is 100 Japanese yen, and VAT is 20%.
The developer lists VAT to the appropriate authorities in the amount of 17 Japanese yen.
Formula: Application price - (application price * 1 / (1 + tax rate))
100 Jap Yen - (100 Jap. Yen * 1 / 1.2) = 17 Jap. yen
Developer's income after paying an operating fee of 30% and VAT: 58 Japanese yen.
Formula: price without VAT * 70%
83 Jap Yen * 0.7 = 58 Jap. yen
More information about tax fees and rules of Google Play is available here .
After you have registered your account and entered the tax collection information, you can specify the price of the application, making sure that the price falls within the price range set for your country. All ranges are here .
The price of the application is set in local currency. In order to view the price of the application, you must:
As the owner of the application, we are entitled to set prices for each country in accordance with our whims. For this you need:
Important: if the client plans to earn on the application as the main source of income, you should tell him about the need to update the prices of the application in accordance with the exchange rate. To do this, check the boxes next to the countries you need and click Update currency rates on the "Prices and Pricing" screen.
- - . . Google Play — , . . , , , , Google Play , .
.
, , , . , . - . , .
, — . , : - . , . , , , .
. 10, 25, 50, 75 100% .
.
, :
.
, . , .
So, what should PM do during the publication process:
- Create an account in the Google Play Developer Console for the customer, if the customer does not have one, or offer to publish from our account.
- Issue privacy policy.
- Prepare marketing materials (icon, screenshots, APK, banner, text, promo).
- Ensure that the assembly has a digital signature certificate.
- Set up payment for using the application.
- Send assembly to Google Play.
All the details - under the cut.
')
UPD on 04/25/2017: added sections on alpha and beta testing and phased implementation, added sections "Ensuring assembly with a digital signature" and "Technical requirements for the apk-file", made a remark about ASO and made cosmetic edits.
Account creation
In order to publish the application on Google Play, you need a developer account. This is a special type of account that allows you to upload an application to Google Play. You can create it using a standard Google account. A necessary part of the process is making a one-time payment for a developer agreement in the amount of $ 25.
→ Follow the link to create a developer account.
After payment you will need to fill in the data for the developer account and complete the registration.
Terms of use
Key points from the Google Play Software Distribution Agreement that you should be aware of:
- You are fully responsible for your product and the content it contains;
- You agree to answer user questions within three business days and “urgent questions as defined by Google” within 24 hours;
- agree to maintain the confidentiality and security of user data;
- you are not trying to deceive, cause any harm or mislead the user and Google;
- You do not distribute prohibited content. All Products distributed via Google Play must comply with the Program Policies for Developers;
- You authorize Google to return the full price of the Product or transaction within the application to you on your behalf if the buyer requests a refund at any time after purchase. Removing the product does not relieve you of any liability to any kind of payments;
- In general, Google disclaims any liability related to your product.
Preparation of marketing materials
For marketing materials there are the following requirements:
- requirements stor. These requirements are monumental and rarely subject to change, they have clear descriptions;
- Requirements that arise from project objectives: what is more relevant for the Central Office of this application, what kind of marketing the project has, etc. Sometimes it’s important how the client sees it: some clients are ready to use simple screenshots and simple texts, other customers constantly change their opinions about screenshots / texts, and we need to work with it.
For urgent releases or MVP checks, the minimum is allowed for PMʻa - to make marketing materials that meet the requirements of the store. In other projects it is necessary to ensure that marketing materials are the maximum contribution to the success of the project.
Text
Starting the preparation of marketing materials is with texts.
Text requirements
The requirements for Google Play are as follows:
- application name: no more than 30 characters;
- short description: no more than 80 characters;
- short description: no more than 80 characters;
- full description of no more than 4,000 characters.
The main difference between the short description from the full one is that the full one is available on the desktop, and the short one is created for mobile devices.
See the full Google Play requirements for the text and its features here (How to specify data for Google Play → About the product).
In general, the design of the application in the stores (App Store Optimization, or ASO) is a whole art, to which a separate self-educated person is allocated, and not to tell about it in a few words. There are already good materials on this topic, such as such .
Coordination of the text with the client
The text, like any other marketing material, must be coordinated with the client. It happens this way: before the meeting, PM makes various options for materials and discusses with the client during the meeting.
This article on Appractor will help you write good text for Google Play (also suitable for the App Store).
Screenshots
Number of screenshots
The maximum number of screenshots available for download to one application is eight. At least two. How many screenshots to download - an open question. On the one hand, we need to visually and from the advantageous side show the functional features of the application for the user. On the other hand, it is necessary to form the user's desire to download the application and see what else is there, what was not in the screenshots. Therefore, before you make the maximum number of screenshots, you need to think about their need.
To create screenshots straight from the device, there is the Clean Status Bar application. It will clear the status bar from debris: make the battery full, put 12:00 on the clock and optionally display the icons 3G and WiFi. You can install the application by the link .
Screenshots Requirements
Guideline requirements:
- JPEG or 24-bit PNG (without alpha channel);
- not less than 320 pixels;
- no more than 3840 pixels;
- aspect ratio should not exceed 2: 1.
Google Play screenshots requirements are available here .
Screenshot Tips
The main purpose of the screenshots is to let the user know at a glance what your application is about. Therefore, the first screenshot should be as informative and as attractive as possible. The remaining screenshots show the various functional features of the application.
If your application has a version for tablets, then you need to upload separate screenshots for seven- and ten-inch screens (thus you will prove that your application is optimized for tablets). A good solution is to make the screenshot source as large as possible (for example, ten inches) and, if necessary, make smaller copies of screenshots for small devices.
Good article with a lot of information, but images are not available.
An example of high-quality screenshots
Icon
The icon is a small image that identifies our application among the rest. If the client has a logo, it is often made an icon. Perhaps we will set a goal - to develop an icon and logo. In any case, the approach to the icon is the same as for any other marketing material: first we make options, then we go to the customer with these options and discuss.
Store requirements for the icon
Guideline requirements:
- 32-bit PNG (with alpha channel) we always do without an alpha channel;
- dimensions: 512 x 512 pixels;
- maximum file size: 1024 KB
In the description, you need a high resolution icon with the same image as the Android application icon. When creating it, follow these guidelines .
Display icons in the store
Promo video
This is an important part of the marketing company, because it allows the most profitable to present the application to the user. Adding a video is optional in itself, but if we care about the customer and users and we have the time and budget, then it is better to do it.
Store requirements for promotions
Google Play Requirements:
- specify the URL of a separate video on YouTube, not a playlist or channel;
- Do not use age-limited videos as promo videos;
- Use the full link to the YouTube video instead of the shortcut:
On play.google.com, videos are always located at the beginning of the description. In the Play Market application, the promo video playback button will be superimposed on the “Recommended” image at the top of the screen.
Video Tips
Videos should be short (from 30 seconds to 2 minutes) and demonstrate the most attractive features of the application. On a device with Android 4.4 or later, you can record video from the device using the adb shell command screenrecord.
Banner
In the picture for the “Recommended” section, you can demonstrate the graphical capabilities of the application to potential users. This image is necessary to show the application on different pages of Google Play.
Banner requirements
Google Play banner requirements:
- JPEG or 24-bit PNG (without alpha channel);
- 1024x500 pixels.
The picture for the “Recommended” section is located above the application information in the Play Market. If a promo clip is loaded, a button will be placed on top of it.
Example of the location of the banner on Google Play
Tips
- Do not place important information around the edges, especially in the lower third of the frame.
- logo is better placed in the center, aligned horizontally and vertically.
- for text, use a large font.
- Remember that the picture can be displayed separately, without the application icon.
Age restrictions
Store requirements
The age limit system for games and applications takes into account the peculiarities of legislation and the culture of individual countries. This allows developers to more accurately determine content restrictions and distribute applications to the audience for which they are intended.
To set an age limit, log in to the Google Play Developer Console and fill out a questionnaire for each of your applications. Programs that are not assigned a rating may be blocked for individual users or countries.
You are required to fill out questionnaires to establish age limits and follow recommendations for assessing content. Applications that are not assigned a restriction can be removed from Google Play.
Attention! In the questionnaire, give truthful and accurate answers, otherwise the application may be deleted or blocked.
Filling in the form
- Sign in to the Google Play Developer Console.
- Select an application.
- In the left menu, click Age Restrictions.
- Read the questionnaire information and enter your email address. At this address, IARC representatives will be able to contact you.
- Click Continue .
- Select a category.
- Fill in the form. If you specified answers to all questions in the section and you want to change one of them, click Edit . To finish filling out the questionnaire later, click Save Project . For each application, only one draft is available.
- Click Determine Age Limit .
- Select Set age limit on the page with general information about restrictions.
After that you can view age limits and profiles on the page Age restrictions . If you want to re-fill in the application form, click New Survey on the Age Restrictions page.
Specifications for the apk-file
- The size of the apk-file should not exceed more than 100 MB (and 50 MB for Android 2.2 and below, or for Play Market 5.2 and below, but let's forget about them already).
It happens that your application runs on static content (do not do this) or is a game and its size is more than 100 MB. Such an application can be divided into parts: the main -
up to 100 MB and several additional APK Expansion Files up to 2 GB each; - The apk-file should not be debuggable;
- The apk-file must be signed with a digital signature file (see Ensuring the assembly with a digital signature).
Providing assembly with digital signature
A digital signature is necessary for Google Play to identify the developer, and in the future only this developer can update / modify the application. In addition, many services are tied to a digital signature, such as the Facebook SDK, the VK SDK, and most Google services.
The digital signature is placed in the keystore (file with the .keystore or .jks extension). The following must be attached to the storage:
- store password - password for the keystore;
- key alias - the name of the key in the repository;
- key password - password to the key.
We consider this section important. From our experience, we learned a sad lesson that customers, especially those who order applications from outsourcers or freelancers, unknowingly pay little attention to such important things as the digital signature of the application. Therefore, the manager must undertake obligations and make sure that the application is signed and the key, along with the accompanying passwords, was not forgotten, was not lost, or did not fall into the wrong hands after publication.
Attention! Keys must be kept in a safe place. If you lose access to the repository or passwords to it, then there is no way back. And even Google will not help. You will have to publish the application with a new package name and a new key. In addition, you will need to update the description of the original application and close it to share. Loss of a file or passwords will result in a complete tragedy for your application: users will have to delete the current version and download a new version from Google Play, and you will lose statistics, downloads, audience and much more, for which you have worked so hard. In general, an unpleasant event. (see p. " Signature for the application ")
It is considered good practice to sign a group of your applications with the same digital signature. Firstly, you will not get entangled in them, and secondly you will get a number of nice bonuses. For example, you can organize secure communication between your applications through Intent, custom <user-permission> and its property android: protectionLevel = "signature". But this should already know the developer.
Setting up payment for using the application
Sometimes the customer plans to sell content in the application, or to make the application itself paid. It should start with the fact that in your developer account after downloading the application, you can choose the type of application: paid or free.
Change application type
You can make a paid application free without having to re-display the application in the store. But in order to make the free application paid, you will need to lay out the application in the store with the new package name and price indication.
Binding to Merchant Center
To specify the price of the application, you will need to link your developer account to the Google Payments Merchant Center. This is required in order to specify tax rates.
Important: linking your account to Merchant Center can be done only once, pay attention to this. If you make a mistake when linking Google Payments Merchant Center, you will have to give $ 25 for creating a new developer account.
→ Account creation steps are described here .
After you have made a binding, you must specify the sales tax for the region. To date, we have no experience in such operations, so it would be advisable to consult with someone who has it. How to specify a sales tax for a region is indicated by reference .
Features of working with taxes in some countries
If the client is Russian, everything is simpler and more difficult at the same time, because for clients from Argentina, Russia, Taiwan, India, tax deductions are made independently. Thus, we must register as an individual entrepreneur and pay taxes on the sale of the application ourselves. Based on this, we include in the price of the application ALL taxes, which we will subsequently pay ourselves. Google will not make any deductions from the sale.
Deductions Google does not produce, but carries an operating fee in the form of 30% of the net price. Net price - price minus all tax charges.
Example
Suppose that the price of the application is 100 Japanese yen, and VAT is 20%.
The developer lists VAT to the appropriate authorities in the amount of 17 Japanese yen.
Formula: Application price - (application price * 1 / (1 + tax rate))
100 Jap Yen - (100 Jap. Yen * 1 / 1.2) = 17 Jap. yen
Developer's income after paying an operating fee of 30% and VAT: 58 Japanese yen.
Formula: price without VAT * 70%
83 Jap Yen * 0.7 = 58 Jap. yen
More information about tax fees and rules of Google Play is available here .
After you have registered your account and entered the tax collection information, you can specify the price of the application, making sure that the price falls within the price range set for your country. All ranges are here .
Application price and currency
The price of the application is set in local currency. In order to view the price of the application, you must:
- On the Pricing & Distribution page , select the countries you need or select the Select All check box.
- See the price for each country in the corresponding column:
- prices for different countries are calculated at the current exchange rate, taking into account local specifics of pricing.
- if the local currency is not supported, the price in your default currency is valid for the country.
As the owner of the application, we are entitled to set prices for each country in accordance with our whims. For this you need:
- next to the country you need, click Edit ;
- enter the price;
- Click Apply.
Price update
Important: if the client plans to earn on the application as the main source of income, you should tell him about the need to update the prices of the application in accordance with the exchange rate. To do this, check the boxes next to the countries you need and click Update currency rates on the "Prices and Pricing" screen.
Configure alpha and beta testing
- - . . Google Play — , . . , , , , Google Play , .
.
, , , . , . - . , .
, — . , : - . , . , , , .
. 10, 25, 50, 75 100% .
.
, :
- Google Play Developer Console.
- .
- .
- .
- .
- . , .
- .
- . , .
- . , Google Play .
.
useful links
, . , .
Source: https://habr.com/ru/post/326874/
All Articles