SAP BUILD - user interface building tool
This is the second publication in the framework of the assistance to the participants of the competition “SAP Koder-2017” . If you chose the task “Sales promotion in a retail network”, you will certainly need an understanding of prototyping and system design and the coordination of the prototypes obtained at an early stage.
In the world of industrial software, it is no longer enough to gather information from sensors, from accounting, storage and production primary data, process it using sophisticated algorithms and use it to manage an enterprise or to report to the outside. Now the business user expects all this to be beautiful, comfortable, modern and desirable to work on mobile devices. Since consultants and software developers often do not pay enough attention to this issue, the risk of user rejection of quite high-quality applications is very high. SAP is often subject to similar criticism. Realizing this risk, SAP offers the community not only a software framework with a rich palette of visual components and a development environment, but also supporting tools such as SAP BUILD — a tool for analytics and software designer.
The most unpleasant situation is that you developed an interface, logic, created a working prototype, and users and / or customers do not like it. And especially sad that everything depends on the little things that could be solved at an early stage. If you take on the task of retail, user dissatisfaction is one of your main stumbling blocks. We know how to minimize UX problems with a handy and simple tool. Learn and use.
')
SAP BUILD is the SAP Cloud Platform service for quick prototyping of user interfaces. It provides practical solutions for building software solutions in the form of design environments, templates, helpers, training materials, and sample applications. Simply put, it gives organizations and individual developers a ready-made approach to building projects that put design and user convenience at the forefront.
Create an application using SAP BUILD
Let's try and we create an application SAPUI5 (OpenUI5) using the SAP BUILD tool. We will create an IoT application. Any IoT application collects and processes data from sensors.
In our example, we will create an application that will collect temperature and illumination data from a controller based on the Arduino platform. The principles of working with the controller, the organization of a free developer account in the SCP, the creation of a database and the inclusion of the SAP Cloud Platform for IoT service are discussed in detail in an article in our blog . Our goal is to create the idea of a graphical interface of the application, get feedback from future users and build a working prototype of the application that will display the received IoT data. Our application will be built on the principle of master-detail: on the main screen, display a table with data from several identical IoT devices, and on a slave, detailing on a particular selected device in the form of a table of indicators and graphs of their changes over time.
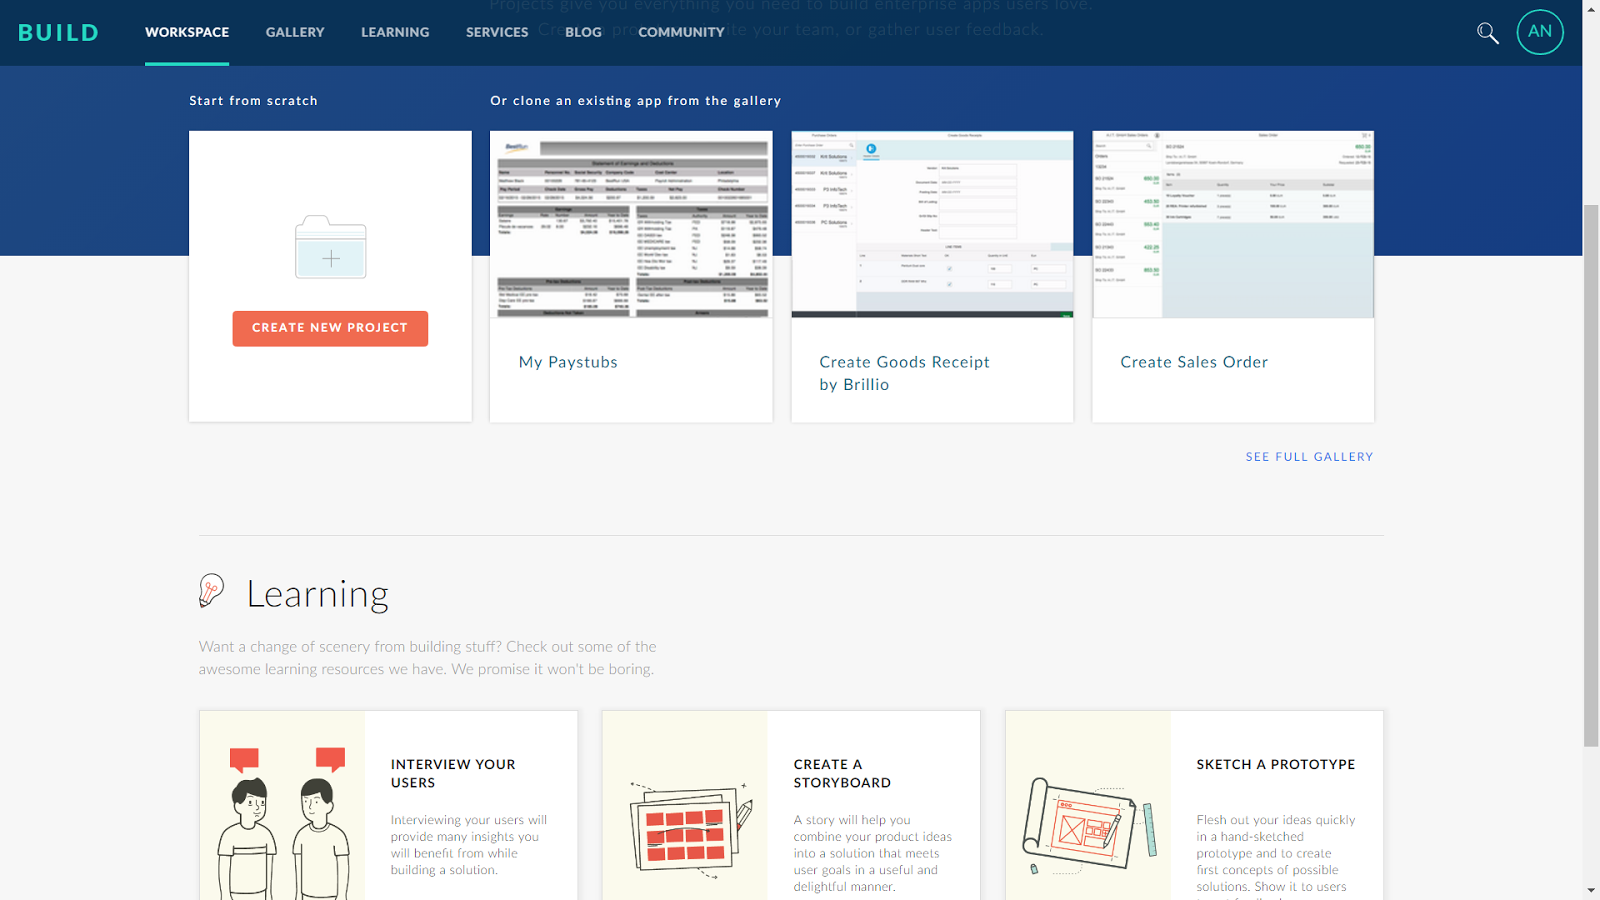
Let's start by registering with SAP BUILD. It is absolutely free, any software developer or just interested can register in the tool in a couple of clicks.

Immediately after registration, you can begin to create a project. The project is created from scratch or on the basis of an existing template. BUILD provides a large number of training materials about the sequence of steps in a project, the principles of operation of the tool, recommendations and best practices.
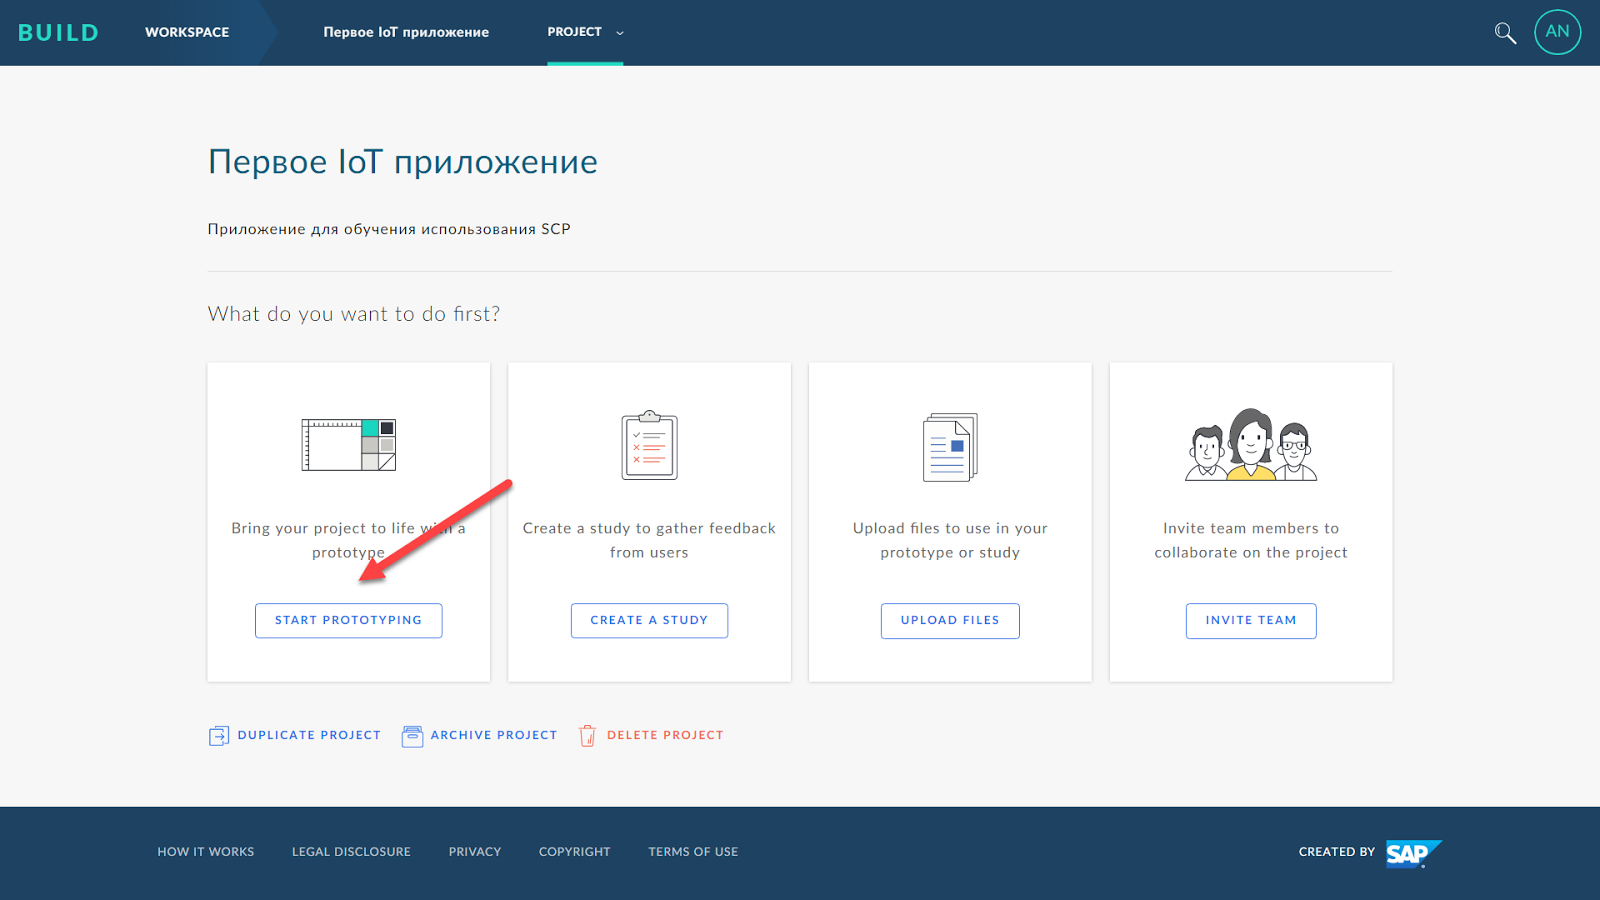
Create the “First IoT Application” project and begin its prototyping
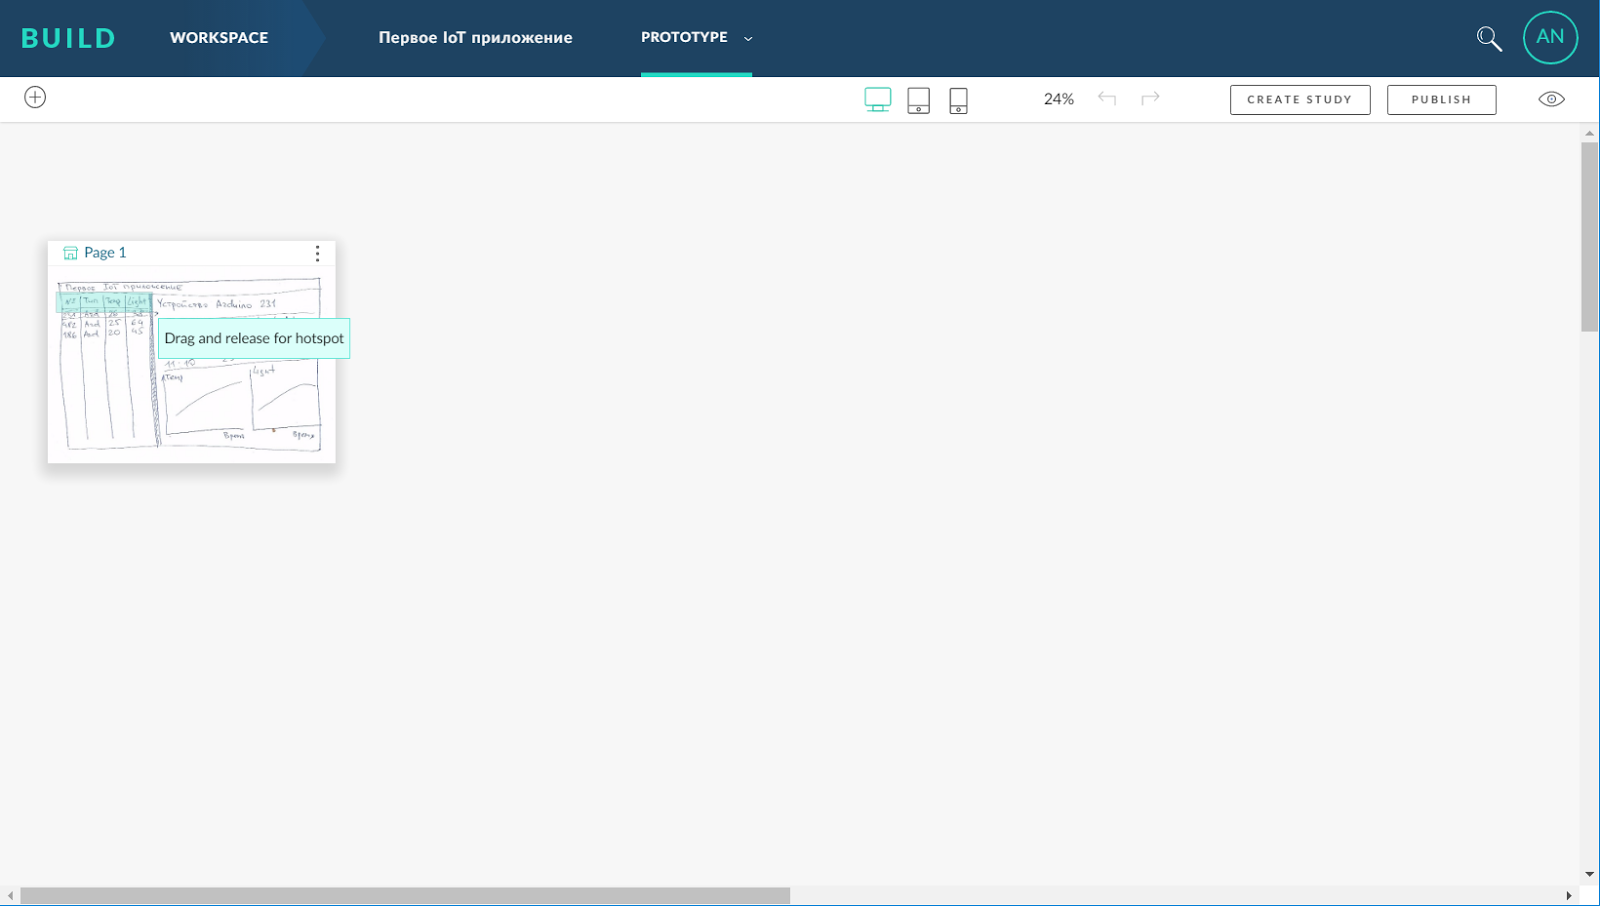
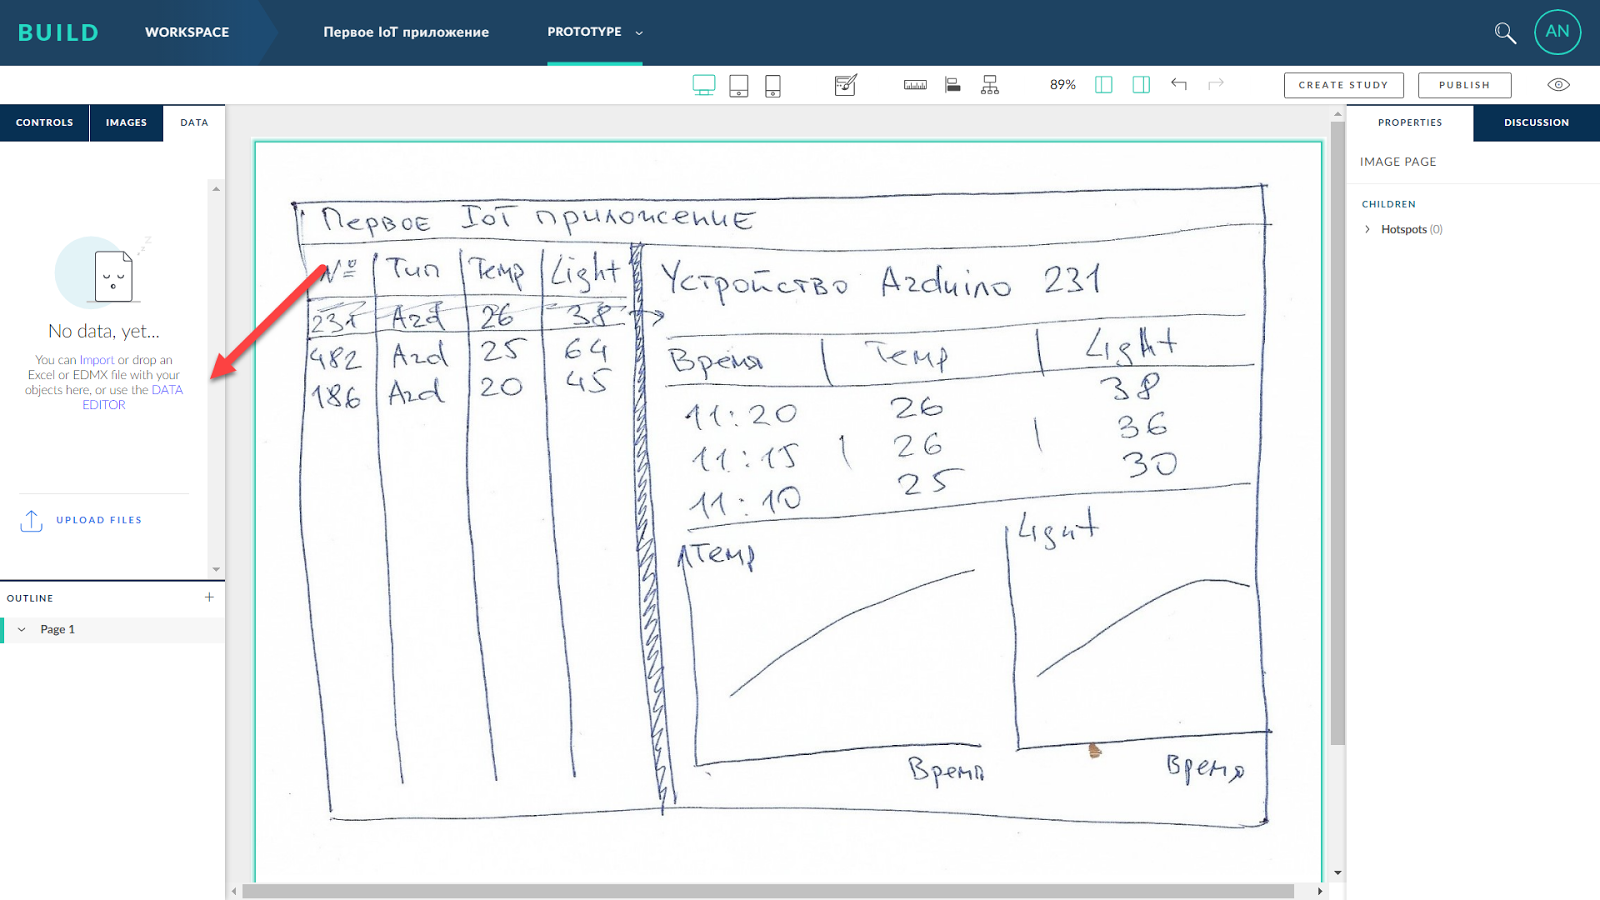
A prototype of the future application can be created on the basis of the proposed templates, and you can restrict yourself to using freehand drawings. To do this, it is necessary to schematically depict the future interface on paper or other usual media, digitize it, if necessary, and load it into the system.

The digitized “analog” interface prototype is loaded into the system and can be sent to the working group (including future users) for approval.

The “paper”, “analog” prototype of an application can be “alive”. If the application consists of two or more screens, the developer can assign areas of the picture, when clicked, which will take some action, for example, moving from one screen to another. This helps key users imagine the future application “on the move”. While the design of our application involves a single screen, so this feature is not used here.
The prototype can also be filled with demonstration data using the built-in data editor or by downloading demo data from Excel.
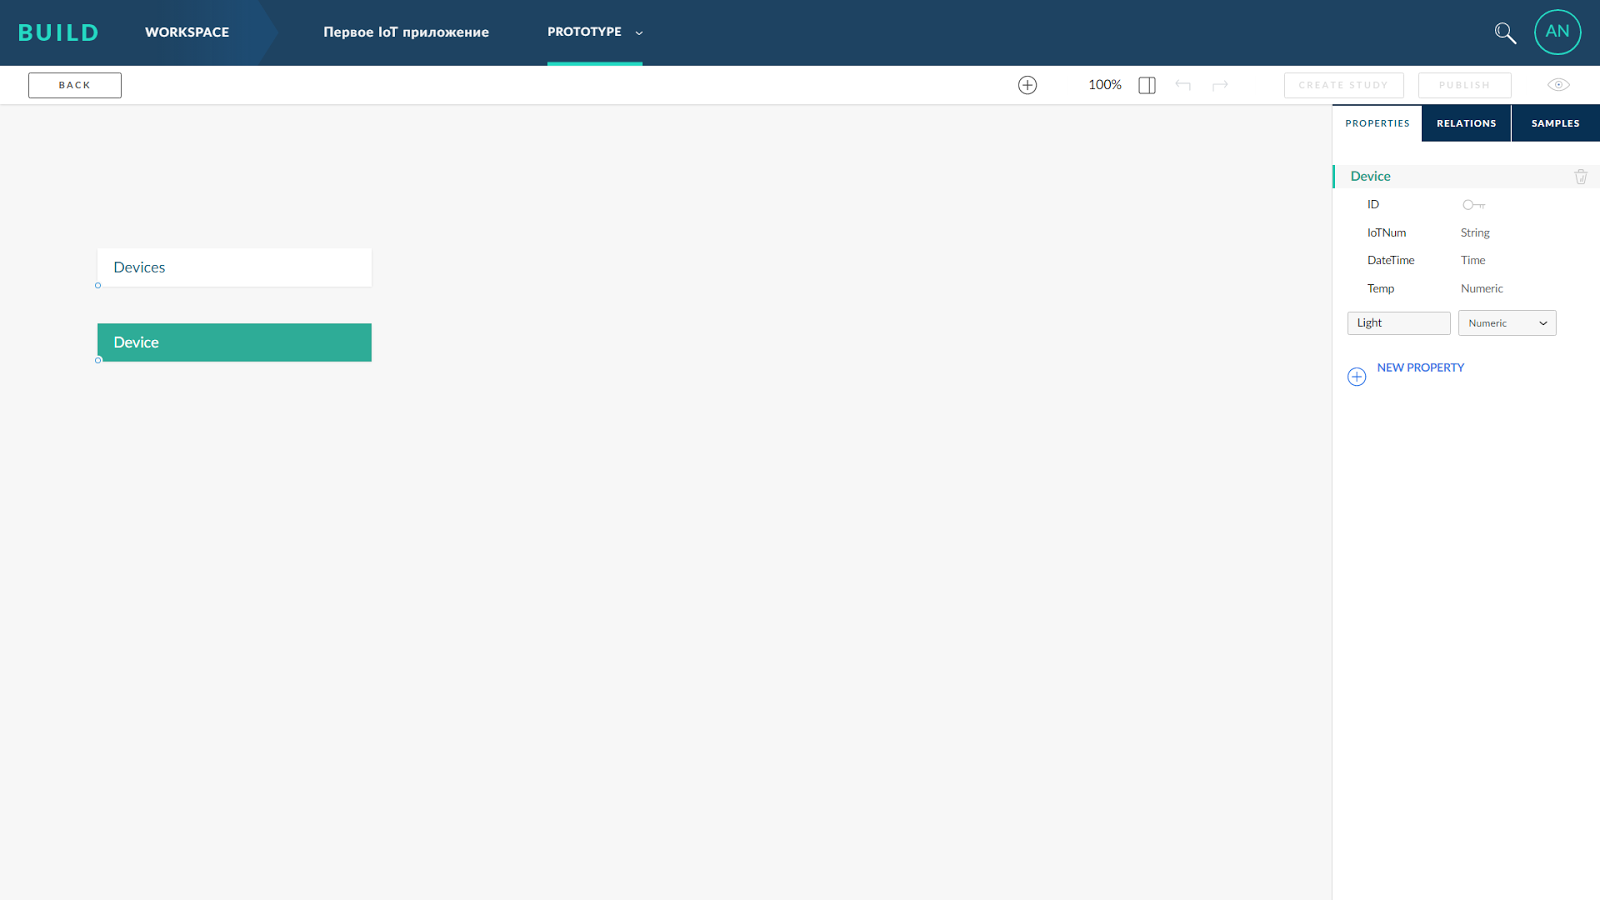
We set data sources, entities, fields, relations between entities and other parameters. We fill the sources with demo data and proceed to discussing the design with the project participants, including with future end users. The data scheme is based on the classical relational model and can be very complex.


After we formed the “analog” pages (screens) of the application, created and filled the sources of the demonstration data, described the transitions between the screens, created a discussion and formed a list of questions.
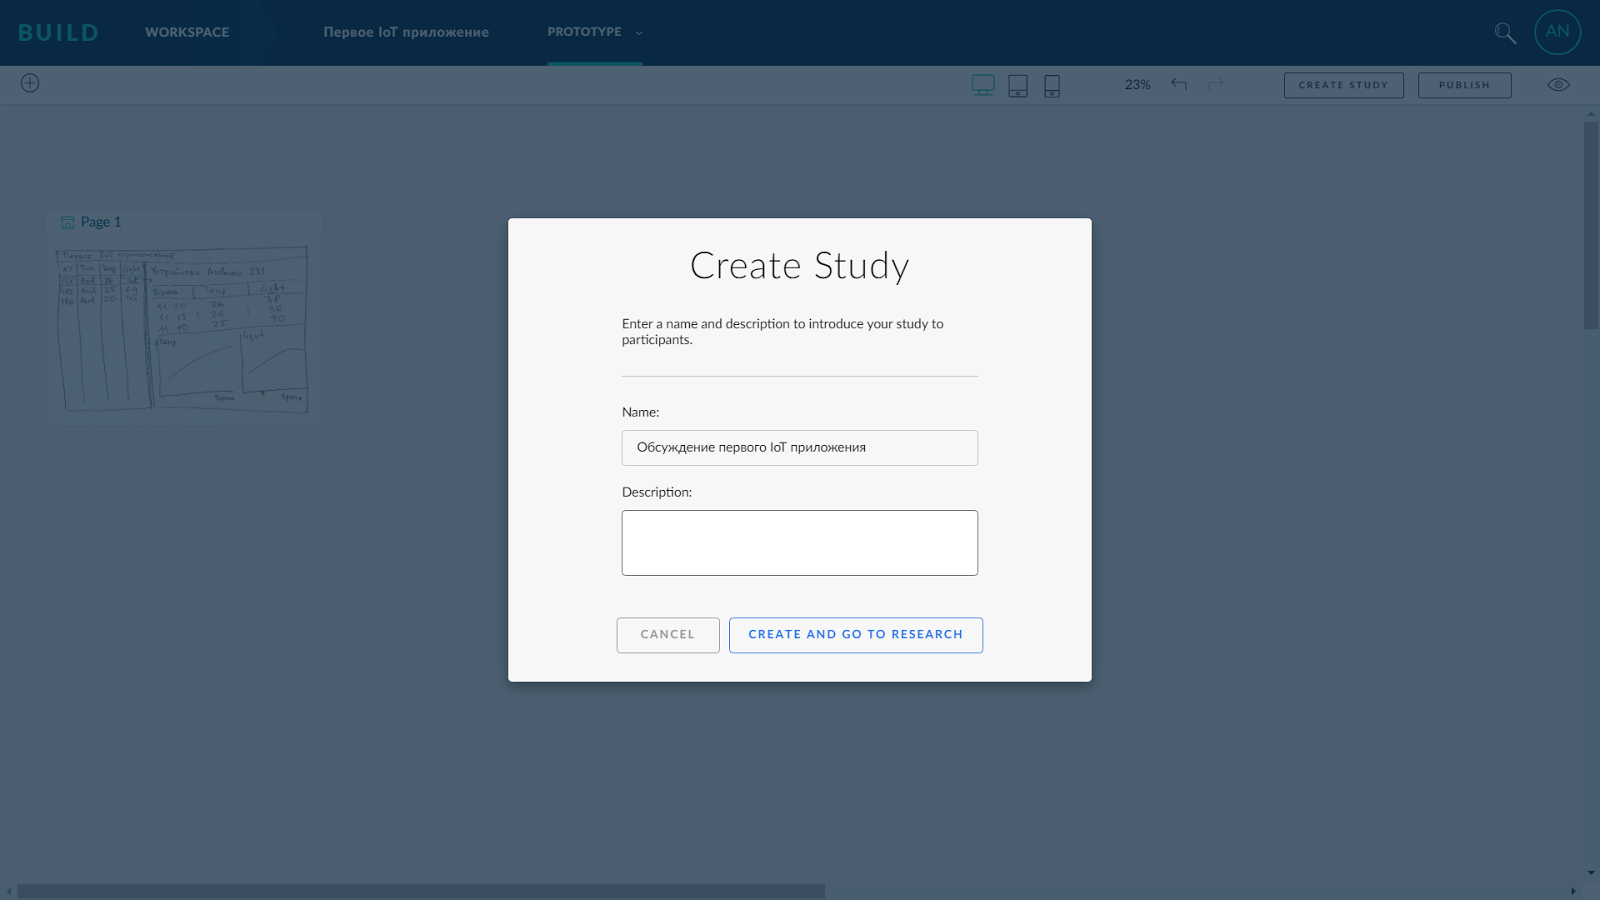
After creating the discussion heading, the BUILD offers to register questions to those participating in the discussion. After the preview, we publish a discussion for all participants.
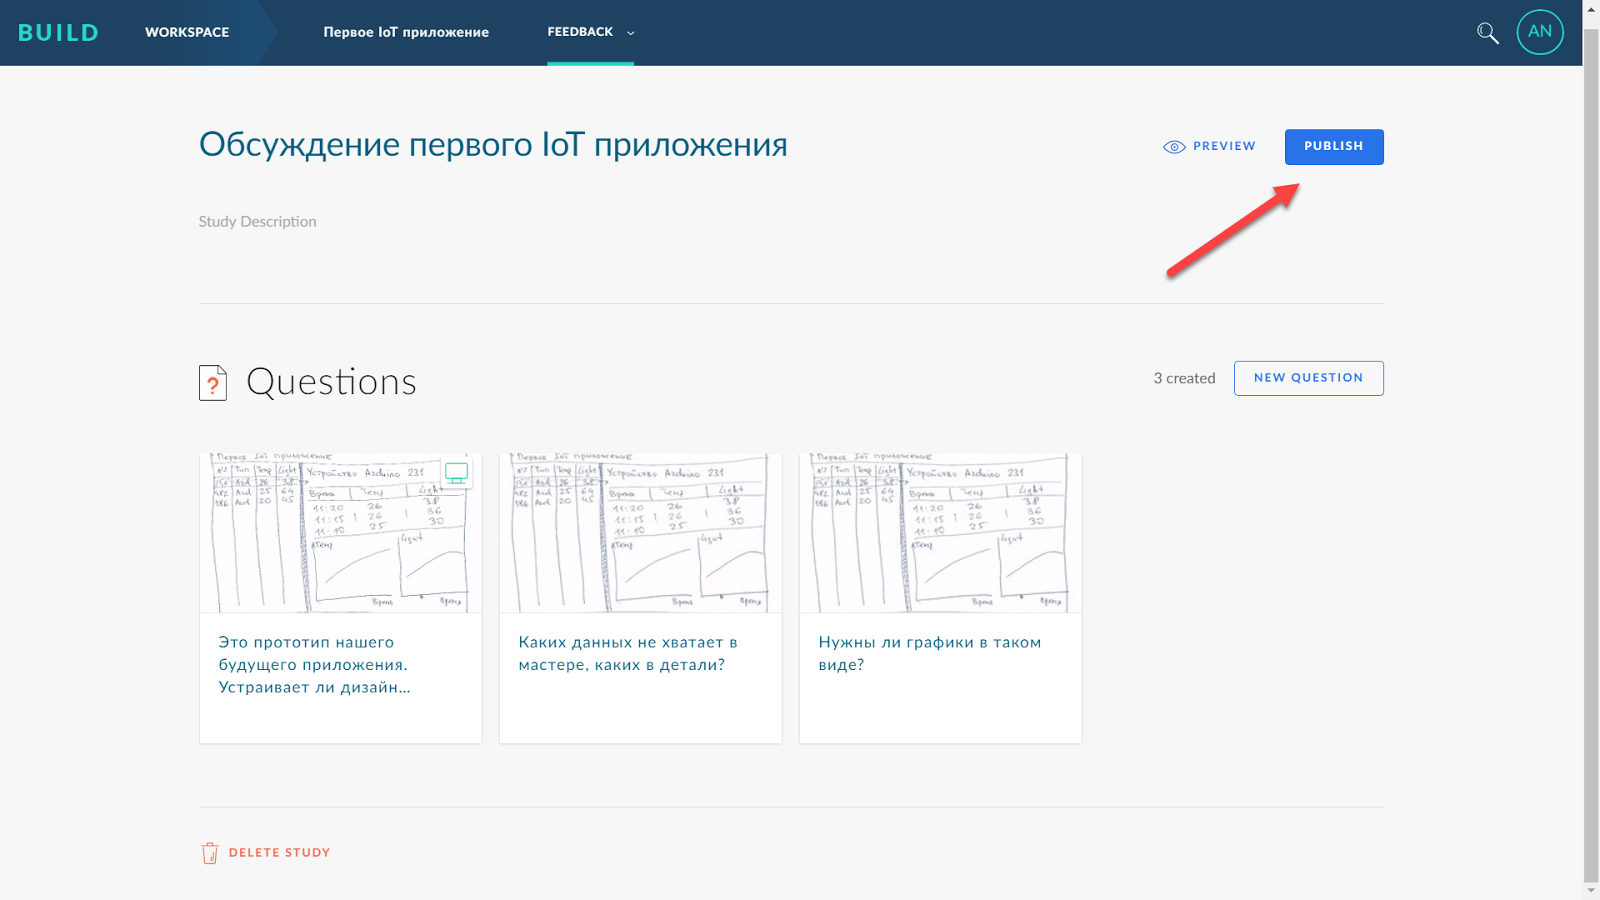
When publishing, BUILD returns a link to a discussion (survey) that can be sent to respondents.
After the discussion has been published, the BUILD shows a prototype statistics page and allows you to invite new participants to agree. A letter of invitation to the discussion comes to each participant, after clicking on the link, the BUILD system loads the discussion page.
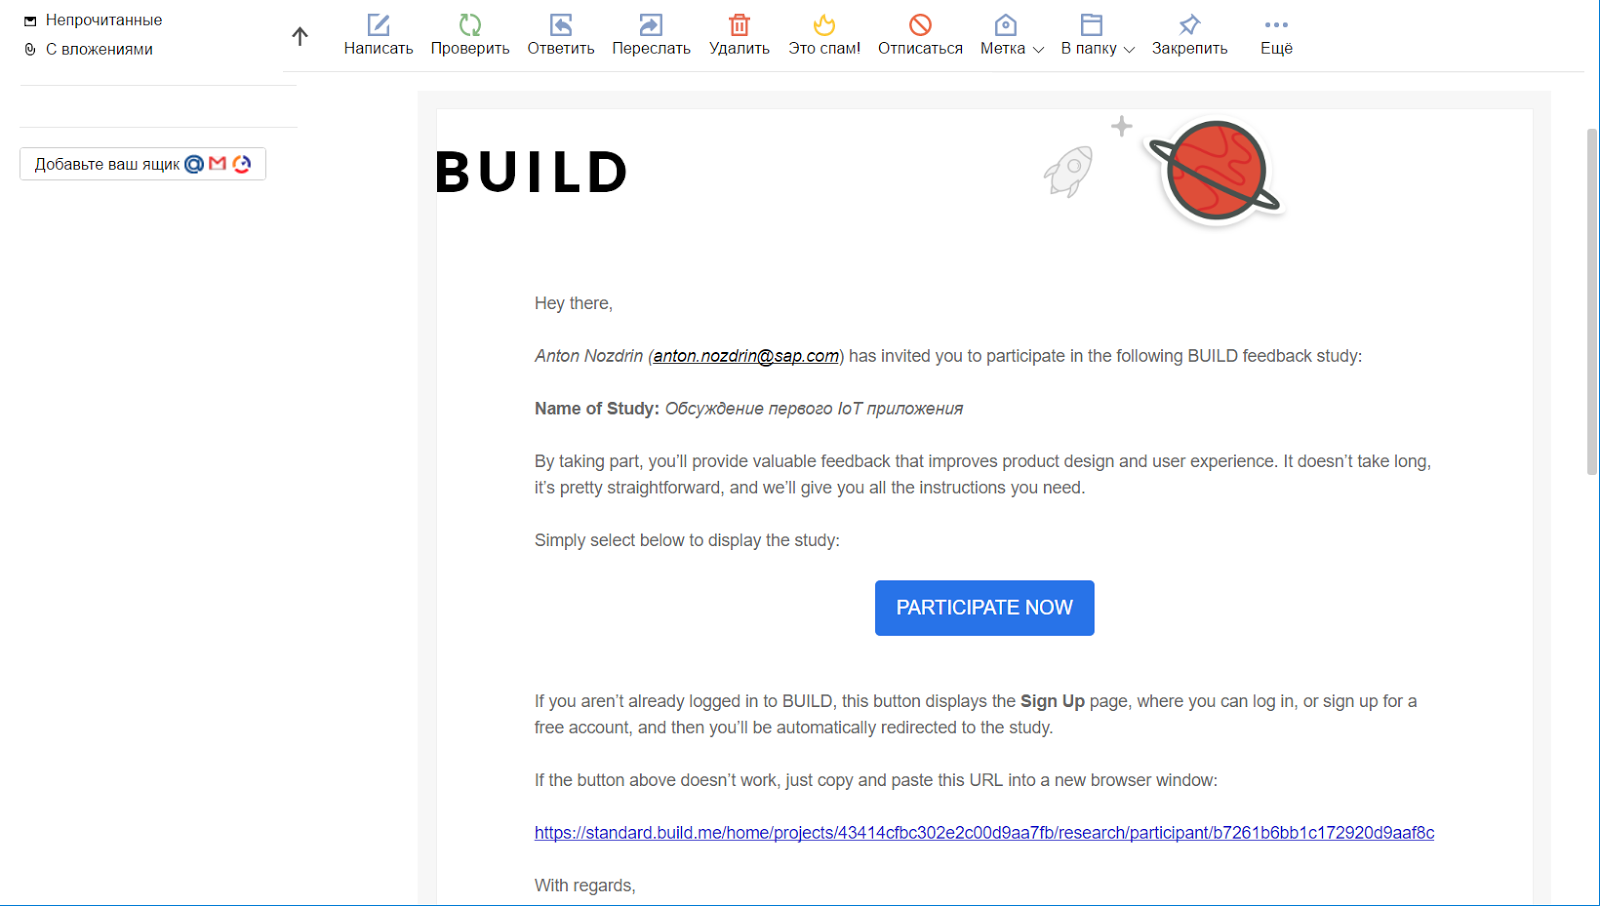
Discussion participants answer questions, make comments, and they can comment on certain areas of the "paper" application.

We see that users are not satisfied with the proposed interface concept (Master-detail on one application screen), they expect two independent application screens. We accept the point of view of the participants in the discussion and in the future we will build a two-screen application.
After several iterations of prototyping and collecting all possible feedback, you can start building a “digital” prototype of the application. To do this, go to the "application map" and add a new page, in our case, such as worklist. This will be the first of two screens of our future application - a list of all IoT sensors
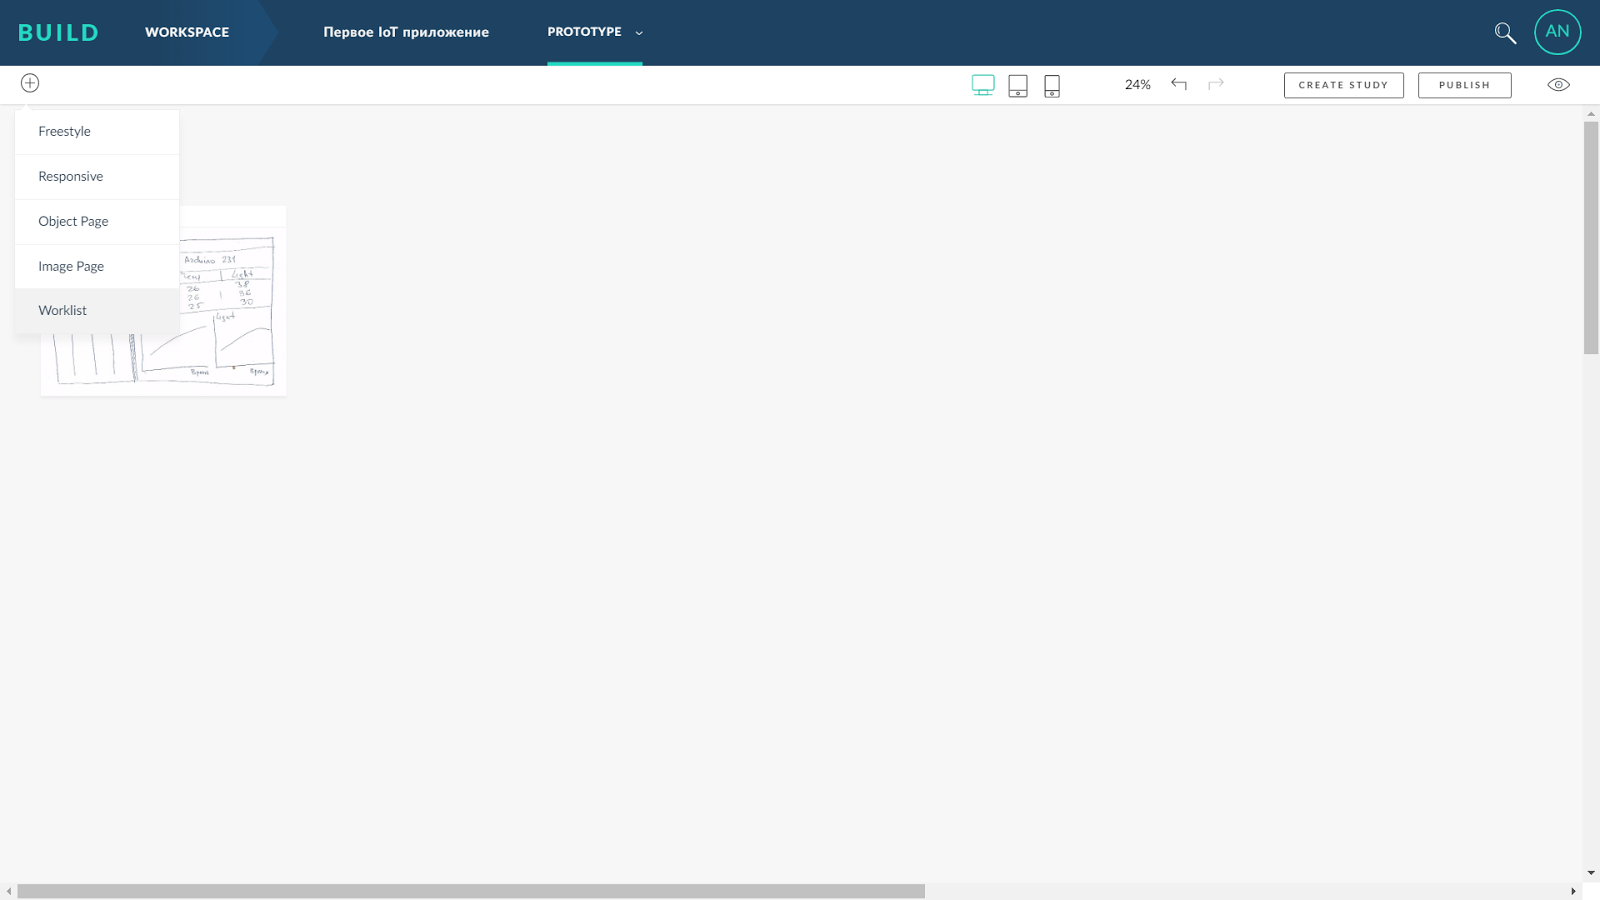
Immediately create a subordinate screen, also of the worklist type, and switch to the page editing mode.
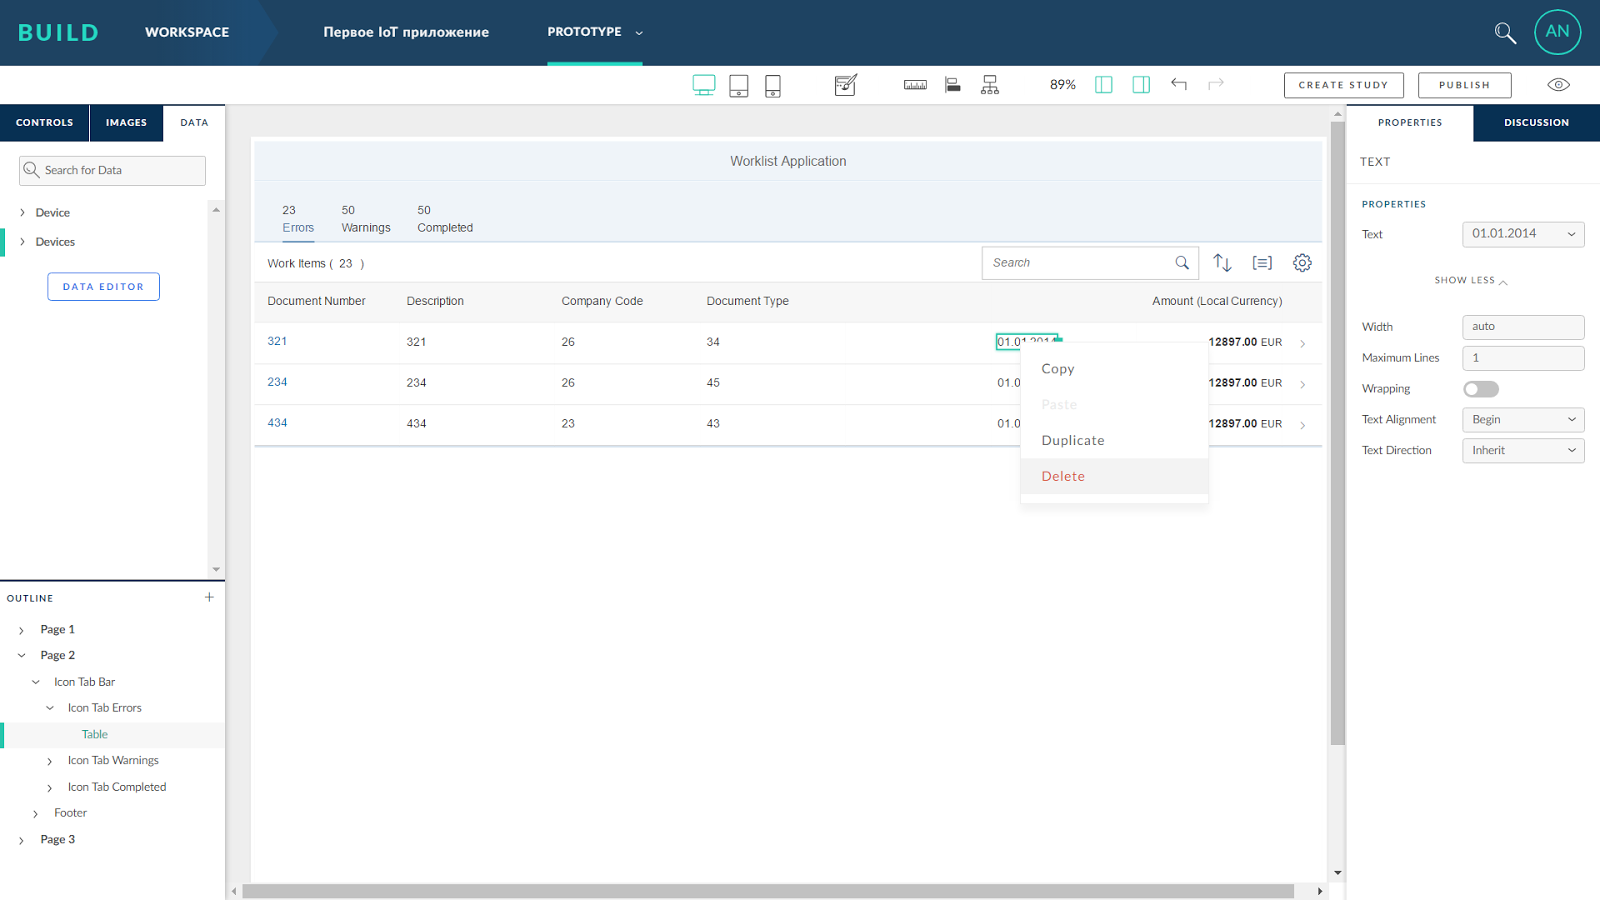
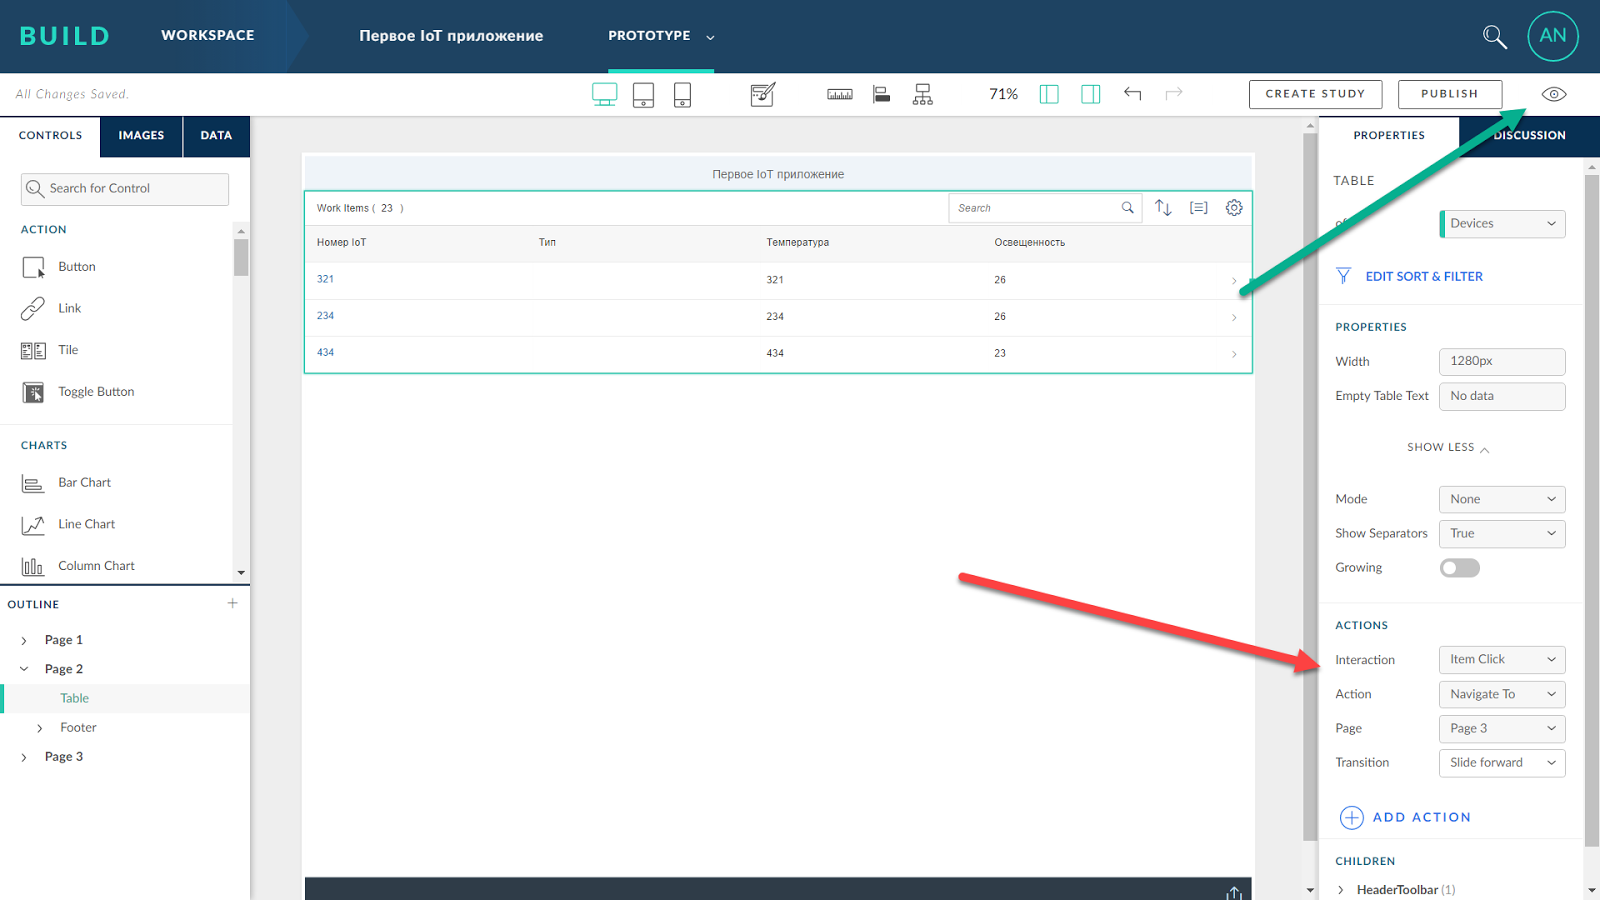
Drag the Devices data source onto the table and delete the extra fields. To modify the page design, use the built-in interface editor. It allows you to modify the generated application patterns and develop your own. In general, the structure and functionality of the editor is quite traditional and does not require additional explanation, only some experience with the tool is needed. Help with BUILD can be found at .

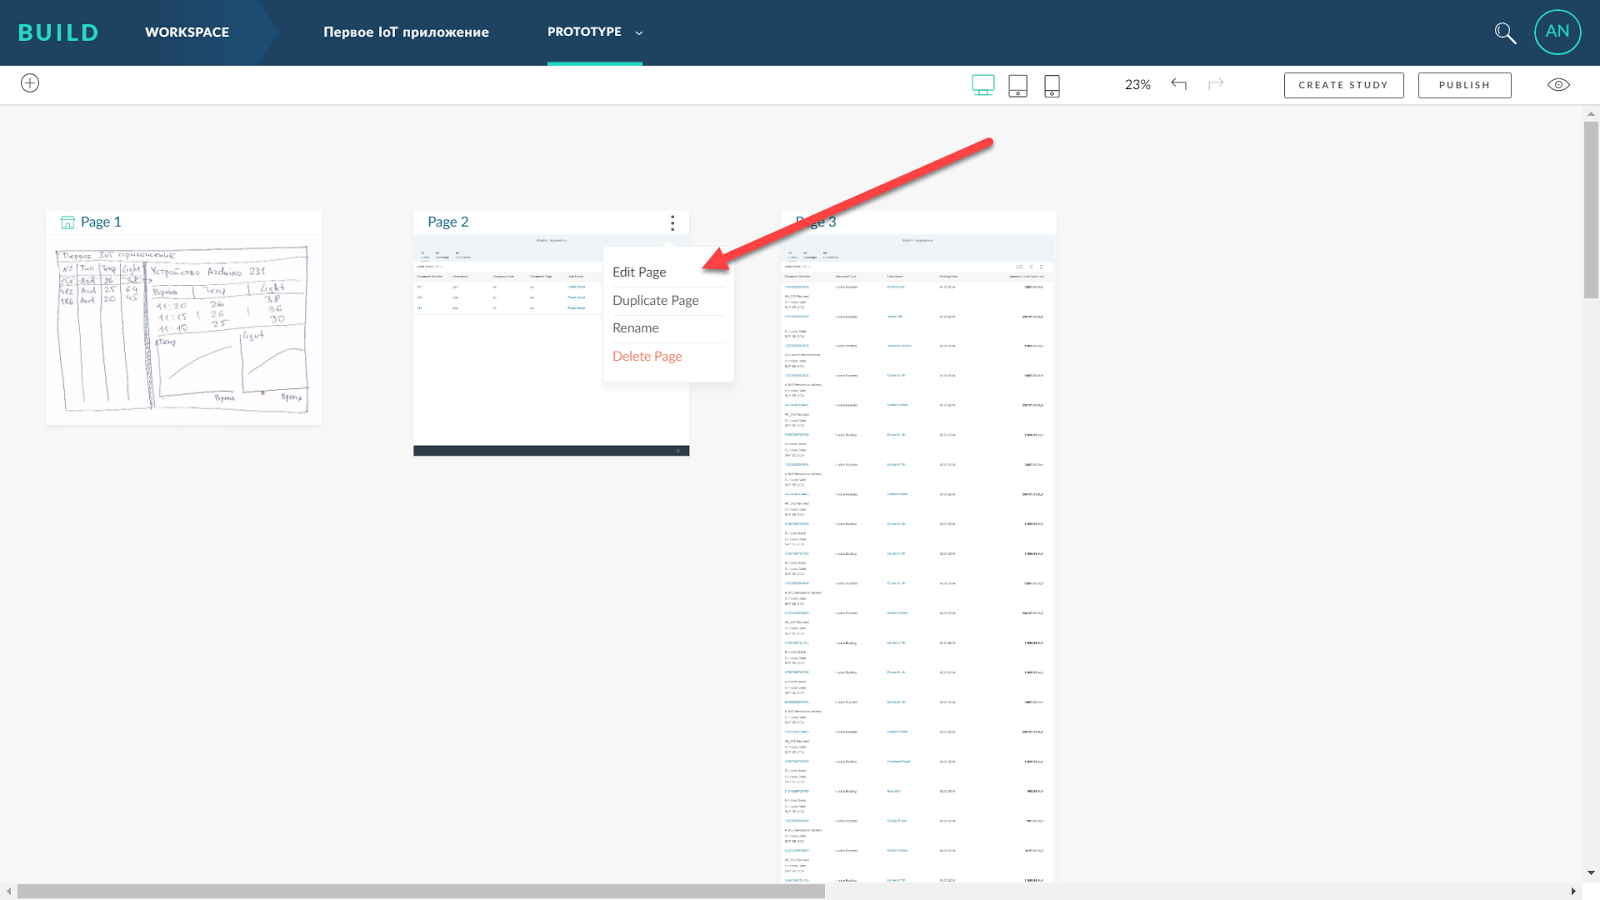
The result is a close to the desired "digital" prototype of the first screen. Doing the same thing with the second screen (in our case, Page 3)
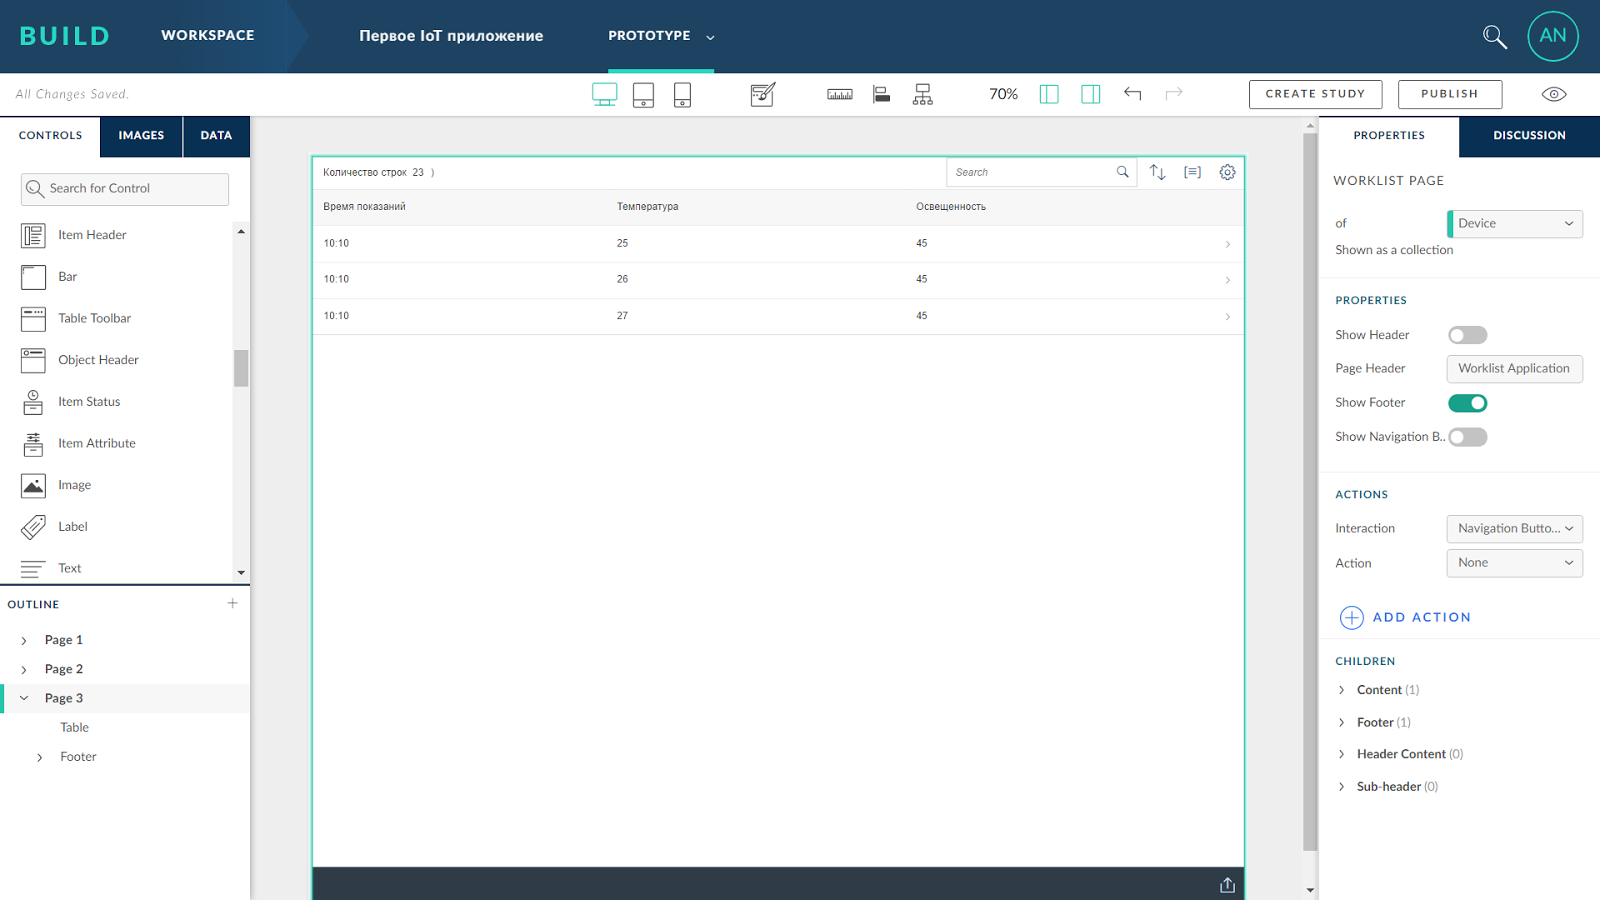
And we add on it temperature and light graphs agreed with key users.

If desired, you can add elements that improve the readability of the page - the boundaries of sections, labels, dividers between visual elements, icons, images, etc.
Finally, for the position of the table, we describe the action that needs to be performed when clicking on a row. In our case, this is a transition to the second screen of our future application. On the second screen of our application, add the “Back” button, the only action of which is to return to the previous page (Navigate Back).
Open the application in preview mode and see what happened. If necessary, you can also check how the application looks in other screen formats, primarily on tablets and smartphones. BUILD automatically scales the preview and we can always immediately edit the screen interface for all kinds of devices.
After finishing work on the “digital” interface of the application, you can immediately start the discussion cycle by key users again and collect feedback and suggestions on the “live” prototype. This completes the BUILD operation, but the creation of the application continues. The SCP WebIDE development toolkit allows you to take advantage of the BUILD prototype. The prototype is converted into a software project UI5 and the developer can continue to work with real data and access to the program code of the application.
By the way, the registration of participants in the SAP Coder 2017 contest continues.
And here you can learn more about the SAP Cloud Platform and get acquainted with additional materials.
Source: https://habr.com/ru/post/326780/
All Articles