An example of creating a web application on PureQML

Introduction
We recently opened up to the world (made coming out, so to speak) and published an article about our modest framework (source code on GitHub ). After communicating with interested participants (thank them very much!), We came to the conclusion that in order to reveal the topic, it is necessary to write a similarity of the tutorial on some real example. The project site has a section with lessons , but these lessons describe specific situations rather than the big picture. That is why we decided to write a small guide. For realism, let's describe in steps the creation of a simple, but real, project that well shows the portability of solutions from the web to SmartTV. And yes, the result of this guide is already available in LG Smart World for webOS-based TVs (you can find this app by the name "Earth Online"). In this article, we describe the creation of exactly the same application for desktop and mobile browsers.
Idea
The idea is quite simple: show views of the Earth from the ISS (for this opportunity, you need to thank NASA, namely, the High Definition Earth-Viewing System project). In addition to the video, the application will show the current position of the ISS above the Earth. For these purposes, we will use the Where the ISS at? . Let's get started!
')
Start
Create a folder for our project:
$ mkdir earth-online $ cd earth-online To create a new project, you need to copy qmlcore to the folder with the project. You can simply download and copy content or clone using GIT:
$ git clone git@github.com:pureqml/qmlcore.git To write with less hands, let's generate the application framework:
$ qmlcore/build --boilerplate After executing the command, two new files will appear in the project folder:
- src / app.qml - PureQML application code
- .manifest - the minimum manifest describing the application
The src folder is used to store the project's qml sources.
In app.qml , we leave only this code:
Item { anchors.fill: context; // Item } To build the application, you need to run the command:
$ qmlcore/build and if everything went well, then a new folder, build.web, will appear in the project folder with the resulting files.
$ ls build.web/ flashlsChromeless.swf index.html modernizr-custom.js qml.app.js For a moment let's digress and see what these files are:
- index.html - received html page
- qml.app.js - the resulting js file, which is loaded into index.html
- modernizr-custom.js - used custom modernizr file
- flashlsChromeless.swf is the file that is used to play the video using flash (bue), in our case it is not needed, but it is automatically added to the web platform projects.
Controls
In addition to qmlcore, the necessary and most stable part of the project, there is also a separate module controls , in which there are many useful components already ready for use. To connect this module it is also enough to copy the project folders into the src or to clone:
$ cd src $ git clone git@github.com:pureqml/controls.git For our application, we just need one component from the controls, which will allow you to play live stream video from youtube, it is called YouTube. Add it to app.qml :
Item { anchors.fill: context; // Item YouTube { anchors.fill: parent; source: "https://www.youtube.com/embed/ddFvjfvPnqk?autoplay=1&controls=0&showinfo=0"; } } As a result, if you open Index.html in a browser, you can see the video from the ISS:

Map
With the video sorted out. We now turn to the station location. Since for the task it is enough to display the station position above the Earth, then you can use just a picture with the unfolded surface of the planet and move a point along it according to the current coordinates (although the controls have YandexMap component for working with maps).

We have prepared a picture with the map of the Earth. In order for our picture, or any other resources, to get into the assembly, you need to create a special folder in the project root - dist :
$ mkdir dist All contents of this folder will be copied after build to build.web . Add a dist image with the map:
$ mkdir dist/res $ cp <path-to-map-image> dist/res If you try to build the project now, you will see how the res folder with the added picture appeared in build.web :
$ ls build.web/res/ map.png The logic of working with the map will be in a separate component, we will create a new file for it IssMap.qml in src and write the following code:
Item { anchors.fill: context; // // Image { anchors.fill: parent; // source: "res/map.png"; // fillMode: Image.Stretch; // , Stretch Image // Rectangle { id: station; // id, width: 30; height: width; // radius: width / 2; // , visible: false; // color: "red"; } } // long lat setPos(long, lat): { // station.visible = true // // , station.x = (long + 180) * this.width / 360 - (this.width / 28.4) station.y = (90 - lat) * this.height / 180 + (this.height / 19.45) } } Now we need to get the coordinates of the station and set the point to the desired position. To do this, we use the API mentioned above.
To execute HTTP requests, there is a special Request object in controls; we will do a control for its asynchronous coordinate request in the IssRequest.qml file in the src folder:
Request { // // callback - , call(callback): { this.ajax({ url: "https://api.wheretheiss.at/v1/satellites/25544", done: callback, withCredentials: true }) } } Now you need to put everything in one place and add more text with the coordinates of the station. Let's call this OSD control and create an Osd.qml file for it with the code:
// WebItem - Item // hover click WebItem { property bool active: false; // bool - OSD anchors.fill: parent; opacity: active ? 1.0 : 0.0; // active // IssRequest { id: request; } // IssMap.qml IssMap { id: map; } // ( ) // Text { id: visibilityText; anchors.right: parent.right; anchors.bottom: parent.bottom; anchors.margins: 10; font.pixelSize: 24; color: "#fff"; text: "Earth visibility: -"; } // : // Text { id: positionText; anchors.left: parent.left; anchors.bottom: parent.bottom; anchors.margins: 10; font.pixelSize: 24; color: "#fff"; text: "Lon: -<br>Lat: -"; // html } // Timer { running: parent.active; // OSD triggeredOnStart: true; // interval: 10000; // 10 repeat: true; // // , updatePositionRequest onTriggered: { this.parent.updatePositionRequest() } } // , // doUpdatePosition updatePositionRequest: { var self = this request.call(function(res) { var data = JSON.parse(res.target.response) if (data) self.doUpdatePosition(data) else log("Request error") }) } // doUpdatePosition(data): { var long = parseFloat(data.longitude) // var lat = parseFloat(data.latitude) // // positionText.text = "Lon: " + Number((long).toFixed(1)) + "<br>Lat: " + Number((lat).toFixed(1)) // data.visibility 'eclipsed' 'daylight' visibilityText.text = "Earth visibility: " + data.visibility map.setPos(long, lat) // } // // 300 Behavior on opacity { Animation { duration: 300; } } } Now you need to place the OSD in our application over the video and display it, say, by clicking on the screen and also (by clicking) close. Now app.qml will look like this:
Item { anchors.fill: context; Youtube { anchors.fill: parent; source: "https://www.youtube.com/embed/ddFvjfvPnqk?autoplay=1&controls=0&showinfo=0"; } Osd { // // OSD onClicked: { this.active = !this.active } } } We build the project, open it in the browser build.web / index.html , click on the screen and OSD appears with animation for transparency!

Finishing touches
Let's try to make a small improvement: it would be great if the text with the coordinates was aligned:
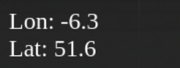
You can use any monospace font to solve the problem.
To add a new font, you need to edit the output index.html file. Remember how we used the dist folder to add files to build.web after build? The important point is the fact that the copying occurs after the assembly, and thus, we can override the index.html . We take the current index.html as a basis:
$ cp build.web/index.html dist and add a link to the new font . After minor edits, dist / index.html will look like this:
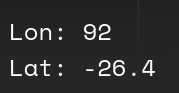
<!DOCTYPE html> <html> <head> <title></title> <meta charset="utf-8"> <meta name="viewport" content="width=device-width, initial-scale=1, maximum-scale=1"> <link href="https://fonts.googleapis.com/css?family=Space+Mono" rel="stylesheet" type='text/css'> <script src="modernizr-custom.js"></script> </head> <body style="font-family: 'Space Mono'"> <script src="qml.app.js"></script> </body> </html> The text with the coordinates will look like this:
Conclusion
Of course, this application does not reveal all the capabilities of the framework, but gives a visual idea of how to quickly and easily write a single page QML application, whose code can be ported to the SmartTV platform.
Links
- High Definition Earth-Viewing System - broadcast from the ISS
- Where is ISS at? - a service providing an API for getting station coordinates
- earth-online - ready application
- earth-online on Github - source code from this guide
- PureQML - PureQML project page
Source: https://habr.com/ru/post/326006/
All Articles