How to make friends Telegram-bot with telephony

It is very difficult to adapt your own products to the rapidly changing world of technology and trends. For example, instant messengers that were two or three years ago were affiliates of forums (a typical use case is friendship of mummies with wheelchairs against cars in the yard), and today these are: a) internal communication in the corporation; b) again, communication in business, but external (company-clients); c) the chatbots' habitat; and d) a whole world of possibilities for creating these chatbots themselves and integrating them with everything that moves technologically.
One of the ideas about combining the capabilities of a virtual PBX with the capabilities of bots, which I'll talk about today, in general, was on the surface - to fasten the simplest chat bot of notifications of missed calls to Telegram (hello to sguslya , who in my previous article about API- designers confirmed that such a case is interesting). The scheme is good because telephony users do not have to be programmers, it’s easy to repeat.
Why is it needed? For example, to send information about missed calls to the sales groups. This makes it possible for the company’s employees to quickly agree on whose contact and contact him without any confusion or calls from several managers to a single potential client.
So, for my recipe, you will need a UIS , IFTTT and Telegram account. We solve the problem in 4 stages:
- Configuring the Maker Connector for HTTP Notifications in IFTTT
- Configuring a Telegram Connector in IFTTT
- Configuring notifications in UIS
- Final integration setup
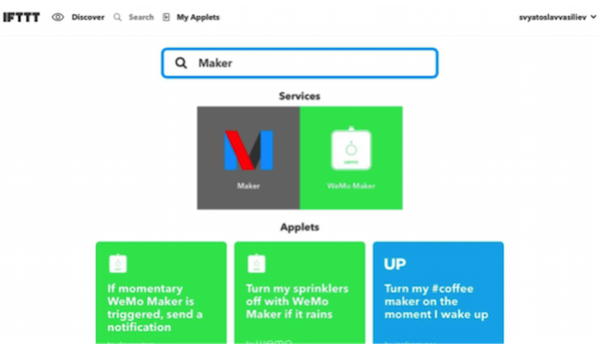
Configuring the Maker Connector for HTTP Notifications in IFTTT
Enter in the search bar in IFTTT "Maker" and click on the service we need - Maker.
We were redirected to the Maker Connector page and now it needs to be configured. To do this, go to the Settings section.
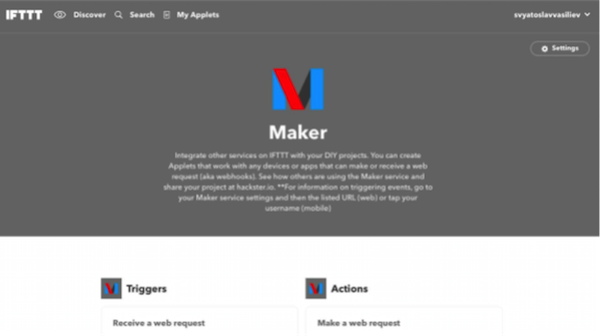
First of all, you need to connect the Maker service: to do this, click Connect.

')
If everything worked out, then your personal connector will be activated, which will be reported to you in the Status column. For information about the format of requests received, you need to follow the link indicated in the URL column.
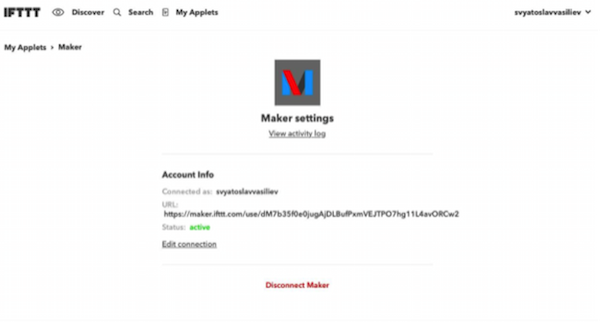
On the page that opens, we see the format of the request URL and the ability to transfer 3 parameters with a free field. These settings and the information received will be enough for us to proceed to the next stage.

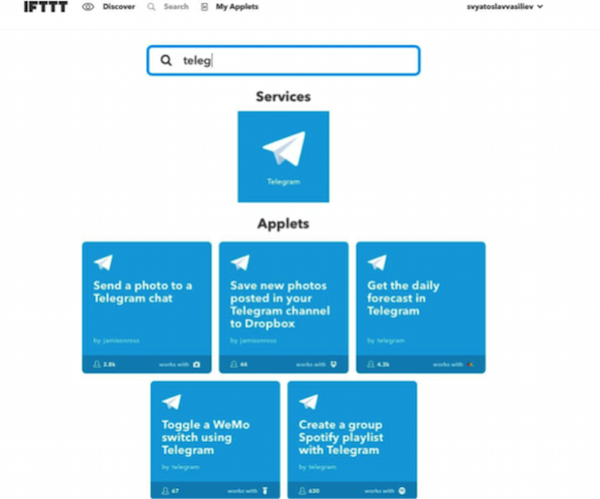
Configuring a Telegram Connector in IFTTT
We are looking for the Telegram service among the IFTTT applets.
Go to the service page.

Go to Settings (Settings) and connect the connector.

After activating the connector, Telegram will send you an informational message from the IFTTT bot. To activate the bot you will need to run the command / start.
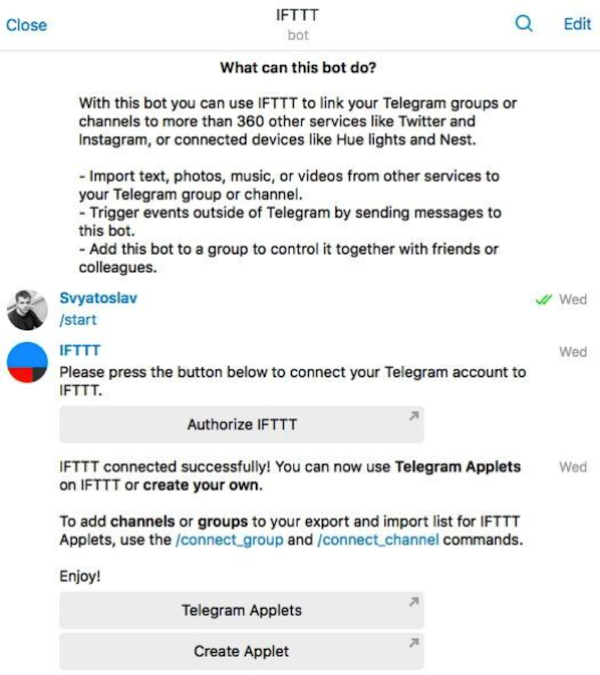
Everything, now you can connect the group to the Telegram or the channel, if you want the messages to be distributed to all employees of the company who are also users of the Telegram service.
Configuring notifications in UIS
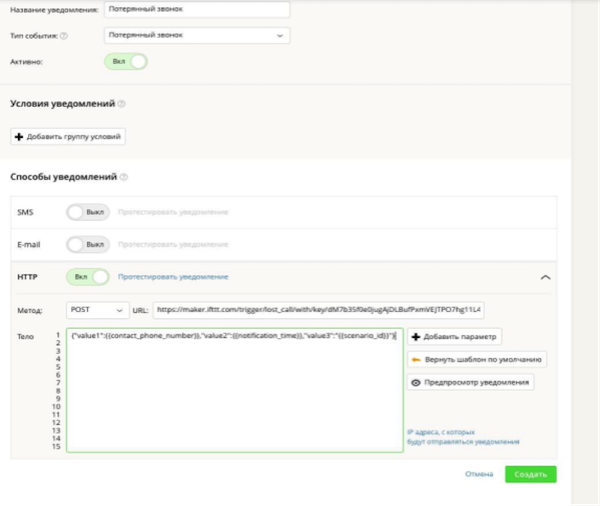
At this stage, we will need updated UIS event notification functionality. Notifications 2.0. To do this, we go to the appropriate section of the interface and click Add notification.

In the settings of the added notification, select the POST method, indicate the link we received from the Maker connector, insert the body with the indication of tokens, to the place of which the information about the call will be supplied.
Final integration setup
So, when all the components are prepared, it remains to combine them. First you need to create a new applet - to do this, click the New Applet on the My Applets page in IFTTT.

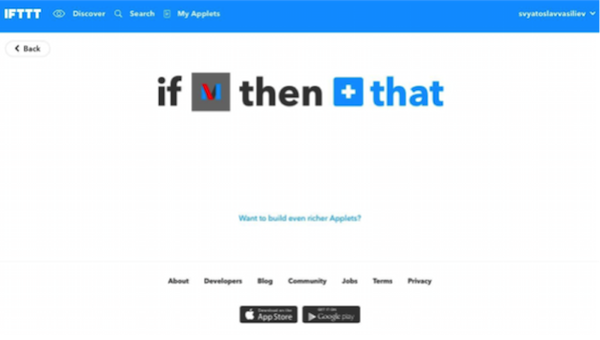
This action will take you to the page where you configure the Event-Action bundle. It is configured in a laconic sentence if this then that (if this (event) happens, then do that (action)). Let's start with the event: click on “+ this”.

We get to the services search page, on which we look for the Maker that we set up.

When choosing Maker, we will be asked to indicate which trigger to create. There is only one choice, we choose it.
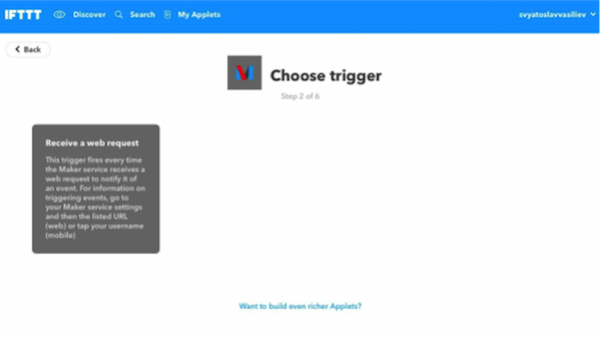
Now we need to tune the trigger. To do this, we specify the name of the event, which we have already prudently indicated in the URL in the notification settings, and complete the creation of the trigger.

It remains to configure the action. To do this, click "+ that".
Select the already configured Telegram connector.

Select the action of interest to us - sending a message.
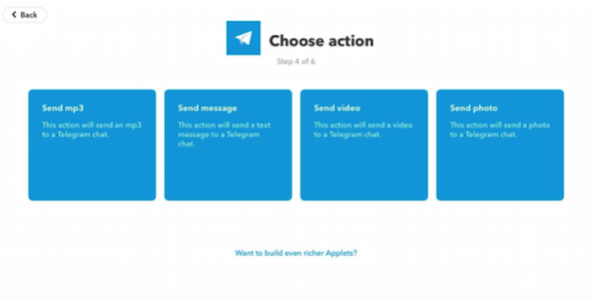
Finish the setting by filling out the template. The parameters correspond to those configured in the notification template in UIS.

Confirm the completion of the setting.
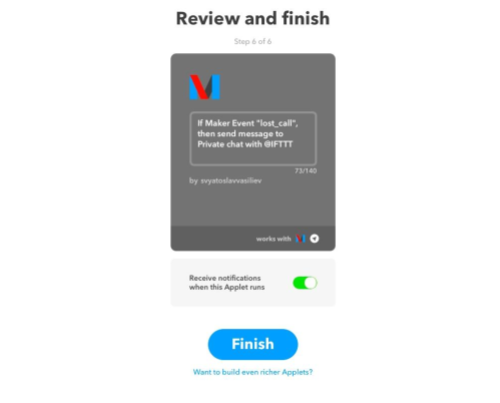
Everything, now at the lost calls you will receive the following message in Telegram:

If you have questions, I will gladly answer. I would also be happy if you tell me what else you would be interested to learn from similar stories of telephony integration with other tools, about the API, etc.
Source: https://habr.com/ru/post/325648/
All Articles