We set up a free build for writing and debugging programs for microcontrollers based on the ARM kernel under Windows 10
The idea to write an article (which will go into a series of articles for beginners who are keen to create something on microcontrollers with almost zero knowledge of programming in principle) came to me after I had to digress from my core business to help my friend set up a little Wednesday for writing software for his small home project based on the board with stm32f103 on board. I figured it would take about half an hour, a maximum of an hour, but my friend’s laptop was on Windows 10 x64, which is unusual for me (I myself work in Ubuntu). As a result, we spent almost 8 hours on setting up and creating a simple project, struggling with many not obvious things.
In parallel with this, I had to explain in detail which element of the assembly was needed for, as well as how these elements interact with each other, since a friend had never before encountered microcontrollers (from the word "I saw Arduino in a store").
This material is designed to help beginners to quickly and easily set up a completely free infrastructure for working with microcontrollers, as well as to understand how the final binary file is assembled. The manufacturer and model of the microcontroller at the stage of setting up this infrastructure is unimportant. The main thing is that it is based on the core of ARM.
')
For these purposes, I use Eclipse. In addition to the editor, it also provides the ability to connect various extensions that greatly simplify the developer’s life, reducing all the routine work (assembly, layout, loading the program into the controller) to a couple of clicks / clicks.
The following actions are informative and may be skipped. In this case, the opened command line can be closed.
Regardless of whether you have a fake st-link or the original one, the drivers are the same. Let's start.
In the next article, I will explain how to configure Eclipse for a specific controller, build a demo project, and set up debugging.
In parallel with this, I had to explain in detail which element of the assembly was needed for, as well as how these elements interact with each other, since a friend had never before encountered microcontrollers (from the word "I saw Arduino in a store").
This material is designed to help beginners to quickly and easily set up a completely free infrastructure for working with microcontrollers, as well as to understand how the final binary file is assembled. The manufacturer and model of the microcontroller at the stage of setting up this infrastructure is unimportant. The main thing is that it is based on the core of ARM.
Table of contents
- Formulation of the problem.
- Selection of software implementation.
- We put Eclipse Neon 3.
- Download the installer Eclipse.
- Install the JRE.
- Install Eclipse.
- Install the GNU ARM Eclipse plugin in Eclipse.
- Patch JRE (in case of an error when installing the plugin).
- Install GNU ARM Eclipse Windows Build Tools.
- Download and install the GNU ARM Embedded Toolchain.
- Install OpenOCD.
- Install drivers on st-link v2.
- We understand how it all works.
- Conclusion
Formulation of the problem
You need to configure the bundle so that you can:- Compile a project consisting of C (C99), CPP (C ++ 14) and ASM files.
- Compile a single firmware file from the compiled files (".elf" and, if necessary, ".hex", as well as the ".map" file for easy analysis of the assembly).
Selection of software implementation
To solve the tasks we need the following software products:- Eclipse Neon 3 for C / C ++ (the latest version at the time of this writing). We will use it as an IDE (text editor with a convenient auto add-on + convenience for interacting with debugging tools), in which we will write code.
- JRE (at the time of writing, the most recent version is 1.8.0). Without it, the Eclipse installer will not start (well, Eclipse itself).
- GNU ARM Embedded Toolchain (at the time of writing, the latest version was 5_4-2016q3-20160926). This is a set of software solutions we need (such as the C compiler for gcc code, C ++ for g ++ code, linker for ld, download and debugging tool for final firmware for gdb, and many others), thanks to which we get source file with the resolution ".elf", which is a binary firmware file of the microcontroller, which later will be loaded into the microcontroller (see below).
- OpenOCD 0.10.0. With it, we will load our ".elf" program file into the microcontroller (in fact, OpenOCD provides the connection between gdb from the above toolchain and the debugger).
')
We put Eclipse Neon 3
As mentioned above, in order to write code, we need a text editor in which it would be convenient to write (various methods of auto-completion, project search, file navigation, etc.). And after we wrote the code, it would be nice if its compilation, build and execution would be a matter of a couple of key combinations (or mouse clicks, as you like).For these purposes, I use Eclipse. In addition to the editor, it also provides the ability to connect various extensions that greatly simplify the developer’s life, reducing all the routine work (assembly, layout, loading the program into the controller) to a couple of clicks / clicks.
Downloading the Eclipse Installer
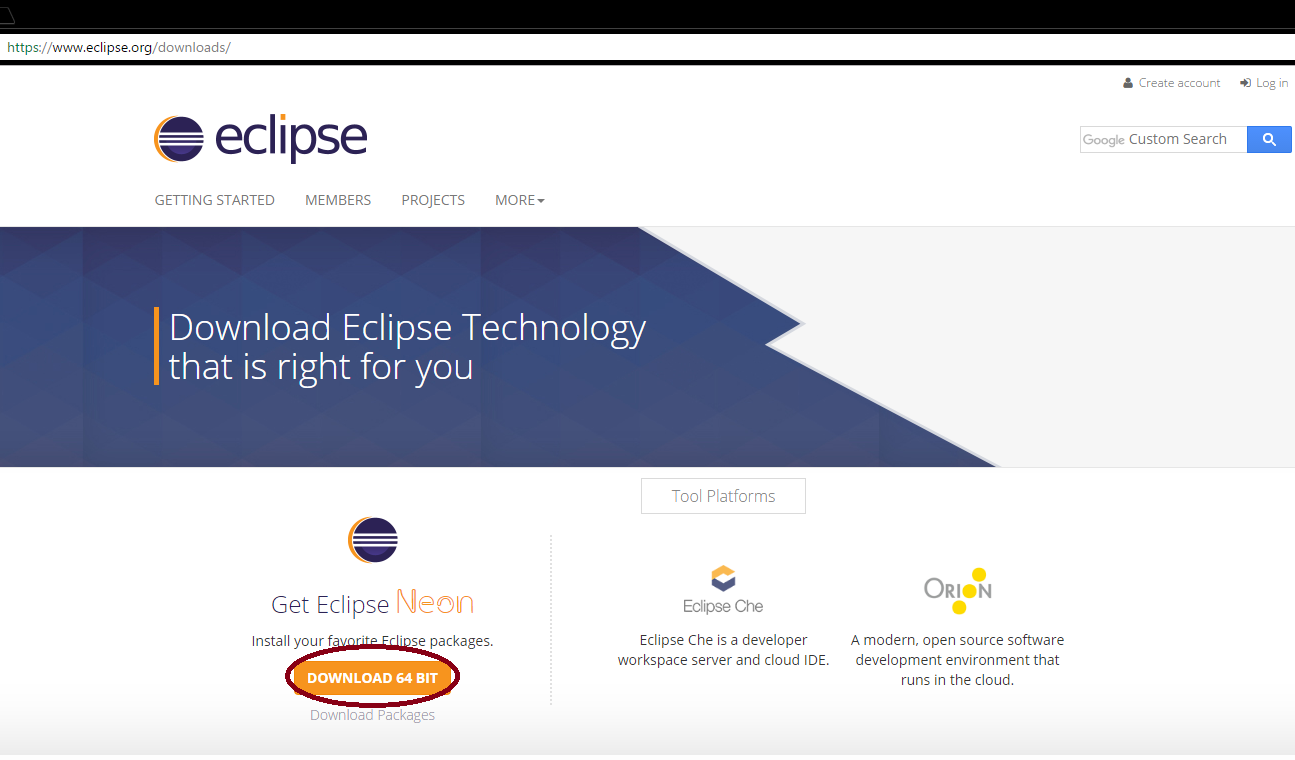
- Go to the official website
- Top right click download.
- In the window that opens, on the left, select download (x64 / x32 should be selected automatically).
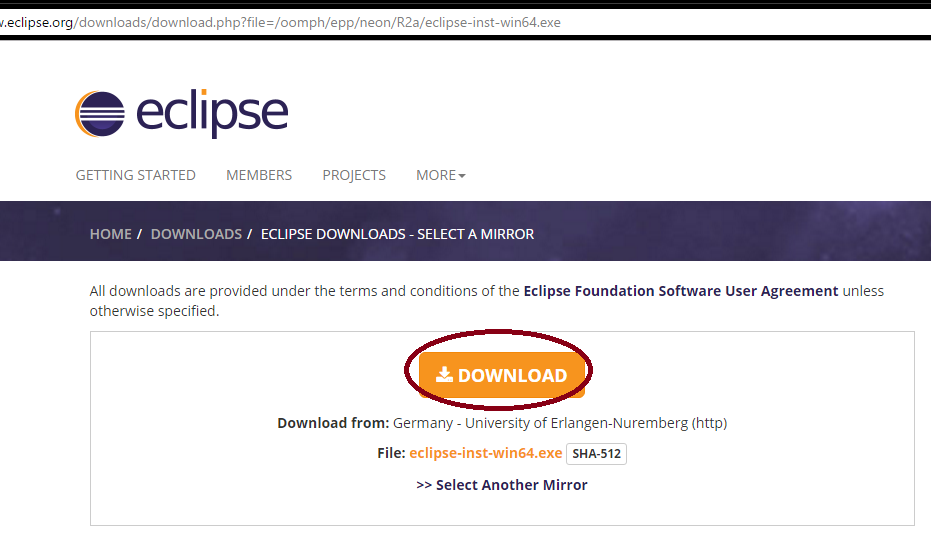
- Well, click download in the center, after which the download will begin. If you wish, you can sponsor the creators of the IDE ...
Here is a more visual download process.
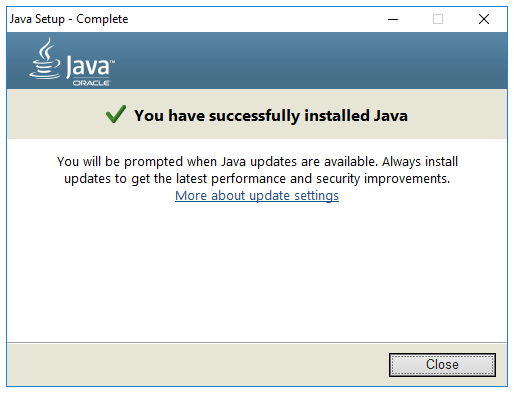
Install JRE
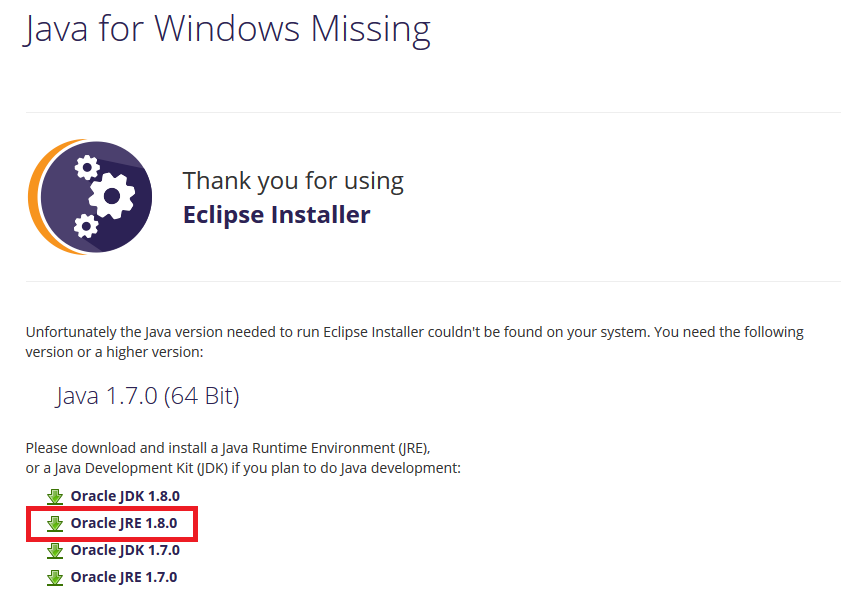
In order to run the installer, you must first install the JRE. The latest version at the time of writing is 1.8.0.- Run the installer we downloaded. We get an error that the JRE is missing.
- Click "no" and wait for the transition to the site.
- On the site, select the item "Oracle JRE 1.8.0".
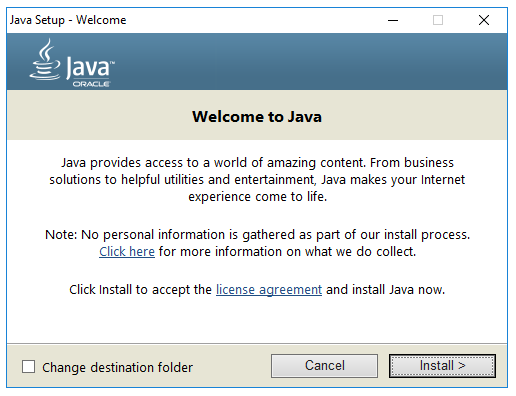
- Choose "Accept License Agreement".
- Download the offline version, according to the bit of your Windows.
- Run the downloaded file. Further installation does not cause problems.
Here is a visual process of downloading and installing.


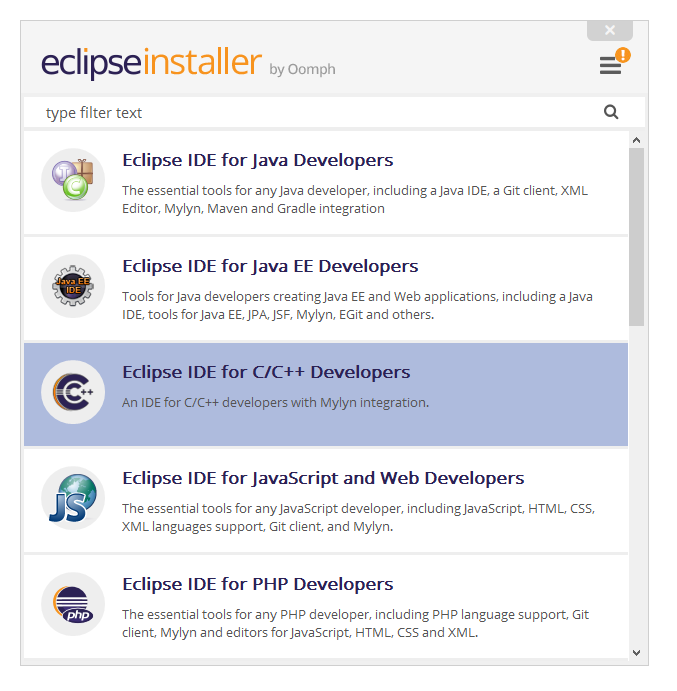
Install Eclipse
- Run the installer we downloaded.
- Choose a version for C / C ++.
- Specify the installation path (I left the default, and I advise you).
- We accept the agreement.
- We are waiting for the end of the installation.
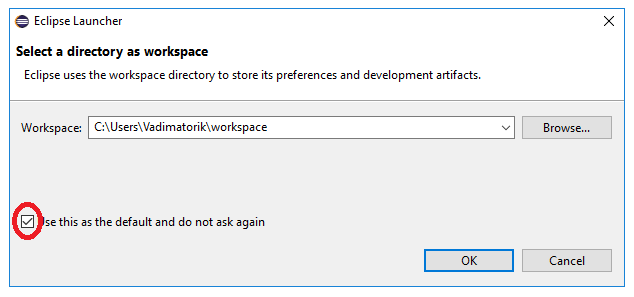
- Click "LAUNCH" to start the environment.
- Specify the path that Eclipse will use for your projects by default (I left it by default), and also tick the box to prevent this window from appearing again.
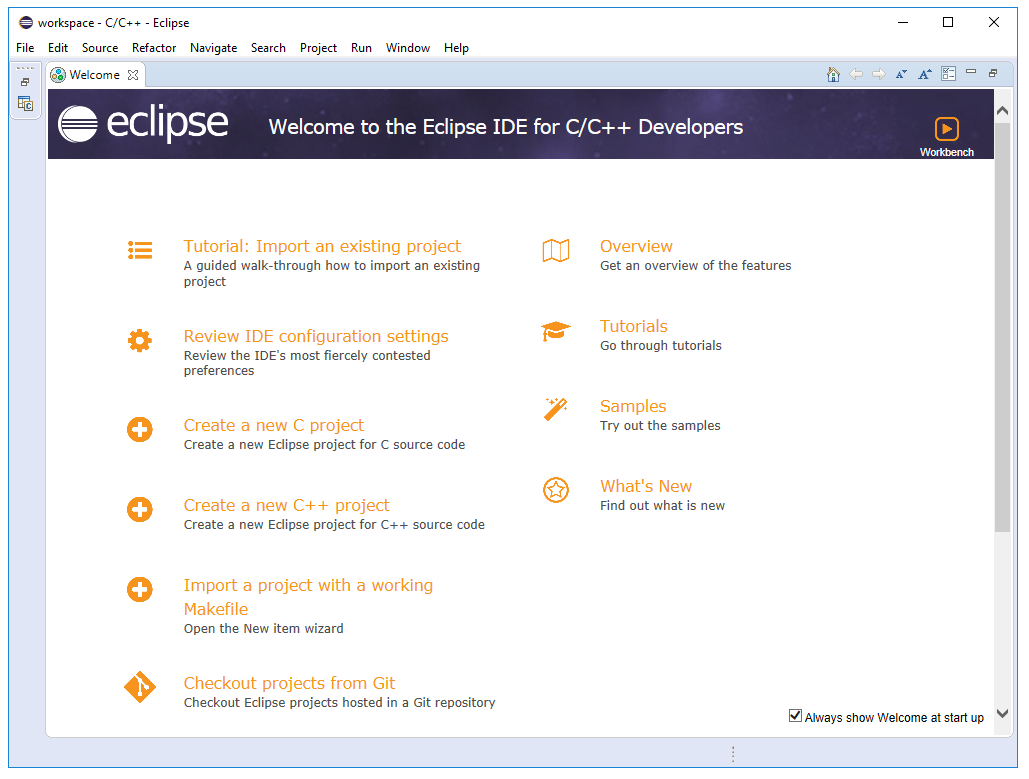
- Make sure that the IDE is running, close.
- During closing we can put a tick so that the window of warning about closing no longer appears.
Here is an illustrative installation process.


Install the GNU ARM Eclipse plugin in Eclipse
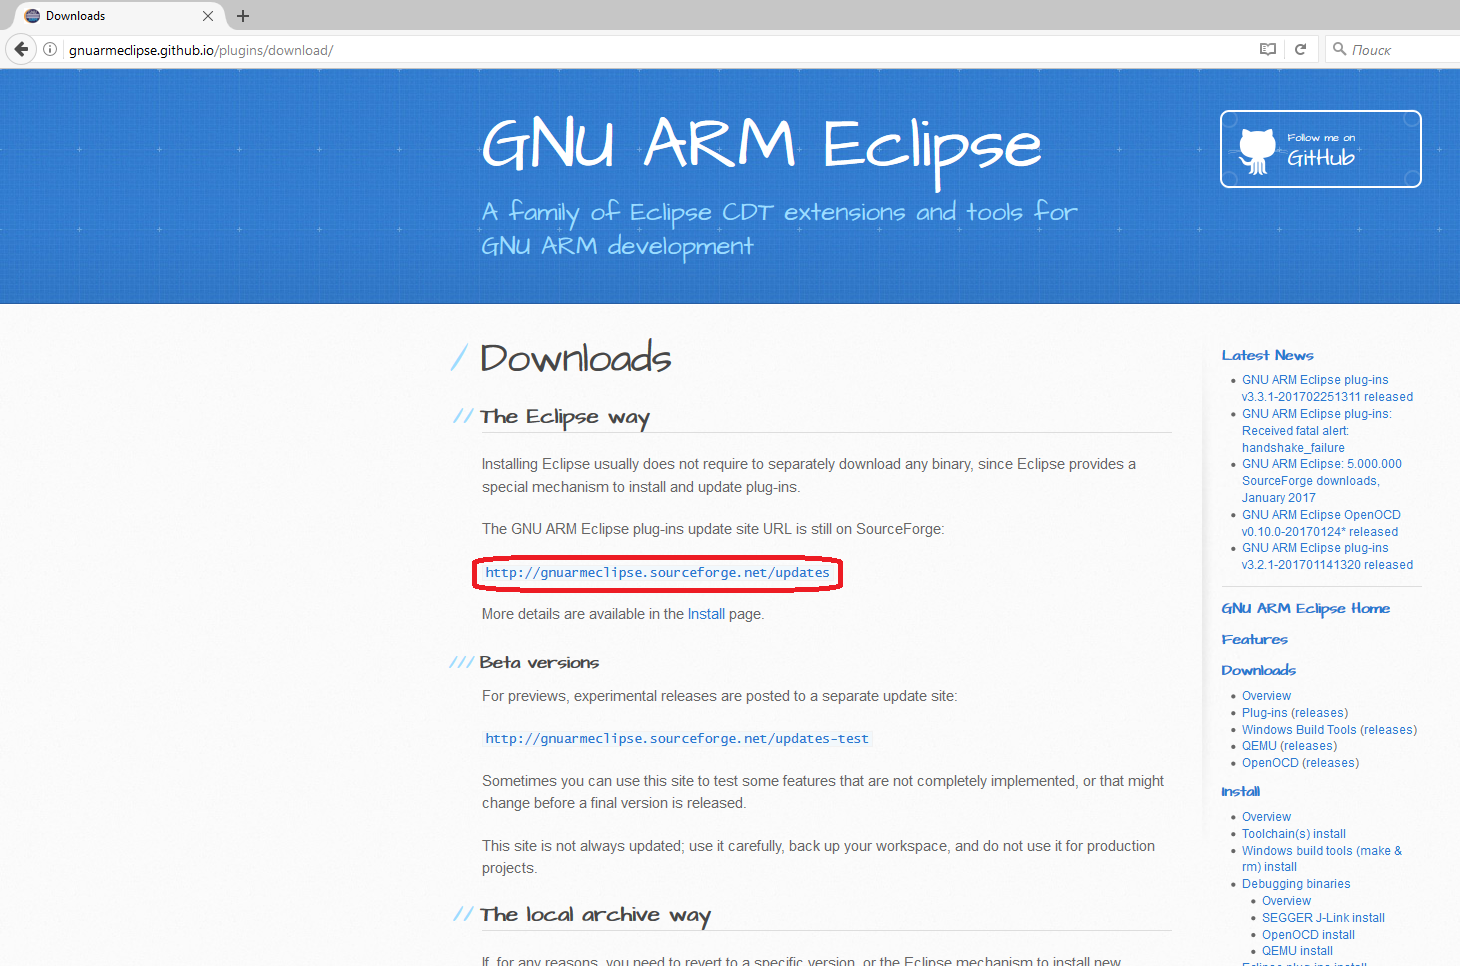
As mentioned earlier, Eclipse will allow you to connect various plug-ins that simplify the life of the developer. One such plug-in is GNU ARM Eclipse. Thanks to him, we will be able to easily connect all the software components we use when creating a new project for our controller (how to do this will be described below).- Go to the official website .
- In the right column, under the “Downloads” line, select “Plug-ins”.
- Next, under the line "The GNU ARM Eclipse plug-ins update site URL is still on SourceForge:" copy the link to the plugin. At the time of this writing, it was:
http://gnuarmeclipse.sourceforge.net/updates - Open Eclipse.
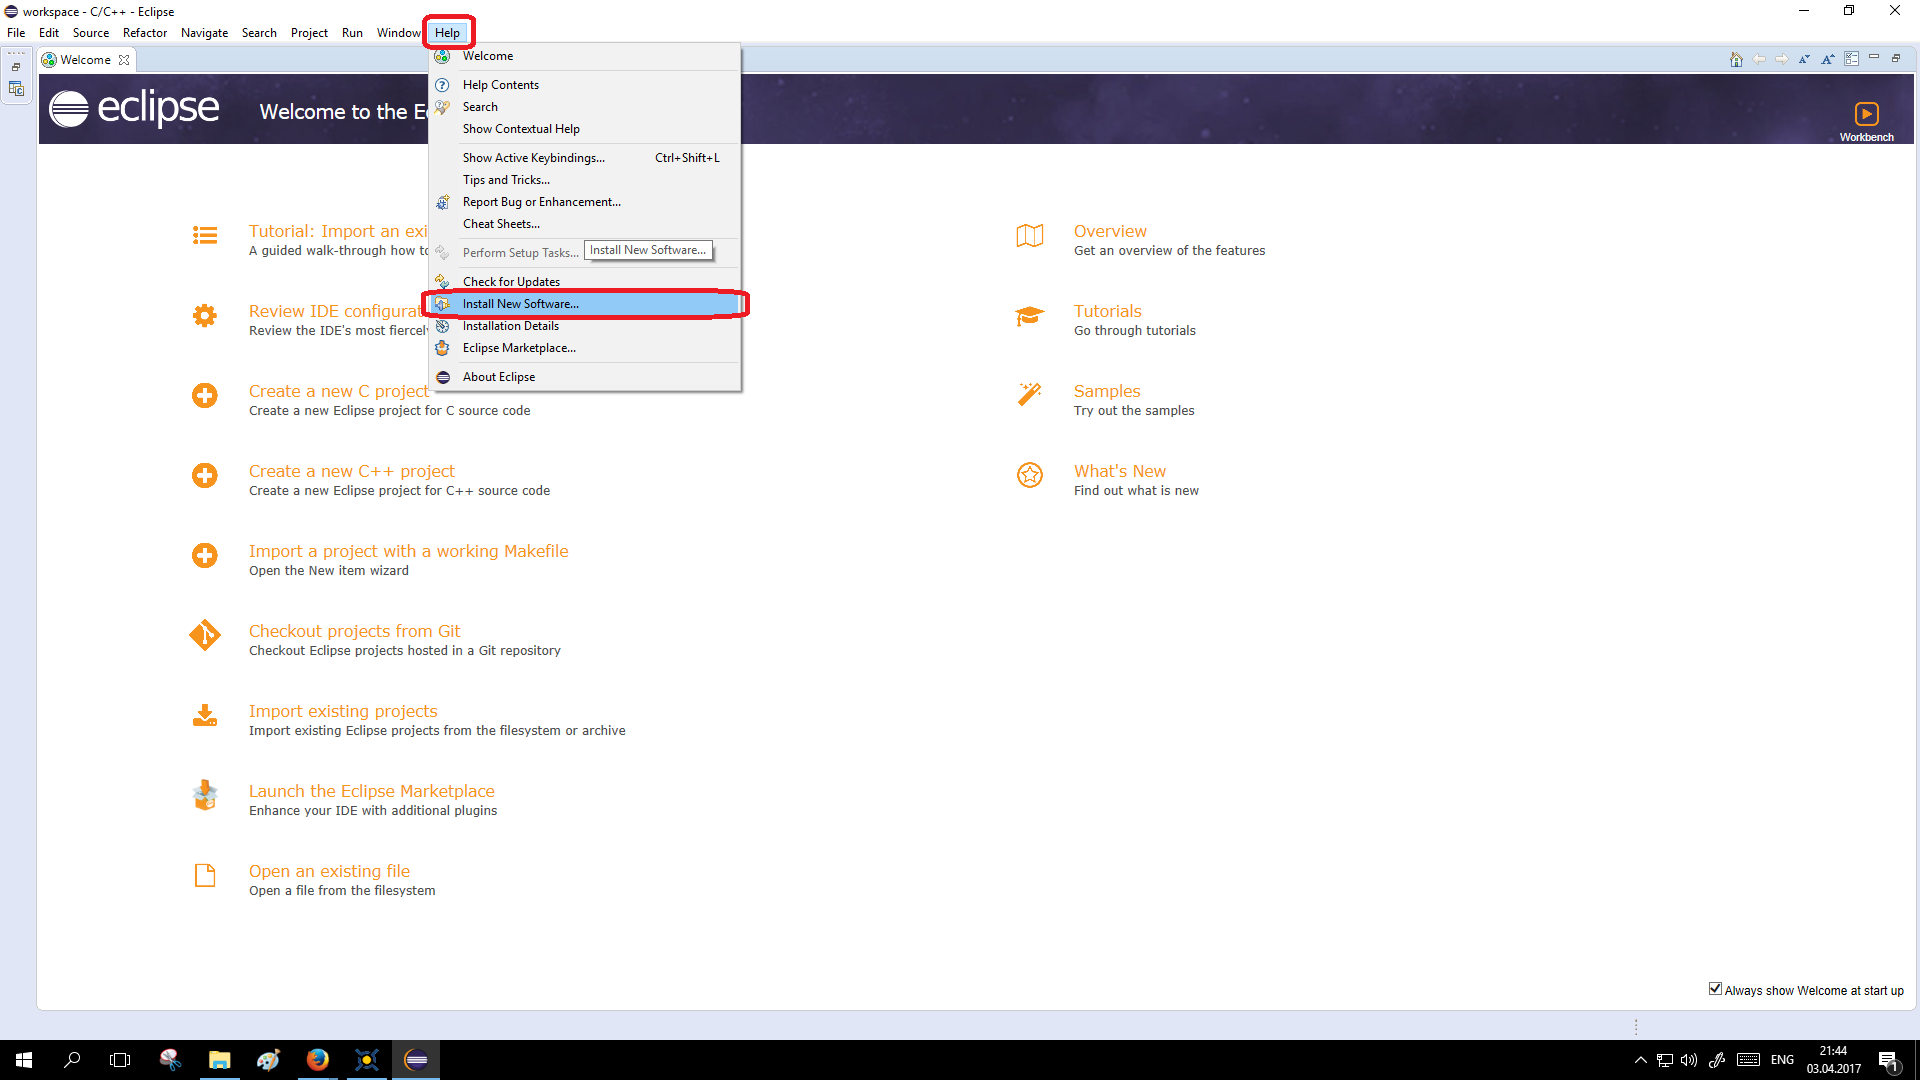
- Go to "Help" -> "Install New Software ...".
- In the window that opens, click on "Add ...".
- In another window that opens, in the item “Name:” we write, for example, “ARM” (the name is not important), and in the line “Location:” we paste the link copied from the site.
- Click "OK"
- The window closes and an empty checkbox with the words “Pending ...” appears in the list of strings.
Further, if you encounter the error presented below, go to the “JRE Patching” item, then go back and repeat everything from point 4.Unable to read repository at http://gnuarmeclipse.sourceforge.net/updates/content.xml.
Unable to read repository at http://gnuarmeclipse.sourceforge.net/updates/content.xml.
Received fatal alert: handshake_failure
If there is no error or you have already corrected it, we continue further. - After the “GNU ARM C / C ++ Cross Development Tools” line appears, you need to select the checkbox to the left of it and click “Next”.
- After another “Next”.
- Next, accept the license agreement and click "Finish". The installation process begins.
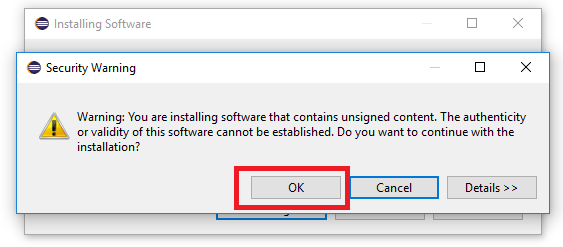
- During installation, a security warning will appear. Click "OK".
- After the installation is complete, you will need to restart Eclipse, to do this, click "Yes" in the window that appears.
- At this installation of the plugin is complete.
The process of installing the plugin in pictures


Patch JRE (if an error occurred in the paragraph above)
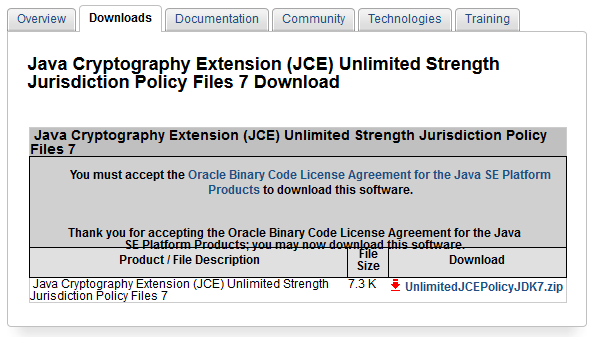
It so happens that the JRE has an unpleasant bug that prevents us from properly installing the plugin. Without going into the nature of sowing phenomena, we do the following.- Go to the site with the patch .
- Select the item "Accept License Agreement".
- Download the ".zip" archive.
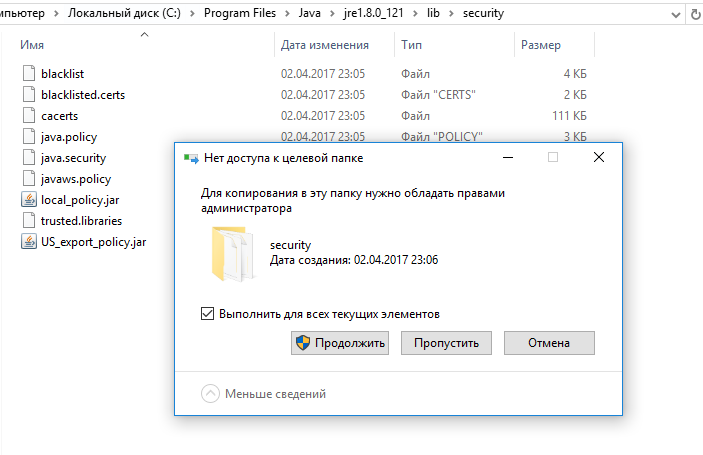
- Unpack The archive contains 2 files ("local_policy.jar" and "US_export_policy.jar") patch and a text file. Copy these 2 files with the ".jar" resolution and replace them with the files at the address of the installed java. In the case of 64-bit windows 10, this is the way
C:\Program Files\Java\jre1.8.0_121\lib\security
The path may be different if there is a new version of jre or you have an OS with a different bit depth. The main thing is that you have to go to the "\ lib \ security" folder and copy there with the replacement of these 2 files. On this patch can be considered complete. You can run eclipse again and install the plugin.
Photo error and replacement path.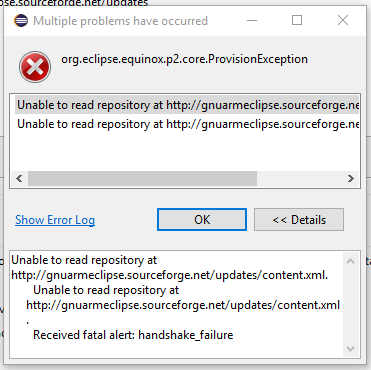


Install GNU ARM Eclipse Windows Build Tools
The fact is that in windows the default “make” command on the command line does not work (although not all distributions have this application installed in linux). For what we need the application "make", we will talk below, and now we just need to put a plugin that will add the ability to use it. For this.- Go to the official repository .
- Download the ".exe" file to your platform. At the time of this writing, the most current version of "gnuarmeclipse-build-tools-win64-2.8-201611221915-setup.exe".
- Run the downloaded file and simply click “Next”, “A Agree”, “Next”, “Install”, “Finish”.
Download and install GNU ARM Embedded Toolchain
- Go to the official website
- Download the latest version, compiled into the ".exe" file for Windows (in the column to the right).
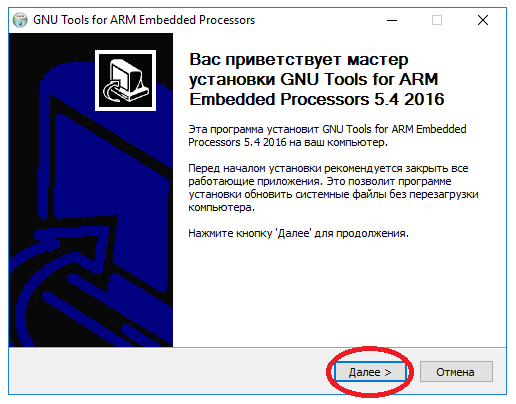
- Run the downloaded file.
- Click "OK".
- Then "Next"
- "Accept"
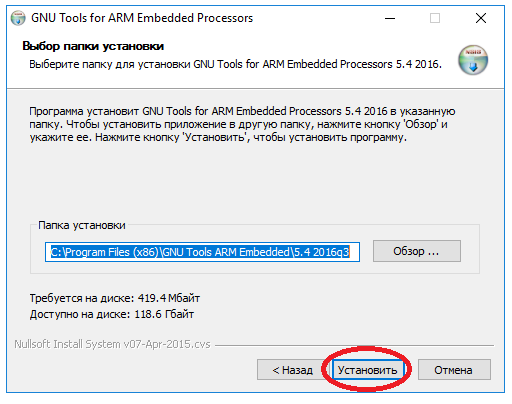
- “Install” (here I will explain that you can specify any folder, but it is better to leave the default one, in order to avoid problems with registering components during installation).
- At the end of the installation, uncheck the “Show ReadMe.” Box. The rest is left by default.
- "Done"
The following actions are informative and may be skipped. In this case, the opened command line can be closed.
- In the command line that opens, we write “cd bin”, without quotes (this is where the .exe files of all the components of the toolchain are located).
- We type "arm-none-eabi-gcc --version", without quotes.
- Making sure that gcc responded, close the console.
The installation and verification process is visual.


Install OpenOCD
With medium and toolchain th sorted out. Next, you need to install OpenOCD, with which Eclipse will control the controller via arm-none-eabi-gdb. It's simple.- Go to the official repository .
- Download the ".exe" file under your OS. At the time of this writing, the most current version of "gnuarmeclipse-openocd-win64-0.10.0-201701241841-setup.exe".
- Run the downloaded ".exe". Installation is done without changing anything (including the path).
Install drivers on st-link v2
OpenOCD controls the controller, this is true, but for this it needs a driver for the debugger. In our case, this is st-link v2. If you have another debugger, then this part can be skipped.Regardless of whether you have a fake st-link or the original one, the drivers are the same. Let's start.
- Go to the official page of st-link v2
- At the bottom of the page download the file "STSW-LINK009" with the description "ST-LINK, ST-LINK / V2, ST-LINK / V2-1 USB driver signed for Windows7, Windows8, Windows10".
- When you go to another page, click "Download" at the bottom of the page. It is important to note here that if you are not surfing the Internet through a VPN, you will have to register. How to do this, I will not describe. After that, the file will be downloaded.
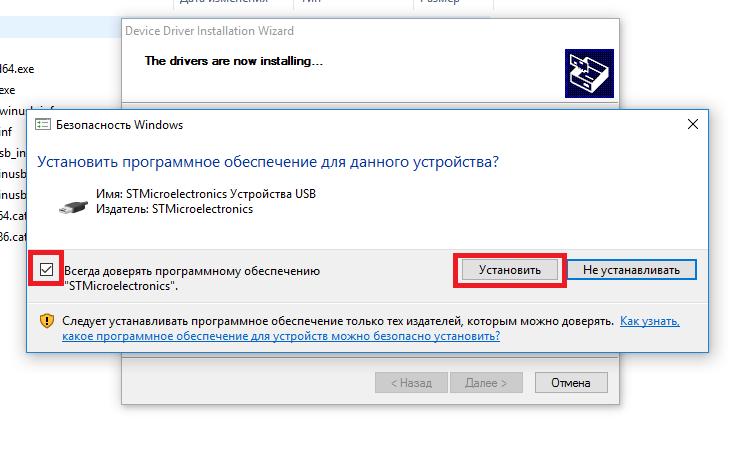
- Unzip the archive, select the driver installation file according to the OS bit. In my case, this is “dpinst_amd64.exe”.
- During installation, we agree with all requirements. And select the checkbox "Always trust the software STMicroelectronics".
The process of downloading and installation in pictures.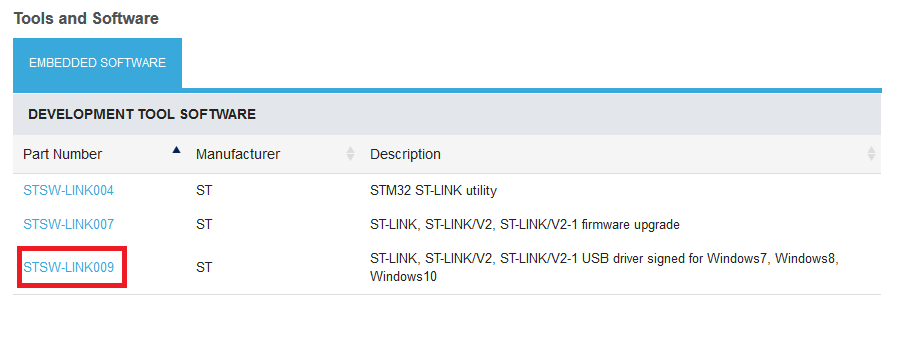


Understand how it all works
So we installed all the necessary components, created a project in Eclipse (how to create and customize a project will be written in the next article) and clicked "Ctrl + B". We received a ready-made firmware file, which by clicking on the "debugging" icon can be downloaded to the controller and start debugging directly. But what is behind all these actions? And the following happens:- After you press "Ctrl + B" - Eclipse analyzes the project directory tree (all the folders and files we created are in them). To do this, he uses the paths to the files that we specify when creating the project.
- Eclipse then creates a makefile. This file contains instructions for the make program about which files to compile (which we added to the project, while specifying the path to the directories where they are located), with which parameters (here Eclipse uses the parameters we filled in in the “C / C ++ Build ”) and how to compile previously compiled files in the final firmware file.
Note: makefile has no extension. - Next, Eclipse calls the make program with the path to the created makefile, as well as the build parameters that we specified when setting up the project (for example, the number of threads of the processor used for compilation).
- The make program goes through all the project files, as indicated in the makefile, and receives a file with the extension ".o" for each file. These files are located in the Debug folder in the same way as in the main project (with preservation of the tree hierarchy). If there is an error in some file, you will receive a notification about it, highlighted in red in the compilation console (by default it is located at the bottom of the screen). If a compilation error occurs, the further compilation and assembly stops. To compile files, make uses the toolchain specified in the makefile (or rather, its components: gcc / g ++). The path to the toolchain from Eclipse takes, again, from the project settings.
- After creating all the ".o" files from ".c", ".cpp", ".S" (please note, files with assembly code must necessarily have an extension of the capital letter "S", otherwise when creating a makefile, these files will be simply ignored , which leads to hard-to-understand errors) make calls the linker (arm-none-eabi-ld from the toolchain we have installed) with the paths to the layout files from the project (files with the ".ld" extension, which we add to the project). Here, the linker, based on the instructions (rules) specified in the files with the ".ld" extension, tries to collect from the heap ".o" files a single object file with the permission ".elf" (and, if there are such instructions in the makefile, ".hex "and" .map "). It is important to note that it is the linker (the linker) who decides which pieces of code and data can be thrown out of the program (if it considers that they are not used anywhere and just take up space). Thus, if we create 1000 global variables, of which we will use only 2 in the code, then the rest (unless explicitly stated that they cannot be excluded from the project with the key word "volatile" or the instruction "put in a section from which nothing can be removed ") Will be excluded from the final object file, which will give us more free memory.
- After we have received the final object file, we can “sew” it into the controller and debug it. To do this, Eclipse calls the OpenOCD program with the path to the file "openocd.cfg" (the name can be any, with the extension ".cfg", but if you ever have to debug from the command line, and not from under the IDE, then you will feel that the correctly named file for OpenOCD allows you not to write the name of the configuration file (because if the configuration file was not specified, then a file with that name is automatically searched)).
In case the specified file exists, OpenOCD, according to the parameters in the file, will try to connect to the microcontroller. In case the connection is correct, you will receive a notification that the connection is established, the controller debugger is working.
In order to communicate with the controller, OpenOCD uses the driver for the st-link, which we installed at the beginning. - After OpenOCD was able to communicate with the controller, it opens the telnet connection. If you do not go into details, this is necessary so that arm-none-eabi-gdb can successfully control the controller.
- After the telnet connection is established, Eclipse launches arm-none-eabi-gdb with the port to which you want to connect (the one that opened OpenOCD).
- Next, Eclipse sends initialization commands to gdb (erase flash, write the firmware file, set a breakpoint on main, and a few more optional parameters).
- After that, in Eclipse we see a pointer to the first line of code in the main file and we can start debugging.
Conclusion
In this article I have tried to describe in detail the process of building configuration under Windows. If you have any questions - write in a personal, I will try to help and add to the article a problem + its solution.In the next article, I will explain how to configure Eclipse for a specific controller, build a demo project, and set up debugging.
Source: https://habr.com/ru/post/325450/
All Articles