Guide to creating a simple photo editor
Today, we offer readers a detailed guide to creating a simple photo editor on iOS. For experienced developers, the task is simple, but for beginners, a similar step-by-step analysis of the whole process may be useful. We preferred the classic development environment for the chosen operating system - Xcode version 8.2.1. The development will be carried out, again, in the classical object-oriented programming language Objective-C.
Before embarking on the actual development, we suggest first splitting the task into subtasks.
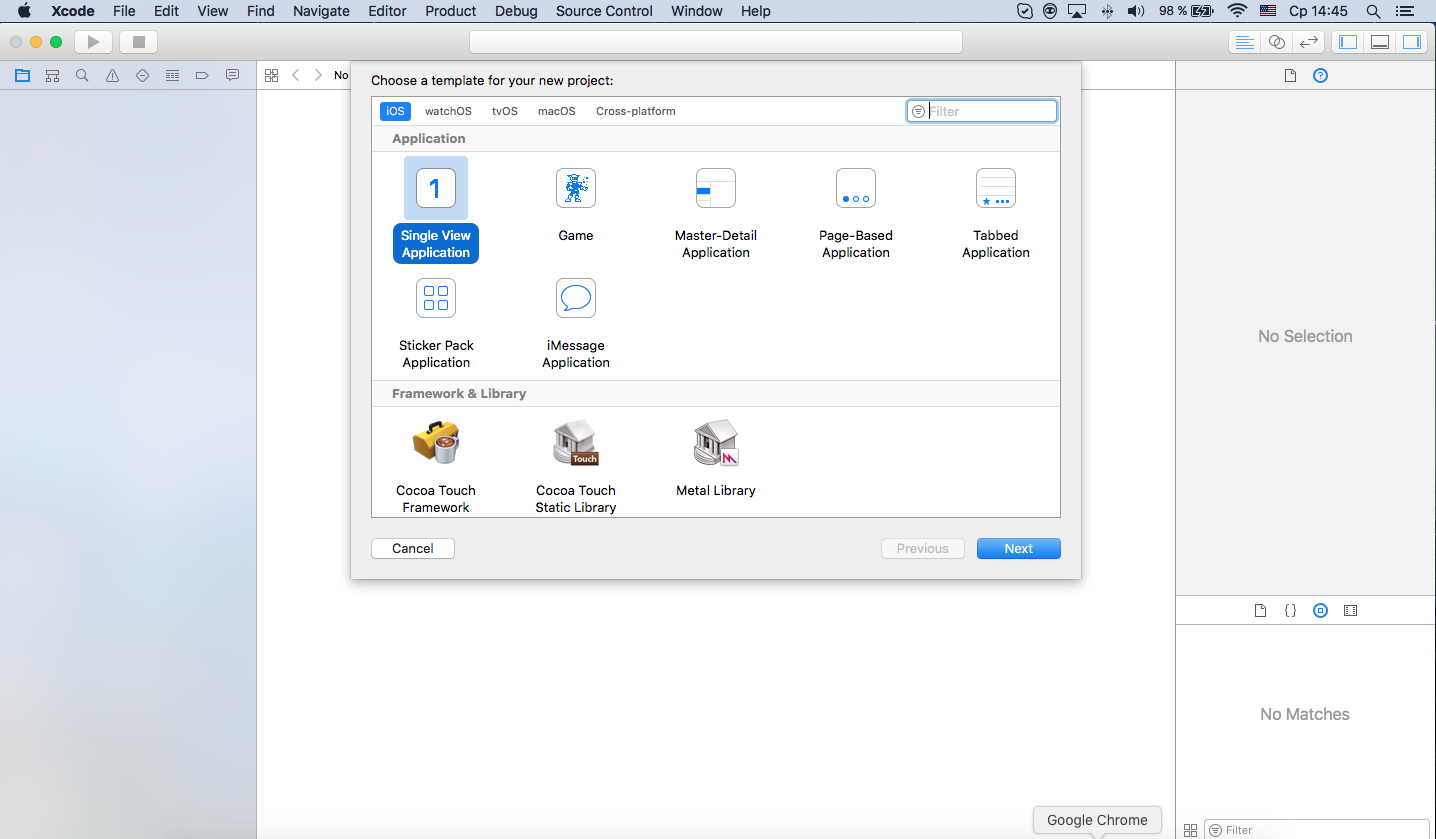
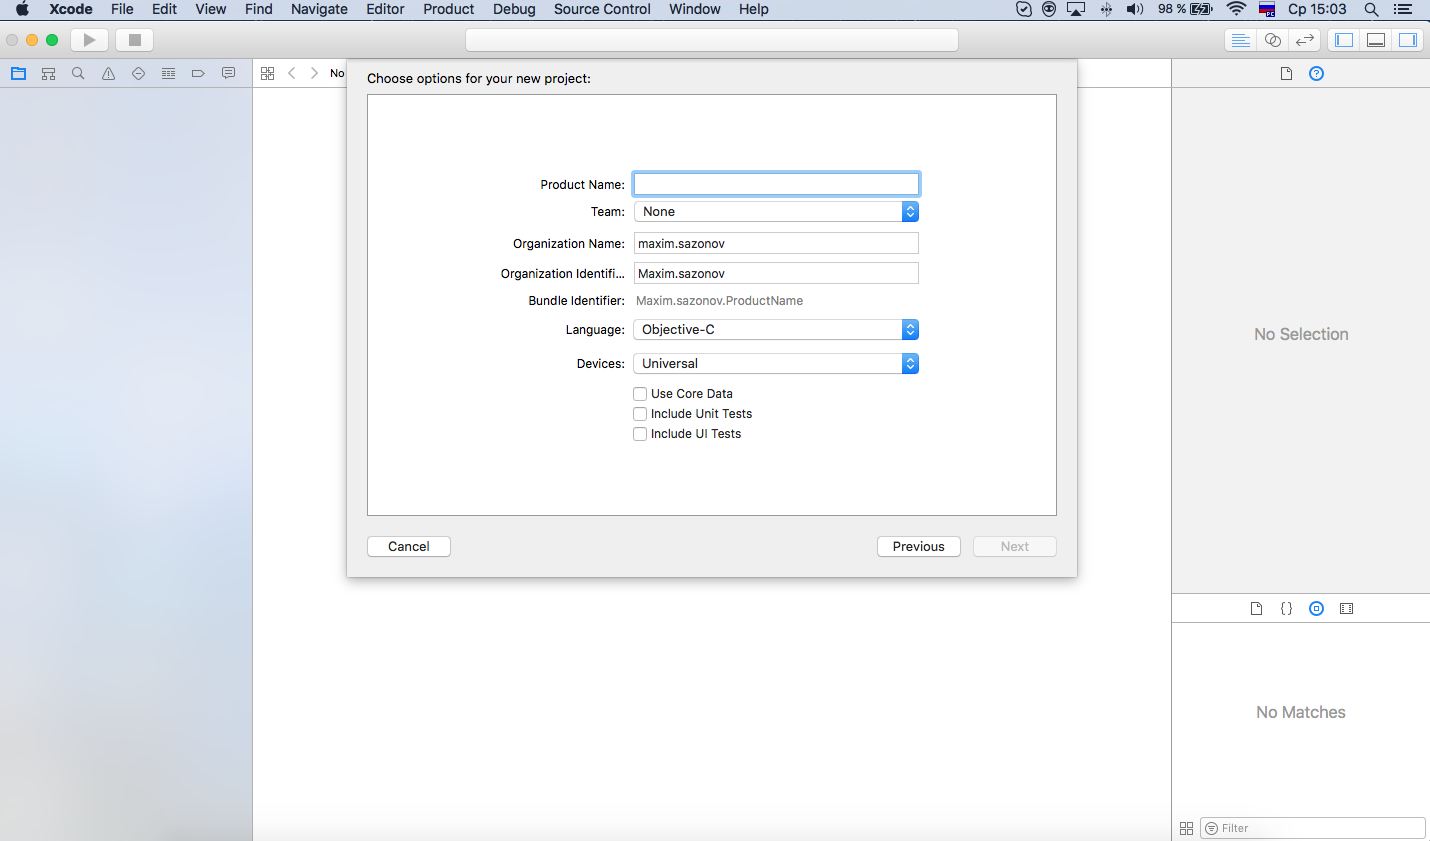
So let's get started. Open Xcode and select a template for iOS development in the Application → Single View Application tab. Let's call our project My First Photo Editor. Next, we specify the directory where we want to save the project.
')
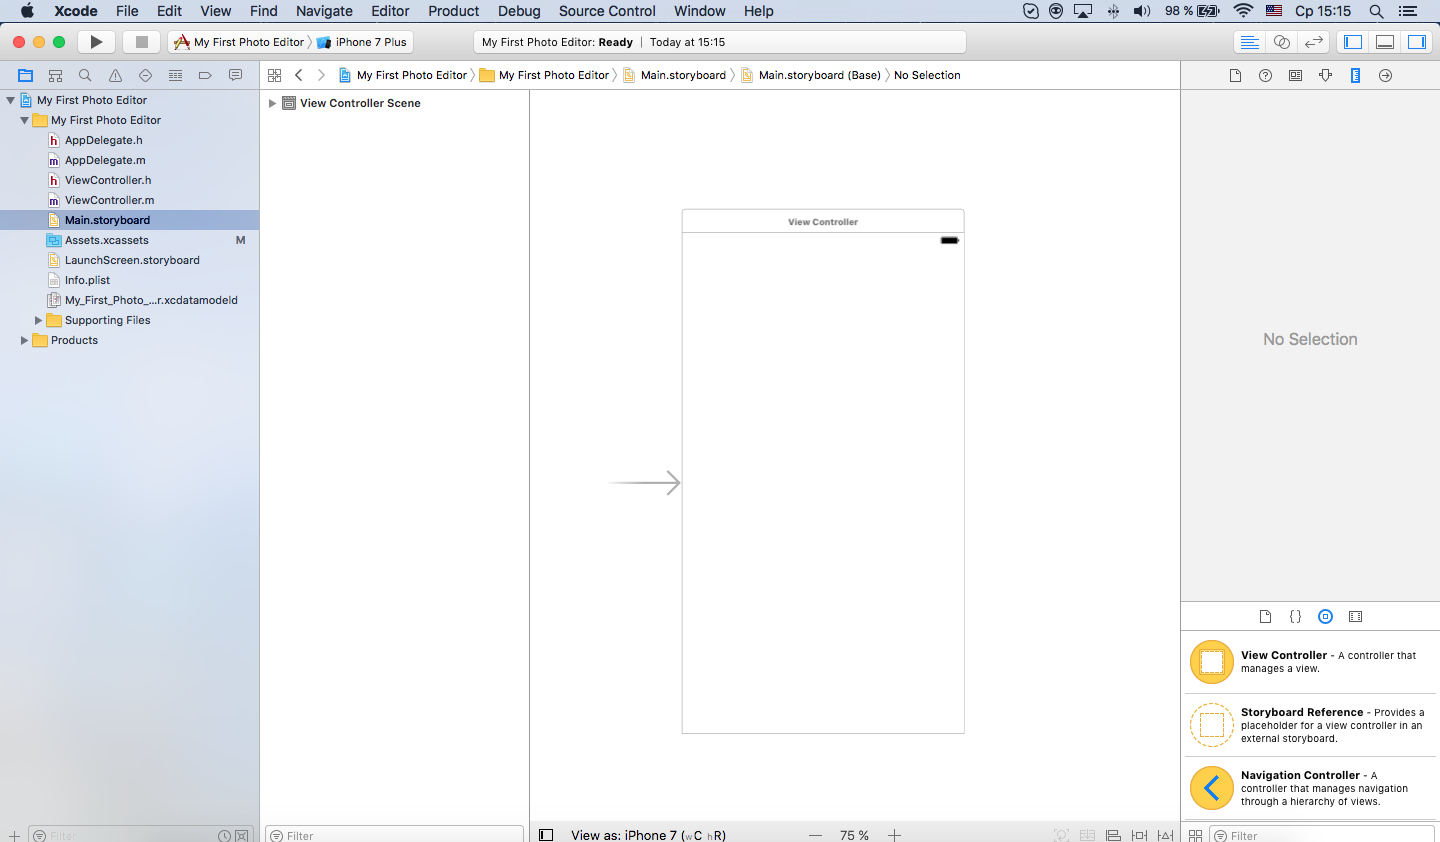
Choose a mechanism for developing the interface program main.storyboard.
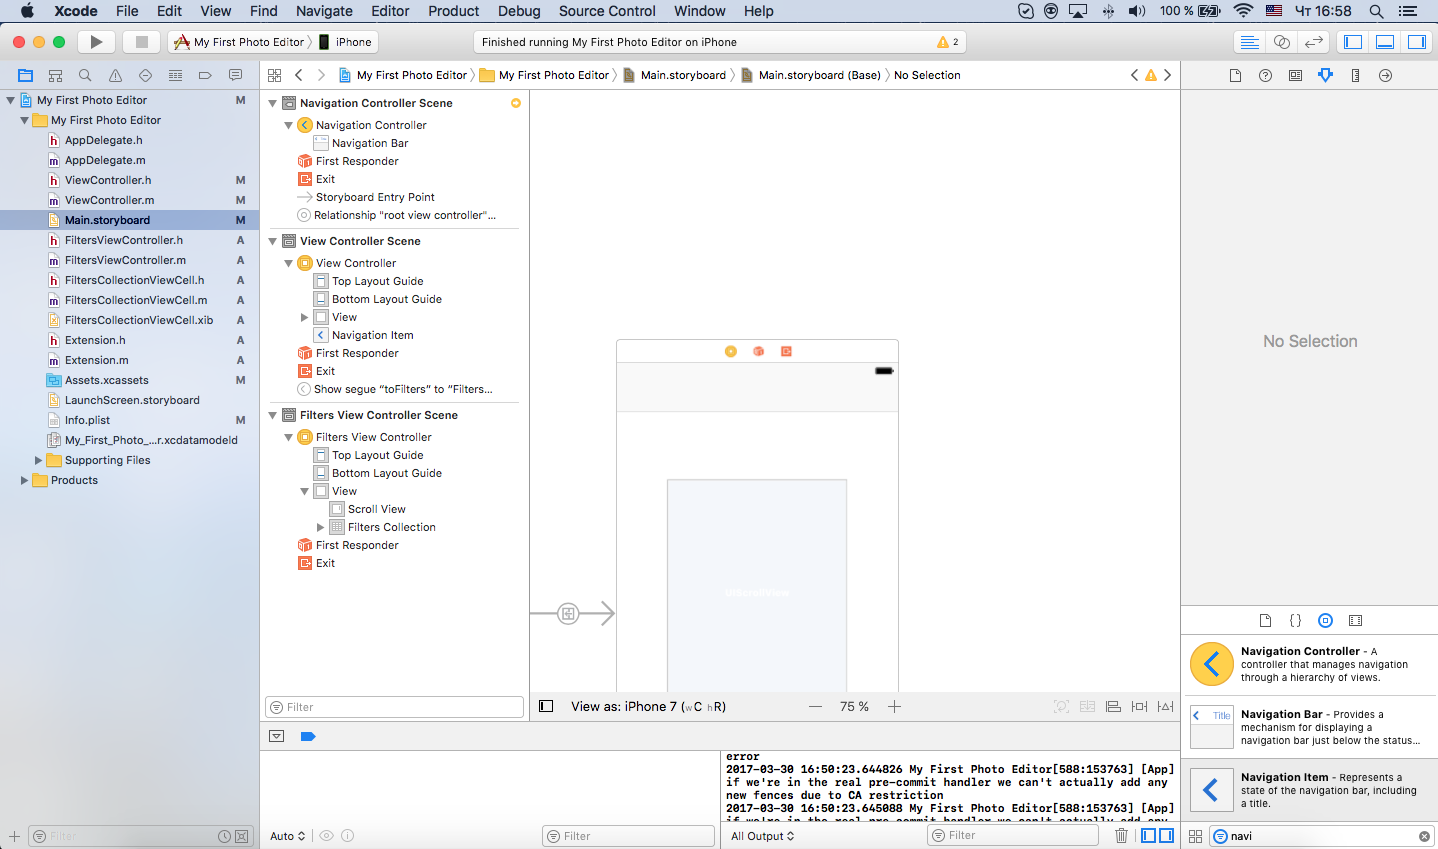
We will have to move on to other scenes that will be added later. To do this, drag the Navigation Controller onto the storyboard.
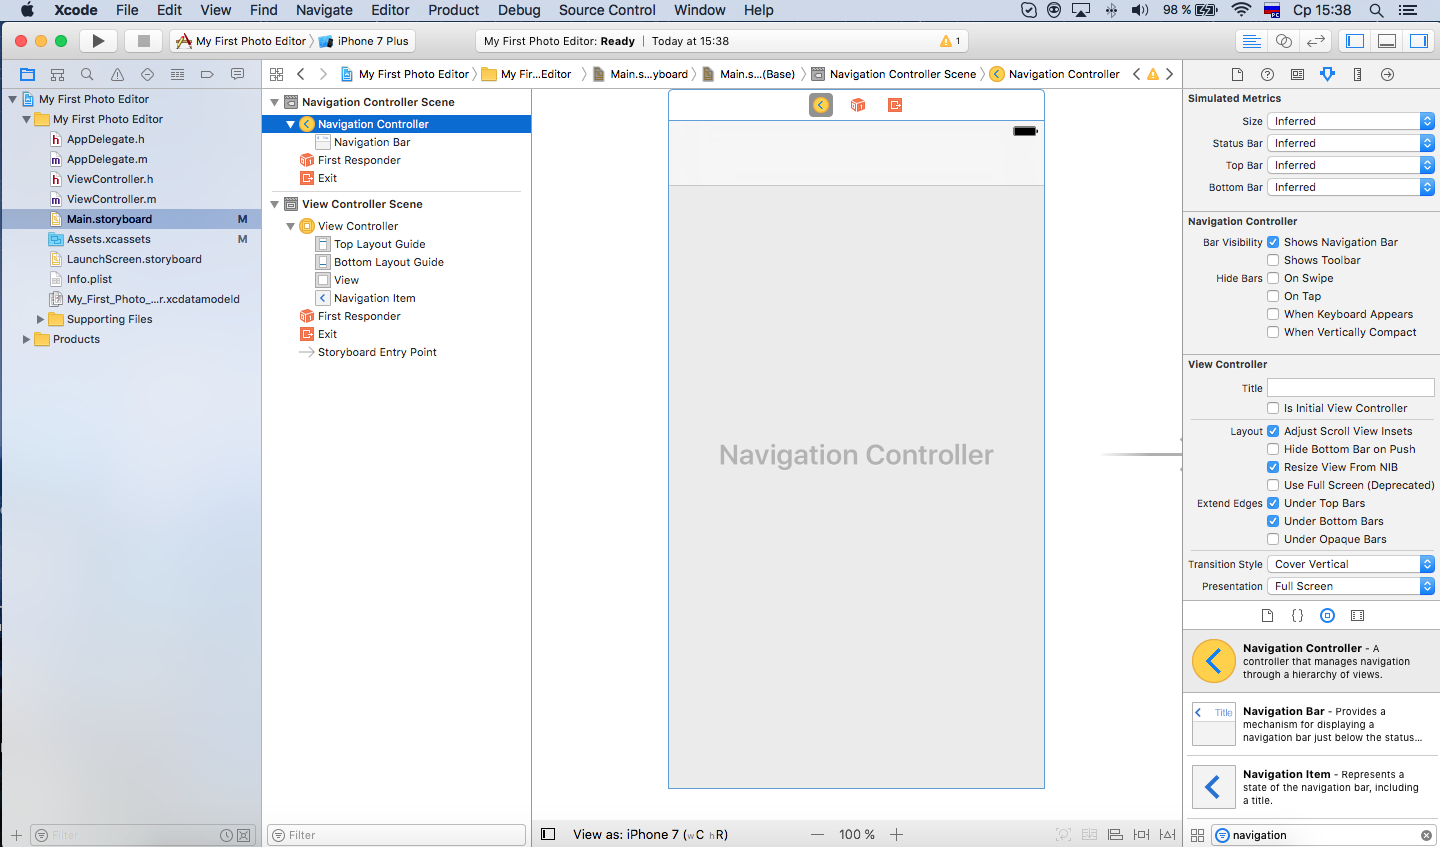
Remove the Root View Controller Scene - we will not need it. It now remains to associate the Navigation Controller with the original View Controller.
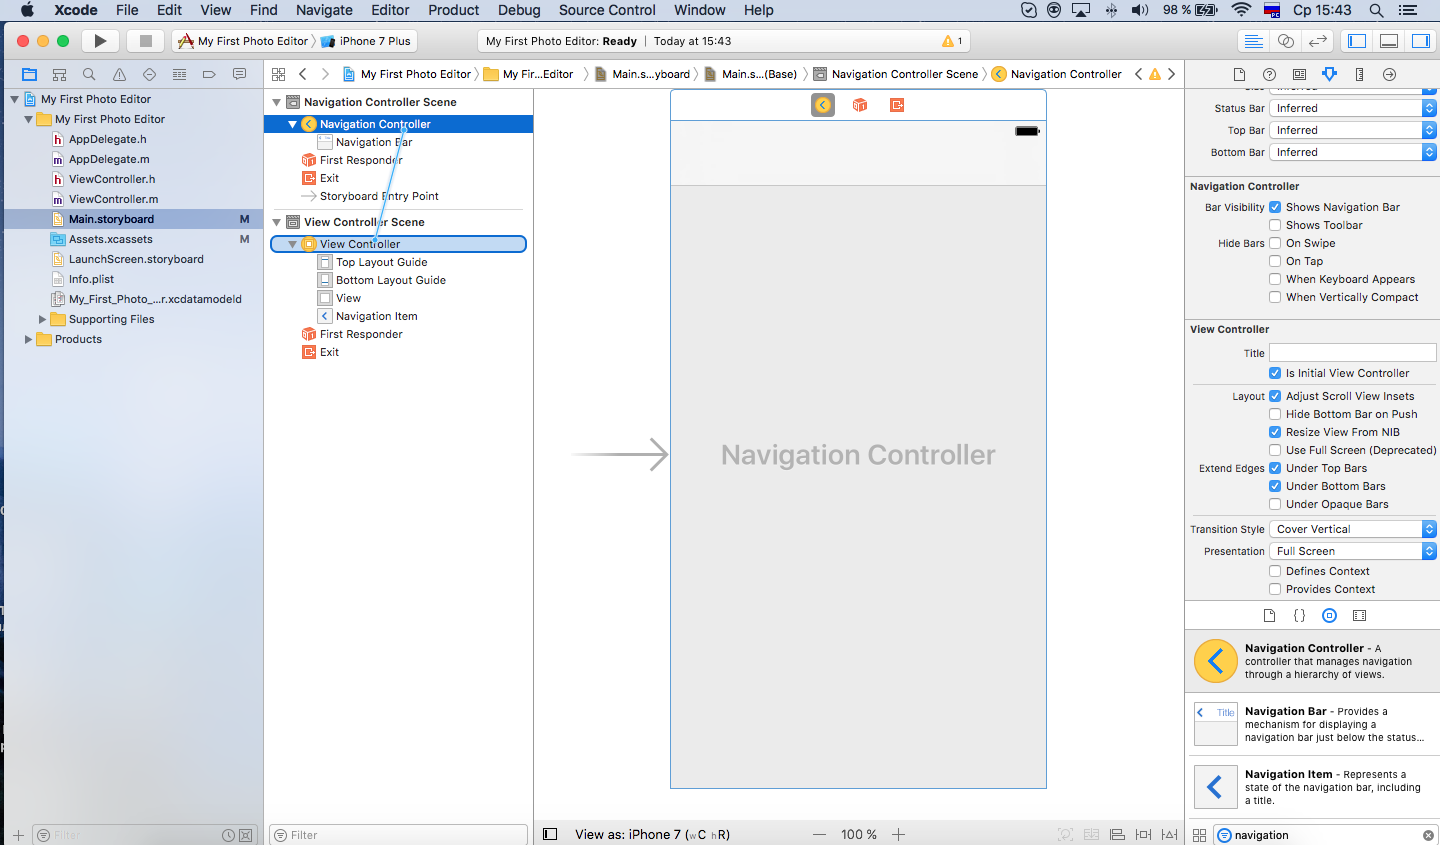
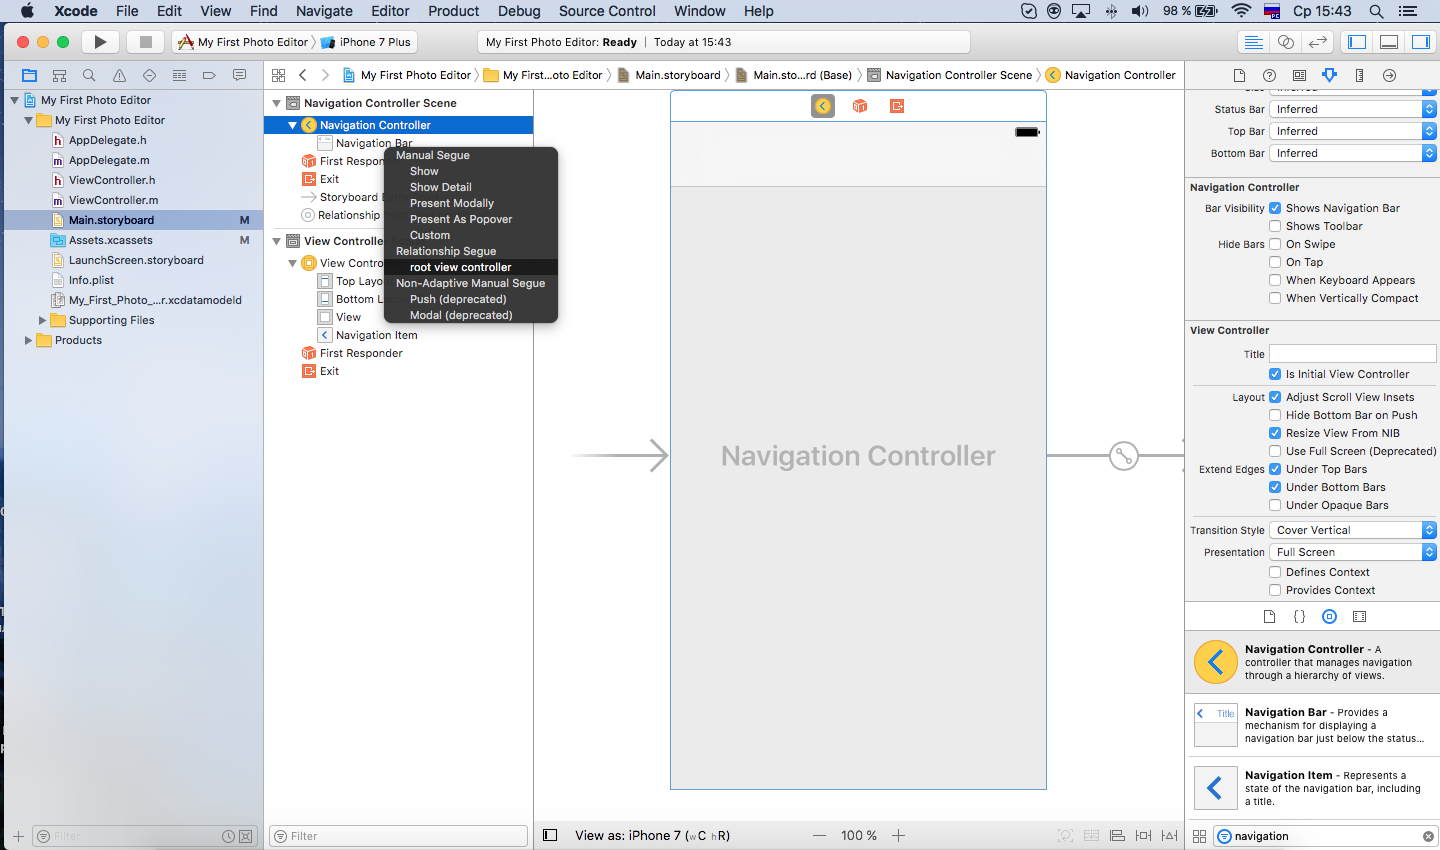
Select the Navigation Controller, tick the checkbox “Is Initial View Controller” (Navigation Controller → Attributes Inspector → View Controller → Is Initial View Controller; you can see how to do this in the pictures) and connect the Navigation Controller with View Controller.
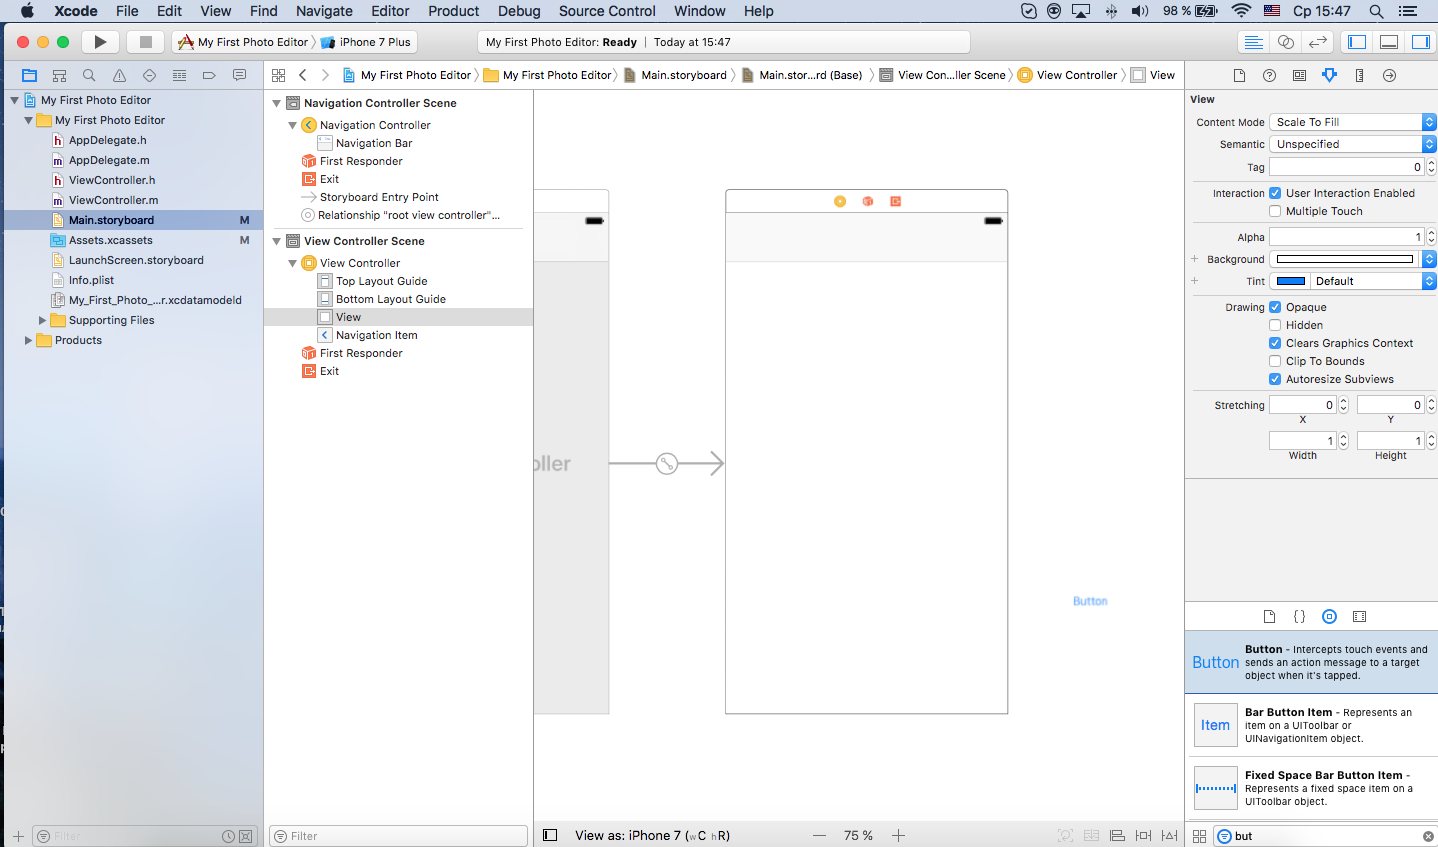
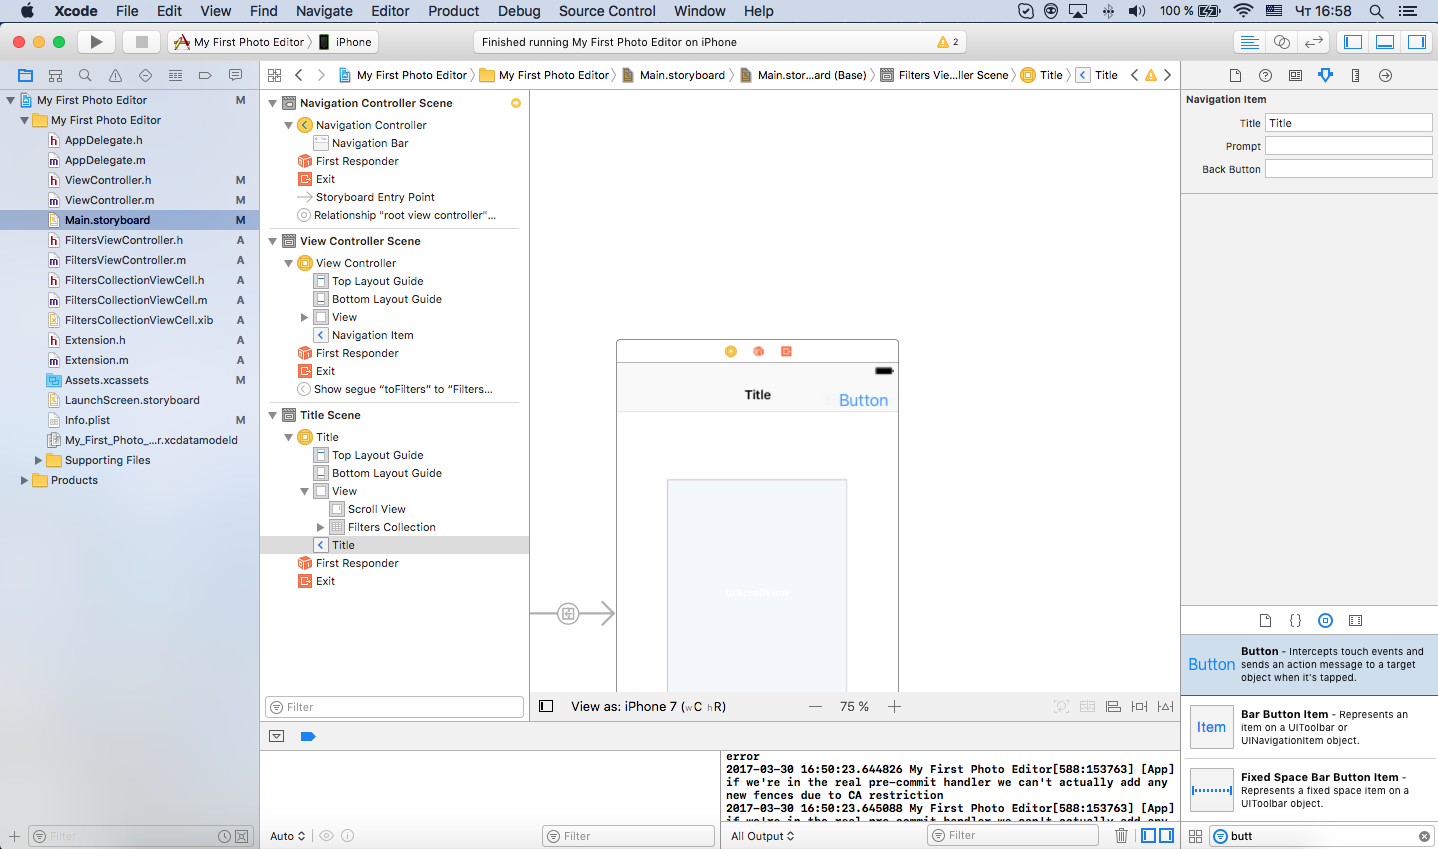
On the View Controller, we need a button to open the gallery window. Transfer it from the Object Library.
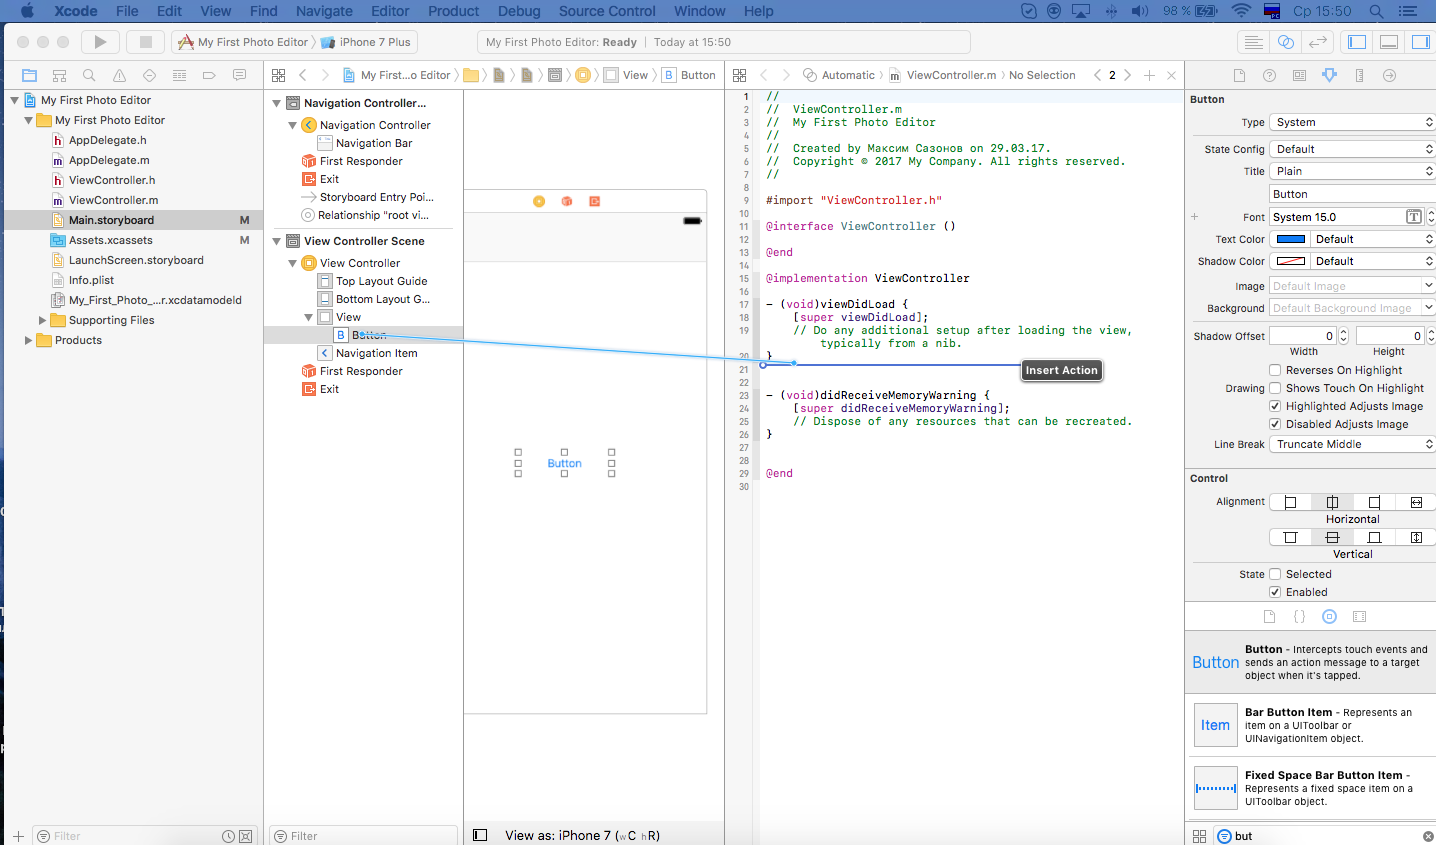
Create a button click event and add it to the controller properties.
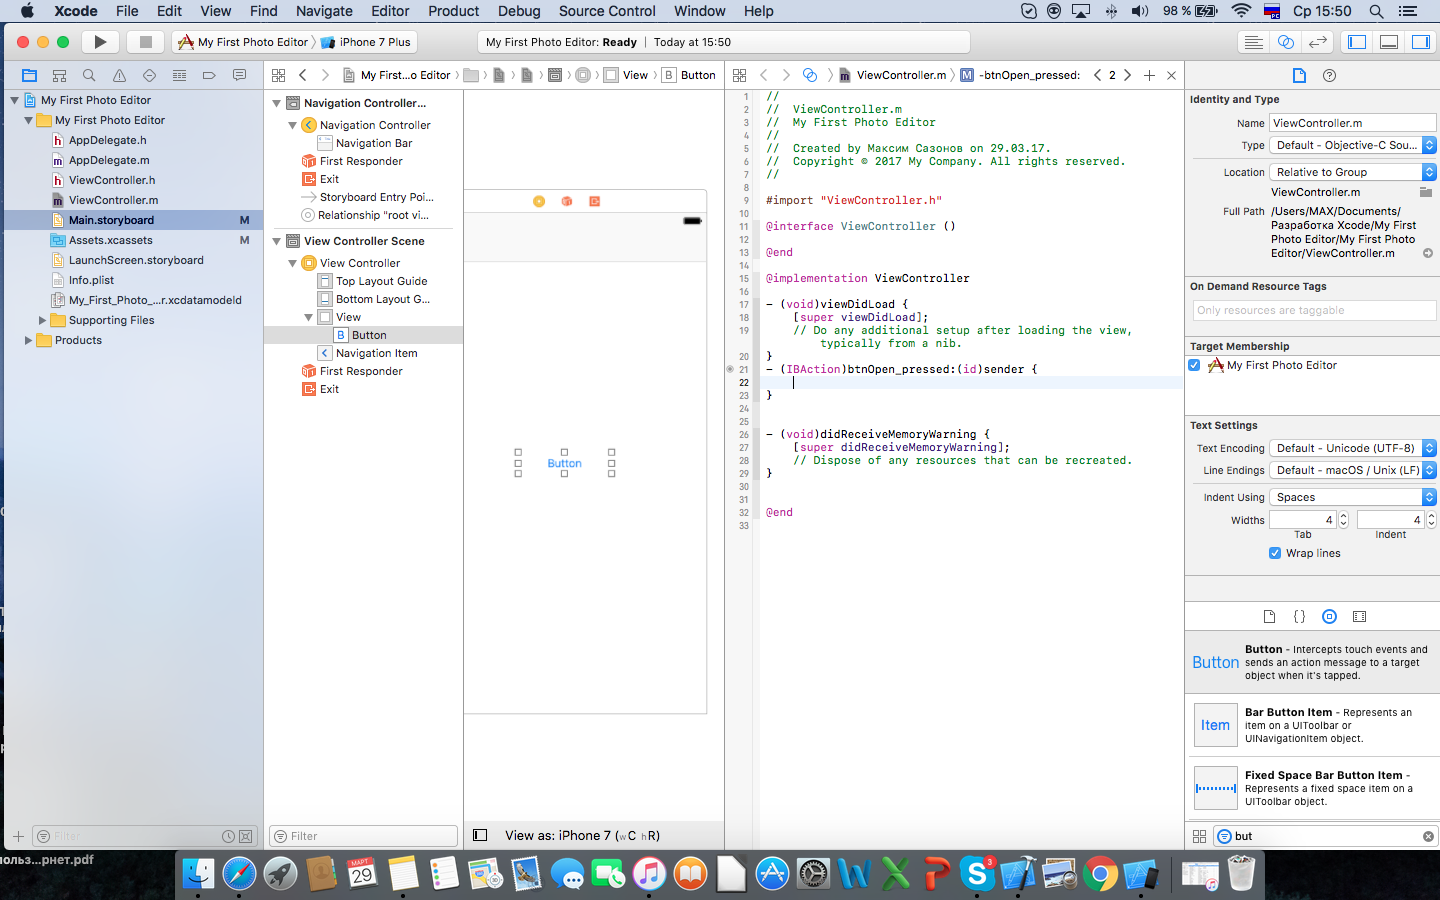
Since we are going to use delegate methods, we’ll add delagate UIImagePickerControllerDelegate, UINavigationControllerDelegate protocols to the interface of the ViewConroller.h controller.
It turns out:
Let's write the following lines in the action of the button:
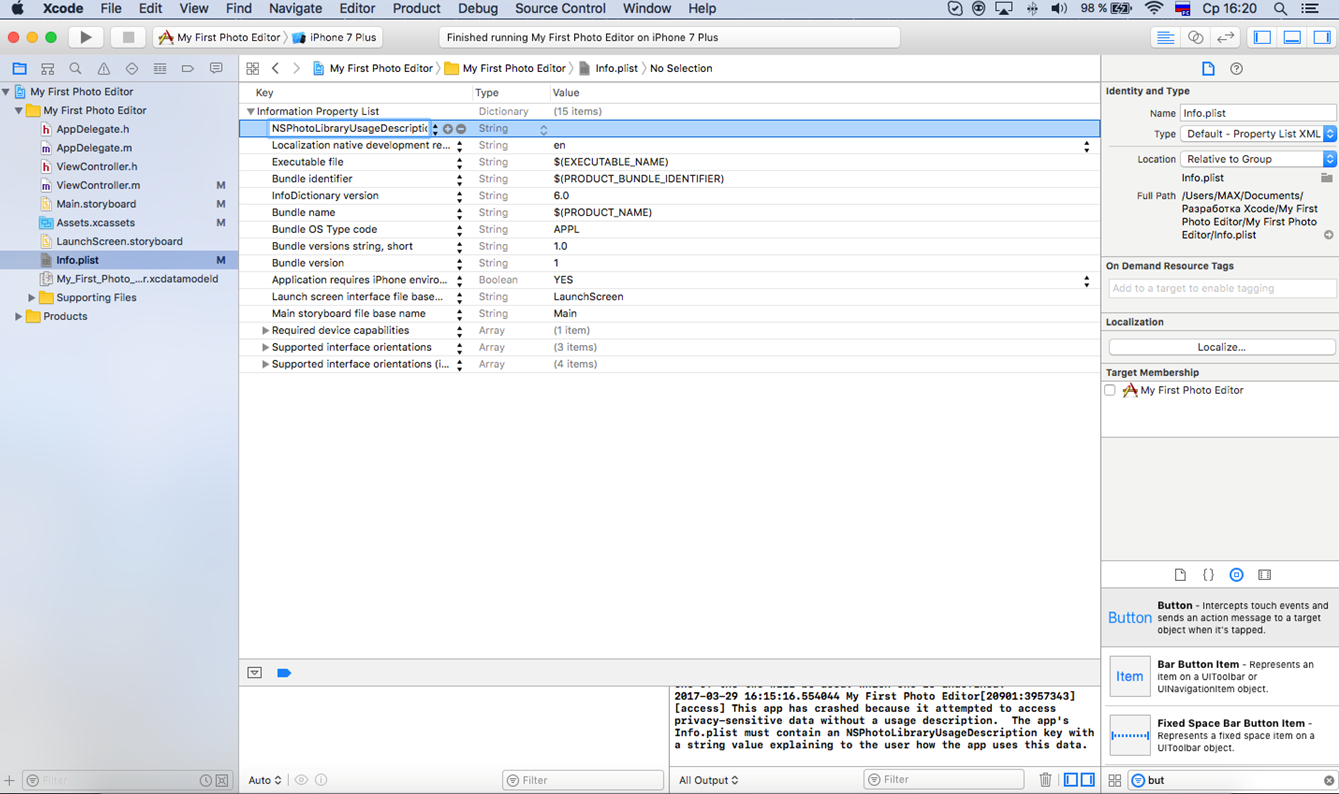
Run the project and see our button on the simulator. Let's try to click and ... get a crash. Why? We forgot to add the property to the info.plist NSPhotoLibraryUsageDescription. Correct this error.
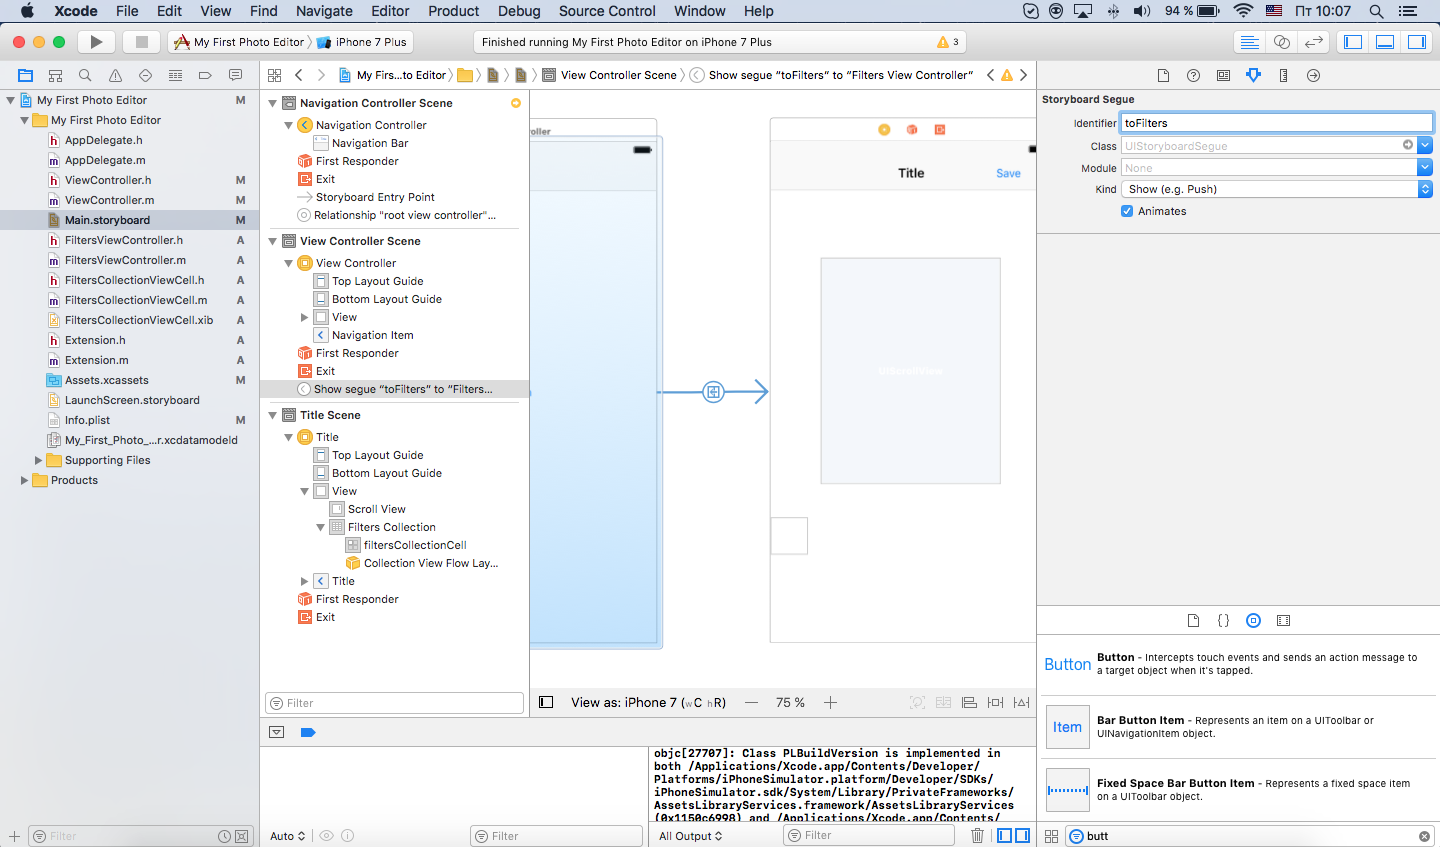
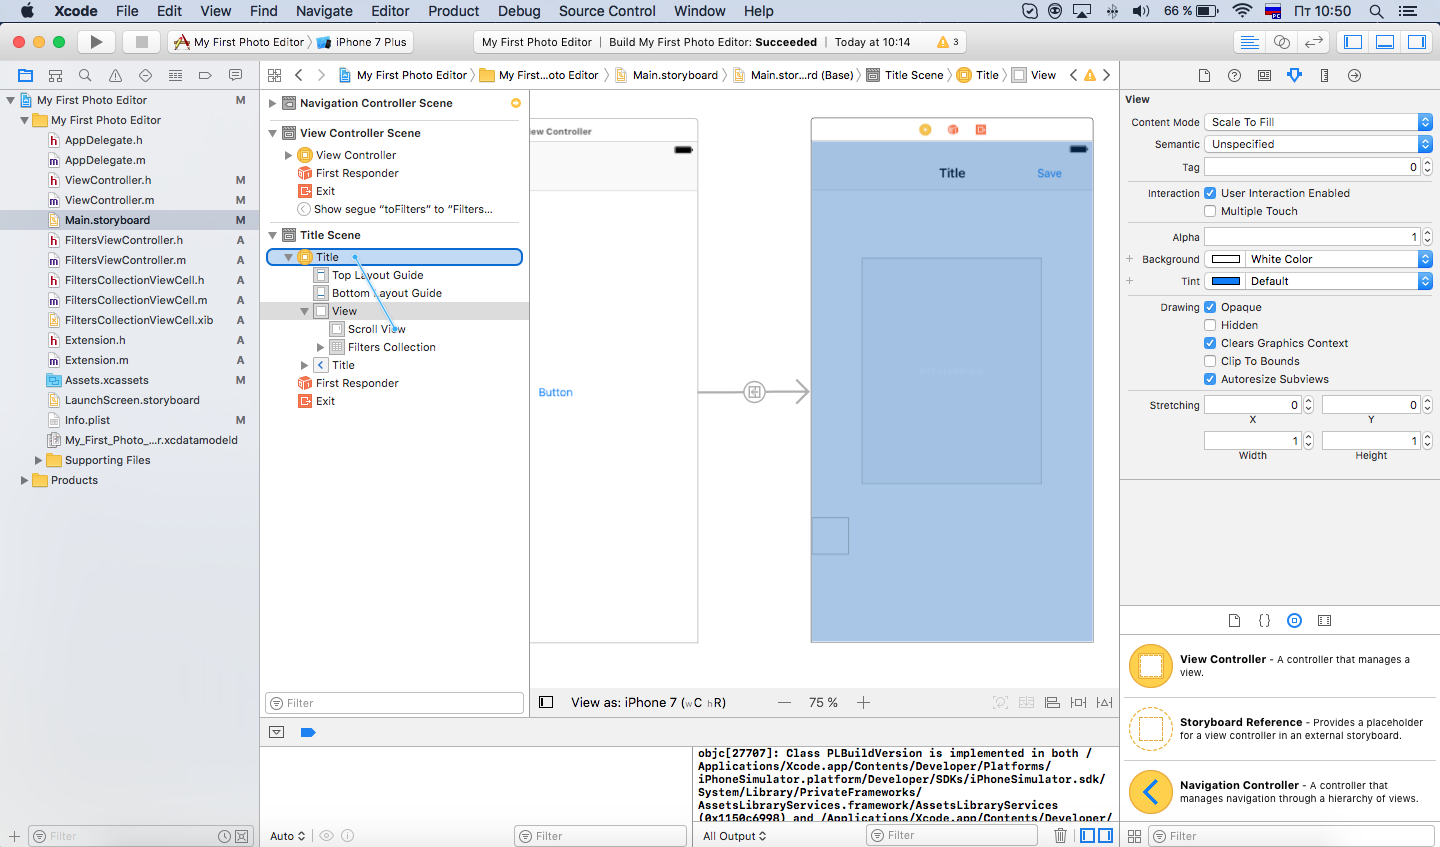
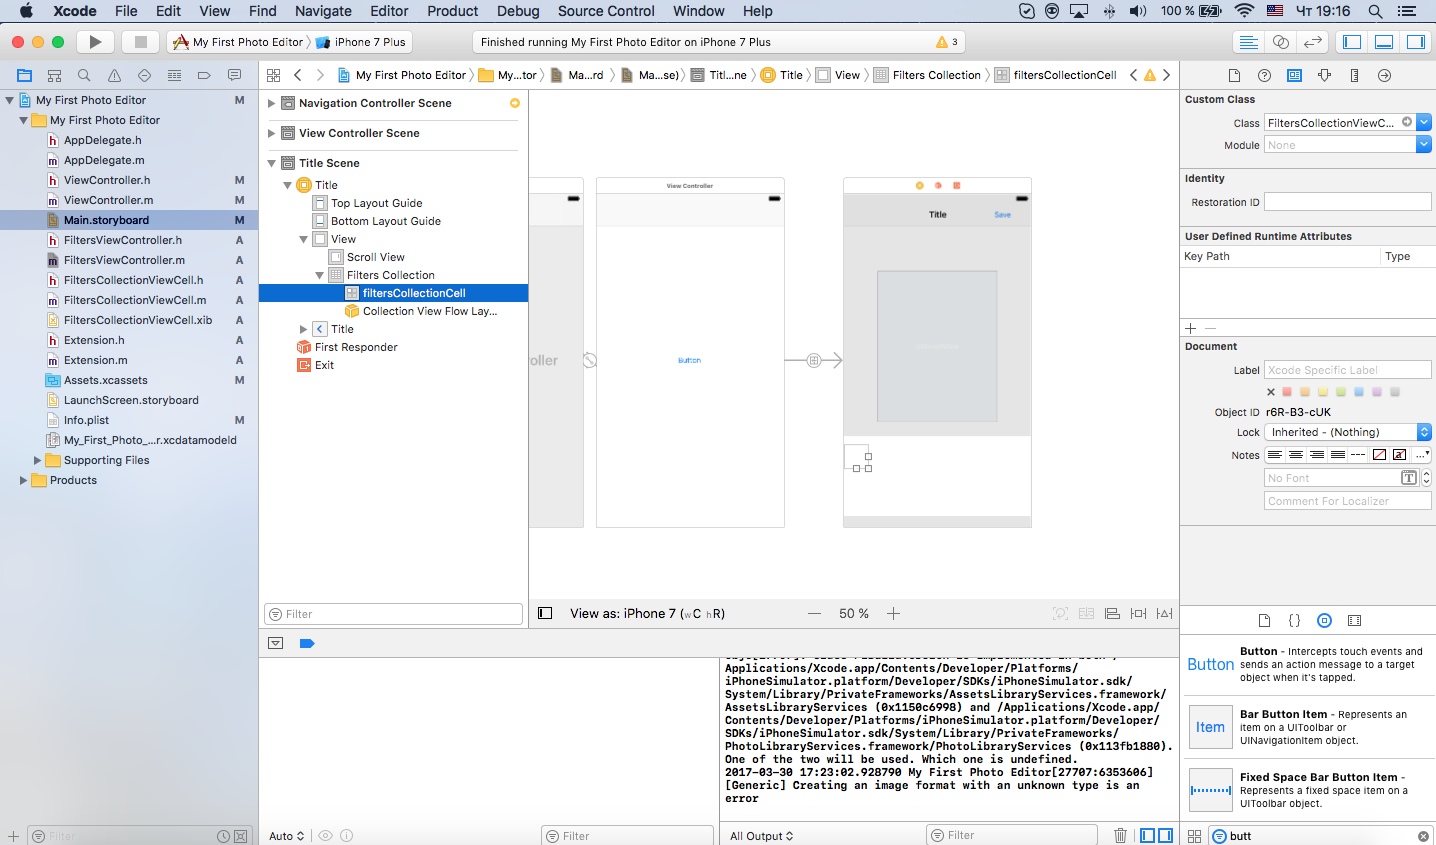
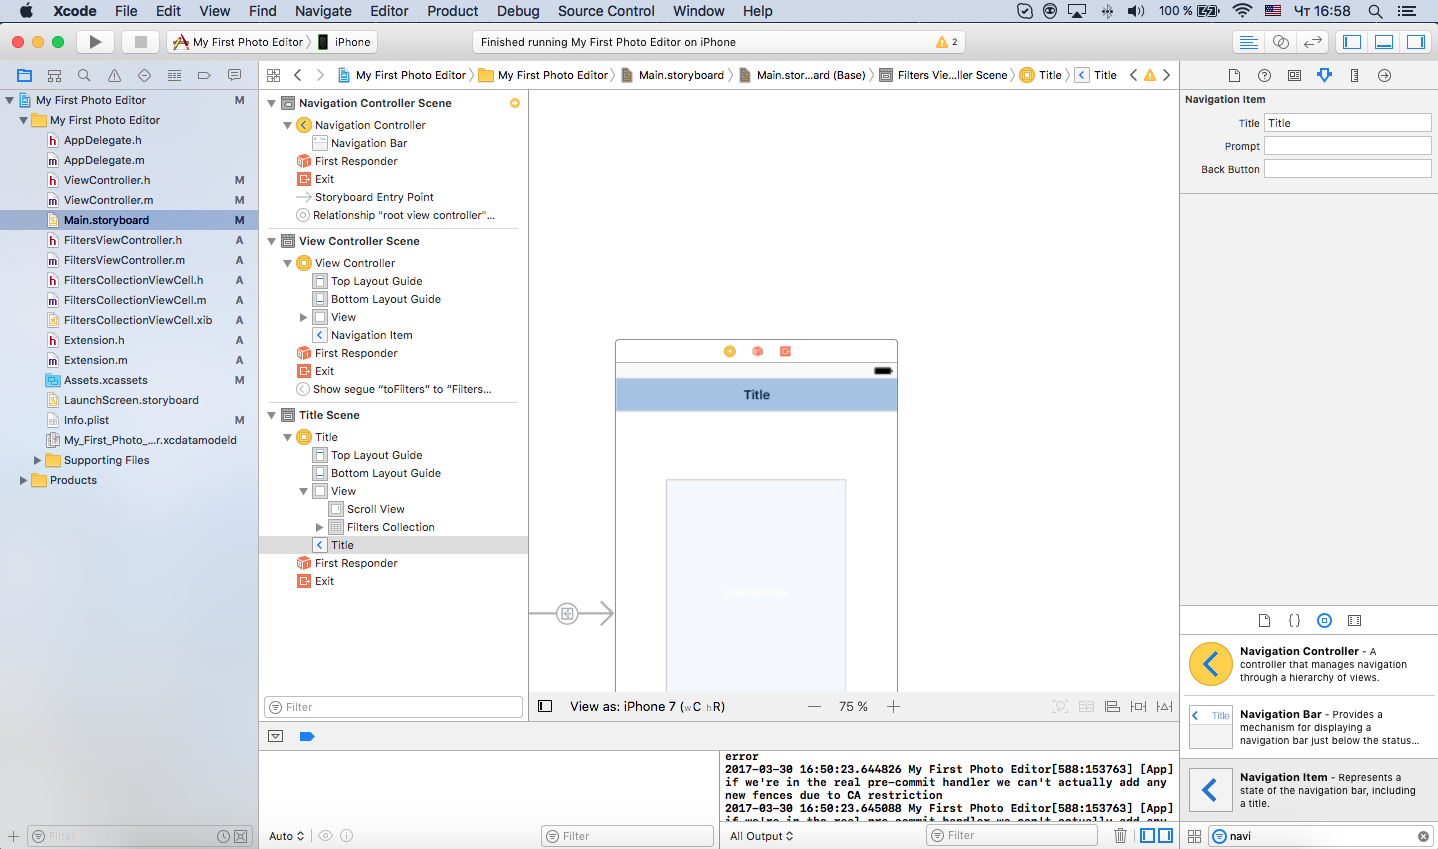
Now you need to add another View Controller to the storyboard. Let's make a connection according to the scheme shown in the screenshots.
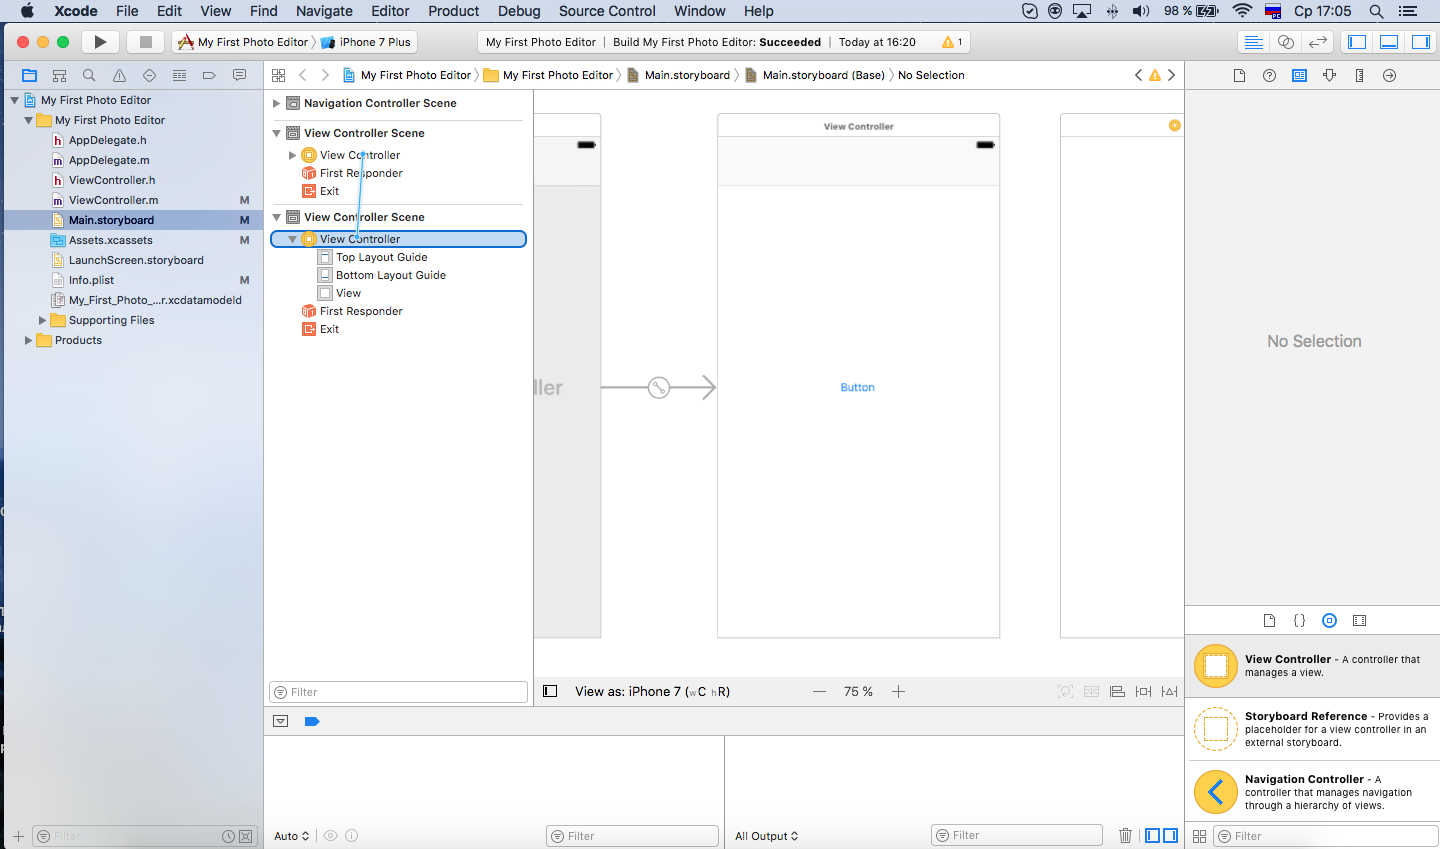
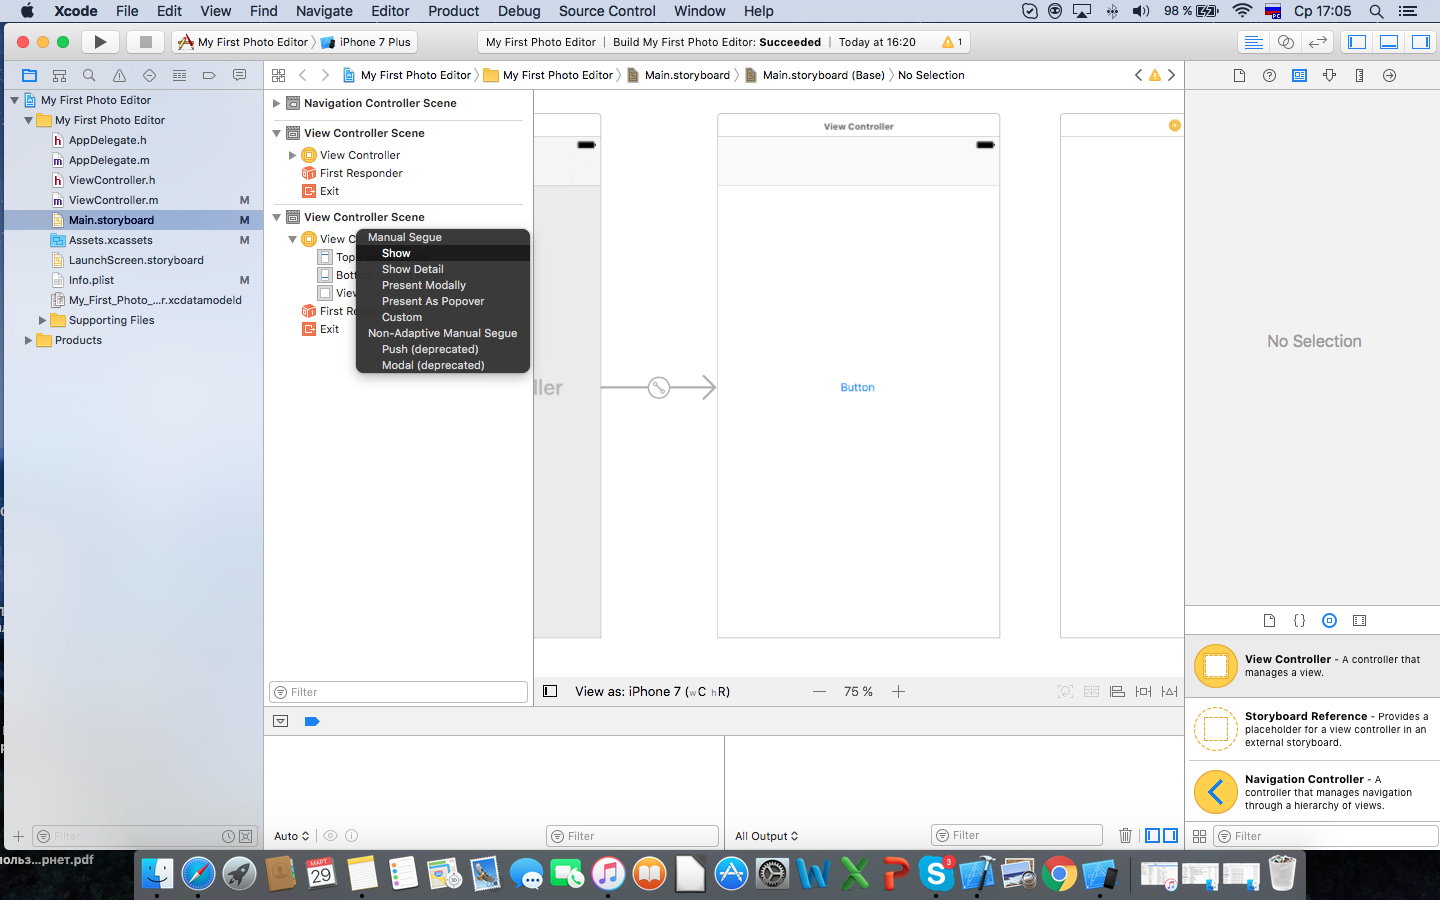
Let's write the Indetifier key “toFilters”. The illustration shows how this can be done. Select the link on Storyboard → Attributes Inspector → Storyboard → identifier → toFilters.
Now let's add to the ViewController.m methods of selecting a photo and switching to a new controller.
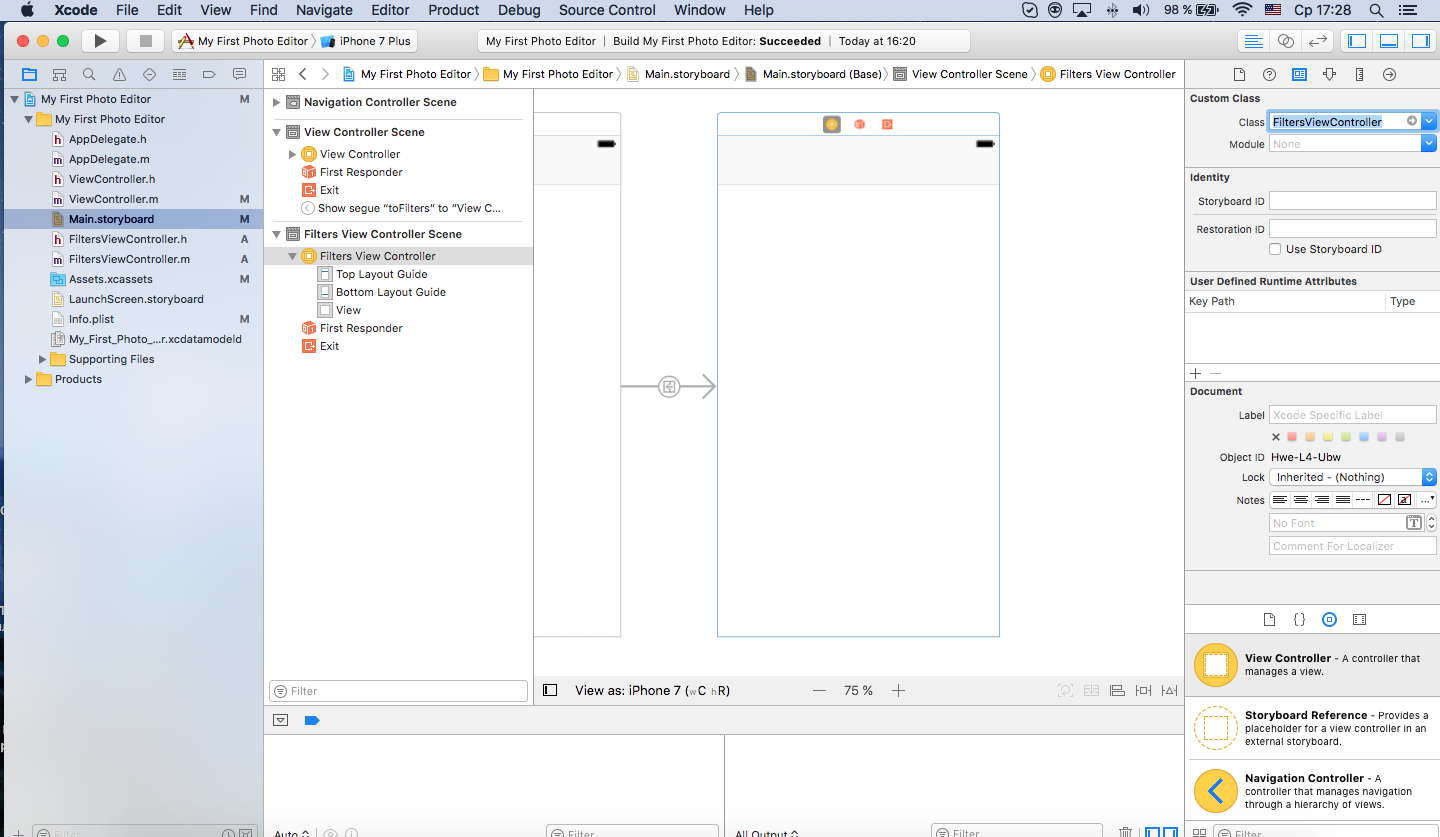
For the new controller, we need to create a special class. To do this, in the top panel, select File → New → File → Cocoa Touch Class → Next. Let's call it FiltersViewController and be sure to select in the column Subclass UIViewController. In the Indetity inspector we register our class.
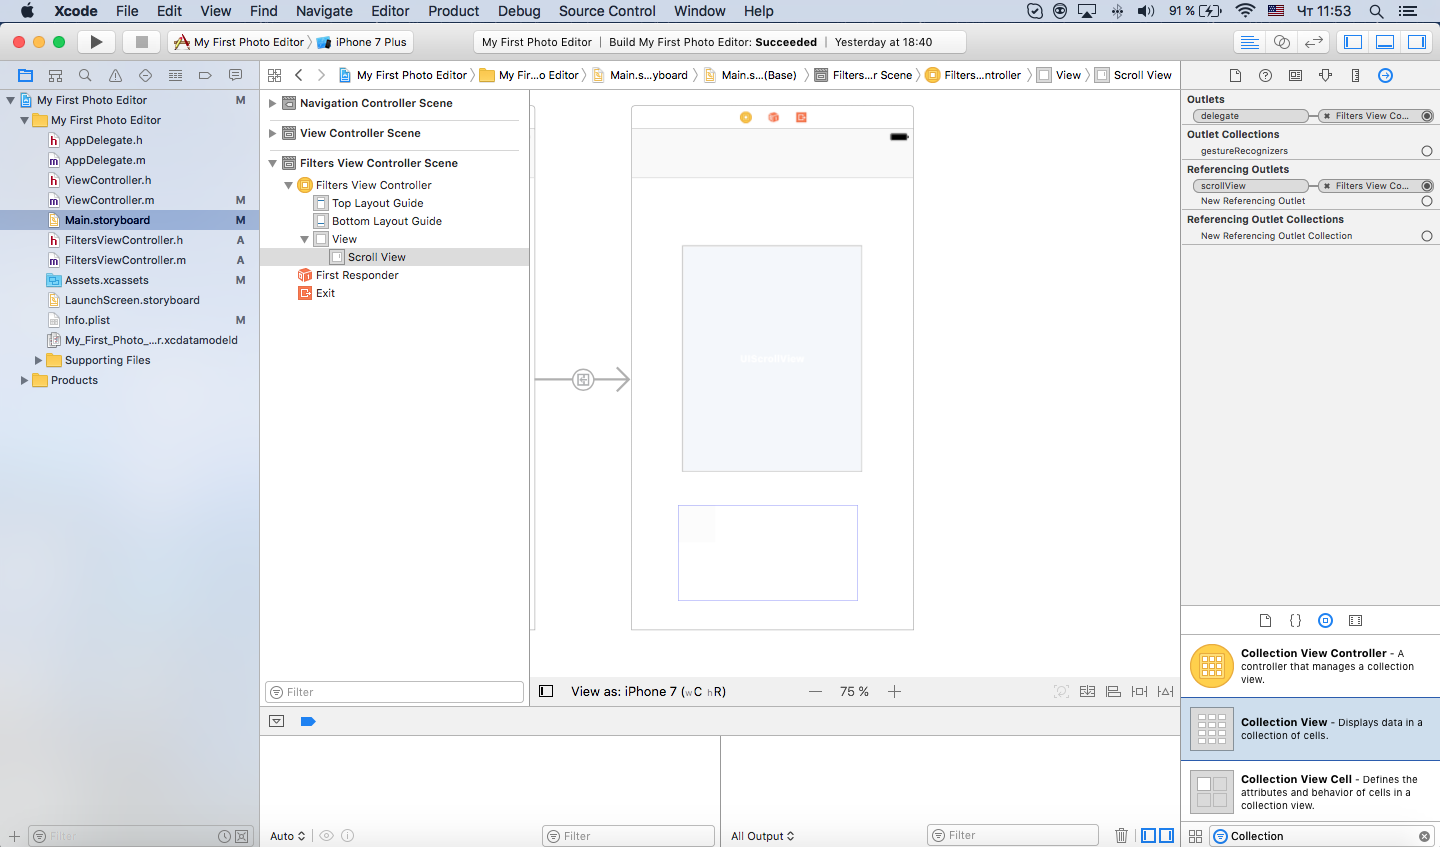
Add to the controller Scroll View (or any other View, at your discretion), it will display an image with the applied filter. Create a link to FiltersViewController.
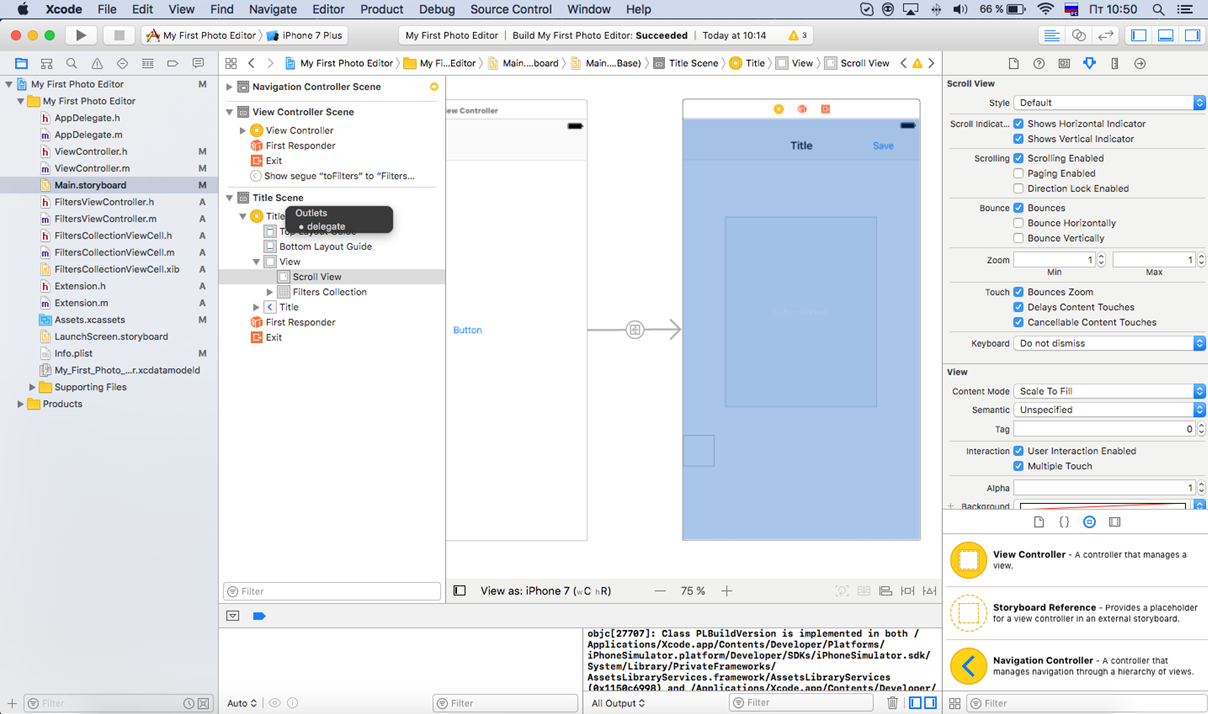
Add Scroll View to the properties of the controller, as was done earlier. Add the UIImageView and UIimage properties.
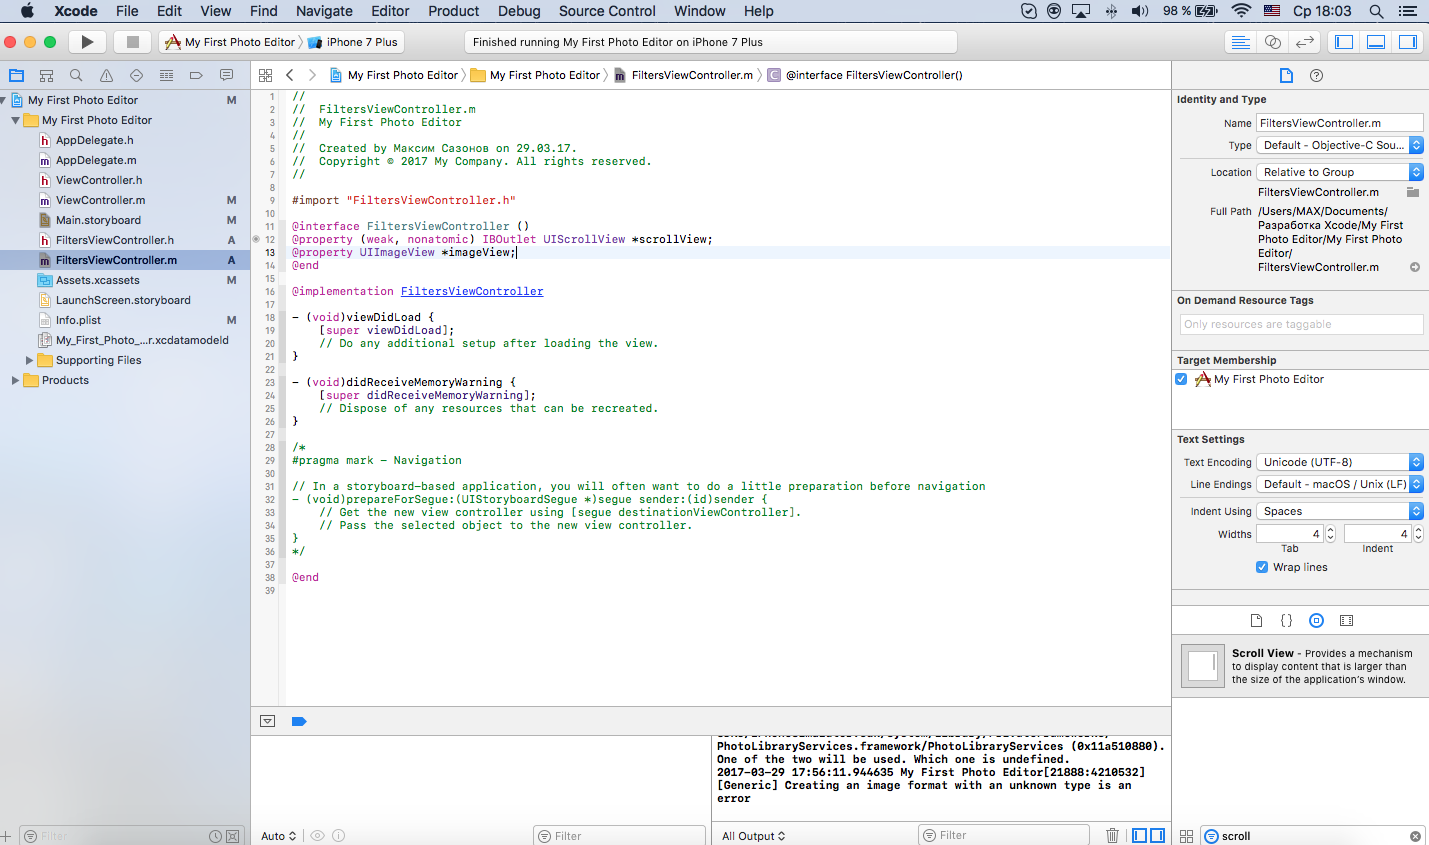
In this case, the UIImage property needs to be added to FiltersViewController.h, since we plan to use it in another class.
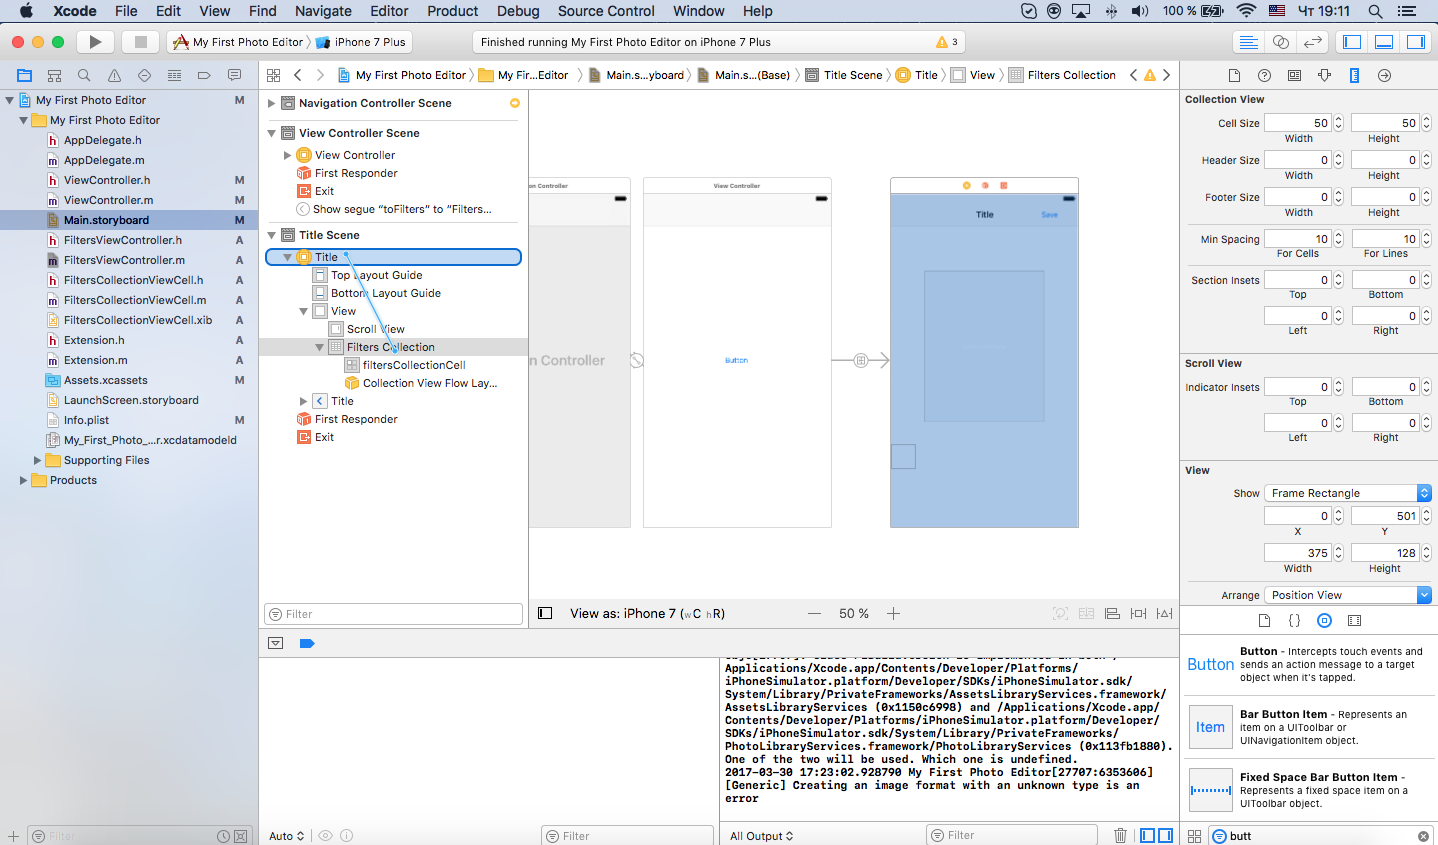
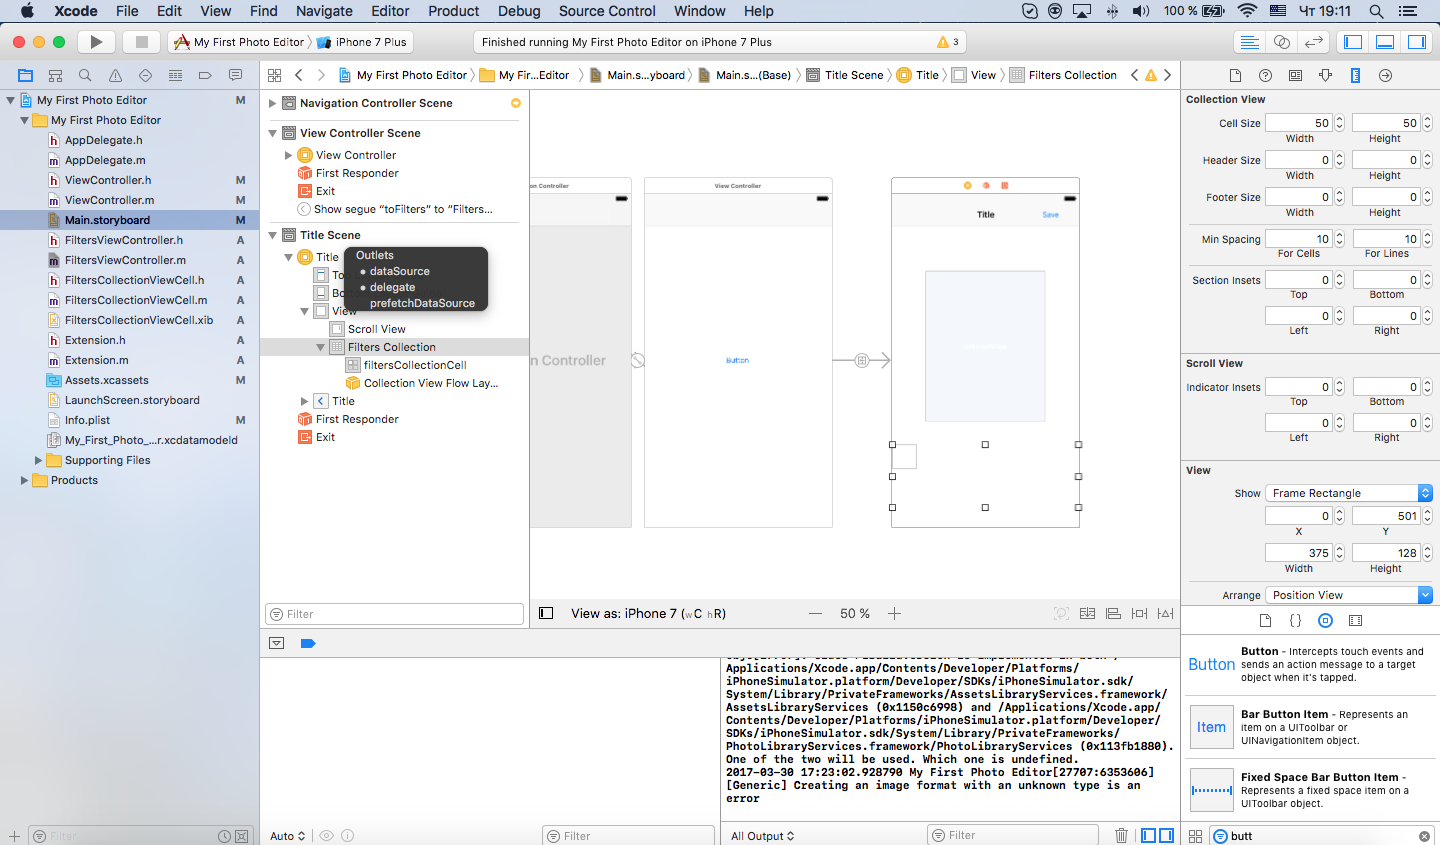
Now create a collection with filters. Find the Object Object Collection View in the Object Library.
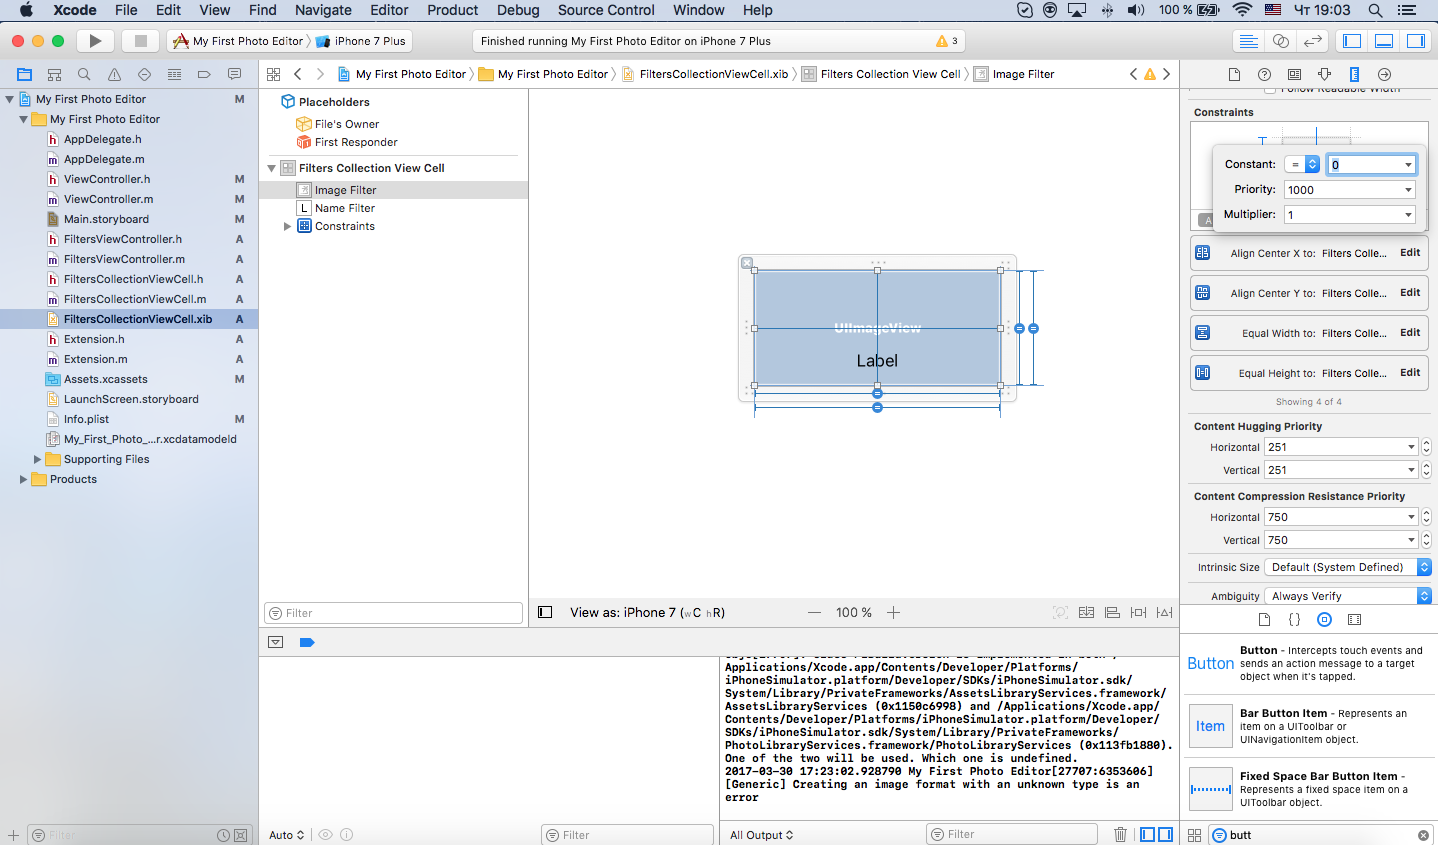
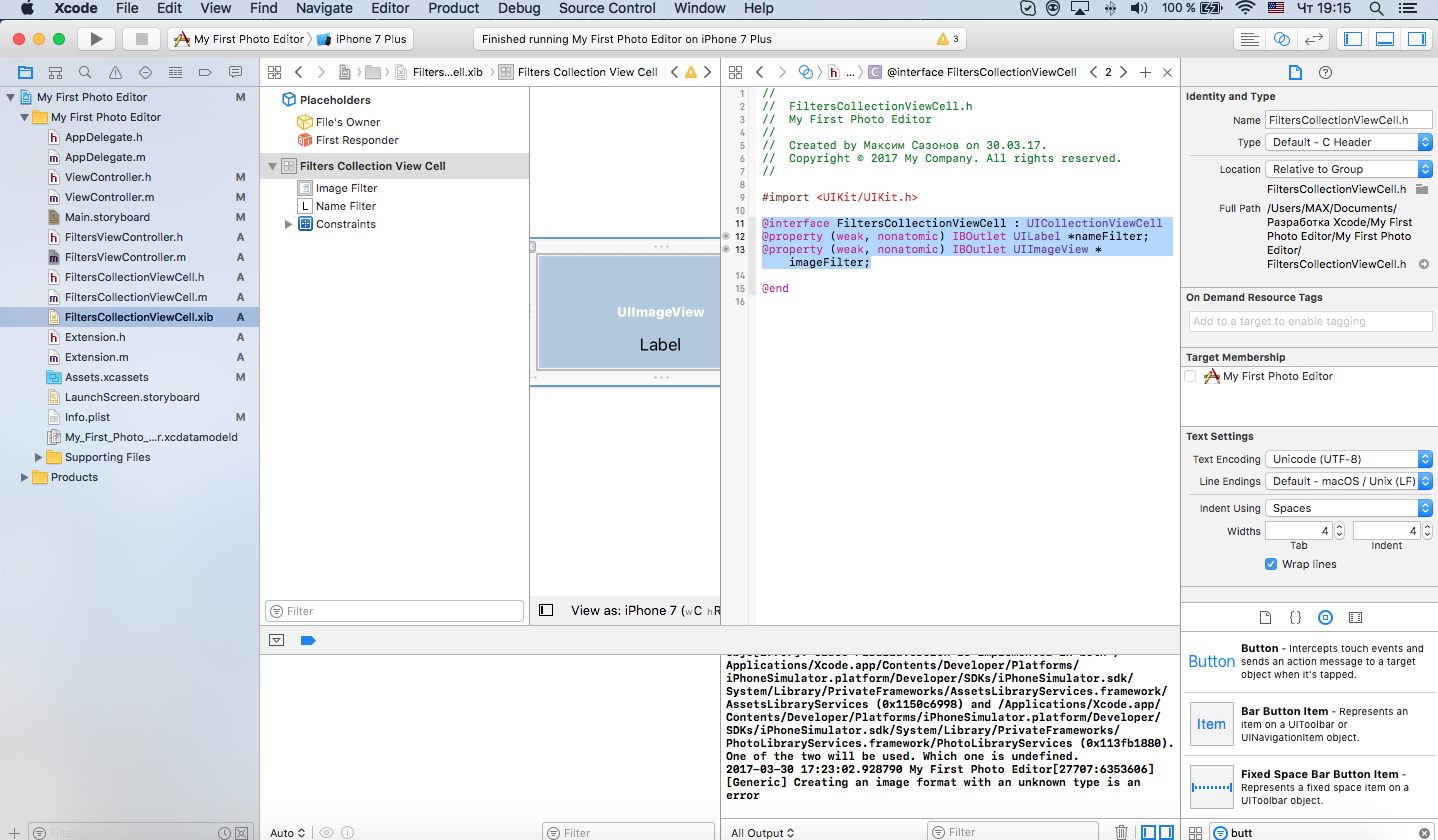
Create a new class for the collection. Go to the xib file, add UIimageView and Label.
Next we set the size of the UIImageView. The easiest way to do this is to right-click the object and drag it onto the one you want to link to. Select the connection, as shown in the screenshot. Then go to the Size inspector of this object and change the settings. Set all constraints to 0.
We establish communication between elements.
Import a new class into FiltersViewController
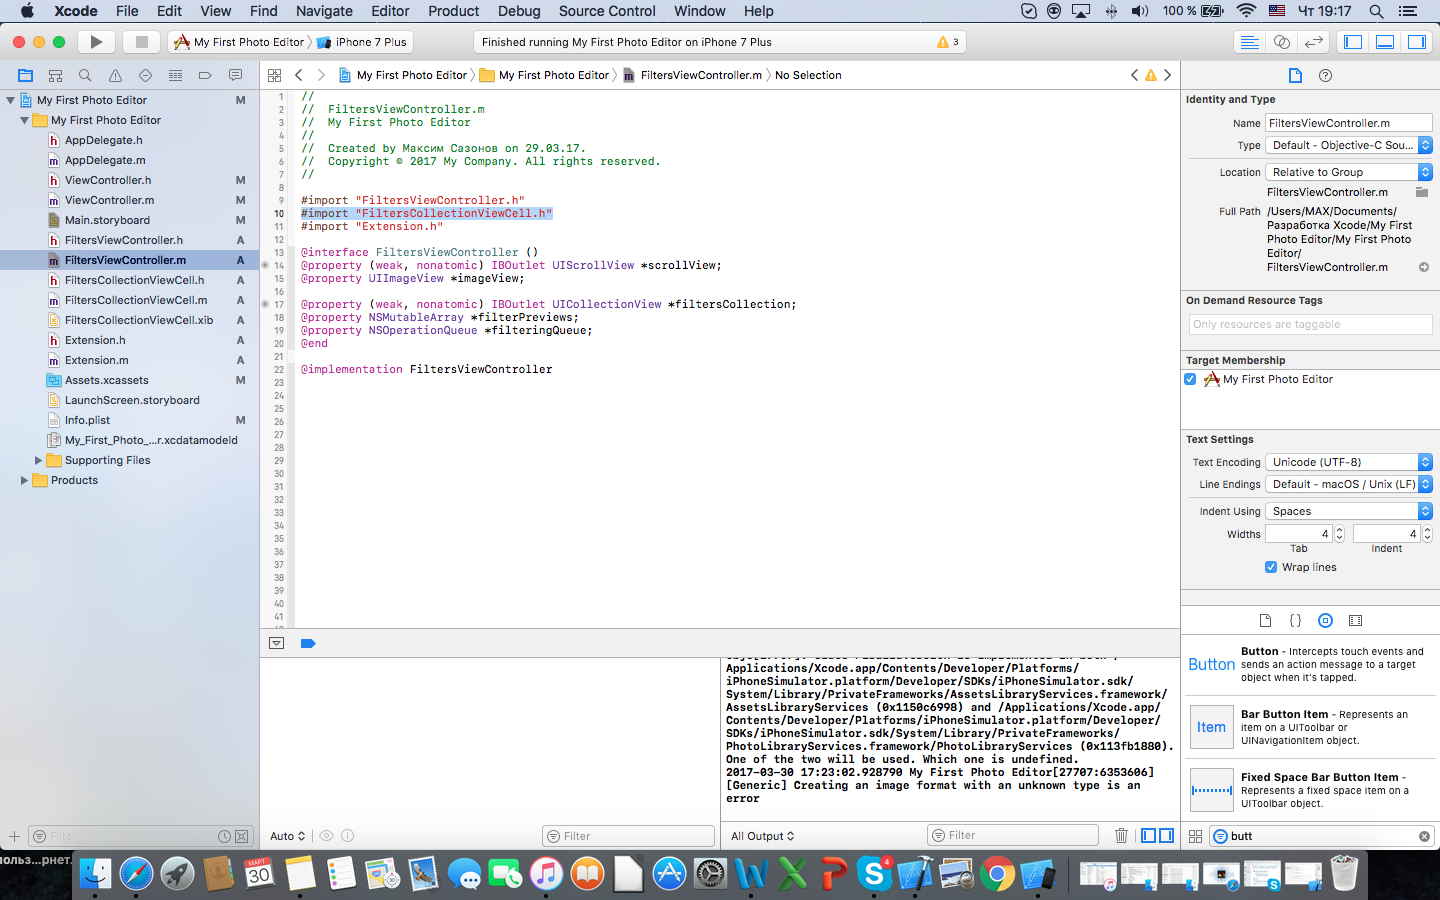
and add FiltersViewControllerCell to this class like this:
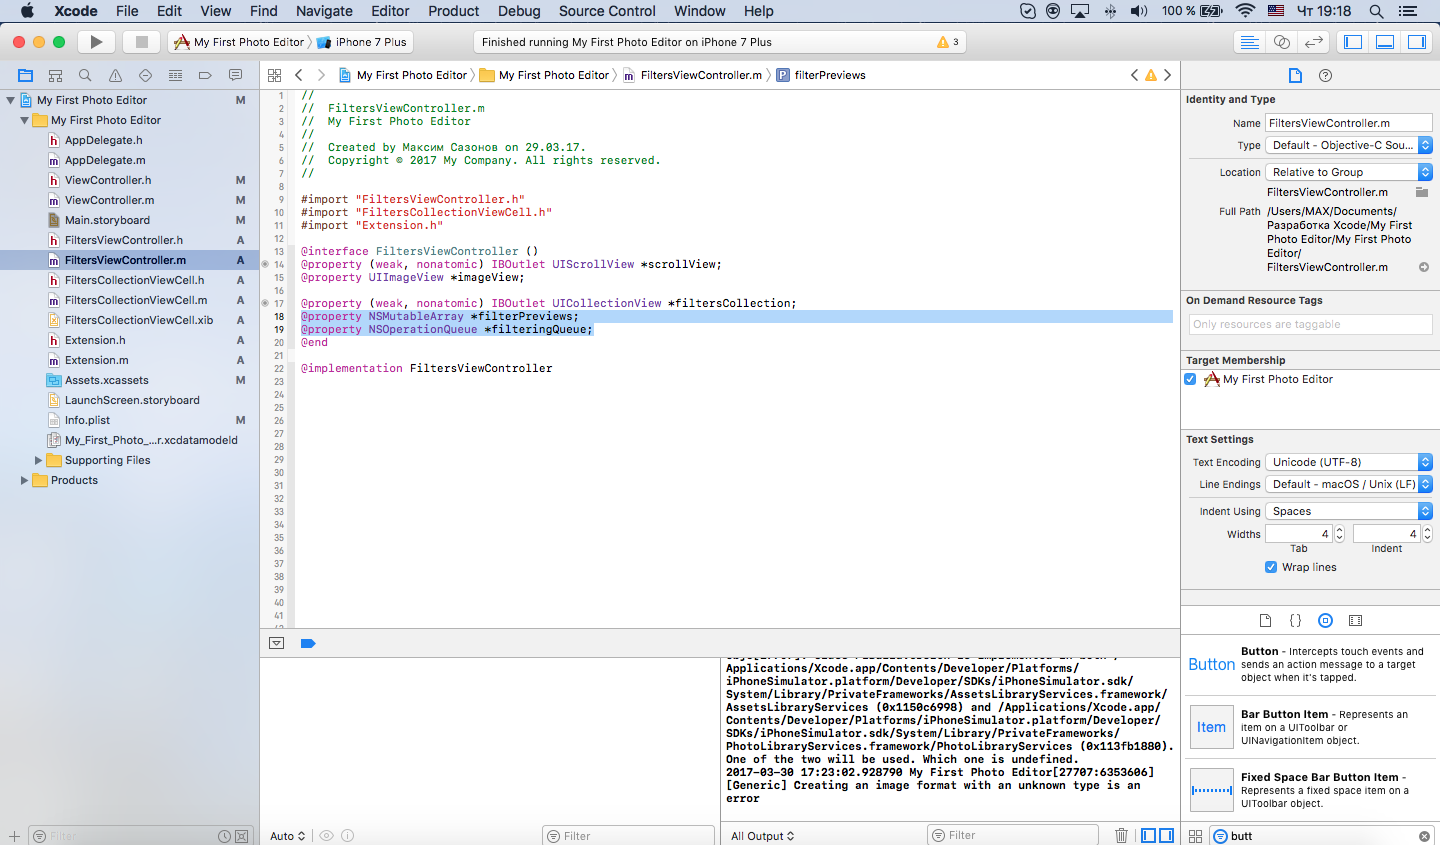
Now let's add the NSMutableArray array and the NSOperationQueue operator to the FiltersViewController properties — they will be useful to us a little later.
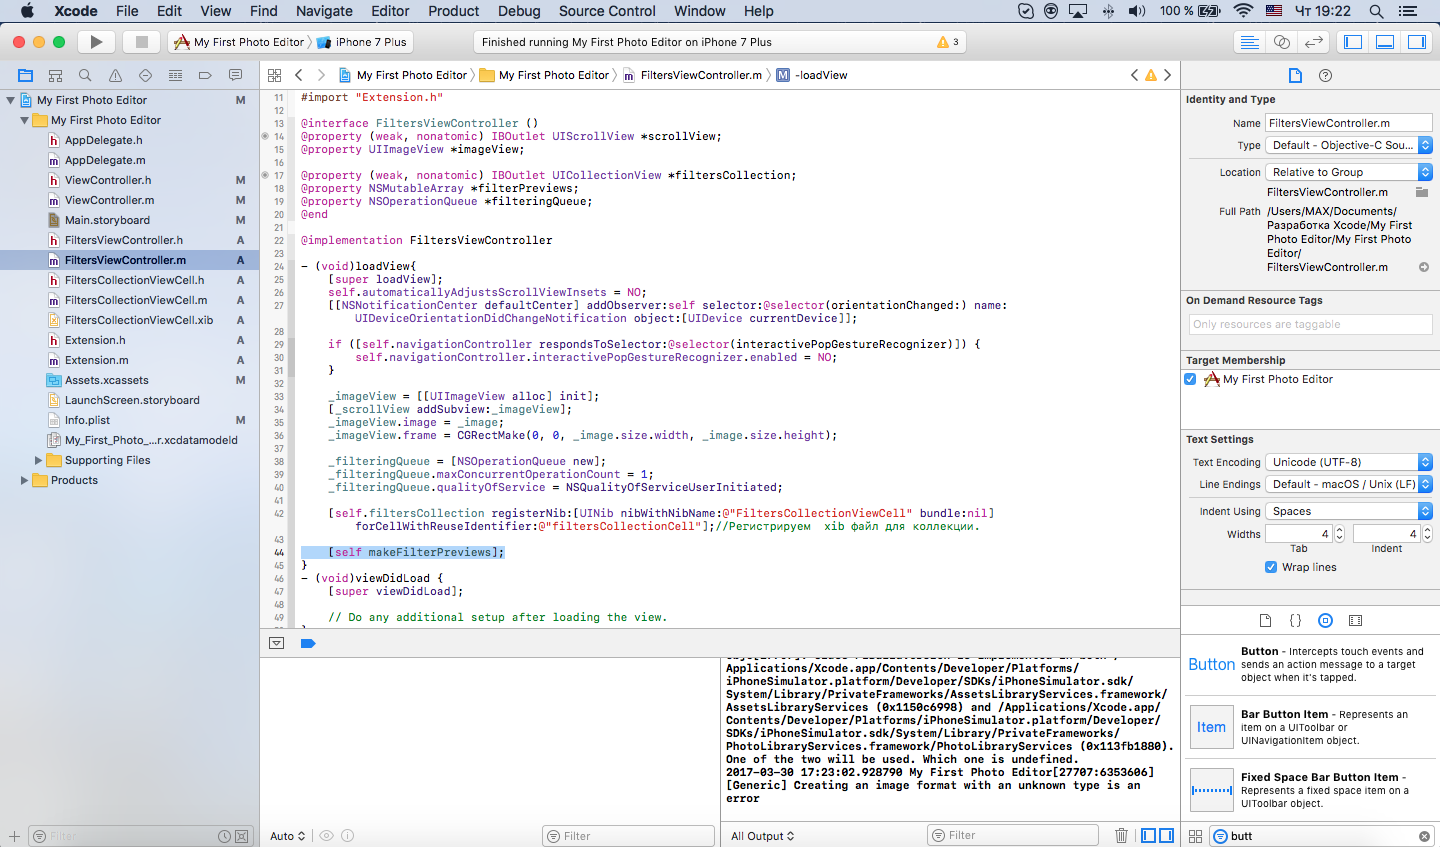
The UIViewController life cycle begins with the loadView method. So, in this method, we need to transfer the image that we chose in the last scene, and add a preview to the collection.
As a result, the loadView will look like this:
In order not to reboot the controller, we will create the Extension class and add methods to it that will perform the function of applying a filter to the image:
Further we will write the interface of calls in Extension.h:
Add the following methods for the collection and for the Scroll View to the FiltersViewController.m class:
The following ViewController lifecycle method is viewDidLoad. viewDidLoad is a good place to continue controller initialization. We will not need it because the initialization of all design elements is already defined. However, the dimensions of the view are not specified, so we will add ScrollView processing in the next stage of the viewWillAppear life cycle:
Create a method for displaying a preview of the filters:
and write the call to this method in loadView
Run our project. After selecting an image, the application freezes for a while. This is because the application of filters to the image takes time. After applying all the filters, the controller will be loaded with an image and a collection with filters.
To ensure the responsiveness of the interface, we add asynchrony when the method is executed.
@synchronized (self.filterPreviews) blocks editing of the filterPreviews array for all elements except the current one.
To update the collection correctly, you need to do this in the dispatch_get_main_queue () stream.
The remaining methods of the ViewController life cycle:
We have not used.
Now create a Save button.
Add a Navigation Item.
Add a button to the Navigation Item.
And write the buttons in action:
Run the application, select the image and filter. When the filter is applied, click Save. On the simulator, we can use the cmd + shift + h key combination (this is the same as the “Home” button on the iPhone), open the Gallery - and find the same image there.
Before embarking on the actual development, we suggest first splitting the task into subtasks.
- Upload a photo from the gallery
- Create a collection with filters
- Implement the ability to apply any of the filters on the selected photo
- Save the result to the gallery.
So let's get started. Open Xcode and select a template for iOS development in the Application → Single View Application tab. Let's call our project My First Photo Editor. Next, we specify the directory where we want to save the project.
')
Choose a mechanism for developing the interface program main.storyboard.
We will have to move on to other scenes that will be added later. To do this, drag the Navigation Controller onto the storyboard.
Remove the Root View Controller Scene - we will not need it. It now remains to associate the Navigation Controller with the original View Controller.
Select the Navigation Controller, tick the checkbox “Is Initial View Controller” (Navigation Controller → Attributes Inspector → View Controller → Is Initial View Controller; you can see how to do this in the pictures) and connect the Navigation Controller with View Controller.
On the View Controller, we need a button to open the gallery window. Transfer it from the Object Library.
Create a button click event and add it to the controller properties.
Since we are going to use delegate methods, we’ll add delagate UIImagePickerControllerDelegate, UINavigationControllerDelegate protocols to the interface of the ViewConroller.h controller.
It turns out:
@interface ViewController : UIViewController<UIImagePickerControllerDelegate,UINavigationControllerDelegate> Let's write the following lines in the action of the button:
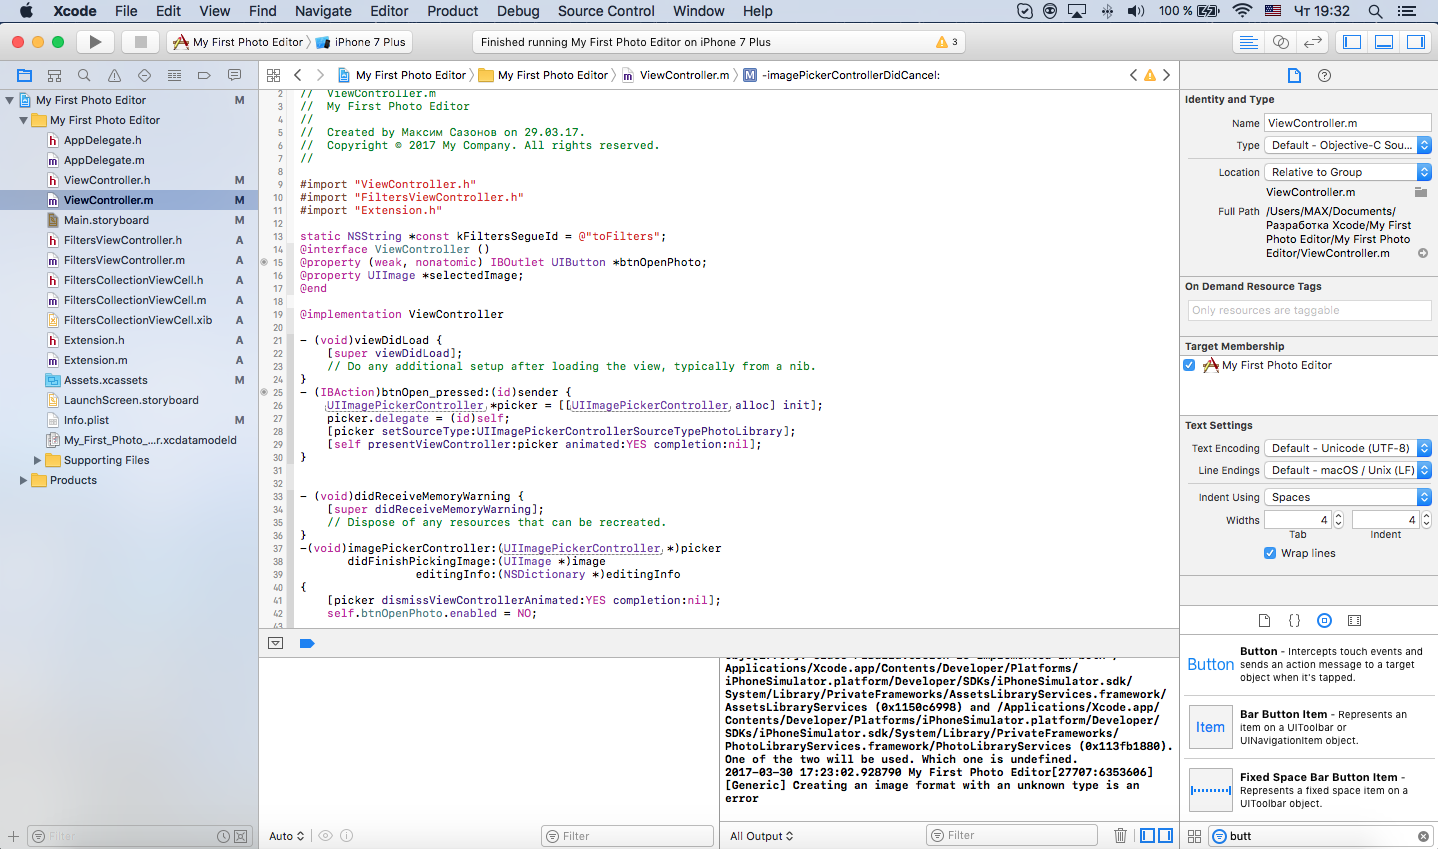
- (IBAction)btnOpen_pressed:(id)sender { UIImagePickerController *picker = [[UIImagePickerControlleralloc] init]; picker.delegate = self; [pickersetSourceType:UIImagePickerControllerSourceTypePhotoLibrary]; [selfpresentViewController:picker animated:YEScompletion:nil];// } Run the project and see our button on the simulator. Let's try to click and ... get a crash. Why? We forgot to add the property to the info.plist NSPhotoLibraryUsageDescription. Correct this error.
Now you need to add another View Controller to the storyboard. Let's make a connection according to the scheme shown in the screenshots.
Let's write the Indetifier key “toFilters”. The illustration shows how this can be done. Select the link on Storyboard → Attributes Inspector → Storyboard → identifier → toFilters.
Now let's add to the ViewController.m methods of selecting a photo and switching to a new controller.
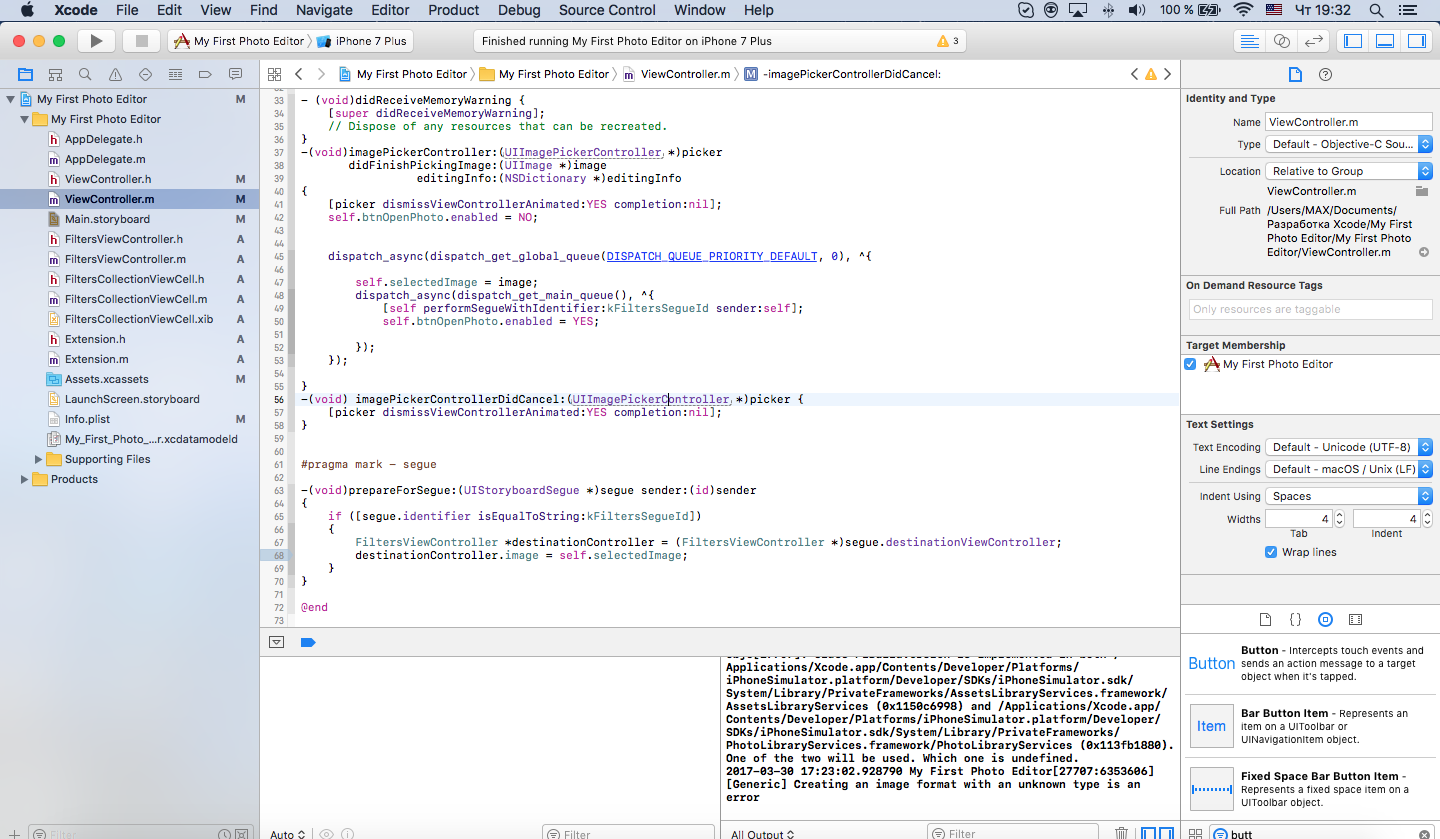
// , -(void)imagePickerController:(UIImagePickerController *)picker didFinishPickingImage:(UIImage *)image editingInfo:(NSDictionary *)editingInfo { [pickerdismissViewControllerAnimated:YEScompletion:nil]; self.btnOpenPhoto.enabled = NO; dispatch_async(dispatch_get_global_queue(DISPATCH_QUEUE_PRIORITY_DEFAULT, 0), ^{ self.selectedImage = image; dispatch_async(dispatch_get_main_queue(), ^{ [selfperformSegueWithIdentifier:kFiltersSegueIdsender:self]; self.btnOpenPhoto.enabled = YES; }); }); } // , -(void) imagePickerControllerDidCancel:(UIImagePickerController *)picker { [pickerdismissViewControllerAnimated:YEScompletion:nil]; } #pragma mark - segue // , -(void)prepareForSegue:(UIStoryboardSegue *)segue sender:(id)sender {//kFiltersSegueId – String «toFilters» if ([segue.identifierisEqualToString:kFiltersSegueId]) { FiltersViewController *destinationController = (FiltersViewController *)segue.destinationViewController; destinationController.image = self.selectedImage; } } For the new controller, we need to create a special class. To do this, in the top panel, select File → New → File → Cocoa Touch Class → Next. Let's call it FiltersViewController and be sure to select in the column Subclass UIViewController. In the Indetity inspector we register our class.
Add to the controller Scroll View (or any other View, at your discretion), it will display an image with the applied filter. Create a link to FiltersViewController.
Add Scroll View to the properties of the controller, as was done earlier. Add the UIImageView and UIimage properties.
In this case, the UIImage property needs to be added to FiltersViewController.h, since we plan to use it in another class.
Now create a collection with filters. Find the Object Object Collection View in the Object Library.
Create a new class for the collection. Go to the xib file, add UIimageView and Label.
Next we set the size of the UIImageView. The easiest way to do this is to right-click the object and drag it onto the one you want to link to. Select the connection, as shown in the screenshot. Then go to the Size inspector of this object and change the settings. Set all constraints to 0.
We establish communication between elements.
Import a new class into FiltersViewController
and add FiltersViewControllerCell to this class like this:
Now let's add the NSMutableArray array and the NSOperationQueue operator to the FiltersViewController properties — they will be useful to us a little later.
The UIViewController life cycle begins with the loadView method. So, in this method, we need to transfer the image that we chose in the last scene, and add a preview to the collection.
As a result, the loadView will look like this:
- (void)loadView{ [super loadView]; self.automaticallyAdjustsScrollViewInsets = NO; [[NSNotificationCenter defaultCenter] addObserver:selfselector:@selector(orientationChanged:) name:UIDeviceOrientationDidChangeNotificationobject:[UIDevice currentDevice]]; if ([self.navigationController respondsToSelector:@selector(interactivePopGestureRecognizer)]) { self.navigationController.interactivePopGestureRecognizer.enabled = NO; } _imageView = [[UIImageView alloc] init]; [_scrollView addSubview:_imageView]; _imageView.image = _image; _imageView.frame = CGRectMake(0, 0, _image.size.width, _image.size.height); _filteringQueue = [NSOperationQueue new]; _filteringQueue.maxConcurrentOperationCount = 1; _filteringQueue.qualityOfService = NSQualityOfServiceUserInitiated; [self.filtersCollection registerNib:[UINib nibWithNibName:@"FiltersCollectionViewCell" bundle:nil] forCellWithReuseIdentifier:@"filtersCollectionCell»];// xib . // Do any additional setup after loading the view. } In order not to reboot the controller, we will create the Extension class and add methods to it that will perform the function of applying a filter to the image:
#import "Extension.h" @implementation CIImage (Extension) -(CIImage *)applyFilter:(long)i { CIFilter *filter; switch (i) { case 0: return [self copy]; break; case 1: filter = [CIFilter filterWithName:@"CISepiaTone"]; break; case 2: filter = [CIFilter filterWithName:@"CIColorMonochrome"]; break; case 3: filter = [CIFilter filterWithName:@"CIPhotoEffectMono"]; break; case 4: filter = [CIFilter filterWithName:@"CIPhotoEffectInstant"]; break; case 5: filter = [CIFilter filterWithName:@"CIHueAdjust"]; [filter setDefaults]; [filter setValue: [NSNumber numberWithFloat: M_PI] forKey: kCIInputAngleKey]; break; case 6: filter = [CIFilter filterWithName:@"CIHueAdjust"]; [filter setDefaults]; [filter setValue: [NSNumber numberWithFloat: M_PI_2] forKey: kCIInputAngleKey]; break; case 7: filter = [CIFilter filterWithName:@"CIColorInvert"]; break; case 8: filter = [CIFilter filterWithName:@"CIFalseColor"]; break; case 9: filter = [CIFilter filterWithName:@"CIPhotoEffectTonal"]; break; case 10: filter= [CIFilter filterWithName:@"CIPhotoEffectTransfer"]; break; case 11: filter= [CIFilter filterWithName:@"CIPhotoEffectProcess"]; break; case 12: filter= [CIFilter filterWithName:@"CIPhotoEffectChrome"]; break; case 13: filter = [CIFilter filterWithName:@"CIGaussianBlur"]; [filter setDefaults]; [filter setValue: [NSNumber numberWithFloat:(self.extent.size.width + self.extent.size.height)/30.] forKey:@"inputRadius"]; default: break; } [filter setValue:self forKey:kCIInputImageKey]; CIImage *result = [filter valueForKey:kCIOutputImageKey]; return result; } @end @implementation UIImage (Extension) +(NSArray *)filterNames { static NSArray *names; static dispatch_once_t onceToken; dispatch_once(&onceToken, ^{ names = @[@"Original",@"Sepia", @"Old Photo", @"Mono", @"Instant", @"Shift", @"Hue", @"Invert", @"Falce", @"Tonal", @"Transfer", @"Process", @"Chrome"]; }); return names; } - (UIImage *)applyFilter:(long)i { CIImage *ciImage = [[CIImage alloc] initWithImage: self]; CIImage *result = [ciImage applyFilter:i]; CGRect extent1 = [result extent]; CIContext *context = [CIContext contextWithOptions:nil]; CGImageRef cgImage1 = [context createCGImage:result fromRect:extent1]; UIImage *img = [UIImage imageWithCGImage:cgImage1]; CGImageRelease(cgImage1); return img; } + (instancetype)imageWithCIImageImproved:(CIImage *)img { CGRect extent = [img extent]; CIContext *context = [CIContext contextWithOptions:nil]; CGImageRef cgImage = [context createCGImage:img fromRect:extent]; UIImage *image = [UIImage imageWithCGImage:cgImage]; CGImageRelease(cgImage); return image; } @end Further we will write the interface of calls in Extension.h:
#import <UIKit/UIKit.h> @interface CIImage (Extension) -(CIImage *)applyFilter:(long)i; @end @interface UIImage (Extension) @property (class, readonly) NSArray * filterNames; + (NSArray *)filterNames; - (UIImage *)applyFilter:(long)i; + (instancetype)imageWithCIImageImproved:(CIImage *)img; @end Add the following methods for the collection and for the Scroll View to the FiltersViewController.m class:
#pragma mark - Collection // , -(NSInteger)collectionView:(UICollectionView *)collectionView numberOfItemsInSection:(NSInteger)section { returnself.filterPreviews.count; } // - (CGSize)collectionView:(UICollectionView *)collectionView layout:(UICollectionViewLayout *)collectionViewLayout sizeForItemAtIndexPath:(NSIndexPath *)indexPath { CGFloat sz = collectionView.frame.size.height - 6; returnCGSizeMake(sz, sz); } // , UICollectionViewCell -(UICollectionViewCell *)collectionView:(UICollectionView *)collectionView cellForItemAtIndexPath:(NSIndexPath *)indexPath { long index = [indexPath item]; FiltersCollectionViewCell *cell = [collectionView dequeueReusableCellWithReuseIdentifier:@"filtersCollectionCell"forIndexPath:indexPath]; UIImageView *ivPreview = cell.imageFilter; ivPreview.image = self.filterPreviews[index]; ivPreview.clipsToBounds = YES; ivPreview.layer.cornerRadius = 3.; UILabel *labelName = cell.nameFilter; labelName.text = [UIImagefilterNames][index]; return cell; } // , , - (void)collectionView:(UICollectionView *)collectionView didSelectItemAtIndexPath:(NSIndexPath *)indexPath { [self.filteringQueuecancelAllOperations]; __blockUIImage *filtered = nil; NSBlockOperation *operation1 = [NSBlockOperationblockOperationWithBlock:^{ filtered = [self.imageapplyFilter:[indexPath item]]; }]; NSBlockOperation *operation2 = [NSBlockOperationblockOperationWithBlock:^{ [CATransactionbegin]; dispatch_sync(dispatch_get_main_queue(), ^{ if (filtered) { _imageView.image = filtered; } }); }]; [operation2addDependency:operation1]; [self.filteringQueueaddOperation:operation1]; [self.filteringQueueaddOperation:operation2]; } #pragma mark - Scroll View // UIView, -(UIView *)viewForZoomingInScrollView:(UIScrollView *)scrollView { returnself.imageView; } // , - (void)scrollViewDidZoom:(UIScrollView *)scrollView { CGSize sz = scrollView.contentSize; float xInsets = MAX(0, scrollView.frame.size.width/2.-sz.width/2.); float yInsets = MAX(0, scrollView.frame.size.height/2.-sz.height/2.); [scrollViewsetContentInset:UIEdgeInsetsMake(yInsets,xInsets,yInsets,xInsets)]; } // , - (void) orientationChanged:(NSNotification *)note { [self.viewlayoutSubviews]; [selfupdateScaleInScrollView:self.scrollView]; } // , ScrollView -(void)updateScaleInScrollView:(UIScrollView *)scrollView { UIImage *image = _image; float minScale = sizeFit(image.size,scrollView.frame.size).width/image.size.width; scrollView.maximumZoomScale = MAX(1,minScale); scrollView.minimumZoomScale = minScale; scrollView.zoomScale = minScale; if (scrollView.zoomScale> scrollView.maximumZoomScale) scrollView.zoomScale = scrollView.maximumZoomScale; elseif (scrollView.zoomScale< scrollView.minimumZoomScale) scrollView.zoomScale = scrollView.minimumZoomScale; [selfscrollViewDidZoom:scrollView]; } #pragma mark - other // CGSizesizeFill(CGSize size, CGSize sizeToFill) { CGSize newSize; if (size.width / sizeToFill.width< size.height / sizeToFill.height) newSize = CGSizeMake(sizeToFill.width, sizeToFill.width*size.height/size.width); else newSize = CGSizeMake(sizeToFill.height*size.width/size.height, sizeToFill.height); return newSize; } CGSizesizeFit(CGSize size, CGSize sizeToFit) { float w = size.width/sizeToFit.width; float h = size.height/sizeToFit.height; return w > h ? CGSizeMake(sizeToFit.width, size.height/w) : CGSizeMake(size.width/h, sizeToFit.height); } CGRectframeFill(CGSize size, CGSize sizeToFill) { CGSize szFill = sizeFill(size, sizeToFill); CGPoint pntFill = CGPointMake(sizeToFill.width/2.-szFill.width/2., sizeToFill.height/2.-szFill.height/2.); returnCGRectMake(pntFill.x, pntFill.y, szFill.width, szFill.height); } The following ViewController lifecycle method is viewDidLoad. viewDidLoad is a good place to continue controller initialization. We will not need it because the initialization of all design elements is already defined. However, the dimensions of the view are not specified, so we will add ScrollView processing in the next stage of the viewWillAppear life cycle:
-(void)viewWillAppear:(BOOL)animated { [superviewWillAppear:animated]; dispatch_async(dispatch_get_main_queue(), ^{ [selfupdateScaleInScrollView:self.scrollView]; }); } Create a method for displaying a preview of the filters:
-(void)makeFilterPreviews { self.filterPreviews = [[NSMutableArrayalloc] init]; float size = 90 * [UIScreenmainScreen].scale; CGRect cropRect = frameFill(self.image.size,CGSizeMake(size, size)); UIGraphicsBeginImageContext(CGSizeMake(size, size)); [self.imagedrawInRect:cropRect]; UIImage *cropped = UIGraphicsGetImageFromCurrentImageContext(); UIGraphicsEndImageContext(); CIImage *ciimg = [[CIImagealloc] initWithImage:cropped]; for (int i = 0; i < [UIImagefilterNames].count; i++) { CIImage *ciFiltered = [ciimg applyFilter:i]; UIImage *filtered = [UIImageimageWithCIImageImproved:ciFiltered]; [self.filterPreviewsaddObject:filtered]; } } and write the call to this method in loadView
[self makeFilterPreviews]; Run our project. After selecting an image, the application freezes for a while. This is because the application of filters to the image takes time. After applying all the filters, the controller will be loaded with an image and a collection with filters.
To ensure the responsiveness of the interface, we add asynchrony when the method is executed.
-(void)makeFilterPreviews { self.filterPreviews = [[NSMutableArrayalloc] init]; // -> for (long i = 0; i < [UIImagefilterNames].count; i++) { [self.filterPreviews addObject:[[UIImage alloc]init]]; } float size = 90 * [UIScreenmainScreen].scale; CGRect cropRect = frameFill(self.image.size,CGSizeMake(size, size)); UIGraphicsBeginImageContext(CGSizeMake(size, size)); [self.imagedrawInRect:cropRect]; UIImage *cropped = UIGraphicsGetImageFromCurrentImageContext(); UIGraphicsEndImageContext(); CIImage *ciimg = [[CIImagealloc] initWithImage:cropped]; // NSOperationQueue *queue = [[NSOperationQueuealloc]init]; queue.maxConcurrentOperationCount = 2; for (int i = 0; i < [UIImagefilterNames].count; i++) { [queueaddOperationWithBlock:^{ CIImage *ciFiltered = [ciimg applyFilter:i]; UIImage *filtered = [UIImageimageWithCIImageImproved:ciFiltered]; @synchronized (self.filterPreviews) { [self.filterPreviewsreplaceObjectAtIndex:i withObject:filtered]; dispatch_sync(dispatch_get_main_queue(), ^{ [self.filtersCollectionreloadData]; }); } }]; } } @synchronized (self.filterPreviews) blocks editing of the filterPreviews array for all elements except the current one.
To update the collection correctly, you need to do this in the dispatch_get_main_queue () stream.
The remaining methods of the ViewController life cycle:
- viewDidAppear: (BOOL) animated - called after drawing all interface elements
- viewWillDisappear: (BOOL) animated - called before deleting all interface elements
- viewDidDisappear: (BOOL) animated - called after deletion
- viewDidUnload - called when the view is unloaded from memory
We have not used.
Now create a Save button.
Add a Navigation Item.
Add a button to the Navigation Item.
And write the buttons in action:
- (IBAction)saveBtn:(id)sender { UIImageWriteToSavedPhotosAlbum(_imageView.image, nil, nil, nil); } Run the application, select the image and filter. When the filter is applied, click Save. On the simulator, we can use the cmd + shift + h key combination (this is the same as the “Home” button on the iPhone), open the Gallery - and find the same image there.
Source: https://habr.com/ru/post/325352/
All Articles