DIY Robot Vacuum Cleaner - Part 2
Good day. Back in 2015, I collected a robot vacuum cleaner, describing its creation in this article .
Since then, the robot has seriously changed. As promised, I want to share the revision.
So, what was done:
')
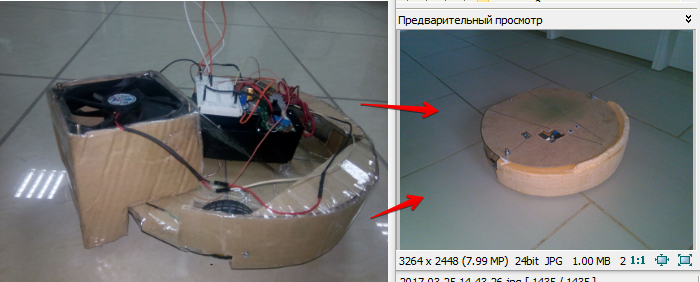
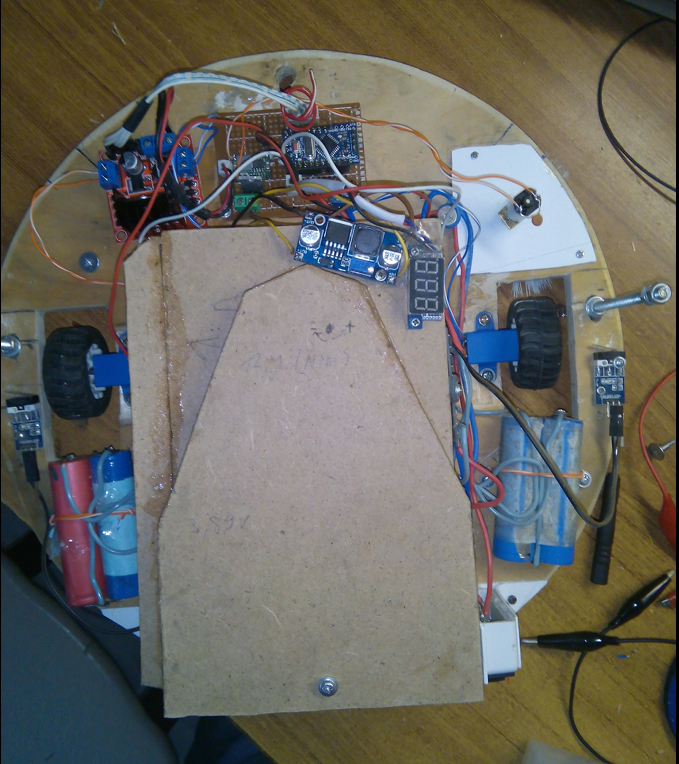
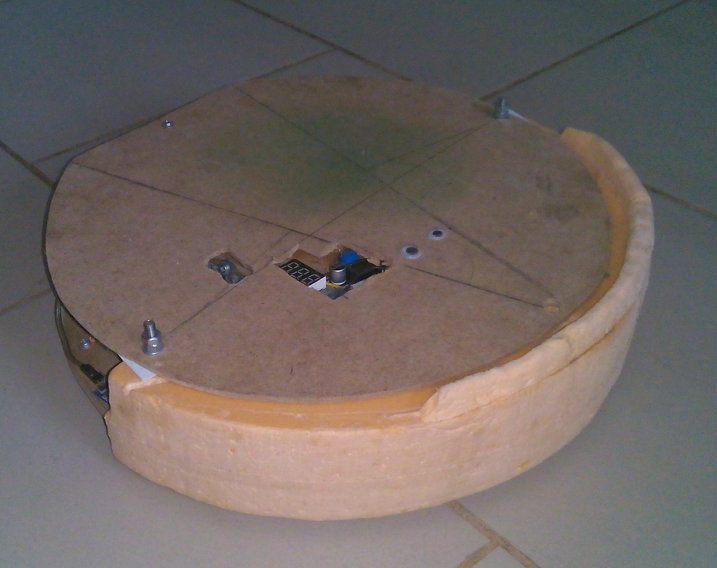
1. Instead of a cardboard base, now a circle of 9mm plywood - this made it possible to fasten all the details of the robot well, using normal screws, rather than screeds.
2. The next block of vacuum cleaner came under the mess. The motor and the turbine left the same, but placed them not a “pancake”, but carried the turbine into the front of the hull. This I have not yet met at homemade. This trick allowed to reduce the height of the vacuum cleaner to 8.5 cm and it now crawls even under some cabinets. The very same body of the vacuum cleaner reassembled from a thin fiberboard.
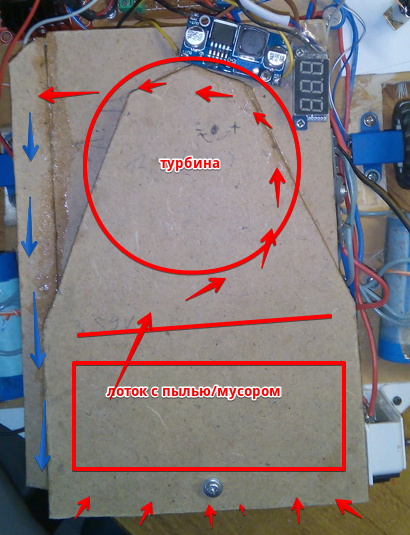
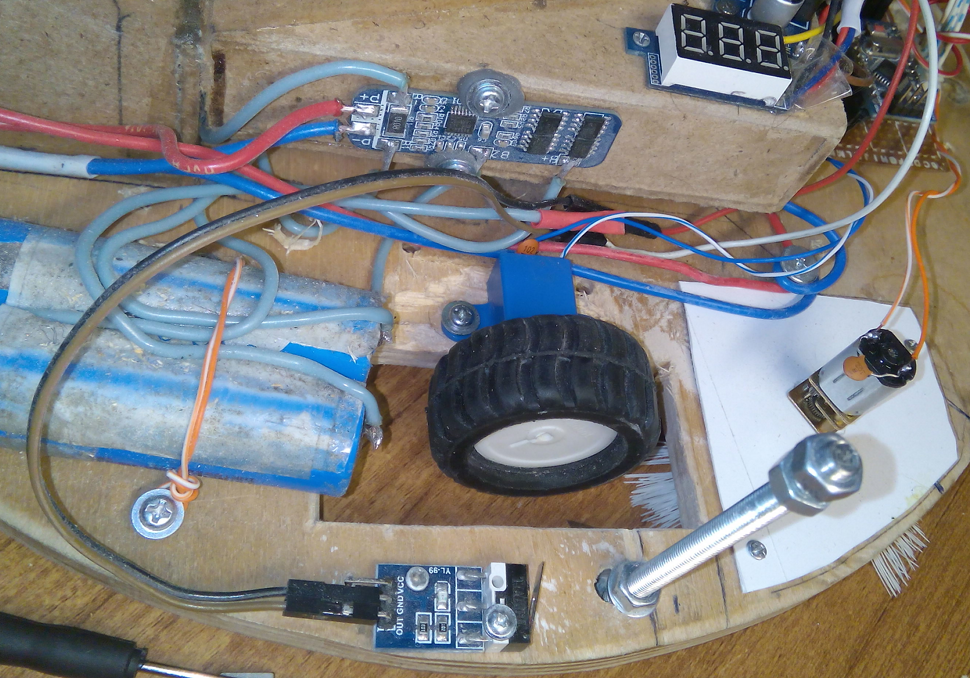
“Waste” air had to be taken out of the hull due to the fact that it was dusty even after the filter, and all this dust was blown directly onto the left engine. Also “temporarily” hung a DC / DC step UP board on the case to increase the turbine supply voltage. The input voltage is + 12V, but this is not enough for confident absorption of medium / coarse dirt. At a voltage of about + 16V thrust is already sufficient. You can raise and higher, but then the noise will increase. Also on the case of the vacuum cleaner (again, "temporarily") secured a voltmeter to roughly determine the current battery charge.
3. Next up were “yellow” geared motors. They do not fit because of the large noise. Yes, and I didn’t succeed in reducing the travel speed on these motors without loss of torque - the robot was running around the room, scaring the cat)
On the Internet, I came across small N20 engines, I decided to use them.
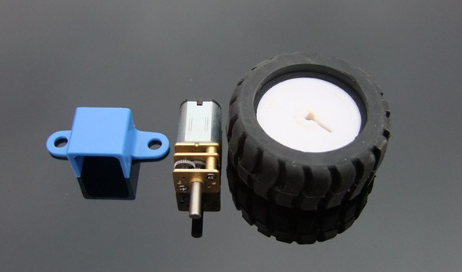
But 2 troubles happened to them: for some reason, the seller sent me both motors with different gear ratios, and when they were installed on the platform, they turned out to be very noisy, even worse than those Chinese yellow gear motors. Probably the noise can be reduced if you make some kind of “damper” between the motor and the body, but I stopped searching for other engines, even though I stopped rushing through the rooms like mad in these rooms) And while I was experimenting, I burned a small controller of gear motors, eventually put the same L298N.
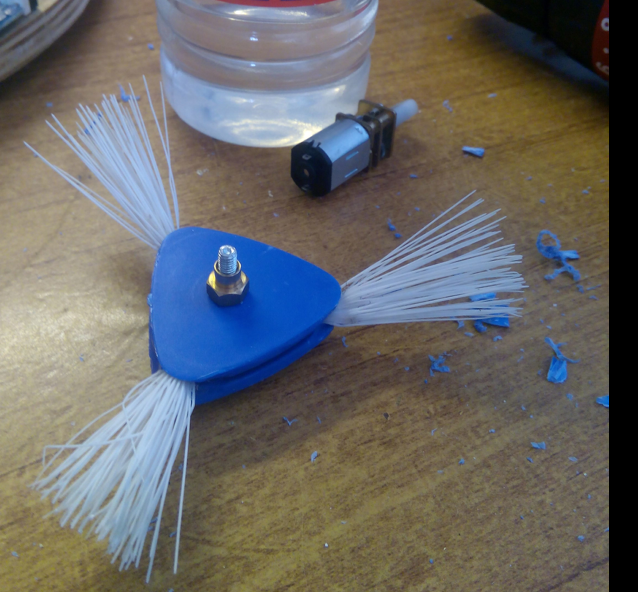
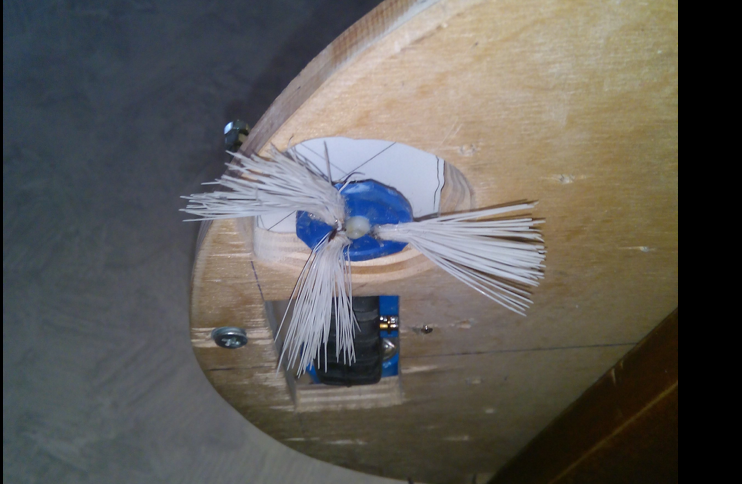
4. In the robot added another small motor with a brush. Brush made from improvised means.
5. Front bumper. I had to tinker with it, having tried many different options. As a result, he stopped at Penoplex

Also as the wall sensors put the most simple limit switches. No additional springs were needed - the buttons are elastic enough to return the bumper back after touching the obstacle.
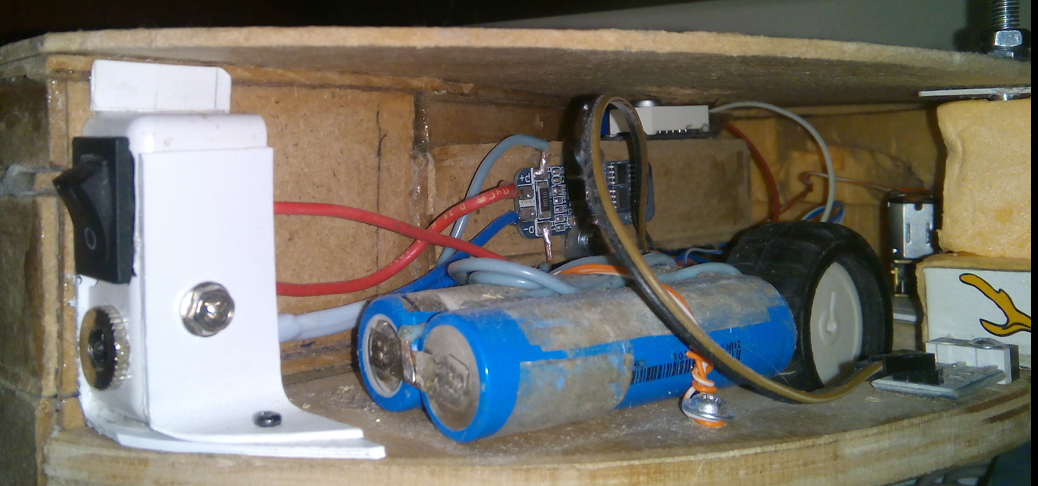
6. BMS controller installed on 3 lithium banks. Initially I wanted to put 4, but BMS came to 4 banks defective, until, again, "temporarily", I left it
The result was a decent budget, simple, but very noisy robot vacuum cleaner.
If readers tell me which motor / gearbox is better to use, I will be grateful. Looking quiet, with a power of 3-12v, about 60 revolutions of the shaft per minute. Thank.
Since then, the robot has seriously changed. As promised, I want to share the revision.
So, what was done:
')
1. Instead of a cardboard base, now a circle of 9mm plywood - this made it possible to fasten all the details of the robot well, using normal screws, rather than screeds.
2. The next block of vacuum cleaner came under the mess. The motor and the turbine left the same, but placed them not a “pancake”, but carried the turbine into the front of the hull. This I have not yet met at homemade. This trick allowed to reduce the height of the vacuum cleaner to 8.5 cm and it now crawls even under some cabinets. The very same body of the vacuum cleaner reassembled from a thin fiberboard.
“Waste” air had to be taken out of the hull due to the fact that it was dusty even after the filter, and all this dust was blown directly onto the left engine. Also “temporarily” hung a DC / DC step UP board on the case to increase the turbine supply voltage. The input voltage is + 12V, but this is not enough for confident absorption of medium / coarse dirt. At a voltage of about + 16V thrust is already sufficient. You can raise and higher, but then the noise will increase. Also on the case of the vacuum cleaner (again, "temporarily") secured a voltmeter to roughly determine the current battery charge.
3. Next up were “yellow” geared motors. They do not fit because of the large noise. Yes, and I didn’t succeed in reducing the travel speed on these motors without loss of torque - the robot was running around the room, scaring the cat)
On the Internet, I came across small N20 engines, I decided to use them.
But 2 troubles happened to them: for some reason, the seller sent me both motors with different gear ratios, and when they were installed on the platform, they turned out to be very noisy, even worse than those Chinese yellow gear motors. Probably the noise can be reduced if you make some kind of “damper” between the motor and the body, but I stopped searching for other engines, even though I stopped rushing through the rooms like mad in these rooms) And while I was experimenting, I burned a small controller of gear motors, eventually put the same L298N.
4. In the robot added another small motor with a brush. Brush made from improvised means.
5. Front bumper. I had to tinker with it, having tried many different options. As a result, he stopped at Penoplex
Also as the wall sensors put the most simple limit switches. No additional springs were needed - the buttons are elastic enough to return the bumper back after touching the obstacle.
6. BMS controller installed on 3 lithium banks. Initially I wanted to put 4, but BMS came to 4 banks defective, until, again, "temporarily", I left it
The result was a decent budget, simple, but very noisy robot vacuum cleaner.
If readers tell me which motor / gearbox is better to use, I will be grateful. Looking quiet, with a power of 3-12v, about 60 revolutions of the shaft per minute. Thank.
Source: https://habr.com/ru/post/324840/
All Articles