Install and configure Puppet + Foreman on Ubuntu 14.04 (step-by-step tutorial)
 Good day, residents of Habr!
When the number of managed servers reaches several dozen, or even hundreds, you have to find a solution to automatically configure and manage such a fleet. This is where Puppet comes to the rescue. Why Puppet? Puppet is cross-platform, has a rich community, has many ready-made modules (4800+), has Enterprise versions. All these advantages do not give doubt to the power of this product. But to manage such a “combine” from the console is not so easy. Therefore, Foreman was developed for easy management and configuration of Puppet. Next, install and configure this bundle using the example of managing SSH keys.
Requirements:
- clean server for puppet-master ;
- commands on the puppet-master server are executed as root ;
- commands on the puppet agent servers are executed through sudo .
Used software:
')
- Ubuntu OS 14.04.5 LTS;
- Puppet 3.8.7;
- Foreman 1.11.4.
Goals:
- get a convenient way to automatically manage the network infrastructure;
- get a convenient way to manage ssh keys.
Note
All screenshots and a piece of configuration are hidden by spoilers. For a better understanding of where commands are executed, a server type (master or agent) is added before each command.
1. Installing Foreman + Puppet on puppet masters
Add the Foreman / Puppet installer repository and install it into the system:
master ~ $ apt-get -y install ca-certificates master ~ $ cd ~ && wget https://apt.puppetlabs.com/puppetlabs-release-trusty.deb master ~ $ dpkg -i puppetlabs-release-trusty.deb master ~ $ sh -c 'echo "deb http://deb.theforeman.org/ trusty 1.11" > /etc/apt/sources.list.d/foreman.list' master ~ $ sh -c 'echo "deb http://deb.theforeman.org/ plugins 1.11" >> /etc/apt/sources.list.d/foreman.list' master ~ $ cd ~ && wget -q http://deb.theforeman.org/pubkey.gpg -O- | apt-key add - master ~ $ apt-get update && apt-get -y install foreman-installer Run the installer:
master ~ $ foreman-installer The result should be similar to the following:
Foreman installation result
Link type puppet. <Domain.com> and login with a password will be useful to us further.
Set up a configuration for viewing file changes in Foreman:
master ~ $ nano /etc/puppet/puppet.conf > show_diff = true Open the link recommended in the previous step in your browser: puppet. <Domain.com>
And enter the username: admin and password, which we saw in the console after installation.
Screenshot of the authorization form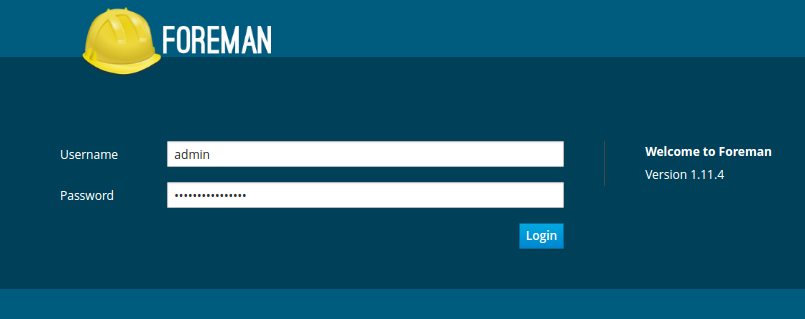
If the authorization is successful, then Foreman is installed and working properly. Now you can proceed to the next chapter.
2. Configure Foreman
By default, Foreman uses its SSL certificate generated by Puppet and your browser will not accept it. You can add a root certificate (
/var/lib/puppet/ssl/certs/ca.pem ) to your browser so that insecure connection warnings disappear (for Chromium add here: Settings / SSL / Certification Authorities).When you first log in, you will see the Dashboard page, where the total statistics for all hosts will be shown. When adding hosts, there will be useful statistical information here.
Screenshot Panel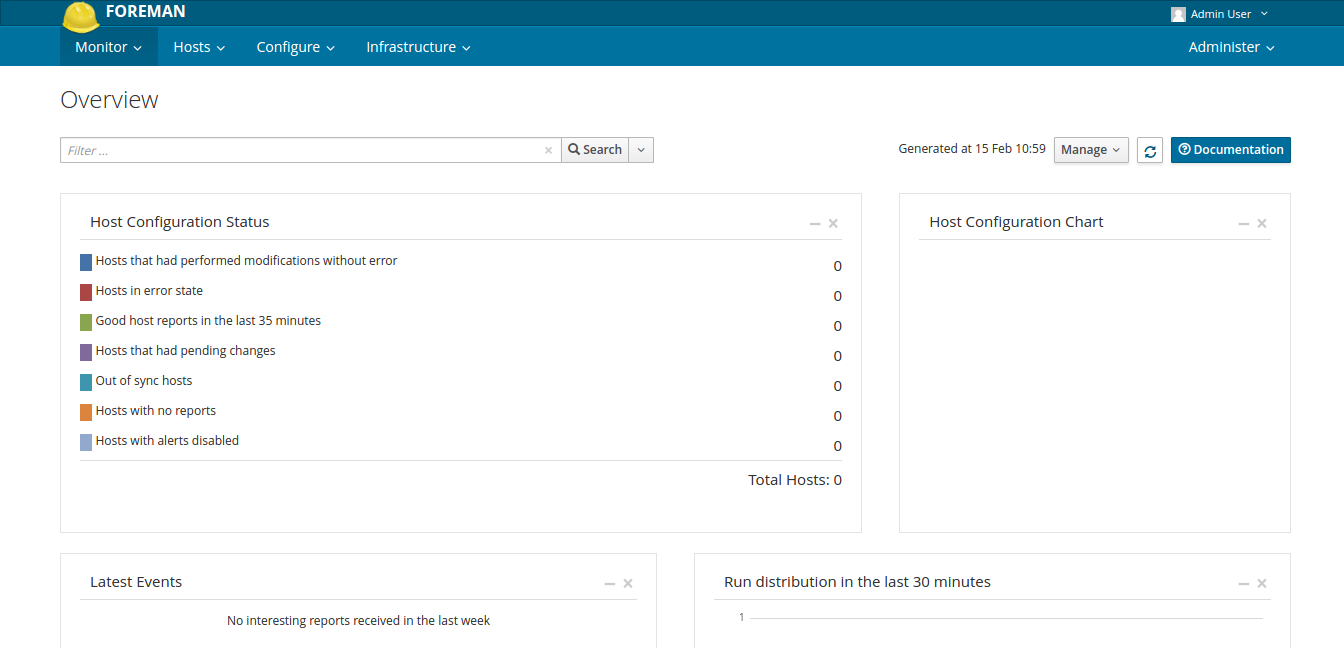
At subsequent logins, you will be redirected to the host list page.
2.1. Change Password
The first step is to change the user password:
Change password
The default password and so complex, but it is better to make your own.
2.2. Adding a module using the example of NTP
The time must be precisely set on the main server puppet-master. For this you need to use NTP. If the time is incorrect, the puppet-master may erroneously issue agent certificates from the distant past or future, which other nodes will consider obsolete.
Sometimes, in order to be able to manage Puppet modules through Foreman, you need to install modules that are not developed by Puppet-Labs, but by the developers of the Puppet community. This follows from the fact that Foreman uses HTTP Restful API requests for Puppet, but not all modules define management using such an API.
Install the saz / ntp module on the puppet master:
master ~ $ puppet module install saz/ntp Note
The saz / ntp module works great on Foreman version 1.11. For other versions of Foreman, you can use modules from the site forge.puppetlabs.com to search for ntp .
You should see the following:
The result of installing saz / ntp
Now the module has been installed only for the puppet-master. Now you need to enter the web interface and add it to Foreman. Go to Configure → Classes and click Import from puppet. <Domain.com> :
Configure → Classes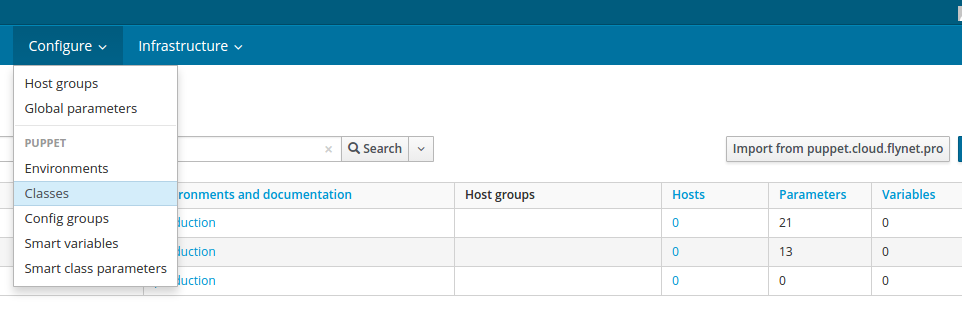
As a result, you will see a list of available classes, check the ones you need and click Update :
Update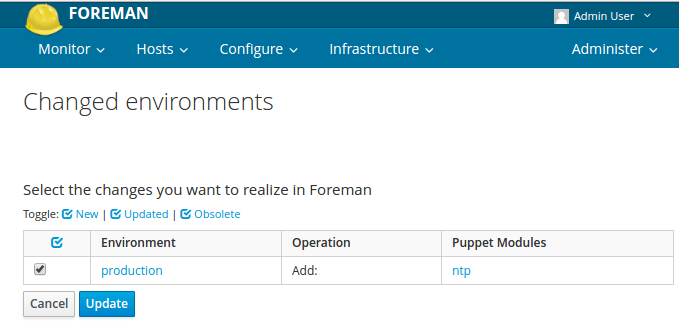
In order to use the ntp servers closest to you, go to the website www.pool.ntp.org . There, in the right block, select the pool we need (Africa, Asia, etc.) and retrieve the list of servers to the clipboard.
Next, go to the settings of the ntp class by clicking on its name. Go to the Smart Class Parameter tab and look for the server list tab in the left list :
server list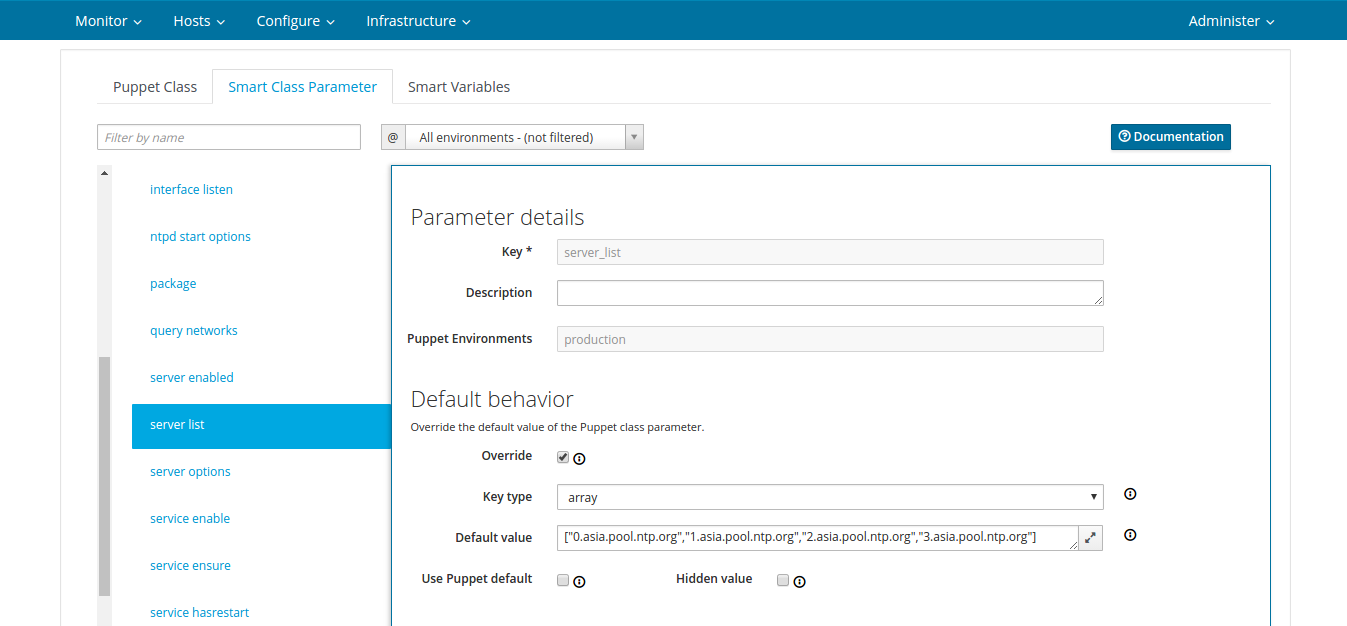
Check the Override item and in the Default value, following the example of the previous value, add the server from the step above. I added the following value:
["0.asia.pool.ntp.org","1.asia.pool.ntp.org","2.asia.pool.ntp.org","3.asia.pool.ntp.org"] Click Submit at the bottom of the page, thus we have redefined the class parameter.
2.3. Adding the accounts and ssh module
Using the example of the previous module, install the accounts module:
master ~ $ puppet module install camptocamp-accounts If the installation was successful, you will see the following:
The result of the installation accounts
Install the ssh module:
master ~ $ puppet module install saz/ssh After that we go to Foreman and import new classes. Later, after creating the host groups, we will configure the accounts and ssh classes.
2.4. Adding the module mysql and apache
To explain the subsequent names of the database and web groups, add apache and mysql modules. We add modules by the example of the previous ones. You can download them with the following commands:
master ~ $ puppet module install puppetlabs-apache master ~ $ puppet module install puppetlabs-mysql 3. Adding network nodes
To add a host to Puppet, you need to install a puppet agent on this host. To install the puppet agent, download and install the puppet-labs repository:
agent ~ $ cd ~ && wget https://apt.puppetlabs.com/puppetlabs-release-trusty.deb agent ~ $ sudo dpkg -i puppetlabs-release-trusty.deb agent ~ $ sudo apt-get update Then install the puppet agent:
agent ~ $ sudo apt-get -y install puppet To run Puppet as an agent, you need to comment out the settings of the puppet wizard zone. Also add a configuration for the agent that will set the address of our puppet wizard. Here is the configuration file
/etc/puppet/puppet.conf in the form:puppet.conf
[main] logdir=/var/log/puppet vardir=/var/lib/puppet ssldir=/var/lib/puppet/ssl rundir=/var/run/puppet factpath=$vardir/lib/facter #templatedir=$confdir/templates #[master] # These are needed when the puppetmaster is run by passenger # and can safely be removed if webrick is used. #ssl_client_header = SSL_CLIENT_S_DN #ssl_client_verify_header = SSL_CLIENT_VERIFY [agent] server = puppet.domain.com # puppet.domain.com - hostname IP- master- Replace the value of the variable START from no to yes to start the puppet agent after rebooting the OS. And also we will start the puppet-agent:
agent ~ $ sudo sed -is/START=no/START=yes/g /etc/default/puppet agent ~ $ sudo service puppet start With a small infrastructure, the puppet agent can be run as a daemon. There is also a way to start via CRON: docs.puppet.com/puppet/3.6/services_agent_unix.html#running-puppet-agent-as-a-cron-job .
Note
The default puppet agent looks for the domain of the puppet master in its zone, unless the server parameter is explicitly specified (in the puppet.conf file). For example: server.domain.com will search for the puppet.domain.com server. Therefore, if you still follow the instructions, then everything should work for you.
After that, go to Foreman in Infrastructure → Smart Proxies → Certificates :
Infrastructure → Smart Proxies → Certificates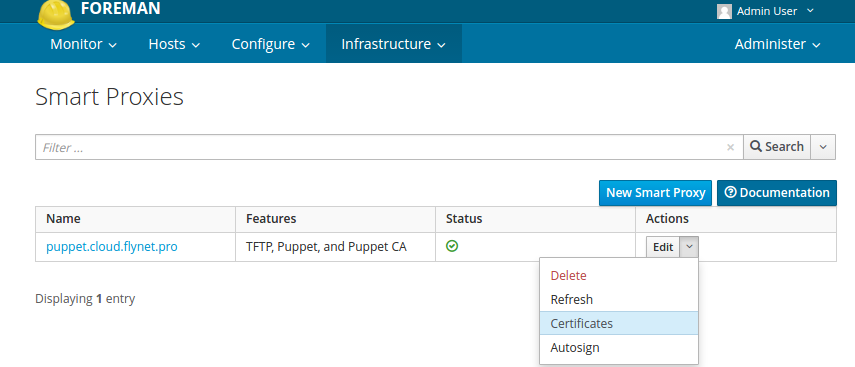
There should appear a network node on which we have just installed the puppet agent. You can use a filter (top left) to see only unsigned certificates. To sign, you must click the Sign button:
Certificates → Sign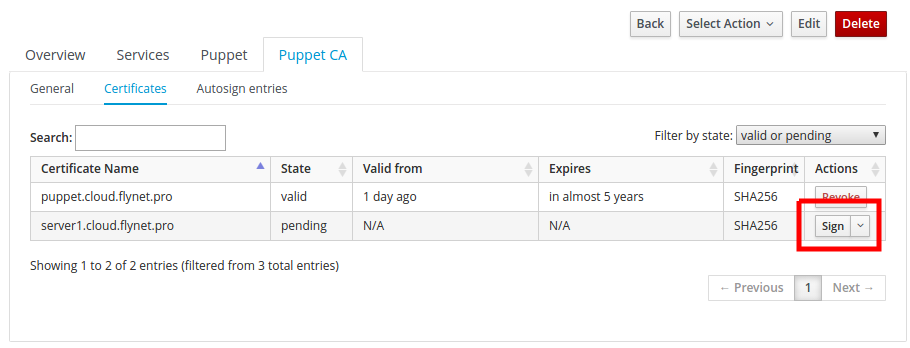
Within a few minutes, the server server. <Domain.com> (the server on which we just installed the agent) will appear in the list of Hosts → All hosts .
4. Adding host groups
Go to the menu item Configure → Host Groups . Click New Host Group . Tab Host Group should get the following:
Configure → Host Groups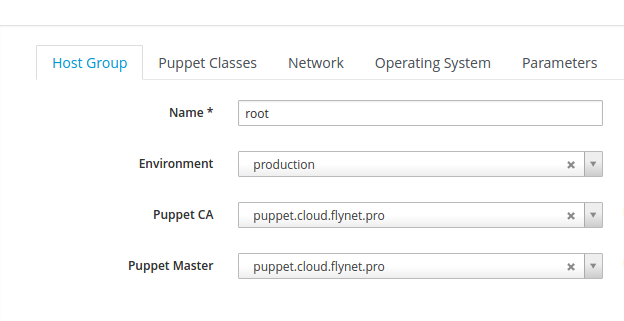
The root group will be the root. She will be the parent of all other groups. She will have full access to everything. And it will include the main classes.
Next, go to the Puppet Classes tab and add the necessary classes by clicking on + :
Puppet classes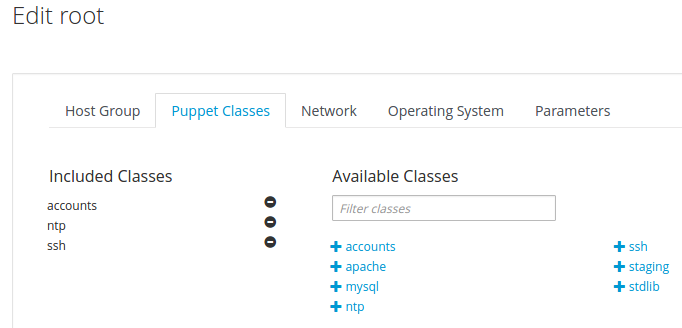
Click Submit .
Let's add two more groups on the same principle. Only now we will select the root group as the Parent , because the accounts , ntp and ssh classes are inherited and you do not need to add them again. Let's add the class mysql :: server only for the database group, and the apache class for the web group.
Add database group
List of all groups
5. Adding a node to a group
To include a node in a group, you must go to its settings.
Host settings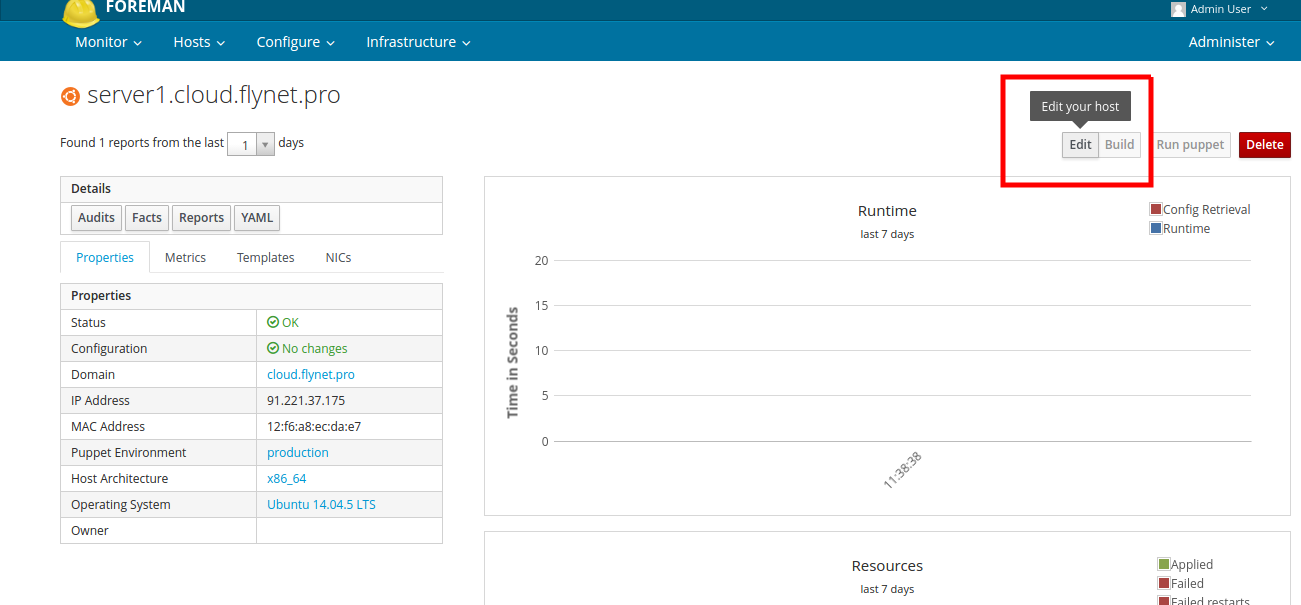
After that, in the first tab, add a group, as in the screenshot below:
Add group to host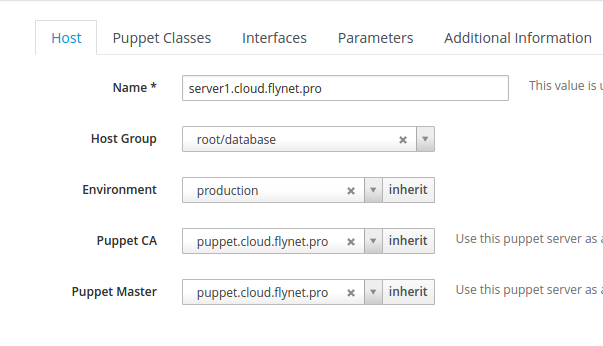
After that click Submit and mysql will appear on the host in a few minutes. In the same way, you can assign the web group to the other two servers:
List of hosts with assigned groups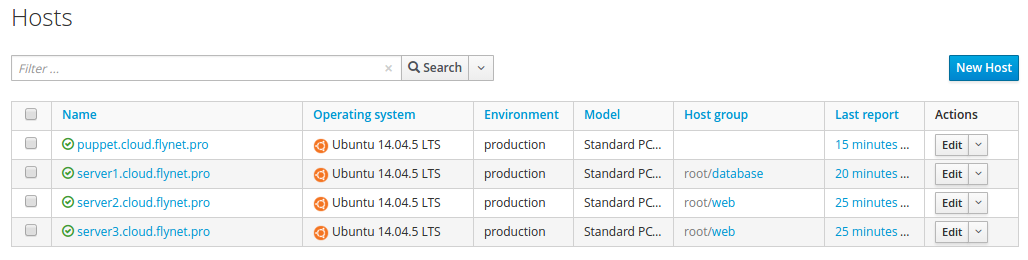
The entire configuration extends to puppet agents automatically for a short time.
If you do not want to wait, then you can run the
puppet agent --test command on clients and see with your own eyes how the configuration is created.6. Setting permissions using the accounts module
Actually now you can once again look at the scheme that we led at the beginning and create logic on the basis of it.
Go to the menu item Configure → Classes . Click on accounts to go to the module settings. Of all the settings, we will need the accounts , ssh keys , users tabs.
Note
Accounts tab - it contains hashes "server user → public key names from ssh keys tab". Tab ssh keys - it contains hashes "key name → type and value". Users tab - it contains the users that you need to create or specify for already existing some parameters.
Open the last users tab and set it up as in the screenshot:
users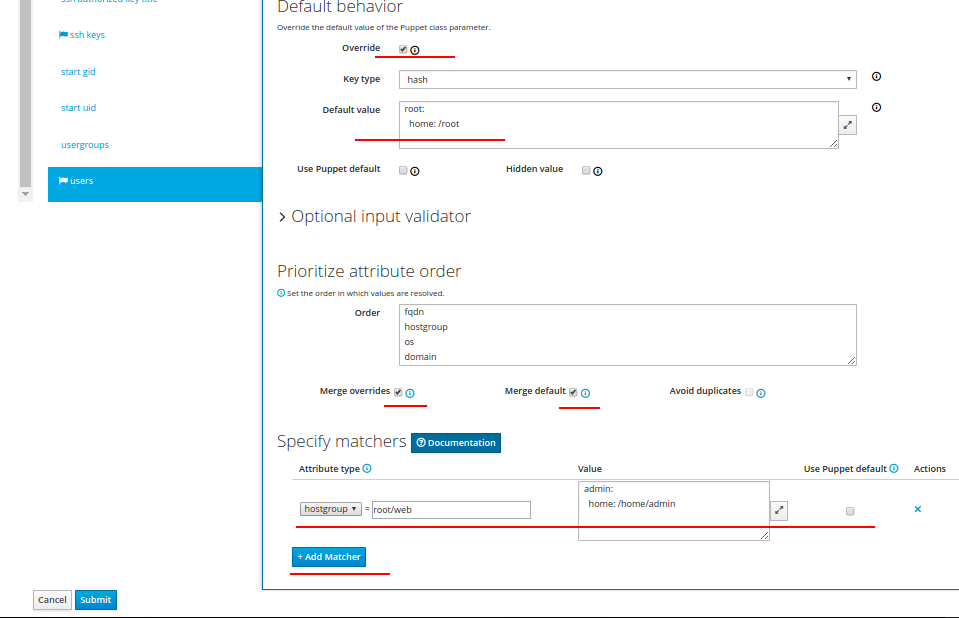
This parameter sets up the user's home directory. Here we used the Merge overrides and Merge default parameters, which will allow to merge the configuration for the end node of the network.
Fill in the ssh keys tab as follows:
ssh keys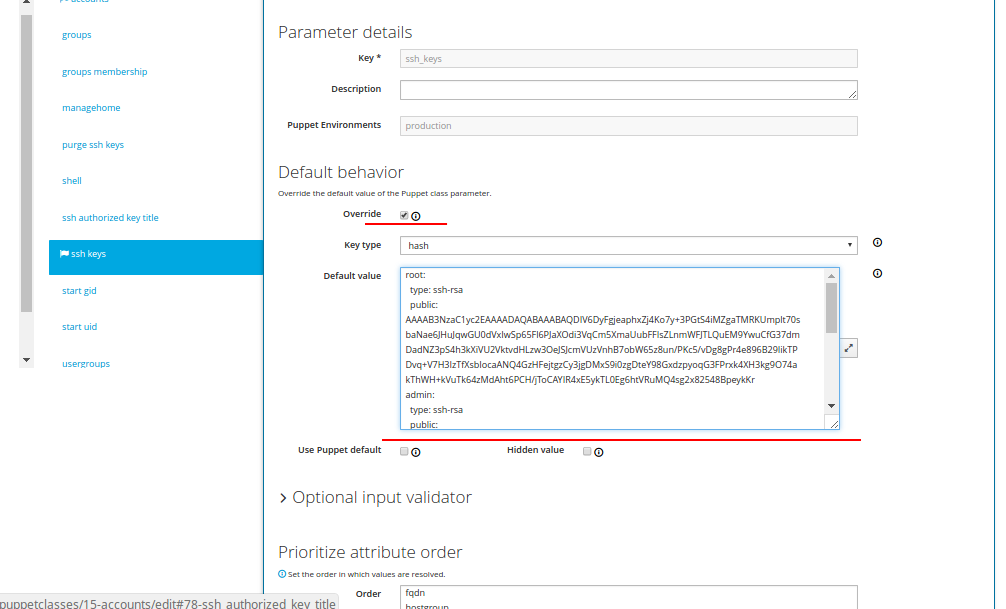
In the Default value field, you must enter all public keys of accounts that will be used in the accounts tab. These are public keys of users who will have access to certain servers. Indenting two spaces before the type and public parameters is required.
An example of how one public key looks like (the rest are added one after another below):
admin: type: ssh-rsa public: AAAAB3NzaC1yc2EAAAADAQABAAABAQDXibuyi2MFzERps7mD2J38mhd4phXQlOEZrmui9rDdcYD0XeEnvdRTZPcsMOw6DRT1ERpzbcFehj+G29YxoiXZ541gVjVvsATAqojN3zEkMz5b0AgBNcKDFi9h/qwlK9YDv2trKEcRHQ4kBN332Z6oqdBFerUMys5dvc3RVlE+x2kVmYNmGIlma5twC9w/wRNoD+nUK+3bk+I+Og40f//uFAKFeY4DMoCrdOsHJrPak5nD9vL6a2m/Fe3jfgmpBCcnV3LS2mr+PdRYbtju7nzfu8WT0ugMAUi+dDMRFh3DmfCzXbOi2TPi+mP//L/A19thXffd/QzW7wmAgxlj+km1 Fill up the uppermost accounts tab as follows:
accounts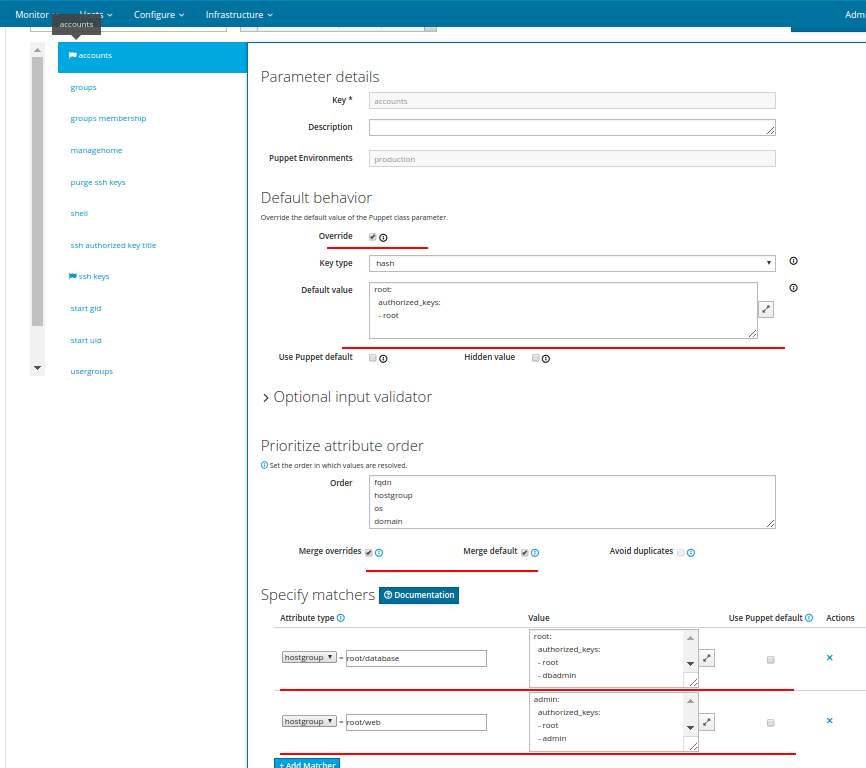
This parameter should: root has access everywhere from the root account (the root account is an element from the ssh keys tab), the dbadmin account has root access only to servers from the database group, and only the web group has admin user admin and can connect only under the admin user.
On the users tab, add the admin user to the www-data group.
users
6.1 Setting up the ssh class
In the accounts class, we set up ssh access by keys. Therefore, for more complete security, it is necessary to prohibit password access. This is done using the ssh class. Go to its settings and open the Smart Class Parameter tab. Further client options are as follows:
client options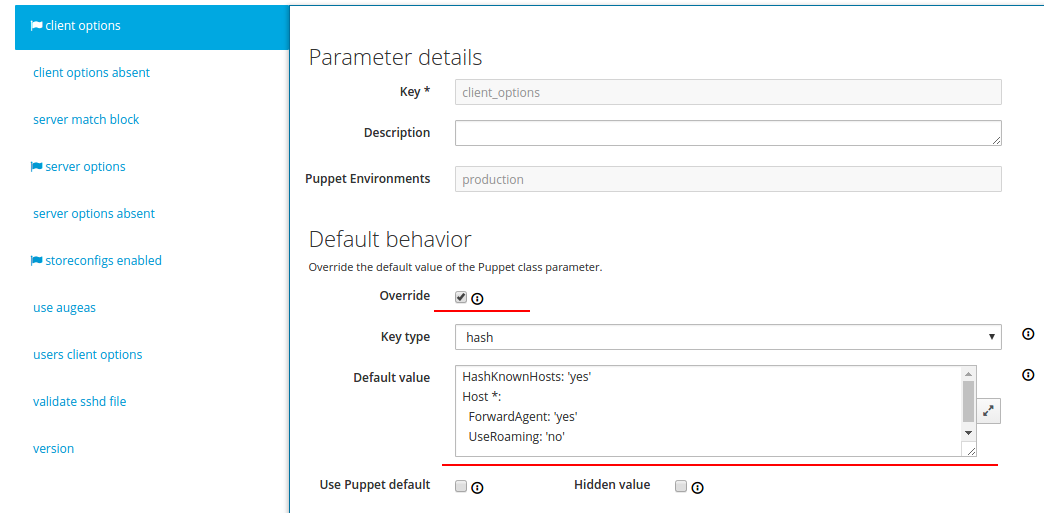
The server options tab is as follows:
server options
And fill in the tab storeconfigs enabled as follows:
storeconfigs enabled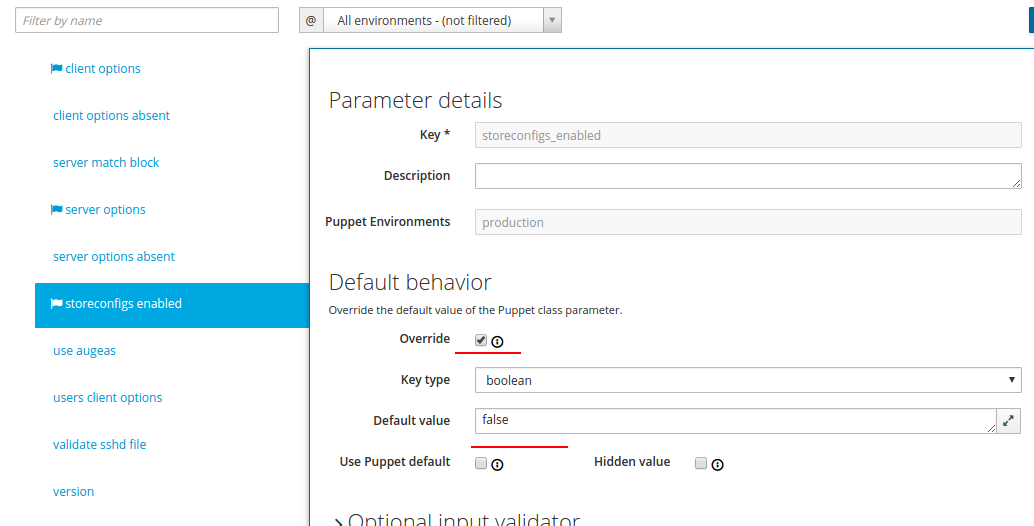
Storeconfigs stores all customer facts, so you can query the database and get lists of hosts that meet certain criteria. For more security, we have disabled it.
7. Results
As you complete this tutorial, your infrastructure added to Puppet management will become quickly configurable and scalable. And the main goal - managing public ssh keys will be as convenient as possible.
A screenshot of the list of admin user keys on one of the root / web machines:
Ssh key list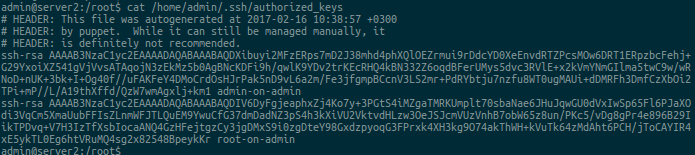
Remember, when setting up the accounts class for the ssh keys parameter, we included Merge overrides and Merge default . This is necessary so that at the end for a certain network node a single structured file with ssh keys is collected.
Check whether you can authenticate as the user “ admin ” with the added key:
Ssh connection check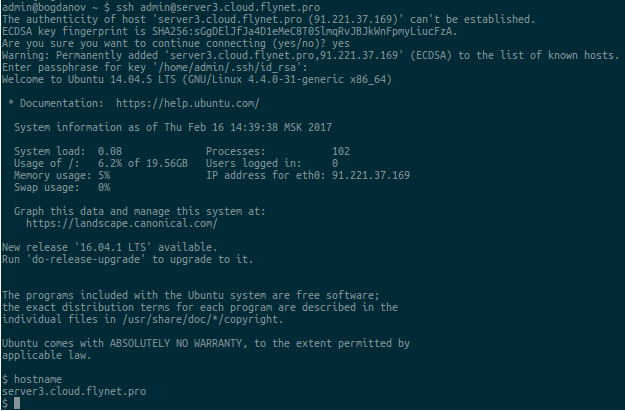
If you also passed the test successfully, the infrastructure is ready and you can gradually connect the rest of your servers to the puppet master and configure other services via Puppet.
Resources used: Puppet documentation, Foreman documentation .
Source: https://habr.com/ru/post/323708/
All Articles