Connection of peripheral modules to MIPSfpga, using the example of the Pmod KYPD keyboard
Hello! We are one of the winners of the MIPfpga hackathon , in this article we will explain how to connect modules to the system on a chip based on the MIPSfpga using the example of the Pmod KYPD keyboard. Also we will familiarize with writing of the program for management of the connected modules
→ Keyboard description can be found here.
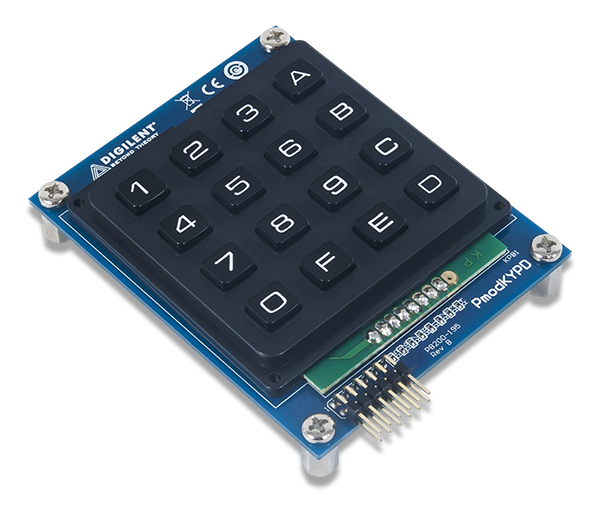
Pmod KYPD is a 16-button keypad with numbers in hexadecimal format (0-F). The polling is done by alternately feeding logical 0 on each column and reading the status of the rows. If at the time of polling a column one of the buttons in it is pressed, the corresponding line will produce a logical 1.
First you need the MIPSfpga sources.
→ Download Instructions
')
Next you need to download the add-in MIPSfpga-plus , which allows you to record programs on UARTu.
Description and installation instructions are present, in short, in order to be able to just run the script and the project is assembled, you need:
- put the MIPSfpga source in a folder
and MIPSfpga-plus directory:
Next, in the folder C: \ github \ mipsfpga-plus \ boards, select your board, for me it is de0_cv, and execute the make_project script. The project that you want to run will be in C: \ github \ mipsfpga-plus \ boards \ de0_cv \ project.
If there is no project for your board, then you can select the most suitable by the number of logical cells and change the destination;
“You will also need a compiler, a Codescape linker, and a USB-UART converter, for example, pl2303hx or ch340.

The keyboard will be directly connected to the AHB-Lite bus. To integrate the keyboard into the system, we created the decoder.v module. This module works as follows: every millisecond one of the columns and is polled. if at that moment the button in this column was pressed. then the corresponding line will produce a logical one. Each combination row + column corresponds to a digit from 0 to F. This digit is written to the register and transferred to the processor memory via the bus. With the help of software data from the memory are displayed on the indicator.

We connect to the project a file with the module described above. In the top-level file, we have this de0_cv.v, we add the following lines:
Select the legs GPIO_0 [35], GPIO_0 [34] to power the keyboard. In the file mfp_system.v add inputs and outputs:
In the description of the module mfp_system add:
When creating an instance of the mfp_ahb_lite_matrix_with_loader module, add our data to the list of inputs:
In the files mfp_ahb_lite_matrix_with_loader.v, mfp_ahb_lite_matrix.v, mfp_ahb_gpio_slave.v add the input:
In the file mfp_ahb_lite_matrix_config.vh, which is located in the folder C: \ github \ mipsfpga-plus, add the following lines:
Actually, this is the address at which registers will be available. The final touch will be writing a program that displays the numbers on a seven-segment display.
Generate the motorola_s_record file:
Check to which COM port the USB UART converter is connected:
Modify the 12_upload_to_the_board_using_uart file:
where a is the number of the COM port to which the USB UART converter is connected.
Finally, load the program:
We wish you success.
→ Keyboard description can be found here.
Pmod KYPD is a 16-button keypad with numbers in hexadecimal format (0-F). The polling is done by alternately feeding logical 0 on each column and reading the status of the rows. If at the time of polling a column one of the buttons in it is pressed, the corresponding line will produce a logical 1.
First you need the MIPSfpga sources.
→ Download Instructions
')
Next you need to download the add-in MIPSfpga-plus , which allows you to record programs on UARTu.
Description and installation instructions are present, in short, in order to be able to just run the script and the project is assembled, you need:
- put the MIPSfpga source in a folder
C: \ MIPSfpga;
and MIPSfpga-plus directory:
C: \ github \ mipsfpga-plus;
Next, in the folder C: \ github \ mipsfpga-plus \ boards, select your board, for me it is de0_cv, and execute the make_project script. The project that you want to run will be in C: \ github \ mipsfpga-plus \ boards \ de0_cv \ project.
If there is no project for your board, then you can select the most suitable by the number of logical cells and change the destination;
“You will also need a compiler, a Codescape linker, and a USB-UART converter, for example, pl2303hx or ch340.
Connecting the keyboard and USB-UART converter to the board
The keyboard will be directly connected to the AHB-Lite bus. To integrate the keyboard into the system, we created the decoder.v module. This module works as follows: every millisecond one of the columns and is polled. if at that moment the button in this column was pressed. then the corresponding line will produce a logical one. Each combination row + column corresponds to a digit from 0 to F. This digit is written to the register and transferred to the processor memory via the bus. With the help of software data from the memory are displayed on the indicator.
Module code
module decoder (
input i_row1,
input i_row2,
input i_row3,
input i_row4,
input i_clk,
input i_rst_n,
output [3: 0] o_col,
output [3: 0] o_number);
reg [3: 0] col;
reg [31: 0] counter;
reg [3: 0] number;
parameter ZERO = 8'b11100111; // row, col
parameter ONE = 8'b01110111;
Parameter TWO = 8'b01111011;
parameter THREE = 8'b01111101;
parameter FOUR = 8'b10110111;
Parameter FIVE = 8'b10111011;
Parameter SIX = 8'b10111101;
parameter SEVEN = 8'b11010111;
Parameter EIGHT = 8'b11011011;
Parameter NINE = 8'b11011101;
Parameter TEN = 8'b01111110;
Parameter ELEVEN = 8'b10111110;
Parameter TWELVE = 8'b11011110;
parameter THIRTEEN = 8'b11101110;
parameter FOURTEEN = 8'b11101101;
Parameter FIFTEEN = 8'b11101011;
always @ (posedge i_clk or negedge i_rst_n)
begin
if (i_rst_n == 1'b0)
begin
col <= 4'b1110;
end
else
begin
if (counter == 31'b111001001110000111000000)
begin
col <= {col [0], col [3: 1]};
end
end
end
always @ *
begin
if (i_rst_n == 0)
begin
number <= 4'b0;
end
else
begin
case ({i_row1, i_row2, i_row3, i_row4, col [0], col [1], col [2], col [3]})
ZERO:
begin
number <= 4'b0000;
end
ONE:
begin
number <= 4'b0001;
end
TWO:
begin
number <= 4'b0010;
end
THREE:
begin
number <= 4'b0011;
end
FOUR:
begin
number <= 4'b0100;
end
FIVE:
begin
number <= 4'b0101;
end
SIX:
begin
number <= 4'b0110;
end
SEVEN:
begin
number <= 4'b0111;
end
EIGHT:
begin
number <= 4'b1000;
end
NINE:
begin
number <= 4'b1001;
end
TEN:
begin
number <= 4'b1010;
end
ELEVEN:
begin
number <= 4'b1011;
end
TWELVE:
begin
number <= 4'b1100;
end
THIRTEEN:
begin
number <= 4'b1101;
end
FOURTEEN:
begin
number <= 4'b1110;
end
FIFTEEN:
begin
number <= 4'b1111;
end
default:
begin
number <= number;
end
endcase
end
end
always @ (posedge i_clk or negedge i_rst_n)
begin
if (i_rst_n == 0)
begin
counter = 31'b0;
end
else
begin
if (counter == 31'b111001001110000111000011)
begin
counter = 31'b0;
end
else
begin
counter = counter + 1'b1;
end
end
end
assign o_number = number;
assign o_col = col;
endmodule
We connect to the project a file with the module described above. In the top-level file, we have this de0_cv.v, we add the following lines:
`ifdef MFP_PMOD_KYPD .KYPD_DATA ( GPIO_0 [35:28] ), .KEY_0 ( KEY [0] ) `endif Select the legs GPIO_0 [35], GPIO_0 [34] to power the keyboard. In the file mfp_system.v add inputs and outputs:
inout [7:0] KYPD_DATA, input KEY_0 In the description of the module mfp_system add:
`ifdef MFP_PMOD_KYPD wire [3:0] KYPD_OUT; `endif `ifdef MFP_PMOD_KYPD decoder decoder ( .i_clk ( SI_ClkIn ), .i_rst_n ( KEY_0 ), .i_row1 ( KYPD_DATA [6] ), .i_row2 ( KYPD_DATA [4] ), .i_row3 ( KYPD_DATA [2] ), .i_row4 ( KYPD_DATA [0] ), .o_col ( {KYPD_DATA [7], KYPD_DATA [5], KYPD_DATA [3], KYPD_DATA [1]} ), .o_number ( KYPD_OUT ) ); `endif When creating an instance of the mfp_ahb_lite_matrix_with_loader module, add our data to the list of inputs:
`ifdef MFP_PMOD_KYPD .KYPD_OUT ( KYPD_OUT ), `endif In the files mfp_ahb_lite_matrix_with_loader.v, mfp_ahb_lite_matrix.v, mfp_ahb_gpio_slave.v add the input:
input [3:0] KYPD_OUT In the file mfp_ahb_lite_matrix_config.vh, which is located in the folder C: \ github \ mipsfpga-plus, add the following lines:
`define MFP_PMOD_KYPD_IONUM 4'h5 `define MFP_PMOD_KYPD_ADDR 32'h1f800014 Actually, this is the address at which registers will be available. The final touch will be writing a program that displays the numbers on a seven-segment display.
Program code
#include "mfp_memory_mapped_registers.h"
int main ()
{
int n = 0;
for (;;)
{
MFP_7_SEGMENT_HEX = MFP_PMOD_KYPD;
MFP_GREEN_LEDS = n ++;
}
return 0;
}
int main ()
{
int n = 0;
for (;;)
{
MFP_7_SEGMENT_HEX = MFP_PMOD_KYPD;
MFP_GREEN_LEDS = n ++;
}
return 0;
}
Generate the motorola_s_record file:
08_generate_motorola_s_record_file Check to which COM port the USB UART converter is connected:
11_check_which_com_port_is_used Modify the 12_upload_to_the_board_using_uart file:
set a=7 mode com%a% baud=115200 parity=n data=8 stop=1 to=off xon=off odsr=off octs=off dtr=off rts=off idsr=off type program.rec >\.\COM%a%, where a is the number of the COM port to which the USB UART converter is connected.
Finally, load the program:
12_upload_to_the_board_using_uart We wish you success.
Source: https://habr.com/ru/post/323360/
All Articles