How to change a closed information system for themselves without involving a vendor. Unsolvable problem solving with Google Chrome
In big business there are often situations when deliberately flawed information systems are being introduced and used. These projects begin as a steep own development of the company, under its processes, taking into account all the features. But after the surrender, it turns out that here and there deficiencies, absurdities. It is impossible to obtain the necessary reports and schedules, since they could not or were forgotten to be taken into account in the TK. The management demands, then asks for something to be done, but the system is closed for changes, and the contractor is with us in the process of arbitration. However, there are no hopeless situations.
This article appeared as a continuation of a long-started conversation about how to quickly raise the management accounting system (SUU) "without a budget . " Everything described below was done by non-professional programmers and non-contractors. The basic idea is that an experienced manager develops programming skills and makes solving a specific task using well-documented technologies. The result of this approach saves considerable money and time. As experience shows, it is much easier for such “pumped managers” to make a model of what they need in the future to order from a supplier for a large-scale solution.
So, we already had an unpretentious MS Access based on MS Access + MS SQL, with the necessary set of fields and all the required reports. Its revision was carried out constantly, because all the time there were new requirements for convenience, additional features.
')
Soon came the understanding of some of the limitations of MS Access in terms of the front-end. That is, it was possible, of course, to make custom controls, to write libraries, but somehow I did not want to get involved in this difficult story. Initially, the goal of the project was to find the simplest and fastest solution to a specific task - accounting. Inflate Access to a full-fledged equivalent of 1C or something like that would be a mistake. Access is not designed to build serious systems. By the way, it is for this reason that we decided not to scale the system to all departments of the agency, but limited ourselves to a division of Digital advertising.
There are also compatibility issues. Access Runtime resolved the issue of launching SAS from users without a full-featured paid MS Access installed. However, the versions of Windows and Office were different for many, as were the connected libraries. As a result, I had to dance with a tambourine to start the system with employees with Office 2016 installed.
To top it all, there was a double work on entering data into the Access-based SMS and the “large system” of the company's document flow, as part of the information was still common. While our system was being tested in a small department within the Digital department, this problem was not so urgent: users were interested. Previously, they themselves conducted such a second “base” with all the data they need in Excel format. After the SUU was distributed to all buying departments (contextual advertising, SMM, production and others), the people began to slowly hate us. Double work has become a bit much on the scale of the department.
The main difficulty in this was that the “big system”, where it was necessary to enter part of the data, which cost the company millions of rubles and years of work, was absolutely closed for us . Source was not. There was access to the database, but since the company's business depended on the performance of this solution, and we could not always understand how it worked (closed source), it was decided not to fit into the database.
Simply put, it required a single terminal to fill in information in two bases at the same time: “large” (with a smaller number of fields) and “small” (with a large number of fields). And, as mentioned above, without the ability to access one of the databases other than through the web user interface.
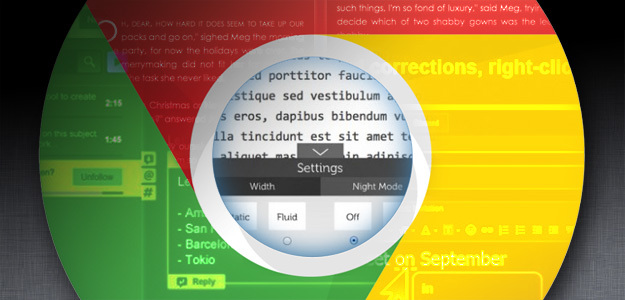
It would seem an unsolvable task. But then I came across the Google Chrome extension, I don’t remember how it was called, the essence of which was that it changed the form of displaying information on a web page, complementing it with fields that were missing earlier. At the same time, practically nothing has changed for the user. He came to the same URL, but saw a much more convenient form. This extension took the information from the fields and saved it on another server, where later it was possible to see this additional data. We liked the idea. In fact, it took about the same in our case.
The storage scheme is as follows:

On the front end, a bunch was selected: Google Chrome extension + Bootstrap + Angular. Why is that? Bootstrap eliminated the need for a long time to work out the layout. We used the default theme and users quite liked it. Angular allowed to quickly build the logic of the behavior of the form and interaction with the back-end. Convenient controls were customized at times. There were almost no compatibility issues between Bootstrap and Angular. For controls, the UI Bootstrap library was used. For interactive tables, we used Angular UI Grid together with Angular JS dropdown multi-select , which added data to the table. In addition, other Angular libraries were used, including ngDialog for drawing pop-up dialogs and some auxiliary (dependencies) for the above modules.
Setting up the Google Chrome extension itself took no more than a couple of days of digging documentation. We will analyze this question in more detail. We should start with the fact that for the normal distribution of new versions of the extension, you must purchase (one-time) access to the Chrome online store . There are currently no restrictions on developing and uploading extensions, although laying out new Google Chrome applications has recently been chopped off . It seems like plans to turn off the extensions have not yet been. The display of the new version is the unloading of the zipped folder in which the development is underway (the file “manifest.json” in the root).
To test the extension you need to go: “Main menu” -> “Additional tools” -> “Extensions” -> “Download unpacked extension”. When updating the code, you need to click “Update Extensions” each time for the changes to take effect and to be displayed. If you use Chrome Dev Editor for development, then the extensions are updated automatically. However, we have already switched from it to the Visual Studio Code , it seemed to us much more convenient.
The simplest extension can be created using the constructor: Extensionizr . It will include the minimum set of files:
- “Manifest.json” - includes the main parameters of the extension, access rights to the browser, references to the “content scripts”, which will be discussed below
- “Page_action.html” is an extension view. In our case, it opened in the form of a modal window on top of the “big system” form. We took out the logic of the Angular controller to a separate file “page_action.js”, and then to other files
- "Inject.js" is the same "content script" that allows you to perform some kind of miracle with a page on top of which the extension opens. You can redraw it completely.
- “Background.js” - keeps track of what is happening on the page, on top of which we will open the form. Contains extension display rules
In our case, the extension is activated only when the user opens a certain form. To “find out” this form, the following rule in background.js was set:
var rule1 = { conditions: [ // id new chrome.declarativeContent.PageStateMatcher({ css: ["textarea[id='id_______']"] }) ], actions: [ new chrome.declarativeContent.ShowPageAction() ] }; chrome.runtime.onInstalled.addListener(function () { chrome.declarativeContent.onPageChanged.removeRules(undefined, function () { // Chrome chrome.declarativeContent.onPageChanged.addRules([rule1]); }); }); To click on the extension button to open a window, in the same background.js there was this code:
chrome.pageAction.onClicked.addListener(function (tab) { // id tabid = tab.id; var w = 1400; var h = 900; var vleft = (screen.width/2)-(w/2); var vtop = (screen.height/2)-(h/2); chrome.tabs.create({ url: chrome.extension.getURL('/src/page_action/page_action.html'), active: false }, function (tab) { // , chrome.windows.create({ tabId: tab.id, width: w, height: h, type: 'popup', focused: true, left: vleft, top: vtop }, function(window) { } ); }); }) The page_action.html file itself is a regular HTML page, but in our case it also contained Angular directives:
<html lang="en" ng-app="____angular"> <head> <!-- css, title --> </head> <body role="document" ng-controller="_"> <!-- --> </body> </html> We had one controller, and as it was written above, it lived in the page_action.js file (the main logic) and a bunch of other .js files containing a specific implementation of each logic segment.
To link records in the bases, the “Comment” field was used in the form of a “large system” (over which the extension was opened). When adding a new entry, the extension inserted a note like this in the comment field: {”ext_id”: ”1233”}. Further, when opening an extension on top of any entry in the “big system”, it immediately loaded the previously saved data into its form.
Separately, I would like to touch upon the topic of content scripts (the file “inject.js”). The fact is that this is a unique feature of Google Chrome, which allows you to completely redraw the original page. I will give an example. In the “big system” there was no sign with some summary data on advertising placements within the project. This label would greatly simplify the life of employees working with the form, since the specific placement would be immediately visible in context. For implementation, a content script was created that displayed a button opening a modal window with a tablet and contained the logic of the tablet itself, as well as the code for loading data into it.
First, insert the button on the page, on top of which the Google Chrome extension works:
// HTML- var parent_node = document.getElementsByTagName("id__"); // HTML-, ( ) var elem = document.createElement('a'); elem.setAttribute("href", "#"); elem.setAttribute("class", "dyn"); elem.setAttribute("ng-click", "openTotalsBySellers()"); var html_code = '<strong style="color:green;">[ ]</strong>' + "\n"; elem.innerHTML = html_code; // parent_node.appendChild(elem); // Angular, $compile(elem)($scope); You may have noticed the “openTotalsBySellers” function, which actually opens the table we need. Let me give you the code of the function of the content script that inserts the necessary JavaScript on the initial page (on which we just placed the button:
function defineDialogTableTotalsBySellers($scope, $compile, uiGridConstants, parent_node) { // , ( ui-grid) $scope.totalsBySellersG = { showGridFooter: true, showColumnFooter: true, enableFiltering: true }; // $scope.totalsBySellersG.columnDefs = [ { name: 'seller', displayName:''}, { name: 'totals_agency', displayName:'', aggregationType: uiGridConstants.aggregationTypes.sum, type: 'number'}, ]; // $scope.totalsBySellersG.data = []; // $scope.totalsBySellersG.onRegisterApi = function(gridApi){ //set gridApi on scope $scope.gridApi = gridApi; }; //JavaScript , ( ngDialog) var dialog = document.createElement('script'); dialog.setAttribute("id", "openTotalsBySellers"); dialog.setAttribute("type", "text/ng-template"); html_code = ""; html_code += '<div class="ngdialog-message">'; html_code += '<h2> (Resolution Money)</h2>'; html_code += '<br /><div ui-grid="totalsBySellersG" class="grid"></div>'; // $scope.total_sum html_code += '<br /><strong> ( ):</strong> {{total_sum}}<br /><br />'; html_code += '</div>'; html_code += '<div class="ngdialog-buttons mt">'; html_code += '<input type="button" value="" ng-click="closeThisDialog()"/>'; html_code += '</div>'; dialog.innerHTML = html_code; parent_node.appendChild(dialog); $compile(dialog)($scope); } A bunch of Apache + PHP + MS SQL worked on the back end. It makes no sense to describe in detail, but the main ideas were as follows. We decided not to pervert with data encryption: after all, the extension worked only within the company. In order not to send raw JSON, the data was packaged in Base64 and so went to the server and back. The POST method was used because it does not contain restrictions on the amount of data. Initially, the PHP application architecture was built on the basis of the ApplicationHelper template described in Matt Zandstra's remarkable book “PHP objects, patterns and programming techniques” (Williams, 2015).
The overall system architecture is as follows:

As a result, in less than a month, a working solution was obtained, which is still in effect. During this year we have a clear idea of the desired functionality and forms. In fact, managers who understand the nuances of business have independently created a model of an “ideal” Management Accounting System, fully adapted to our tasks. Due to this, with much less blood we will soon replace the Google Chrome extension with a larger information system, including workflow, which is built very differently and scales to the whole agency. The expansion described in this article allowed for one and a half years to keep management accounting without duplicating work. An integral part of the SMS are reports on which I would like to tell in detail, but beyond the scope of this article.
Source: https://habr.com/ru/post/323328/
All Articles