How to add AppIcon and LaunchScreen to React Native App
Not having ever done native development for mobile platforms before, this time I decided to go the “easy way” - to master React Native. The greatest difficulty was the addition of the application icon (AppIcon) and the boot screen (Launch Screen). What I want to tell in this article to those who master React Native.
At the time of this writing, the current version of React Native 41.0, XCode 8.2 (these data are indicated for the reason that in later versions something may change and this manual will not be applicable).
Let's start ...
We create React Native application
react-native init habr Adding AppIcon
On iOS
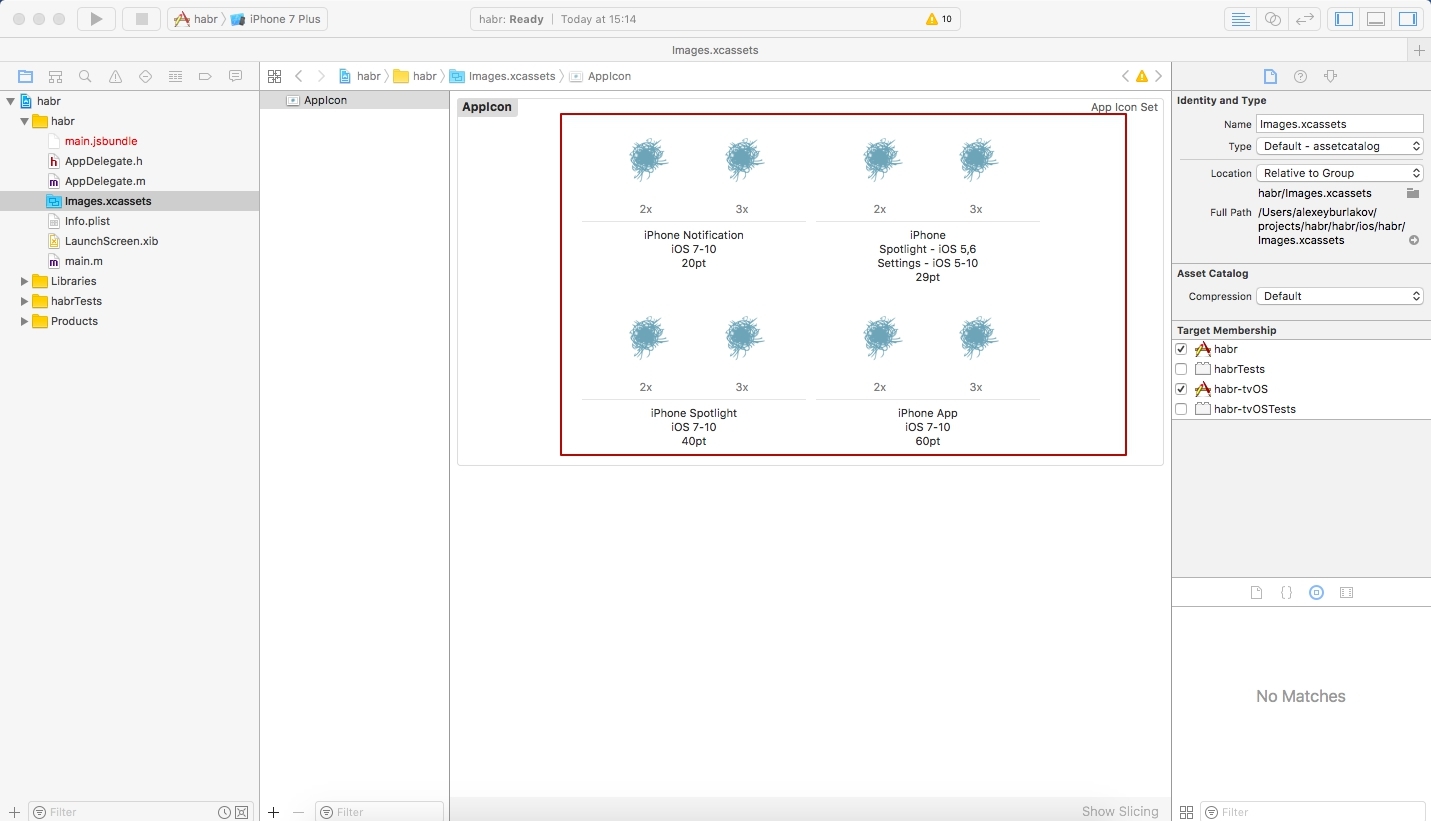
Go to the folder with the iOS part of the application.
cd habr/ios/ and open the hacode.xcodeproj XCode project file there .
Next, click on the following buttons:

In field 4 we add icons by dragging them into empty cells. Below the cells is the size of the icon (in pt).
It turns out like this:
Important: the picture of the icon should be square and, ideally, there should be several versions of different sizes (each cell has its own size). If you don’t want to mess around with creating different sized icons, add one, 120x120px, to the cell for iPhone 7-10:
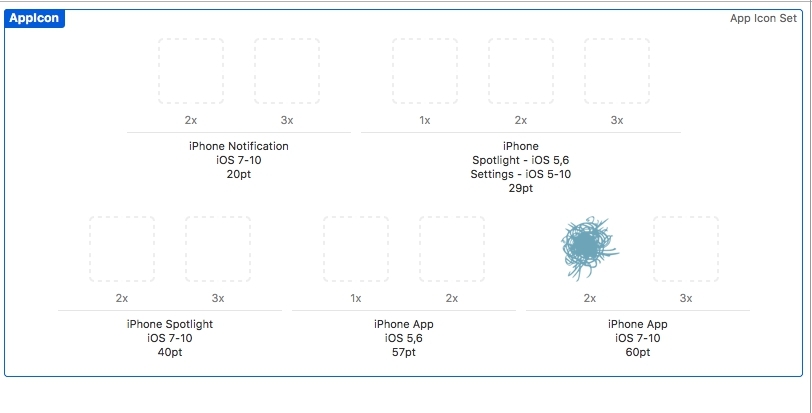
If you add icons that are not the right size, you will get the error "Images.xcassets: The app icon set named“ AppIcon ”
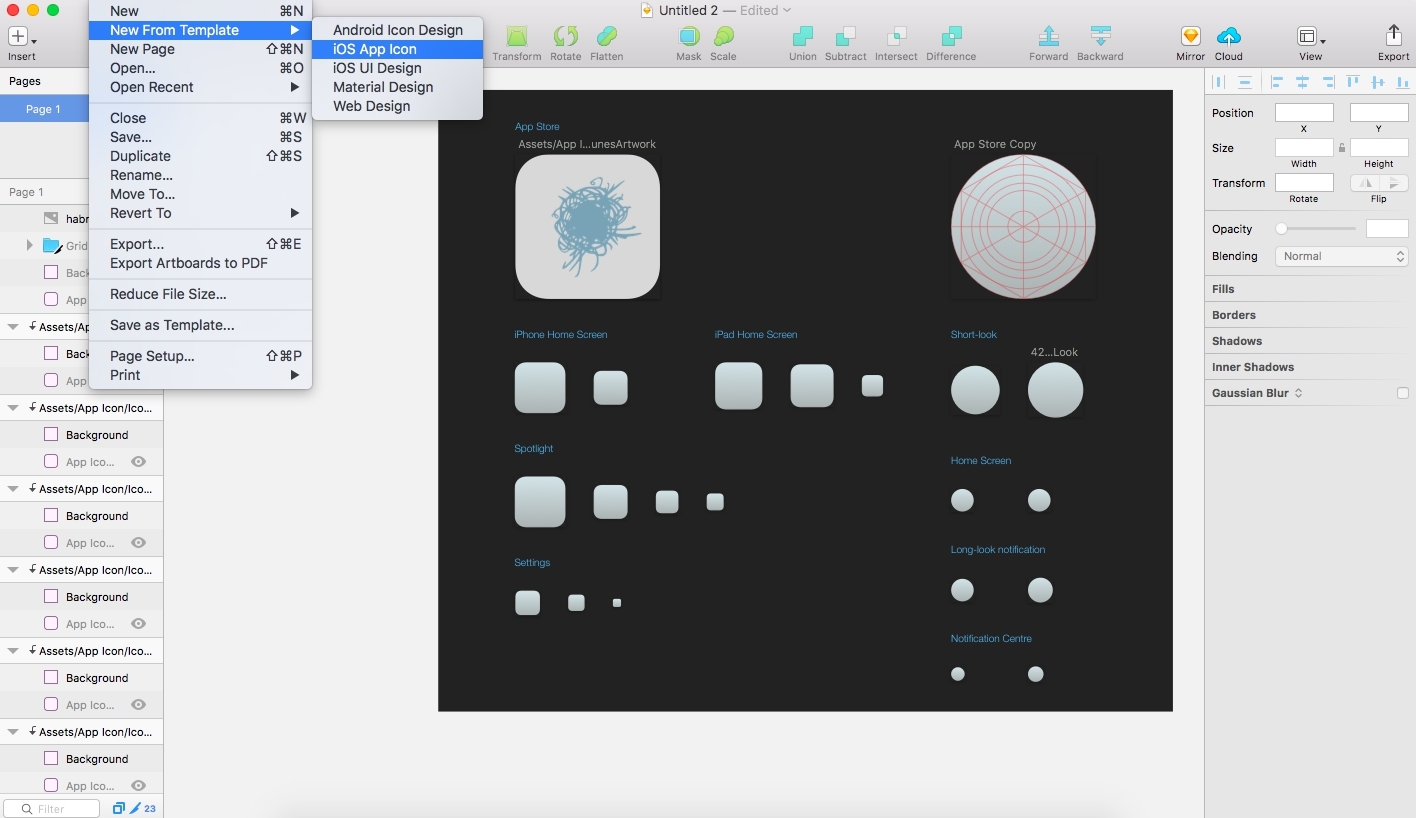
Good to know: the most convenient way to create icons for ios is in Sketch (available only under OS X), because it has templates of the right sizes, which can then be exported to png-format (File → Export ...):
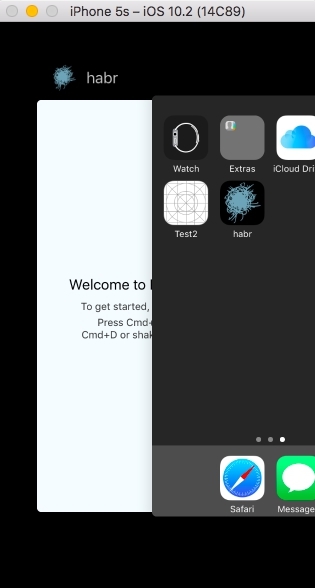
We start the assembly of the ios version from the root folder of the project:
react-native run-ios We get a profit:
( hit: to minimize the application in the emulator, double click Cmd + Shift + H)
On Android
From the project folder, go to the folder with the Android part of the application, to the resource storage location:
cd habr/android/app/src/main/res/ and see the folders here:

We go in each of them and in each we see the file ic_launcher.png . Replace each file with your own, with the same name and the same size (in px).
We start assembly of the Android version from the root folder of the project:
react-native run-android We get a profit:

With the icons finished, go to the loading screen.
Adding LaunchScreen
On iOS
There are at least 2 ways to add LaunchScreen to iOS. I will describe the one that worked for me.
First of all, let's go back to XCode, along the same route that is shown on the very first image in this article, but instead of the Images.xcassets folder, select the LaunchScreen.xib file.
At the same time, Xcode will ask for which version of which device to display the contents of this file. Choose any iPhone.
Next, click on the buttons at number 3 and 4 in this screenshot:
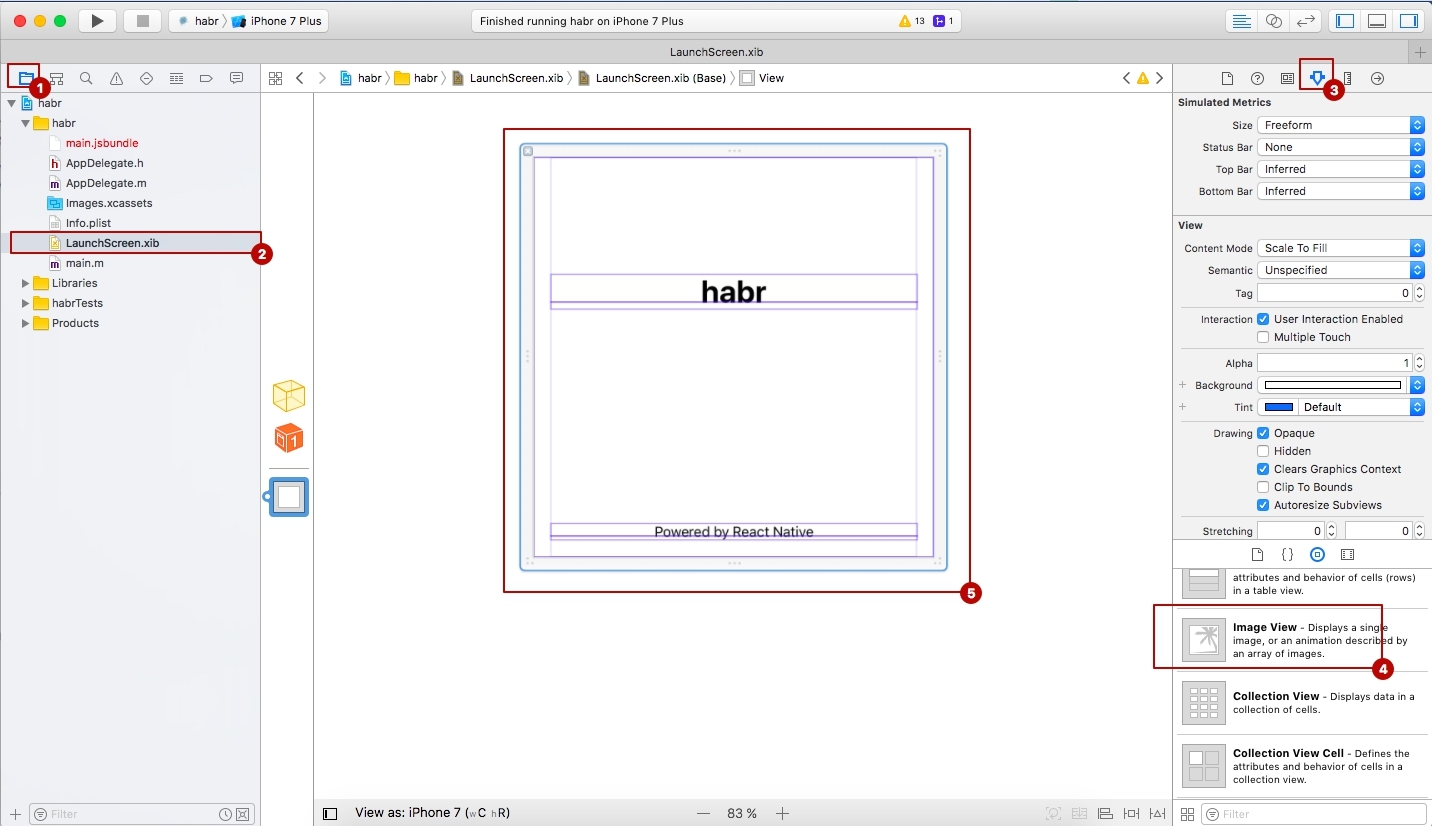
Then we drag element 5 ( Image View ) onto the working field 6. Elements 6 that are in the working field (text labels) can be deleted.
The next step is to add the image file we need to our project (for beginners, the context menu is called by touching the touchpad with two fingers at the same time).
Next, click on the UIImageView element in the working area and set its properties:
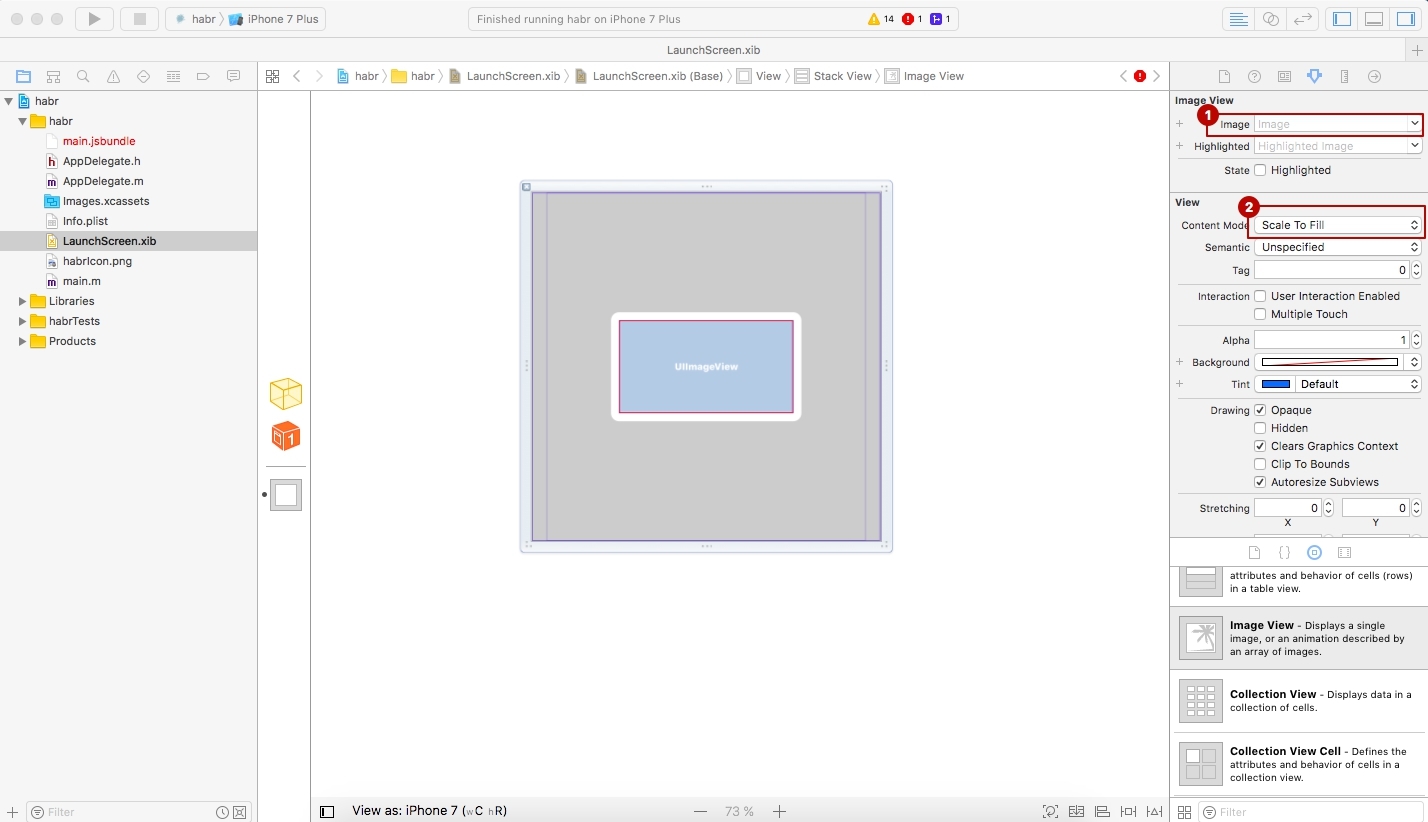
In the menu at number 1 (in the screenshot), select the image added in the previous step (if the drop-down list is empty, click in the left pane (where you selected the LaunchScreen.xib file for any other file) and then go back to the LaunchScreen.xib file - the file will appear in the dropdown list. This is a minor Xcode bug).
In the menu at number 2, select "Aspect Fit" to scale the image proportionally, regardless of the screen size of the device on which the application will be launched.
To make the picture strictly centered, click the picture itself (on the workspace) and click on button 1, as shown in the following screenshot:
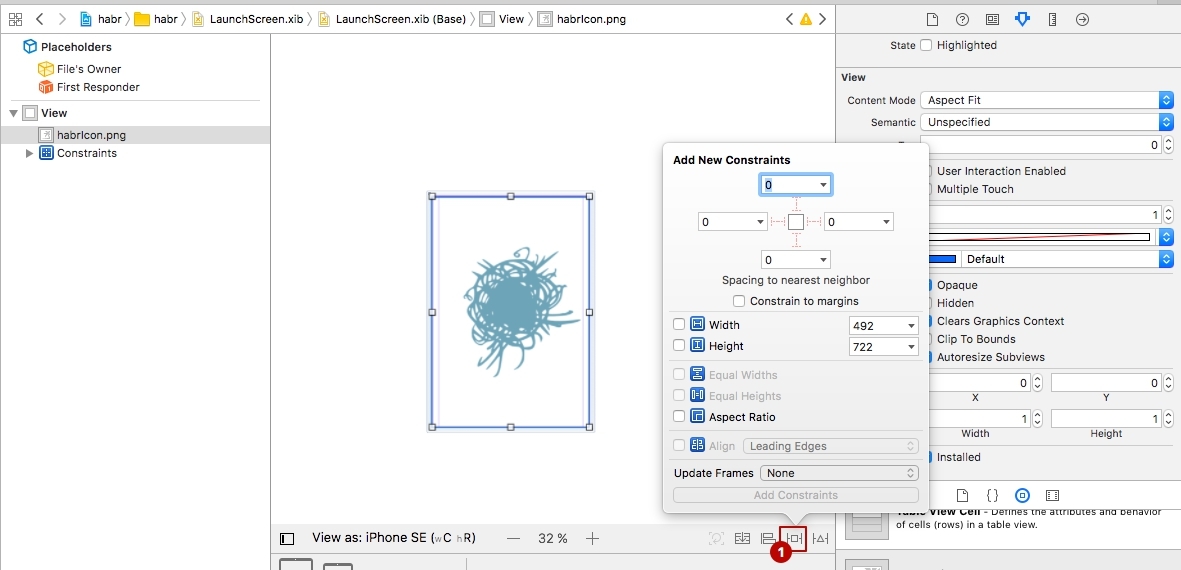
In each of the four "Add new constrains" fields, set the value to 0.
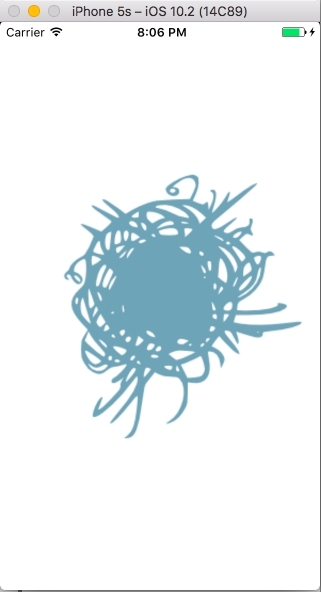
We start the assembly of the ios version from the root folder of the project:
react-native run-ios We get a profit:
On Android
From the project folder, go to the folder with the Android part of the application, to the resource storage location:
cd habr/android/app/src/main/res/ Add the drawable folder here . Create in it a file splash_screen.xml of such content
<?xml version="1.0" encoding="utf-8"?> <layer-list xmlns:android="http://schemas.android.com/apk/res/android"> <item> <color android:color="@color/white"/> </item> <item> <bitmap android:gravity="center" android:src="@drawable/ic_launcher"/> </item> </layer-list> This file describes the new "resource" of the application, and the path to the external files of the resource (in our case, the file with the image for the start screen).
android:gravity="center" this part of the code indicates the location of the resource on the screen. And this:
android:src="@drawable/ic_launcher"/> path to the resource file, relative to the res folder.
Code block
<item> <color android:color="@color/white"/> </item> Creates a background underlay to the loading screen, and a string
@color/white indicates the background color. The background color value is taken from the colors.xml file, which does not exist yet and which you need to create and place at:
*
habr/android/app/src/main/res/values/colors.xml The contents of the file may be:
<?xml version="1.0" encoding="utf-8"?> <resources> <color name="orange">#ff5500</color> <color name="white">#ffffff</color> <color name="transparent">#00000000</color> </resources> Here every line is like
<color name="white">#ffffff</color> contains a color constant. I did not manage to set the background color value directly (in the splash_screen.xml file), so I added such a file, as advised in one of the instructions on the web.
Next, in the drawable folder , add the file ic_launcher.png , which is an image on the start screen.
Then go to the folder
cd habr/android/app/src/main/res/values and edit the styles.xml file so that it looks like this
<resources> <!-- Base application theme. --> <style name="AppTheme" parent="Theme.AppCompat.Light.NoActionBar"> <!-- Customize your theme here. --> </style> <!-- --> <style name="SplashTheme" parent="AppTheme"> <item name="android:windowBackground">@drawable/splash_screen</item> </style> </resources> With this action we add a new "theme" for "activity" (activity).
"Activity" (Activity) in Android-applications represents a "screen" or "page". By default, there is only one “activity” in React Native, we add another one.
To do this, go to the folder with the java-code:
cd habr/android/app/src/main/java/com/habr (the path after / java / in your project will be different) and do the following:
- rename MainActivity.java to MainActivity2.java
- edit the file MainActivity2.java - change the class name in the 6th line from "MainActivity" to "MainActivity2":
public class MainActivity2 extends ReactActivity { Create a file MainActivity.java , in which we write the following code:
package com.habr;// import android.content.Intent; import android.os.Bundle; import com.facebook.react.ReactActivity; public class MainActivity extends ReactActivity { @Override protected void onCreate(Bundle savedInstanceState) { super.onCreate(savedInstanceState); Intent intent = new Intent(this, MainActivity2.class); startActivity(intent); finish(); } }
The meaning of the above 3 steps is simple: we change the starting boot screen ("activity") to our screen ("activity) SplashScreen.
(In this paragraph, you might have noticed that LaunchScreen was renamed to SplashScreen. In Android development (and not only), the boot screen is called SplashScreen.)
Now it remains to register our "activity" in the manifest file of the Android application so that it is available for calling in the code.
Open the file AndroidManifest.xml , which is located at
/android/app/src/main/AndroidManifest.xml (relative to the project root directory)
And we bring it to this form:
<manifest xmlns:android="http://schemas.android.com/apk/res/android" package="com.habr" android:versionCode="1" android:versionName="1.0"> <uses-permission android:name="android.permission.INTERNET" /> <uses-permission android:name="android.permission.SYSTEM_ALERT_WINDOW"/> <uses-sdk android:minSdkVersion="16" android:targetSdkVersion="22" /> <application android:name=".MainApplication" android:allowBackup="true" android:label="@string/app_name" android:icon="@mipmap/ic_launcher" android:theme="@style/AppTheme"> <!-- "" - --> <activity android:name=".MainActivity" android:theme="@style/SplashTheme"> <intent-filter> <action android:name="android.intent.action.MAIN" /> <category android:name="android.intent.category.LAUNCHER" /> </intent-filter> </activity> <!-- "" - --> <activity android:name=".MainActivity2" android:label="@string/app_name" android:theme="@style/AppTheme" android:configChanges="keyboard|keyboardHidden|orientation|screenSize"> </activity> <activity android:name="com.facebook.react.devsupport.DevSettingsActivity" /> </application> </manifest> As a result, in the AndroidManifest.xml file we have 2 activities, and in one of them it is indicated that this is the one with which the launch of the Android application will begin. This is done by adding the following parameters:
<intent-filter> <action android:name="android.intent.action.MAIN" /> <category android:name="android.intent.category.LAUNCHER" /> </intent-filter> in the body of "activity".
With preparations finished. Run the build of the android version from the project root folder:
react-native run-android We get a profit:

The complete project code can be found here .
')
Source: https://habr.com/ru/post/322548/
All Articles