Problems encountered in the development of android-applications
Introduction
Good day. In this article you will learn what problems may arise during the development of android-applications. Comments from the previous article prompted me to write this article, by the way, here it is: my first article . Thanks for the tips! Well, it's time to start ...
Problem 1
Developing my applications, I wanted to make them as comfortable and beautiful as possible. This was hampered by standard dialog boxes. I wanted the background in the dialog to match the main background of the application.
Decision
In the manifest, you need to choose your own theme, the attribute is responsible for this:
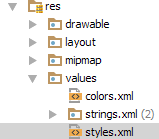
android:theme="@style/AppTheme"> Go to the values / styles.xml:
')
This file contains the application theme. First, I made the application in full screen, through the inheritance of the theme - android: Theme.Black.NoTitleBar.Fullscreen, then I changed the style of the dialog boxes in this way:
<item name="android:alertDialogStyle">@style/alertStyle</item> but this option does not work ... This attribute is responsible for the style of dialog boxes:
<item name="android:alertDialogTheme">@style/alertStyle</item> Now you can define the style itself in the same file:
<style name="alertStyle" parent="android:Theme.Dialog"> <item name="android:layout_gravity">center</item> <item name="android:background">#64abcdf5</item> </style> Whole file
<resources> <style name="AppTheme" parent="android:Theme.Black.NoTitleBar.Fullscreen"> <item name="android:alertDialogTheme">@style/alertStyle</item> </style> <style name="alertStyle" parent="android:Theme.Dialog"> <item name="android:layout_gravity">center</item> <item name="android:background">#64abcdf5</item> </style> </resources> The result is:
Beautiful dialog box
Problem 2
This problem is related to saving data. At first I found solutions related to the creation of databases, but this was something scary for me. I was looking for an easier option. Finally I came across in the official documentation for the SharedPreferences class. Using it is very easy to save data. Consider the example of saving time.
SaveObjectRating
public final class SaveObjectRating { private Date[] convertedTime; private SharedPreferences sharedPref; private long[] time; SaveObjectRating(Context context) { time = new long[10]; convertedTime = new Date[10]; sharedPref = context.getSharedPreferences("RatFile", MODE_PRIVATE); load(); } public Date[] getConvertedTime() { return convertedTime; } public void setNewTimeOnIndex(long a, int index) { if (a < time[index] && a != 0) { time[index] = a; } } // public void save() { SharedPreferences.Editor editor = sharedPref.edit(); for (int i = 0; i < 10; i++) { editor.putLong("key" + i, time[i]); } editor.apply(); } // private void load() { for (int i = 0; i < 10; i++) { time[i] = sharedPref.getLong("key" + i, 3599); } } // void createConvertedTime() { for (int i = 0; i < 10; i++) { convertedTime[i] = new Date(); long min = time[i] / 60; long sec = time[i] % 60; convertedTime[i].setMinutes((int) min); convertedTime[i].setSeconds((int) sec); } } } This class is used to save the time spent by the player on the passage level. When creating objects of this class, they will have already loaded data, because the load () method is called in the class constructor.
The new time spent can be set using the method:
setNewTimeOnIndex(long a, int index) It changes the data only if the user spent less time on the passage. To save the data, call the save () method.
And the problem of saving data is solved without creating databases.
Problem 3
It all started with multi-screen applications. Screens need to be changed, but how. The first solution I used for a long time was to create my own activity for each screen. If I had a powerful phone, like my friend, I would not even notice the disadvantages of this solution, but this is not so. When switching to another screen, one more activity was created and visually on a weak phone this is very noticeable. After thinking, I finally realized that activity is not the best option for navigating between application screens. It was necessary to use fragments. This gives a normal visual effect - not at all noticeable screen changes.
Problem 4
Probably the most difficult problem, because until now, whatever solution I used to have to put a crutch somewhere, is to implement the definition of the current fragment. The first thing that occurred to me was to use a static variable. As an option, it will do, but if there are a lot of fragments, then huge samples of a static variable are created and you get confused about which value is responsible for which fragment. The next option is to determine on which fragment we are now through its type (using the keyword of the Java programming language, instanceof). At first glance it should work, but it does not work. I never managed to figure out why this is not how it should work. (it works, but with errors ...)
So, I tried another option - to check which fragment is visible on the screen. It works as it should, if used together with a static variable.
MainActivity.class
@Override public void onBackPressed() { System.out.println("MainActivity:onBackPressed()"); if (idTheCurrentFragment == 4) { finish(); } if (start.isVisible()) { System.out.println(" "); idTheCurrentFragment = -1; finish(); } else if (game1vs1.isVisible() || gameCompany.isVisible()) { confirmation(); // . } else if (idTheCurrentFragment == -1) { System.out.println(" "); super.onBackPressed(); } } The task was that when the system button was pressed back, the player was asked if he was sure that he wanted to leave the game. If the player agrees, the instance method of the FragmentManager class popBackStack ("...") is called, the static variable is set to 4, and when the button is pressed again, the application terminates. This solution suited me, but it would be interesting how this can be done even better.
Problem 5
The problem of dynamic fragments change. For example, there is a fragment A and when you click on a button that is in the layout of this fragment, the next screen should open, that is, fragment B. I tried the option - in the activity class I created an event handler for pressing all the buttons in the application. Throughout the markup, I have specified the event handler created in the activity for all buttons in the android: onClick = "..." attribute. For buttons, you must specify an id so that the handler understands which button it is dealing with.
Handler code
public void onClick(View v) { int id = v.getId(); switch (id) { case R.id.exit: { onBackPressed(); break; } case R.id.info: { fm.beginTransaction().replace(R.id.fragment_container, infoFragment).addToBackStack(null).commit(); break; } case R.id.about_game: { fm.beginTransaction().replace(R.id.fragment_container, aboutGameFragment).addToBackStack(null).commit(); break; } case R.id.about_authors: { fm.beginTransaction().replace(R.id.fragment_container, aboutAuthorsFragment).addToBackStack(null).commit(); break; } } The buttons themselves are not created in java code, only in xml. Yes, yes it works. There is an instance of the FragmentManager class in the activity to perform a transaction, that is, change the current fragment.
All this is good, but I don’t know if this is considered correct, so I quickly refused this option, gradually removing several values from the sample until it was completely empty. Another option offered by the Google documentation is through an interface object, that is, the fragment processes pressing its buttons and, when pressed, creates an interface object that implements the activity in the following way:
SendingActivity message = (SendingActivity) getActivity(); message.send('' ''); In the implementation, the activity of this interface can be made switch - case, in which it is already to determine which fragment to open further.
@Override public void send(int a) { switch (a) { case 0: { // break; } case 1: { // break; } case 2: { // break; } case 3: { // break; } case 4: { // ( ) finish(); break; } } Problem 6
This problem remained so unresolved. I hope there will be some experienced developers who can share their experiences in the comments. The fact is that it often happens that you need to import your svg-format pictures into the development environment, but you can take one picture for a very long time, even if you train yourself ... The story was like this, I was tormented by inserting 80 pictures into the development environment, and then it turned out that they needed redo ...
Conclusion
Well done those who read to the end. So, I have come a long way around these problems so that others can learn from my mistakes and share my experience with novice android developers. For examples, I used the applications I wrote. Here are links to them:
play.google.com/store/apps/details?id=com.thekingames.memorize
play.google.com/store/apps/details?id=com.thekingames.warrior
I hope my article was helpful to you. Good luck to all!
Source: https://habr.com/ru/post/322116/
All Articles