Continuous Integration UWP Applications in Visual Studio Team Services
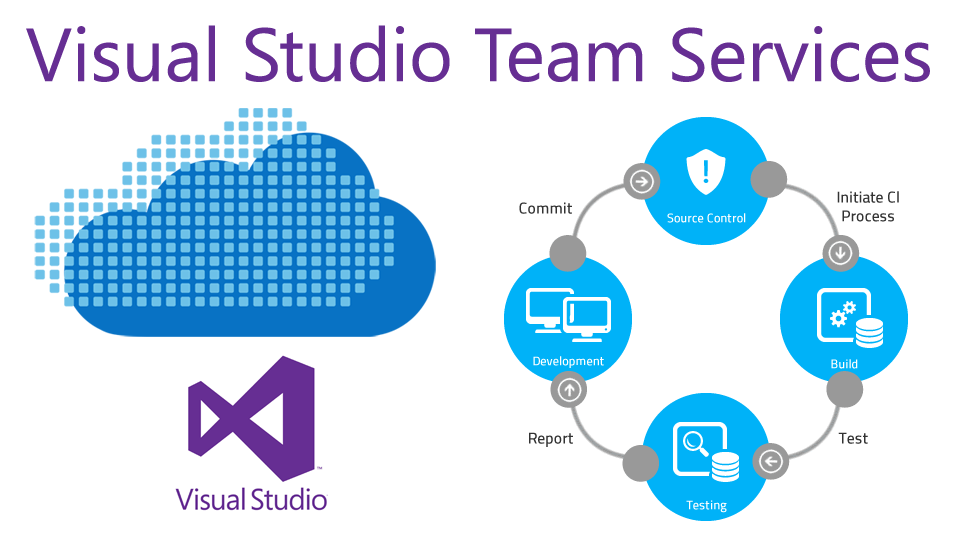
With VSTS, you can automate software deployment and testing in a variety of environments. The essence of Continuous Integration is to perform frequent automated project builds to quickly identify and solve integration problems. In particular, CI allows you to automate the regression testing of applications.
As an introduction to VSTS features, I propose to publish and configure Continuous Integration with Unit tests with a simple UWP application.
Create a simple UWP application project in which we will have one method:
')
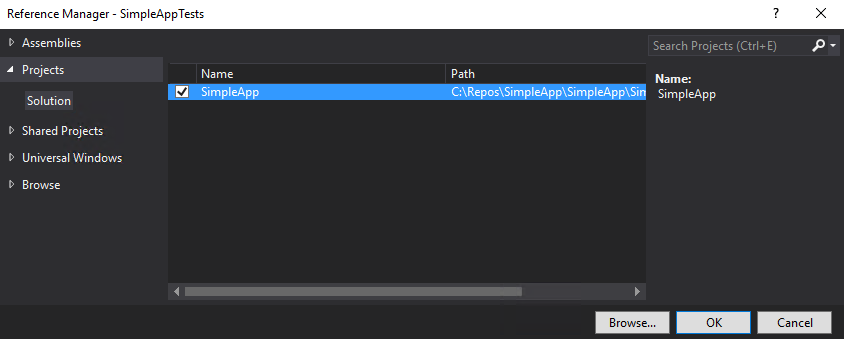
public double CalcSquere(string t) { double res = Convert.ToDouble(t); res = res * res; return res; } In the solution, add a project with unit tests (Unit Test App). It is recommended to name the test project under the convention, adding to the end Tests. Thus, it will be easier to configure test launches in VSTS and TFS. Add a link to the main project:
Rename UnitTest.cs to MainPageTests.cs. If the file is named this way, it will become easier to understand exactly what this class is testing.
Add a method:
[TestMethod] public void CalcSquere_5_Result25() { Windows.ApplicationModel.Core.CoreApplication.MainView.CoreWindow.Dispatcher.RunAsync(CoreDispatcherPriority.Normal, () => { SimpleApp.MainPage mp = new SimpleApp.MainPage(); double expected = mp.CalcSquere("5"); Assert.AreEqual(expected, 25, "Wrong"); }).AsTask().Wait(); } Method code is run from a UI stream. Do not forget to add the namespace
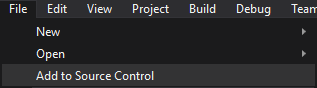
using Windows.UI.Core; If during the creation of the project we did not add a version control system, then we need to do it now.
You must remove the certificates of both projects from the gitignore list (otherwise the VSTS build will fail).
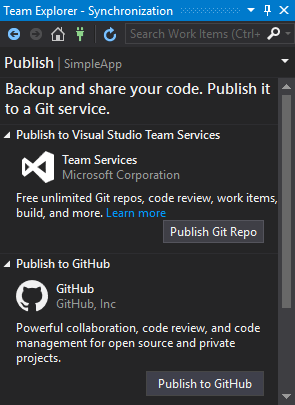
We publish on VSTS. Go to the Team Explorer window and click Sync.
 |  |
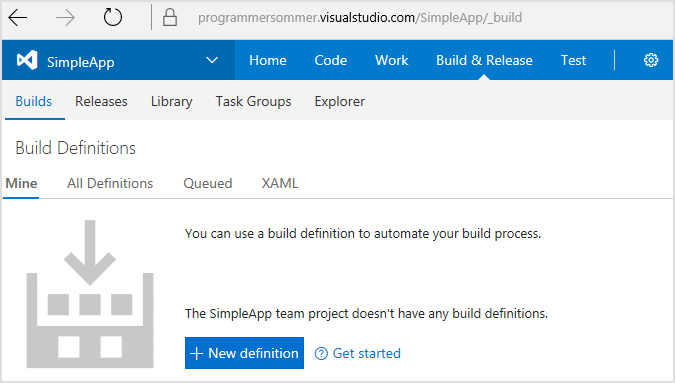
After the publication we can create Build Definition. But before that we need to configure the build agent. The fact is that in order to run Unit tests it is necessary that a custom agent be created.
By default, there are 3 agent pools:
Default pool is used for agents that are installed on remote servers.
Hosted pool is used for agents that are installed by default on VSTS and TFS servers.
Hosted Linux pool allows you to work with Linux machines without any configuration of your agent. Works in a Ubuntu Linux host inside the vsts-agent-docker container docker.
The table below shows possible scenarios that indicate that we need a custom agent:
| Scenario | Custom Agent | Hosted build agent |
| Main features of UWP builds (including .NET native) | X | X |
| Creating packages for sideloading | X | X |
| Creating Packages for Windows Store | X | X |
| Using third-party certificates | X | |
| Build for a special version of the Windows SDK | X | |
| Running unit tests | X | |
| Using incremental build | X |
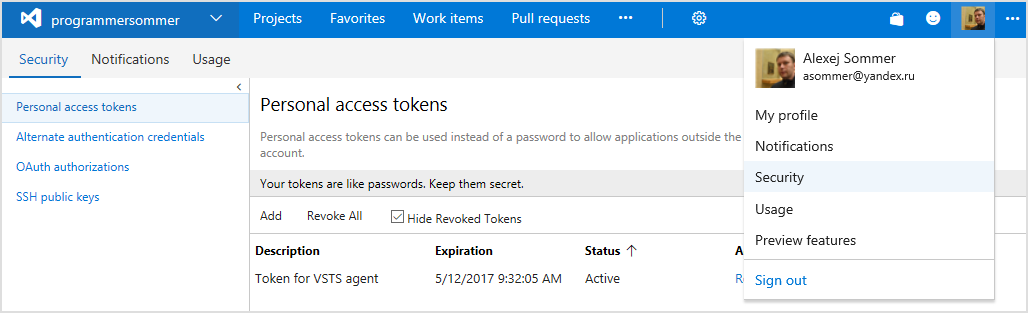
To create your build agent, you need to create a personal token. Click on the profile icon and go to Security.
Click Add. We select only Agent pools (read, manage)
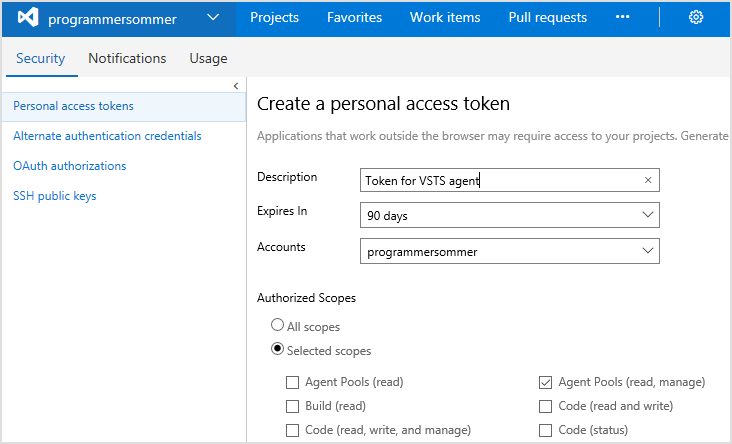
Click Create token (below) and copy the value, saving it on your computer

The message warns us that if we do not save the value of the token now, then later we will not be able to get it. Go to the agents

It is in this window that our agent will appear after we create it, but for now, it is empty.
Click Download agent.

You download the archive vsts-agent-win7-x64-2.110.0.zip. Unpack it into the C: \ agent folder (the name and location do not have to be exactly that)
It is not necessary to install the agent on the same machine on which you are developing. It can be installed on any machine. Theoretically, it can be installed on the Azure virtual machine. A prerequisite - you must have a 64-bit version of Windows. Most scenarios require that Visual Studio along with NuGet be installed on the machine.
Start PowerShell and go to the directory C: \ agent. Configurable. Execute the batch file . \ Config.cmd and respond to requests. Enter the server URL and select the type of authentication. For VSTS, the only available option is PAT (Personal Access Token). This is exactly the same token that we created a little earlier. Next comes the selection of the pool and agent name. These values in my case were left by default.

The final configuration step is whether you need to start the agent as a service. If testing is necessary, the agent is started manually, i.e. as a service, you do not need to install it.
Remark: You can remove the agent using . \ Config remove This will need to enter the PAT token.
Read more about configuring here: Deploy an agent on Windows
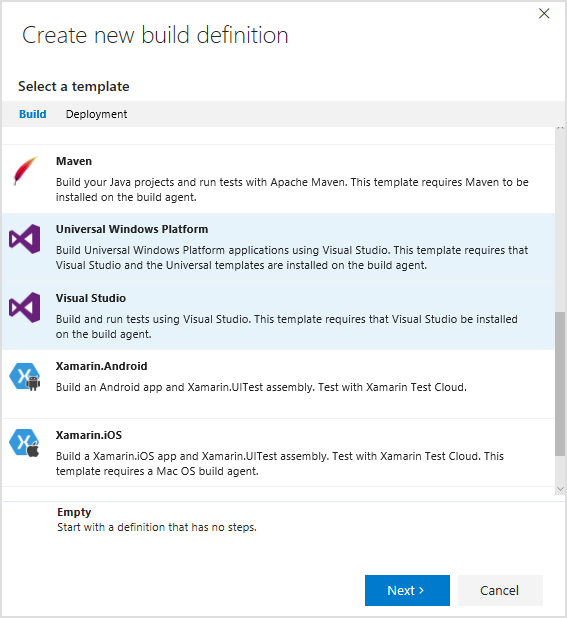
Now let's create a build
Choose a template for a universal platform
And configure Continous integration (tick the opposite). Agent pool, select Default
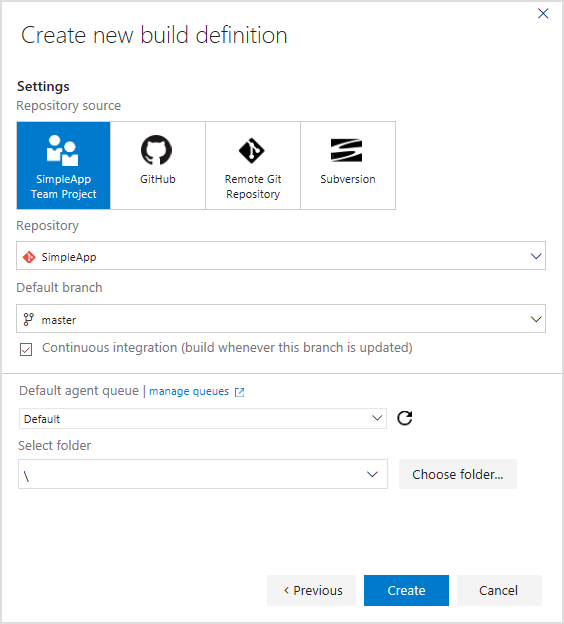
As a result, we get the following window:
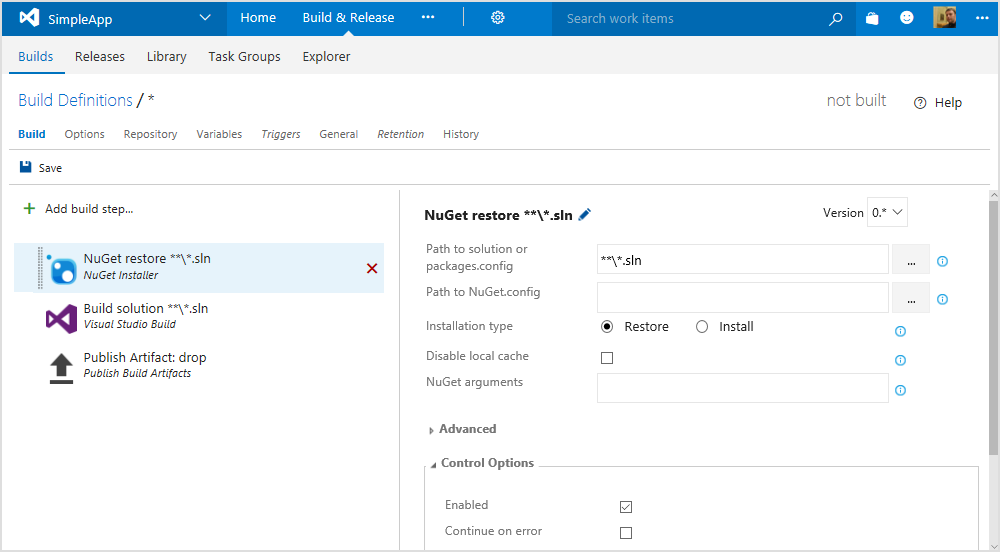
The step of publishing artifacts (Publish Artifact: drop) can be skipped or even deleted to save time if you are not going to make a copy of the files obtained as a result of building the application (you can, for example, send this copy to the client, send it to a release or test it manually).
To speed up the build (if you only need to make sure that the tests pass) at the Build solution step you can specify one platform - x64. This is recommended for CI.
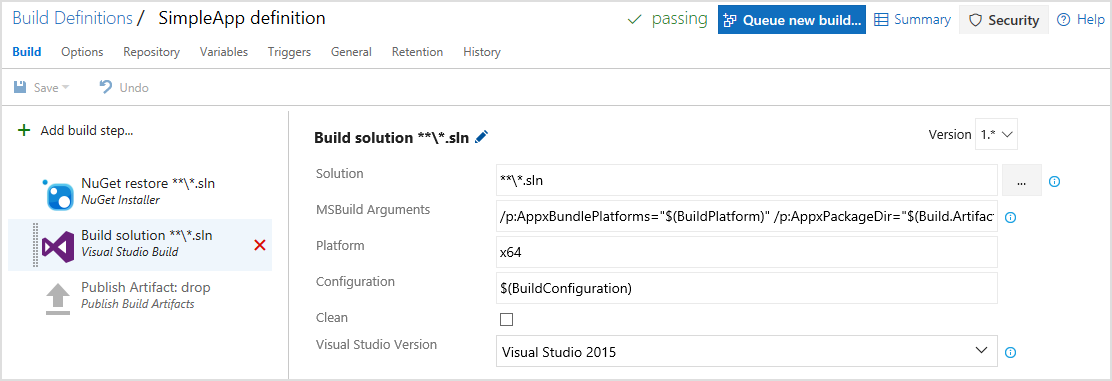
In this case, change the MSBuild Arguments line in the build settings. AppxBundle set the Never setting:
/ p: AppxBundlePlatforms = "$ (BuildPlatform)" / p: AppxPackageDir = "$ (Build.ArtifactStagingDirectory) \ AppxPackages \\" / p: AppxBundle = Never / p: UapAppxPackageBuildMode = StoreUpload
In this line, $ (Build.ArtifactStagingDirectory) is a variable that denotes the path to the folder with artifacts. If on my machine the agent is installed on drive C in the agent folder and if during its configuration I chose the directory called _work as the working folder, then the path to this folder is as follows:
C: \ agent \ _work \ 1 \ a
Here 1 is the serial number of the project.
A list of all variables can be found on the following page: Use build variables
Basic settings:
If you want to generate a bundle (a file containing application packages for different processor architectures), then you need to make changes in the project settings. Or rather, open the .csproj project files and make the following changes.
In the project file, the unit test at the end of the first element
<PropertyGroup> add:
<AppxBundle>Never</AppxBundle> And in the project file add:
<AppxBundle>Always</AppxBundle> After these changes, the AppxBundle parameter can be safely removed from the MSBuild Arguments line along with its value (or set to Auto - / p: AppxBundle = Auto)
This option is suitable for CD.
Since there is a desire to test (and in our case it is), it is necessary to add a step
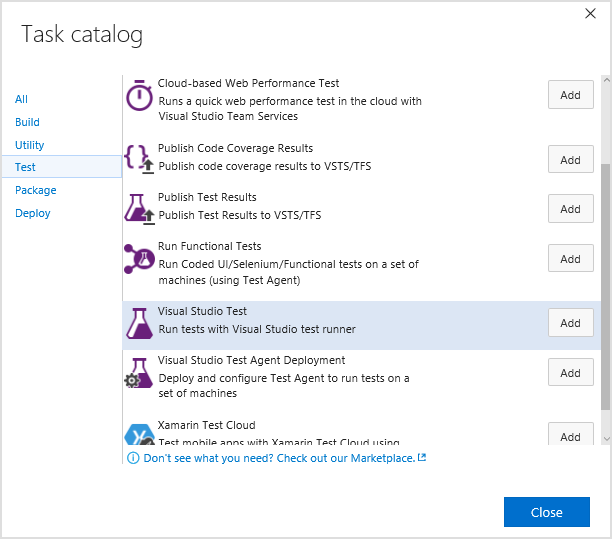
In the task selection window, add Visual Studio Test. Specify the path to the test assembly
In my case it is:
$ (Build.ArtifactStagingDirectory) \ AppxPackages \ SimpleAppTests_1.0.0.0_x64_Test \ SimpleAppTests_1.0.0.0_x64.appx
Other possible test settings are described at the following link: Visual Studio Test
For unit tests, it is necessary for the agent to be run interactively (that is, using the script . \ Run.cmd ).
In addition, it is necessary that application certificates (both the main application and the unit test application) are installed in the Local Machine - Trusted People storage (installation is possible by simply double clicking on the * .pfx file). You need to install certificates on the same machine where the agent is installed.
Sometimes, when running tests, an error may occur:
... (0x5B4) Operation timed out. Unable to install Windows app package in 30 sec ..
In this case, you can artificially increase the launch time. This is done by creating a .runsettings file. The minimum content of the file in this case may be as follows:
<?xml version="1.0" encoding="utf-8"?> <RunSettings> <!-- Configurations that affect the Test Framework --> <RunConfiguration> <!-- [x86] | x64 - You can also change it from menu Test, Test Settings, Default Processor Architecture --> <TargetPlatform>x64</TargetPlatform> </RunConfiguration> <!-- Adapter Specific sections --> <!-- MSTest adapter --> <MSStoreTest> <AppxInstallTimeout>240000</AppxInstallTimeout> </MSStoreTest> </RunSettings> Here we select the package for which architecture we will test and set the time limit for installing the application to 240 seconds.
The file is usually created in the root directory of the application and is specified in the VSTS build settings:

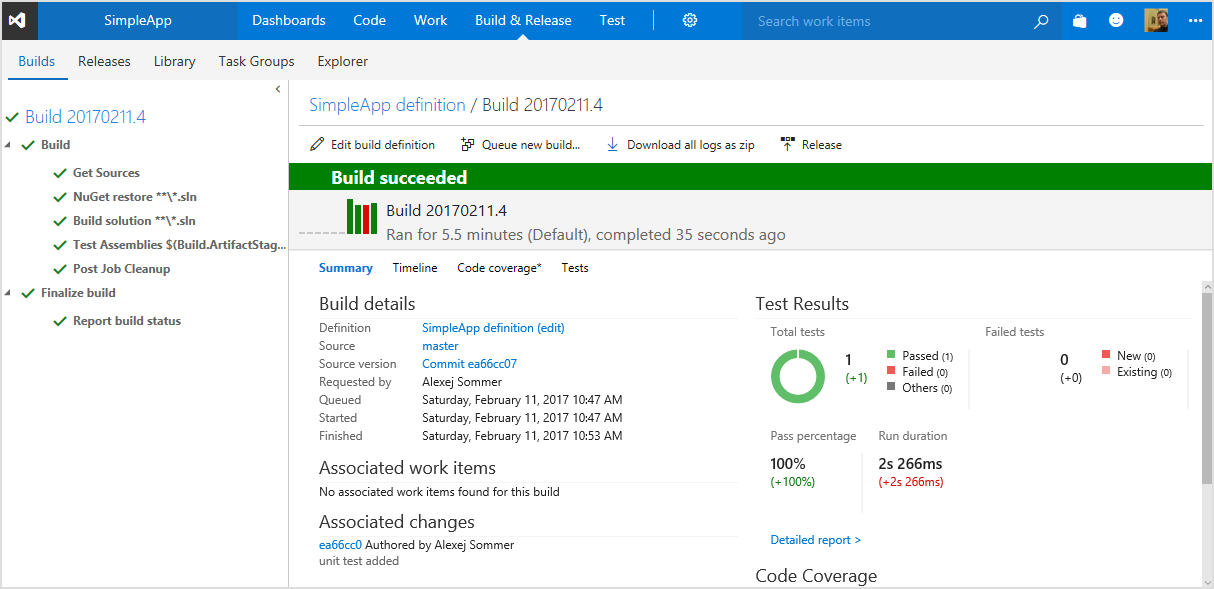
The result of the successful construction and execution of the test is displayed below:
Test Details Window:
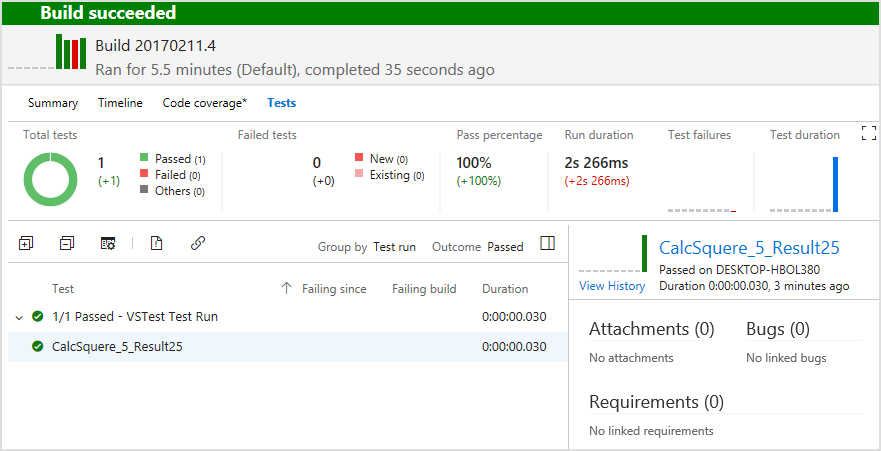
From this window, you can create a new bug or associate a test with a development task.
The price of the question: most of the functions for small development teams are free (and even there is no need to link a credit card to an account). Unlimited private repositories, creating tasks. In addition, a private pipeline ( concurrent pipeline ) is provided, which allows you to run one build and one release at the same time. You can run several builds at the same time, but they will be executed sequentially one after the other. In addition, you can use the hosted agent for 240 minutes per month for free (each build or release should not last longer than 30 minutes).
For prices for large development teams, see here: Prices for using Visual Studio Team Services .
Official manual: Setting up automatic builds for a UWP application
Source: https://habr.com/ru/post/321638/
All Articles