Home Assistant or another “brain” for a project like “Smart Home”
Good afternoon, dear reader. The other day I had a chance to play around with many already known toys from Google - Google Home. The thing is good - I certainly will not do a review of it. In the closet, Raspberry PI 3 (RPi), Arduino Mega and a similar trifle, which they wanted to connect to Google Home (GH) for voice control, were completely randomly lying around. GH does not have a simple API, but it is possible to organize voice control of the system on the RPi + Arduino with the help of a third-party service with a delay of several seconds in commands.
Reading the bourgeois forums (for the sake of justice, I need to point out the person I turned on automation and IoT), I noticed a hitherto unknown to me something that is called the Home Assistant (HASS), this system is fastened to the GH by the craftsmen.
Briefly about the platform itself:
')
The system is written in Python, the last release was January 29, current version: 0.37.0
Supported OS:
Supported components: 545 pcs., Including almost all TV / AV receivers, Broadlink, ZigBee, iCloud, Yandex TTS and much, much more.
To start, connect and configure components, switches, scripts, groups, triggers, it is not necessary to know Python, but you need to know a little yaml.
“What a sudden?” - you think.
The answer is: the configuration of all of the above (existing components) is carried out exclusively through the YAML file (“configuration.yaml”).
The installation is simple - it doesn't make sense to dwell on it and paint all the steps, besides, the project has a smart community ready to help in difficult times (Eng). (All links will be additionally placed in the basement, as prescribed by the statute)
Be prepared that the installation takes a lot of time, on my RPi 3 the total time (without Raspbian) took about an hour.
After completing the coveted
By default, the following component is present in the config:
If you have such devices on your network:
They will be detected automatically and displayed in the main (and so far the only) group “ Home ”.
The " http " component:
As absolutely rightly noted on the portal - HIGHLY recommended - for security reasons.
After successfully changing the configuration file, you must restart the service. There are two ways to do this:
1) Use shell commands:
or immediately
2) Restart from the GUI: Expand the hamburger, open “ Services ” in the “ Developer Tool ” basement, select “ homeassistant ” in the “ Domain ” drop-down list, and click “CALL SERVICE” in the “ Service ” drop-down list.
As soon as the restart of the service is launched, either through the shell or through the GUI, a field showing the current status of the service will be displayed at the bottom of the screen.
As soon as the service rises, the page automatically refreshes and the field disappears. If an error has crept into the config, the service will not start.
What should be done in this case:
1) Open the log file:
Log entries are quite structured, with often specifying the line number in configuration.yaml in which the error occurred.
2) Solve the problem specified in the log
3) Start the service with the command from the console above.
We set the password, we set up (if for some reason there was no default) autodetection of the equipment, it’s time to go to the portal:
8123 is the default port.
What allows HASS to do with the receiver:
Available to us: Source, Volume, Without Sound (when listening to audio recordings, track control buttons are available).
Now, let's take a closer look at yaml-ku. I present a somewhat enhanced version, on the basis of which it will be easier to understand what opportunities HASS has, and also, perhaps, will help you in setting up your own environment.
Looking ahead, HASS supports integration with the Telegram service, on the basis of which I implemented an alert, but more on that later.
Next you need to edit the config file, restart the HASS service, go to the Web page and see what happened.
Now we will start the first automation (further automation ). As the first automation, I propose to consider the "Alarm Clock". To accomplish this task, we do not need to have audio or video devices on the network. However, in the example, I will show the use of the receiver as the alarm clock itself.
Task
Wake up at the appointed time, turning on the AV receiver, with increasing volume. After a certain time, synthesize text to speech and notify those who wake up about the current weather outside the window, in order to dress in accordance with weather conditions, also sending a message to the Telegram, with information about the weather.
Resources
Implementation
First we need to create a bot in Telegram, to connect it to our project. There are many instructions on the Internet about how to register your own bot , so I will not describe this process. Only in the course of the description, I will focus your attention on the important points.
So, we have our own bot. To connect to HASS, you need to set the following in
However, if you plan to add several alert services, it is better to use the attached file. Significantly simplifies the readability of the configuration file.
How to do this will be written below.
As you can see from the comments, we need the API given to us for Bot, and also Chat ID. In order to get the Chat ID, you need to write your Bot at least one message, and then open the page with the address:
Where * API * - API given to you.
As a result, you will get some JSON in which we are interested in the following:
The ID value is what we need.
Next, let's connect the component responsible for synthesizing text - SpeechKit Cloud Yandex .
To do this, we need to register and go through several simple configuration steps.
Choose SpeechKit Cloud API from the connected services and get the key.
In
Explanations and options of parameters are available on the Yandex website.
Now we already have two warning services, but we will “not be enough”, we will have to add one more: VLC.
Since I originally used Raspberry PI, I installed VLC with a simple command:
Next, you need to adjust the sound settings on Raspberry - the default playback device and do some simple manipulation with the user's access rights, which was created when installing HASS AIO (All-In-One).
The command adds the user to the audio group.
In
Create a file in the parent folder:
We make the following settings:
My receiver has two playback zones ( Main , Zone 2 ). In the example I use the second.
All optional components are connected. We can proceed to setting the alarm element itself.
Add a line to the configuration file:
Create a file in the parent folder:
We enter the following lines:
As you can see from the name yaml, we connect a component of the “Switch” type. The only thing that seems to me additionally is to describe this icon . We can use any icons from the MDI library.
You can use components to set the time:
One is a selection from the list. Another slider. I used a convenient slider to customize.
We register in
As already started in the parent folder, create the file:
Next, fill it in:
And one more simple piece we have to do: the sensor .
In the config we write:
This command means that all files from the sensors folder should be taken. In turn, in the sensors folder, create a yaml file with the name:
It's more interesting here. A template appears. This component allows you to fully manage the data of other HASS components. In this example, we create a sensor and fill it with data from the alarm clock sliders, forcing the value to int and adding “0” if “length” minutes == 1. For more information about the possibilities, see the HASS portal.
We need another sensor - weather conditions.
Among all the available weather components, my choice fell on OpenWeatherMap Sensor . In the sensors folder, you need to create a
As it is not difficult to notice, we will need to integrate the API from OWM. API is free, and you can get it by registering on the portal . Save, close, go ahead.
Switches, sliders and sensors for the alarm we have created. But why include if there is no alarm clock yet?
Let's start creating automation .
We register in
This means that all files from the automation folder will be loaded. Now we create an “automation” folder in the parent directory.
Create a file:
And proceed to fill.
Since my volume increment is used every second, the file is large. I will give the most necessary lines, the rest can be customized by analogy.
"Hooray! Earned! But in order to do everything beautifully, I propose to perform one more simple action. Create groups (tab on the frontend).
Create a file
And we proceed to filling out
It is time to save all our settings, restart the service and see what happened!
At the moment I have the following components connected:
TV, AV Receiver, TP-Link router, tracking devices, alerting me and my wife when one of us came / left the house, auto-switching on the receiver when someone first appears at home, turning off devices when everyone leaves home, temporarily: Broadlink + Livolo Switch.
Development
Dear reader, I am grateful to you for your precious time! If there is a keen interest in HASS, I will describe other possibilities with examples. See you again!
Reading the bourgeois forums (for the sake of justice, I need to point out the person I turned on automation and IoT), I noticed a hitherto unknown to me something that is called the Home Assistant (HASS), this system is fastened to the GH by the craftsmen.
Briefly about the platform itself:
')
The system is written in Python, the last release was January 29, current version: 0.37.0
Supported OS:
- Windows 10
- Mac os x
- Ubuntu 14.04
- Raspbian (Raspberry PI)
- iOS App - beta
Supported components: 545 pcs., Including almost all TV / AV receivers, Broadlink, ZigBee, iCloud, Yandex TTS and much, much more.
To start, connect and configure components, switches, scripts, groups, triggers, it is not necessary to know Python, but you need to know a little yaml.
“What a sudden?” - you think.
The answer is: the configuration of all of the above (existing components) is carried out exclusively through the YAML file (“configuration.yaml”).
The installation is simple - it doesn't make sense to dwell on it and paint all the steps, besides, the project has a smart community ready to help in difficult times (Eng). (All links will be additionally placed in the basement, as prescribed by the statute)
Be prepared that the installation takes a lot of time, on my RPi 3 the total time (without Raspbian) took about an hour.
After completing the coveted
wget , I proceeded to explore the platform. HASS is installed in the directory: /home/homeassistant . We are also interested in /home/homeassistant/.homeassistant/configuration.yaml .By default, the following component is present in the config:
# discovery: If you have such devices on your network:
- Google chromecast
- Belkin WeMo switches
- Philips Hue
- Netgear routers
- Plex media server
- Panasonic Viera
- Roku media player
- Sonos speakers
- Yamaha media player
- Logitech media server (Squeezebox)
- DirecTV
They will be detected automatically and displayed in the main (and so far the only) group “ Home ”.
The " http " component:
# frontend http: # (recommended!) #api_password: YOUR_PASSWORD As absolutely rightly noted on the portal - HIGHLY recommended - for security reasons.
After successfully changing the configuration file, you must restart the service. There are two ways to do this:
1) Use shell commands:
~ $ sudo systemctl stop home-assistant.service ~ $ sudo systemctl start home-assistant.service or immediately
~ $ sudo systemctl restart home-assistant.service 2) Restart from the GUI: Expand the hamburger, open “ Services ” in the “ Developer Tool ” basement, select “ homeassistant ” in the “ Domain ” drop-down list, and click “CALL SERVICE” in the “ Service ” drop-down list.
I draw your attention that the frontend uses caching, while restarting or stopping the service, the page is fully viewable, but no action is possible.
As soon as the restart of the service is launched, either through the shell or through the GUI, a field showing the current status of the service will be displayed at the bottom of the screen.
As soon as the service rises, the page automatically refreshes and the field disappears. If an error has crept into the config, the service will not start.
What should be done in this case:
1) Open the log file:
~/.homeassistant/ home-assistant.logLog entries are quite structured, with often specifying the line number in configuration.yaml in which the error occurred.
2) Solve the problem specified in the log
3) Start the service with the command from the console above.
We set the password, we set up (if for some reason there was no default) autodetection of the equipment, it’s time to go to the portal:
http://IP-Address:8123 8123 is the default port.
First launch of HASS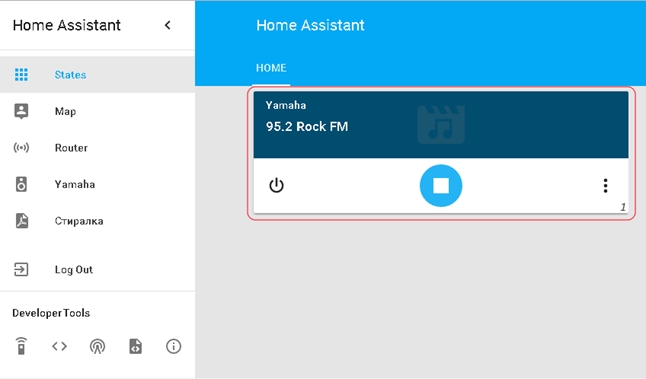
What allows HASS to do with the receiver:
Available to us: Source, Volume, Without Sound (when listening to audio recordings, track control buttons are available).
Now, let's take a closer look at yaml-ku. I present a somewhat enhanced version, on the basis of which it will be easier to understand what opportunities HASS has, and also, perhaps, will help you in setting up your own environment.
configuration.yaml
homeassistant: # HASS name: # *, latitude: _REDACTED_ longitude: _REDACTED_ # – elevation: 0 # 'metric' , 'imperial' - unit_system: metric # : http://en.wikipedia.org/wiki/List_of_tz_database_time_zones time_zone: Europe/Moscow # customize . - #customize: !include customize.yaml # frontend GUI. , frontend: # updater: reporting: no # logbook: # - sun: # GUI conversation: # history: # discovery: # : http: api_password: _REDACTED_ # ssl_certificate: _REDACTED_ # SSL # ssl_key: _REDACTED_ # base_url: _REDACTED_ # trusted_networks: # - 127.0.0.1 # - _REDACTED_/24 # ip_ban_enabled: True # login_attempts_threshold: 5 House Zone * - HASS allows you to create zones (locations) around the world, country, city (anywhere) on the basis of geo-coordinates, for use later in creating “automation” (automation) and notifications (notify).
Looking ahead, HASS supports integration with the Telegram service, on the basis of which I implemented an alert, but more on that later.
Next you need to edit the config file, restart the HASS service, go to the Web page and see what happened.
Now we will start the first automation (further automation ). As the first automation, I propose to consider the "Alarm Clock". To accomplish this task, we do not need to have audio or video devices on the network. However, in the example, I will show the use of the receiver as the alarm clock itself.
Task
Wake up at the appointed time, turning on the AV receiver, with increasing volume. After a certain time, synthesize text to speech and notify those who wake up about the current weather outside the window, in order to dress in accordance with weather conditions, also sending a message to the Telegram, with information about the weather.
Resources
- Raspberry pi
- Home assistant
- Network (wired / wireless) with Internet access
- VLC
- AV Receiver (optional)
- Telegram
- Telegram Bot
- Yandex SpeechKit Cloud
- Openweathermap
Implementation
First we need to create a bot in Telegram, to connect it to our project. There are many instructions on the Internet about how to register your own bot , so I will not describe this process. Only in the course of the description, I will focus your attention on the important points.
So, we have our own bot. To connect to HASS, you need to set the following in
configuration.yaml : # Telegram Notifier notify: - name: NOTIFIER_NAME ( 'notify' - eng) platform: telegram api_key: ABCDEFGHJKLMNOPQRSTUVXYZ chat_id: YOUR_CHAT_ID However, if you plan to add several alert services, it is better to use the attached file. Significantly simplifies the readability of the configuration file.
How to do this will be written below.
As you can see from the comments, we need the API given to us for Bot, and also Chat ID. In order to get the Chat ID, you need to write your Bot at least one message, and then open the page with the address:
https://api.telegram.org/bot*API*/getUpdates. Where * API * - API given to you.
As a result, you will get some JSON in which we are interested in the following:
{"<b>id</b>":<b>123456789 </b>…} The ID value is what we need.
Next, let's connect the component responsible for synthesizing text - SpeechKit Cloud Yandex .
To do this, we need to register and go through several simple configuration steps.
Choose SpeechKit Cloud API from the connected services and get the key.
In
configuration.yaml make the following entry: tts: - platform: yandextts # TTS name: yandextts # , api_key: 'API SpeechKit' language: 'ru-RU' # – ru codec: 'mp3' # voice: 'jane' # emotion: 'good' # speed: '1' # Explanations and options of parameters are available on the Yandex website.
Now we already have two warning services, but we will “not be enough”, we will have to add one more: VLC.
Since I originally used Raspberry PI, I installed VLC with a simple command:
sudo apt-get install vlc Next, you need to adjust the sound settings on Raspberry - the default playback device and do some simple manipulation with the user's access rights, which was created when installing HASS AIO (All-In-One).
sudo usermod -a -G audio homeassistant The command adds the user to the audio group.
In
configuration.yaml we enter the line: media_player: !include media_player.yaml Create a file in the parent folder:
media_player.yaml where all settings for media devices that we will connect will be stored.We make the following settings:
- platform: yamaha name: Yamaha_671 zone: 2 # - commands: turn_on: service: media_player.turn_on turn_off: service: media_player.turn_off volume_up: service: media_player.volume_up volume_down: service: media_player.volume_down customize: # frontend media_player.yamaha_671: hidden: true # yamaha_671 - (Main) - platform: vlc name: vlcmp # VLC My receiver has two playback zones ( Main , Zone 2 ). In the example I use the second.
All optional components are connected. We can proceed to setting the alarm element itself.
Add a line to the configuration file:
## Input Boolean input_boolean: !include input_boolean.yaml Create a file in the parent folder:
input_boolean.yamlWe enter the following lines:
alarmweekday: # - name: initial: on # icon: mdi:calendar As you can see from the name yaml, we connect a component of the “Switch” type. The only thing that seems to me additionally is to describe this icon . We can use any icons from the MDI library.
You can use components to set the time:
input_slider input_select One is a selection from the list. Another slider. I used a convenient slider to customize.
We register in
configuration.yaml : ## Input Slider input_slider: !include input_slider.yaml As already started in the parent folder, create the file:
input_slider.yamlNext, fill it in:
alarmhour: name: icon: mdi:timer initial: 8 # min: 0 # max: 23 # step: 1 # alarmminutes: name: icon: mdi:timer initial: 40 min: 0 max: 59 step: 1 And one more simple piece we have to do: the sensor .
In the config we write:
sensor: !include_dir_merge_list sensors This command means that all files from the sensors folder should be taken. In turn, in the sensors folder, create a yaml file with the name:
alarmclock.yaml . alarmclock.yaml : - platform: template sensors: alarm_time: friendly_name: ' ' value_template: '{{ states.input_slider.alarmhour.state | int }}:{% if states.input_slider.alarmminutes.state|length == 1 %}0{% endif %}{{ states.input_slider.alarmminutes.state | int }}' It's more interesting here. A template appears. This component allows you to fully manage the data of other HASS components. In this example, we create a sensor and fill it with data from the alarm clock sliders, forcing the value to int and adding “0” if “length” minutes == 1. For more information about the possibilities, see the HASS portal.
We need another sensor - weather conditions.
Among all the available weather components, my choice fell on OpenWeatherMap Sensor . In the sensors folder, you need to create a
weather.yaml file and fill it with the following: - platform: openweathermap api_key: *API* latitude: *latitude* longitude: *longitude* monitored_conditions: - weather - temperature - wind_speed - humidity - clouds - rain - snow As it is not difficult to notice, we will need to integrate the API from OWM. API is free, and you can get it by registering on the portal . Save, close, go ahead.
Switches, sliders and sensors for the alarm we have created. But why include if there is no alarm clock yet?
Let's start creating automation .
We register in
configuration.yaml : ## Automation for: alarmclock... automation: !include_dir_merge_list automation This means that all files from the automation folder will be loaded. Now we create an “automation” folder in the parent directory.
Create a file:
alarmclock.yamlAnd proceed to fill.
Since my volume increment is used every second, the file is large. I will give the most necessary lines, the rest can be customized by analogy.
Automation for Alarm
- alias: ' ' trigger: platform: template value_template: '{{ states.sensor.time.state == states.sensor.alarm_time.state }}' # . condition: # condition: or conditions: - condition: and conditions: - condition: state entity_id: input_boolean.alarmweekday state: 'on' - condition: time weekday: - mon - tue - wed - thu - fri - condition: state entity_id: input_boolean.alarmweekday state: 'off' action: # - service: notify.NOTIFIER_NAME data_template: title: , ! =) message: ", ! {{ states('sensor.owm_temperature')|int }} °C." - service: media_player.turn_on # entity_id: media_player.yamaha_671_zone_2 # , - service: media_player.volume_set # data: entity_id: media_player.yamaha_671_zone_2# , volume_level: '0.20' # - service: media_player.select_source # data: entity_id: media_player.yamaha_671_zone_2 source: NET RADIO - delay: 00:00:10 # - service: media_player.volume_set # data: entity_id: media_player.yamaha_671_zone_2 volume_level: '0.25' - delay: 00:00:01 # - service: media_player.volume_set # data: entity_id: media_player.yamaha_671_zone_2 volume_level: '0.30' # - delay: 00:00:01 - service: media_player.turn_on # , . ( automation) entity_id: media_player.yamaha_671_zone_2 - service: media_player.select_source data: entity_id: media_player.yamaha_671_zone_2 # - Audio 2 - RPi source: AUDIO2 - service: media_player.volume_set data: entity_id: media_player.yamaha_671_zone_2 volume_level: '0.70' - delay: 00:00:01 - service: tts.yandextts_say # data_template: message: " ! . {{ states('sensor.owm_temperature')|int }} ." # entity_id: media_player.vlcmp # , language: 'ru-RU' "Hooray! Earned! But in order to do everything beautifully, I propose to perform one more simple action. Create groups (tab on the frontend).
Create a file
group.yaml in the parent folder. In the config, refer to it: group: !include group.yaml And we proceed to filling out
group.yaml .Customize the display of created items
# frontend, , . default_view: view: yes entities: - group.AlarmClock - sensor.alarm_time - sensor.owm_cloud_coverage - sensor.owm_condition - sensor.owm_humidity - sensor.owm_rain - sensor.owm_snow - sensor.owm_temperature - sensor.owm_wind_speed # alarmclock: name: . entities: - sensor.alarm_time - input_slider.alarmhour - input_slider.alarmminutes - input_boolean.alarmweekday # (tab) . AlarmClock: name: view: yes entities: - group.alarmclock It is time to save all our settings, restart the service and see what happened!
At the moment I have the following components connected:
TV, AV Receiver, TP-Link router, tracking devices, alerting me and my wife when one of us came / left the house, auto-switching on the receiver when someone first appears at home, turning off devices when everyone leaves home, temporarily: Broadlink + Livolo Switch.
Development
- Connect to DIY light switches
- Try to connect to a coffee machine and a kettle
- Make buttons by the bed for easier turning off the alarm!
- Create more optimal "automation"
Dear reader, I am grateful to you for your precious time! If there is a keen interest in HASS, I will describe other possibilities with examples. See you again!
Source: https://habr.com/ru/post/321606/
All Articles