Creating a desktop application using Webix and Electron
This article is a step-by-step description of my experience in creating a cross-platform desktop application using Webix, Electron and Node.js.
Once I had the bright idea to create a desktop application based on a stack of web technologies, which I am well acquainted with. I know that desktop programmers usually use C ++, Java, C #, and look down on the web technologies stack for this purpose. But, since I wrote the application for myself, I rightly decided that using familiar tools would speed up the process. And of course, I wanted to “cross already with a hedgehog” and see what happens. In short, the resulting result can be run both as a regular web application and as a desktop.
The code for the finished application can be downloaded from GitHub .
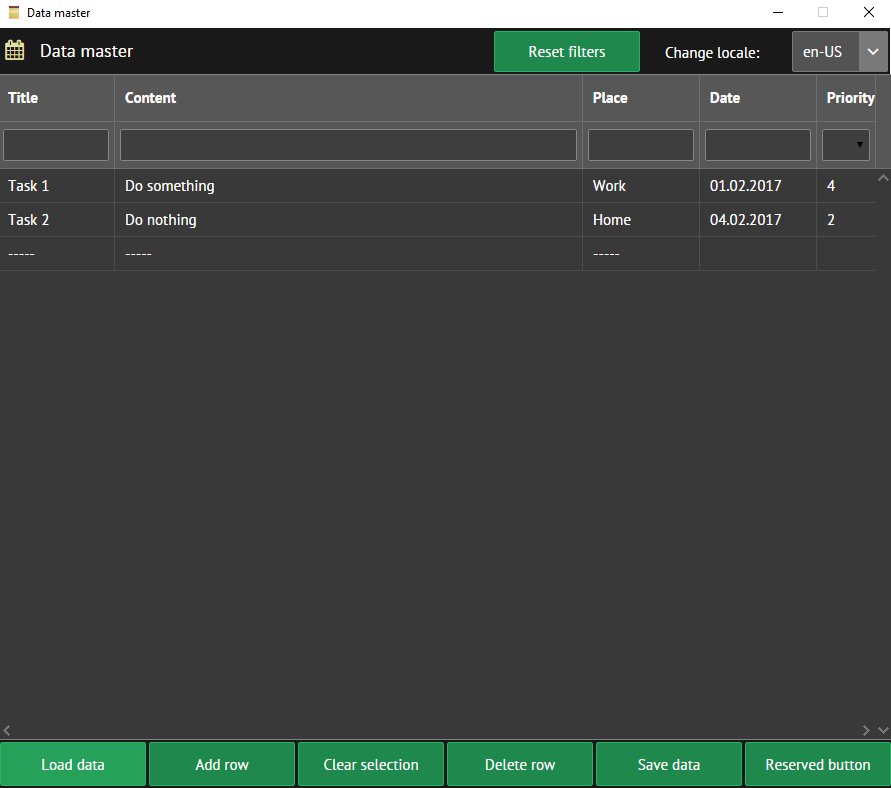
What our application will do ... This is the TODO-list (and how else ...), in which we can add events, edit them and delete them. The event will have a title, content, location, date, and priority. The ability to translate the interface into Russian and English will also be available. Let's call it "Data master".
')
To create a web application, I used Webix . It is a cross-platform and cross-browser UI library that uses components to quickly build an application using JavaScript syntax. Electron was used to compile the web application into the desktop. This is a cross-platform tool that runs on Node.js and allows you to compile a web application to run on various platforms of various sizes: Windows, Linux, Mac. For all auxiliary things, Node.js-based tools are used.
Let's start with the folder structure. At the root of the project, I created it in this form:
- css - styles
- data - backend
- img - images
- js - javascript scripts
After installing Node.js, the node_modules folder will be added, the codebase folder will be used for Webix, and the versions of the desktop application for various platforms will be in the ~ / release / DataMaster folder.
As a result, the structure of the project I got this:
The project root folder must be located on the server. In my case, this is Apache.
So, to start, I went to the Webix download page and clicked "Download Webix Standard". This is a free version of the library (license "GNU GPLV3"), which is quite suitable for our needs. There is also a commercial version of "Webix PRO", which differs mainly in the extended widget library, as well as in technical support capabilities. From the received archive "webix.zip" copy the folder "codebase" to the root of our project. Inside the “codebase” folder, notice the webix.js and webix.css files. Connecting these files in the application allows you to work with Webix. The folder "skins" contains css-files with themes.
Create the index.html file in the project root.
index.html
<!DOCTYPE HTML> <html> <head> <link rel="stylesheet" href="codebase/skins/contrast.css" type="text/css"> <link rel="stylesheet" href="css/main.css" type="text/css"> <script src="codebase/webix.js" type="text/javascript"></script> <script src="codebase/i18n/en.js" type="text/javascript"></script> <script src="codebase/i18n/ru.js" type="text/javascript"></script> </head> <body> <script src="bundle.js" type="text/javascript"></script> </body> </html> Add webix.js. Connecting webix.css gives us the opportunity to use a standard theme. I decided to connect a pretty dark theme, which lies in the “codebase / skins / contrast.css”. We also connected files from the “codebase / i18n” folder to use the built-in Webix localization feature. In the index file, we include the file “bundle.js”. There will be an assembly of all our js-code. We need Node.js and Gulp to build.
If you have not yet installed Node.js, you can do it from here . With the commands
$ node -v and $ npm -v check the correctness of the installation of Node.js and the package manager of the platform - NPM.Now in the js folder we will create the main application logic. The file internalization.js contains an object for internationalizing the application interface. By analogy with existing languages (Russian, English) you can add other languages there if necessary.
internalization.js
var translations = { // English "en-US": { localeName: "en-US", headerTitle: "Data master", resetFilters: "Reset filters", changeLocale: "Change language:", loadData: "Load data", addRow: "Add row", clearSelection: "Clear selection", deleteRow: "Delete row", saveData: "Save data", title: "Title", noItemSelected: "No item selected", dataSaved: "Data saved", reservedButton: "Reserved botton" }, // Russian "ru-RU": { localeName: "ru-RU", headerTitle: " ", resetFilters: " ", changeLocale: " :", loadData: " ", addRow: " ", clearSelection: " ", deleteRow: " ", saveData: "", title: "", noItemSelected: " ", dataSaved: " ", reservedButton: "..." } }; The logic.js file contains functions, the purpose of which you can understand from their name and from the comments to the code.
logic.js
var defaultLocale = "en-US"; // object from translations.js var localizator = translations[defaultLocale]; /** * Get data from backend and fill datatable grid */ function getData() { $$("dataFromBackend").clearAll(); $$("dataFromBackend").load("http://localhost/data_master/data/data.php"); } /** * Add new row to datatable */ function addRow() { $$("dataFromBackend").add( { title: "-----", content: "-----", place: "-----" //date: "-----", //priority: "-----" } ); } /** * Reset selection in datatable grid */ function clearSelection() { $$("dataFromBackend").unselectAll(); } /** * Delete selected row */ function deleteRow() { if (!$$("dataFromBackend").getSelectedId()) { webix.alert(localizator.noItemSelected); return; } //removes the selected item $$("dataFromBackend").remove($$("dataFromBackend").getSelectedId()); } /** * Save data to backend from datatable grid */ function saveData() { var grid = $$("dataFromBackend"); var serializedData = grid.serialize(); webix.ajax().post("http://localhost/data_master/data/save.php", {data: serializedData}); webix.alert(localizator.dataSaved); } /** * Reset filters settings */ function resetFilters() { $$("dataFromBackend").getFilter("title").value = null; $$("dataFromBackend").getFilter("content").value = null; $$("dataFromBackend").getFilter("place").value = null; $$("dataFromBackend").getFilter("date").value = null; $$("dataFromBackend").getFilter("priority").value = null; // reload grid $$("dataFromBackend").clearAll(); $$("dataFromBackend").load("http://localhost/data_master/data/data.php"); } /** * Change translation to selected */ function changeLocale(locale) { localizator = translations[locale]; $$("headerContainer").define("template", localizator.headerTitle); $$("headerContainer").refresh(); $$("resetFiltersContainer").define("value", localizator.resetFilters); $$("resetFiltersContainer").refresh(); $$("changeLocale").define("label", localizator.changeLocale); $$("changeLocale").refresh(); $$("loadData").define("value", localizator.loadData); $$("loadData").refresh(); $$("addRow").define("value", localizator.addRow); $$("addRow").refresh(); $$("clearSelection").define("value", localizator.clearSelection); $$("clearSelection").refresh(); $$("deleteRow").define("value", localizator.deleteRow); $$("deleteRow").refresh(); $$("saveData").define("value", localizator.saveData); $$("saveData").refresh(); $$("reservedButton").define("value", localizator.reservedButton); $$("reservedButton").refresh(); webix.i18n.setLocale(locale); } /** * Function for reserved button */ function reservedButton() { // your code... } Most functions are handlers for the onclick event of the buttons. Function code is basically a way to work with Webix elements. In general, it is intuitive, if you need more detailed information - welcome to the Webix documentation page .
In the objects.js file, it was planned to store constructor functions that are wrappers over standard Webix components. I thought to put there widgets often used in the application, but I limited myself to only one - the most repeated - Button element. Below I will explain its use.
objects.js
/** * Create object with type "Button" * * @constructor */ function Button(id, value, type, width, onClickFunction) { this.view = "button"; this.id = id; this.value = value; this.type = type; this.width = width; this.on = { "onItemClick": function(){ onClickFunction(); } } } The structure is specified in the structure.js file
/** * Create main layout */ webix.ui({ view: "layout", id: "page", rows:[ { cols: [ { view:"icon", id: "headerIconContainer", icon:"calendar" }, { view:"template", id: "headerContainer", type:"header", template:"Data master" }, new Button("resetFiltersContainer", "Reset filters", "form", 150, resetFilters), { id: "divider", width: 20 }, { view: "combo", id: "changeLocale", label: 'Change locale:', labelWidth: 130, width: 230, align: "right", value: "en-US", options: [ "ru-RU", "en-US" ], on: { "onChange": function(newv, oldv) { changeLocale(newv); } } } ] }, { view: "datatable", id: "dataFromBackend", columns: [ { id: "title", header: [ { text: "<b>Title</b>" }, { content: "textFilter" } ], editor: "text", fillspace: 2 }, { id: "content", header: [ { text: "<b>Content</b>" }, { content: "textFilter" } ], editor: "popup", fillspace: 8 }, { id: "place", header: [ { text: "<b>Place</b>" }, { content: "textFilter" } ], editor: "text", fillspace: 2 }, { id: "date", header: [ "<b>Date</b>", { content: "dateFilter" } ], editor: "date", map: "(date)#date#", format: webix.Date.dateToStr("%d.%m.%Y"), fillspace: 2 }, { id: "priority", header: [ "<b>Priority</b>", { content: "selectFilter" } ], editor: "select", options: [1, 2, 3, 4, 5], fillspace: 1 } ], editable: true, select: "row", multiselect: true, // initial data load data: webix.ajax().post("http://localhost/electron_with_backend/data/data.php") }, { view: "layout", id: "buttonContainer", height: 50, cols: [ // Webix ui.button structure example: /*{ view: "button", id: "loadData", value: "Load data", type: "form", width: 150, on: { "onItemClick": function(id, e, trg){ getData(); } } },*/ new Button("loadData", "Load data", "form", 150, getData), new Button("addRow", "Add row", "form", 150, addRow), new Button("clearSelection", "Clear selection", "form", 150, clearSelection), new Button("deleteRow", "Delete row", "form", 150, deleteRow), new Button("saveData", "Save data", "form", 150, saveData), new Button("reservedButton", "Reserved button", "form", 150, reservedButton), {} ] } ] }); $$("buttonContainer").define("css", "buttonContainerClass"); $$("resetFiltersContainer").define("css", "resetFiltersContainerClass"); $$("headerIconContainer").define("css", "headerIconContainerClass"); $$("headerContainer").define("css", "headerContainerClass"); $$("changeLocale").define("css", "changeLocaleClass"); $$("divider").define("css", "dividerClass"); How it works ... An object with a multi-level structure is passed to the webix.ui () method. The view property determines the type of the Webix widget: in our case “layout”. There are a lot of these types, each of them has its own methods and properties. In addition, we can extend the standard Webix components using the webix.protoUI () method, adding or overriding the functionality we need. As you can see, working with Webix is done using Javascript, so we put all the code for working with this library into <script> tags. In the webix.ui () method, we set a sequence of rows and columns, some of which, in turn, have nested rows and columns, forming a grid, whose element parameters we can set, for example, using the “width” and “height” properties . In the columns and rows, we "put" the elements, customizing them. For example, you can define a button like this:
{ view: "button", id: "loadData", value: "Load data", type: "form", width: 150, on: { "onItemClick": function(id, e, trg){ getData(); } } The “id” property is a Webix “view_id” property, through which we can access an element using the $$ () method. For example, $$ ("loadData") will return to us the button object described in the code above. The “value” property determines the label on the button, “type” - type, “width” - width. In the on object, you can specify event handlers for the element. In the example above, it is one (“onItemClick”) and corresponds to the “onclick” event, which calls the getData () function.
Instead of the structure described above, I used the constructor function to create the Button element (in the “objects.js” file). It creates and returns a Button object in accordance with the passed parameters. This allows you to eliminate duplication of code and create an object in this way:
new Button("loadData", "Load data", "form", 150, getData) By the way, I added a reserved button for the best UX in the compiled application. I did not invent functionality for it, so you can use it as you like.At the bottom of the components.js file there is a code like:
$$("buttonContainer").define("css", "buttonContainerClass") In this way, we can define and change the properties of the elements (in the example: adding an attribute class with the value “buttonContainerClass”). The method shown here is for clarity. We can initially initialize an object with some class, by assigning the value to the “css” property.Webix has various ways to load data into the application and into individual elements. In the getData () function, I used the load () method to load data into the grid. The method is removed to our backend by the URL “data / data.php”.
The backend of our application is obscenely simple. I decided not to use databases for such a small application. Data is stored in the data.json file, read from there using data.php, and saved there using save.php.
data.php
<?php $dataFromFile = json_decode(file_get_contents("data.json")); echo json_encode($dataFromFile); /*$example_json_data = array( array (title => "My Fair Lady", year => 1964, votes => 533848, rating => 8.9, rank => 5), array (title => "Film 1", year => 1984, votes => 933848, rating => 6.9, rank => 4), array (title => "Film 2", year => 1966, votes => 53848, rating => 4.3, rank => 5), array (title => "Film 3", year => 1975, votes => 567848, rating => 2.9, rank => 2), array (title => "Film 4", year => 1981, votes => 433788, rating => 6.3, rank => 1) );*/ //echo json_encode($example_json_data); save.php
<?php $data = $_POST["data"]; file_put_contents("data.json", $data); In a commercial project, of course, we should have done various data checks and error handling, but for clarity, I omitted them. In the data-example.json file, I put a sample data structure for loading into the Webix element “datatable”, taken from the documentation site.
data-example.json
[ {"title":"My Fair Lady", "year":1964, "votes":533848, "rating":8.9, "rank":5}, {"title":"Film 1", "year":1984, "votes":933848, "rating":6.9, "rank":4}, {"title":"Film 2", "year":1966, "votes":53848, "rating":4.3, "rank":5}, {"title":"Film 3", "year":1975, "votes":567848, "rating":2.9, "rank":2}, {"title":"Film 4", "year":1981, "votes":433788, "rating":6.3, "rank":1} ] The data is saved in the saveData () function using the webix.ajax (). Post () AJAX method, which is passed the URL on the backend and the data object. In general, Webix can work with data differently, accepting and giving, for example, json or xml. By the way, in the downloaded archive with the Webix version, in addition to the codebase folder, there is a samples folder in which you can look at examples of working with various system components. In the “samples / common / connector” folder there is a “native” basis for working with the backend.
Thus, in general, the work of our application is performed as follows ... A grid is created with rows and columns into which elements are placed. When interacting with elements, events occur and the handlers defined for these events are executed. Some of the handlers use methods to communicate with the backend to get and save data. In total, we have a SPA application where data acquisition and processing do not require reloading the page. The application interface is translated by taking the properties of the translations object in accordance with the selected locale, setting a new value for the “value” properties of the elements and updating these elements. The logic hangs on the combobox's onChange event and calls our changeLocale () function. In this function, we, by the way, the built-in method webix.i18n.setLocale (locale), where we pass the locale from the combo box. More details can be found here .
Then we need to collect all the js code in a bundle. But first we will do a little preparatory work. Create a package.json file in the project root with the main settings of the application.
package.json
{ "name": "data_master", "description": "Simple ToDo list with desktop building", "version": "0.0.1", "homepage": "https://github.com/paratagas/data_master", "repository": { "type": "git", "url": "git+https://github.com/paratagas/data_master.git" }, "author": { "name": "Yauheni Svirydzenka", "email": "partagas@mail.ru", "url": "https://github.com/paratagas" }, "tags": [ "node.js", "webix", "electron", "ToDo list" ], "main": "main.js", "scripts": { "start": "electron .", "package": "electron-packager ./ DataMaster --all --out ~/release/DataMaster --overwrite" }, "dependencies": { "electron-prebuilt": "^0.35.6", "electron-packager": "^8.4.0" }, "devDependencies": { "gulp": "^3.9.0", "gulp-concat": "^2.6.0", "gulp-uglify": "^1.2.0", "gulp-sourcemaps": "^1.5.2" }, "license": "GPL-3.0" } Then run the
$ npm install command to download the necessary components. In the gulpfile.js file in the root of the project we will define the settings of our assembly.gulpfile.js
var gulp = require('gulp'), uglify = require('gulp-uglify'), concat = require('gulp-concat'); // to create source mapping sourcemaps = require('gulp-sourcemaps'); /* * Collect all js files to one bundle script * Command: "gulp bundle" */ gulp.task('bundle', function() { // choose any files in directories and it's subfolders return gulp.src('js/**/*.js') .pipe(sourcemaps.init()) .pipe(concat('bundle.js')) .pipe(sourcemaps.write('./')) //.pipe(uglify()) // output result to current directory .pipe(gulp.dest('./')); }); /* * Watch js files changing and run task * Command: "gulp watch" */ gulp.task('watch', function () { gulp.watch('./js/**/*.js', ['bundle']); }); I commented on the execution of the minification so that you can see how bindle.js looks like with all of our code. In addition, I did not use CSS minification, since we have only one file with a small number of styles. You can change this behavior if you want. Now we can build the project by running the
$ gulp bundle at the root of the project. During development, the $ gulp watch allows you to track changes to js files and, if available, execute the $ gulp bundle .Our web application is ready and we can run it on the production server. I did something like:
Now let's make it a desktop using Electron. Choose and download the latest version here . Inside each release page there is a list of versions for different platforms. Our “package.json” defines two modules that will allow us to do the main work. The module "electron-prebuilt" is responsible for pre-assembling and running the application. Separately, the module can be installed using the
$ npm install --save-dev electron-prebuilt . In turn, the module "electron-packager" allows you to compile applications for the target platform or for all possible platforms. Separately installed by the command $ npm install --save-dev electron-packager .Pay attention to the section:
"scripts": { "start": "electron .", "package": "electron-packager ./ DataMaster --all --out ~/release/DataMaster --overwrite" }, Having defined it, you can run the application preassembly with the
$ npm start command, and the compilation with the $ npm run-script package command. By the way, if we change the package command, for example, to "package": "electron-packager ./ DataMaster --win32-x64 --out ~/release/DataMaster --overwrite" then the application will be compiled for the target platform - in our case Windows x64. Currently Electron supports platforms: Windows x32 / x64, Linux x32 / x64 / armv7, OS X / x64. For a more complete understanding, you can look at the documentation .Create a file in the project root main.js. It is needed for Electron settings.
main.js
/* * Commands: * npm init - initialize npm in current directory * npm install - install modules * npm install --save-dev electron-prebuilt - install module for pred-build * npm install --save-dev electron-packager - install module for build * npm start - to start app * npm run-script package - to compile app */ const electron = require('electron'); // lifecycle of our app const app = electron.app; // create window for our app const BrowserWindow = electron.BrowserWindow; // To send crash reports to Electron support // electron.crashReporter.start(); // set global link // if not, the window will be closed after garbage collection var mainWindow = null; /** * Check that all windows are closed before quiting app */ app.on('window-all-closed', function() { // OS X apps are active before "Cmd + Q" command. Close app if (process.platform != 'darwin') { app.quit(); } }); /** * Create main window menu */ function createMenu() { var Menu = electron.Menu; var menuTemplate = [ { label: 'File', submenu: [ { label: 'New window', click: function() { createSubWindow(); } }, {type: "separator"}, { label: 'Exit', click: function() { app.quit(); } } ] }, { label: 'Edit', submenu: [ { label: 'Cut', role: 'cut' }, { label: 'Copy', role: 'copy' }, { label: 'Paste', role: 'paste' } ] }, { label: 'About', submenu: [ { label: 'Name', click: function() { console.log(app.getName()); } }, { label: 'Version', click: function() { console.log(app.getVersion()); } }, { label: 'About', click: function() { console.log('ToDo list'); } } ] }, { label: 'Help', submenu: [ { label: 'Node.js docs', click: function() { require('electron').shell.openExternal("https://nodejs.org/api/"); } }, { label: 'Webix docs', click: function() { require('electron').shell.openExternal("http://docs.webix.com/"); } }, { label: 'Electron docs', click: function() { require('electron').shell.openExternal("http://electron.atom.io/docs/all"); } } ] } ]; var menuItems = Menu.buildFromTemplate(menuTemplate); Menu.setApplicationMenu(menuItems); } /** * Create main window */ function createMainWindow() { mainWindow = new BrowserWindow({ title: "Data master", resizable: false, width: 910, height: 800, // set path to icon for compiled app icon: 'resources/app/img/icon.png', // set path to icon for launched app //icon: 'img/icon.png' center: true // to open dev console: The first way //devTools: true }); createMenu(); // load entry point for desktop app mainWindow.loadURL('file://' + __dirname + '/index.html'); // to open dev console: The second way //mainWindow.webContents.openDevTools(); // Close all windows when main window is closed mainWindow.on('closed', function() { mainWindow = null; newWindow = null; }); } /** * Create sub menu window */ function createSubWindow() { newWindow = new BrowserWindow({ title: "Go to GitHub", resizable: false, // imitate mobile device width: 360, height: 640, icon: 'resources/app/img/mobile.png', center: true }); newWindow.loadURL("https://github.com/"); newWindow.on('closed', function() { newWindow = null; }); } /** * When Electron finish initialization and is ready to create browser window */ app.on('ready', function() { createMainWindow(); }); The comments in the file describe the purpose of some steps. In general, we create an electron object, then an application window, and then configure it. After that, the window transmits the main URL of the application, for example, like this:
mainWindow.loadURL('file://' + __dirname + '/index.html') . In our case, this is the “index.html” file in the project root. At the end, the expression mainWindow = null removes the link to the window, because if the application supports multiple windows, then you need to catch the moment when you should delete the corresponding element. Closing the main application window in our case closes (assigns null) the child window. In the settings, you can also set the icon of the finished desktop application. To do this, specify the icon: 'resources/app/img/icon.png' , where “resources / app” is the place where the source code is stored in the already compiled version of the application.Electron also allows you to create a customized menu of application windows. For demonstration purposes, I added a few menu items to show how this is done. Good info on this topic is here and in the official documentation . In the menu item
File > New window I added a new window. It simulates viewing content on a mobile device and opens the GitHub page. You can set the starting URL for the new window and in our web application, thus creating another entry point if, for example, you need to isolate any functionality.In development mode, you can activate Chrome Dev Tools. In the comments of the file “main.js” there are a couple of ways to do this.
We execute the
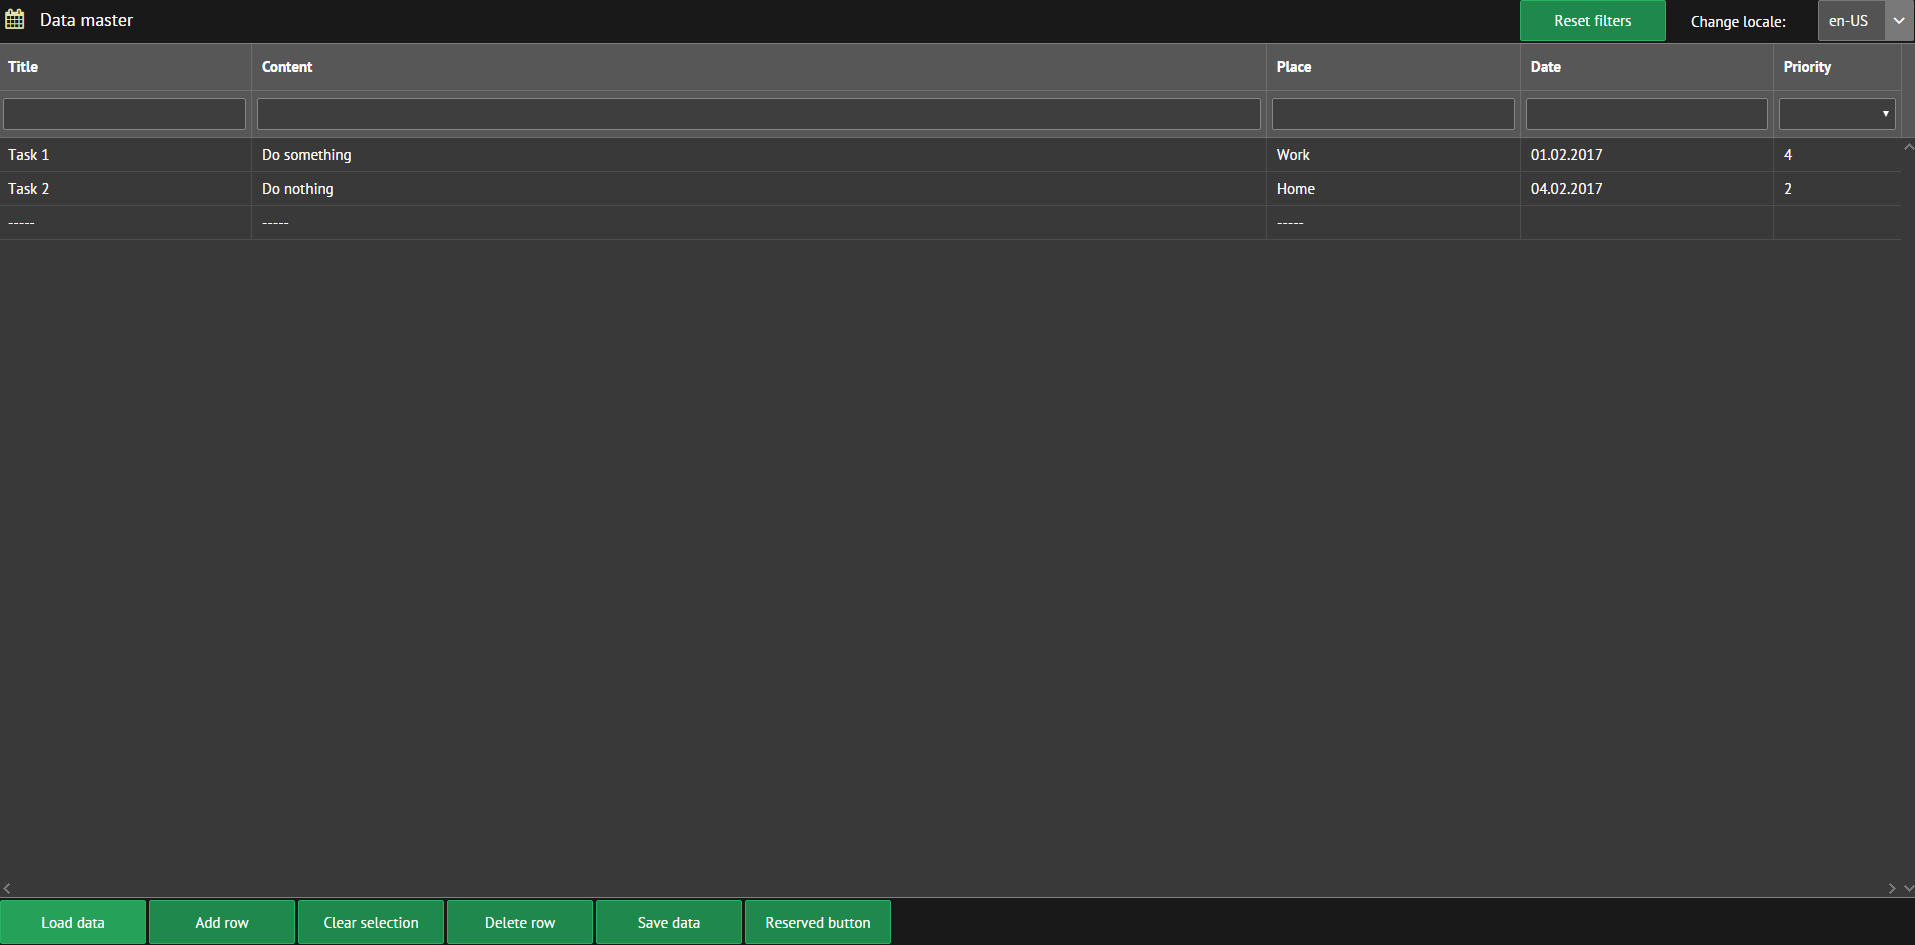
$ npm run-script package command and ready-made applications for various platforms appear in "~ / release / DataMaster".With the additional window open, the view is as follows:
As a result, we have a completely workable application that can be useful to someone. The project code does not pretend to the best development practices (although I tried), but it is possible that the used technologies and their interaction may seem interesting to someone. Actually, for this I wrote this article. After all, it was from just such articles on Habré that I once learned about these tools and now I use them with pleasure. I note that the application uses only a small part of the capabilities of Webix and Electron. In fact, these tools have fairly extensive functionality, the possession of which allows you to create solid cross-platform applications.
Changes and additions
Discussion of the article and the project in the comments (thanks to justboris ) and with friends prompted me to rewrite the application backend, using Node.js and Express as the basis.
This made it possible to abandon Apache and PHP and reduce project dependencies.
At the root of the project, the server.js file was created, which describes the entire server logic.
server.js
const express = require('express'); const bodyParser = require('body-parser'); const fs = require('fs'); var cors = require('cors'); var path = require("path"); const app = express(); const port = 3000; // use to parse json data app.use(bodyParser.json()); // use to create cross-domain requests (CORS) app.use(cors()); // create path aliases to use them in index.html file // otherwise the assets in it will not work and icons will not be shown // scheme: // app.use('/my_path_alias', express.static(path.join(__dirname, '/path_to_where/my_assets_are'))); app.use('/css', express.static(path.join(__dirname, '/css'))); app.use('/skins', express.static(path.join(__dirname, '/codebase/skins'))); app.use('/bundle', express.static(path.join(__dirname, '/'))); app.use('/codebase', express.static(path.join(__dirname, '/codebase'))); app.use('/i18n', express.static(path.join(__dirname, '/codebase/i18n'))); app.use('/fonts', express.static(path.join(__dirname, '/codebase/fonts'))); const filePath = __dirname + '/data/'; const fileName = "data.json"; /** * Get index page * * @param {string} URL * @param {function} Callback */ app.get('/', (req, res) => { res.sendFile(path.join(__dirname + '/index.html')); }); /** * Send GET request to get data * * @param {string} URL * @param {function} Callback */ app.get('/data', (req, res) => { const options = { root: filePath }; res.sendFile(fileName, options, function (err) { if (err) { console.log('Error:', err); } else { console.log('Received:', fileName); } }); }); /** * Send POST request to save data * * @param {string} URL * @param {function} Callback */ app.post('/data', (req, res) => { // use JSON.stringify() 2nd and 3rd param to create pretty JSON data // remove them for minified JSON fs.writeFile(filePath + fileName, JSON.stringify(req.body, null, 4), 'utf-8', (err) => { if (err) { console.log('Error:', err); } res.status(200).send(req.body); }); }); /** * Listen to server with specified port * * @param {string} Port * @param {function} Callback */ app.listen(port, () => { // open browser on http://localhost:3000 console.log('Server is running on http://localhost:' + port); }); The comments to the code describe its purpose. I would like to highlight some points.
First, since the main server is now located at
http://localhost:3000, I had to change the paths in the files “js / logic.js” and “js / structure.js”. And here I ran into the first problem. The value of the HTTP parameter "Content-type" in Webix requests of the form "webix.ajax (). Post ()" by default: "application / x-www-form-urlencoded". This did not allow us to properly process our data for storage in the data / data.json file. Even the transfer of headers from the Express server using “app.set ()” did not work. Decided by passing the header directly to the request: webix.ajax().headers({ "Content-Type": "application/json" }).post("http://localhost:3000/data", {data: serializedData}); Thus, we have three URLs in the application:
- localhost : 3000 - GET request to get the main page
- localhost : 3000 / data - AJAX GET request for receiving data
- localhost : 3000 / data - AJAX request by POST method for saving data
The second problem arose due to the prohibition of Javascript on cross-domain requests (CORS). After numerous attempts to use different headers, I found on the network information about the Node.js module, which is called: cors . As a result, the second problem was solved in one line of code:
app.use(cors()); .The third problem occurred when displaying the index page. Express did not want to display styles and scripts in the form they were. You can compare (the old “index.html” you can look above) ...
new index.html
<!DOCTYPE HTML> <html> <head> <link rel="stylesheet" href="skins/contrast.css" type="text/css"> <link rel="stylesheet" href="css/main.css" type="text/css"> <script src="codebase/webix.js" type="text/javascript"></script> <script src="i18n/en.js" type="text/javascript"></script> <script src="i18n/ru.js" type="text/javascript"></script> </head> <body> <script src="bundle/bundle.js" type="text/javascript"></script> </body> </html> In order for the new paths to work, I needed to write path aliases in server.js.
app.use('/css', express.static(path.join(__dirname, '/css'))); app.use('/skins', express.static(path.join(__dirname, '/codebase/skins'))); app.use('/bundle', express.static(path.join(__dirname, '/'))); app.use('/codebase', express.static(path.join(__dirname, '/codebase'))); app.use('/i18n', express.static(path.join(__dirname, '/codebase/i18n'))); app.use('/fonts', express.static(path.join(__dirname, '/codebase/fonts'))); The first parameter in app.use () here is the path alias, the second is the path itself. Now in “index.html”, for example, we should refer to the “skins” path like this:
<link rel="stylesheet" href="skins/contrast.css" type="text/css"> instead of (it was before):
<link rel="stylesheet" href="codebase/skins/contrast.css" type="text/css"> Accordingly, for the use of new modules in “package.json” I have prescribed new dependencies: “express”, “body-parser” and “cors”.
For ease of development, I also installed the Nodemon package . This is a module that tracks changes to project files and (if there are changes) restarts the server.
Now we have appeared in the collection of commands:
$ npm run nodemonfor starting the server in the development mode and
$ npm run serverfor starting the server in the working mode.
The last command should now precede any launch of our application, both the web version and the desktop. Also, the server should work at the time of compilation.
Now our application has fewer dependencies and uses the built-in Node.js server.
As you can see, the “server.js” file (unlike the previous examples of js code) was written taking into account the syntax of the ES6 standard. In the future, I plan to rewrite the entire project on ES6. The project code (with changes) is still available on GitHub.
Source: https://habr.com/ru/post/321134/
All Articles