4 rules of working in Sketch on large projects
The appearance of the Sketch editor greatly facilitated the work of designers. Artboards, Symbols, Styles, a large number of plug-ins and an intuitive interface - all this made us a little happier. In this article I will try to give the rules and techniques that I developed when working on projects, because not only the tools are important, but also their proper use.
Rule # 1: Create Symbols
Elements that repeat more often 2 times on the artboard need to be converted to symbols. If you need to make any changes to the appearance of the character, change it on the “Symbols” page, and editing will be applied automatically on all artboards of the project.
The prerequisites of the characters were in Photoshop, in which it was possible to import a link to another psd-file, and when it was changed in one place, it changed in all files. You can even control its display with Layer Comp. But Sketch has a similar work to a new level.
To arrange the characters in the menu “Symbols” into groups and subgroups, use slashes - “/”. For example, the name of artboard elements of a form must begin with “Form / element_title”. Then they will be grouped in the “Form” section. If the artboard is called "Form / Input / element_title" it will be placed in the Input subgroup of the Form group. The nesting level is unlimited.

Grouping option in the Symbols menu
No one needs a set of twin elements. After all, most often, the appearance of objects is the same, and the content is different. The content of the symbol is edited in the “Overrides” panel. It is easy to edit text layers.
Notice that in the Overrides panel, the text field headers have the correct names and order. To do this, arrange the layers in the symbol from top to bottom and call them not contextually, but functionally. That is, the title of the input in the symbol must not be “Name”, but “Label” and stand at the very top.
In the latest versions of the Sketch, in addition to editing text layers, you can replace nested characters. Here you need to remember 2 points: a symbol can contain nested characters. Nested characters can be replaced from the Overrides panel if they have the same size.
Usage example - navigation bar:
To display the active menu item, edit the visibility of the embedded symbol Active.
Alternatively, you can create 2 characters of the same size “Active” and “Default” and change them to repaint the active menu item.
What now, in my opinion, is not enough in the Sketch - the ability to change the color of text layers. Those. in order to repaint the inscription, you need to create a symbol for it where it is black, and a symbol where the inscription is red, only after that switch them between themselves. It would be much more convenient to immediately indicate the color of the text.
If there is an object inside a symbol filled with a raster image (for example, autark), then it can also be easily edited.
True, even here I lack one feature, namely, to copy the raster fill from the “Overrides” panel and paste it into another symbol.
And still symbols, as well as groups, it is possible to do "rubber". In the sketch there is an opportunity to prescribe the rules according to which the character is stretched or compressed, and how the content inside should behave. Here's a 3-minute video of how this works, from the creators of Sketch. It is in English, but everything is clear.
Thanks to the possibility described in this video, you can make universal sets of UI elements in the Sketch, which is simply necessary for large projects. More on this in the following rule.
Rule number 2: Support the page with the UI guide
If the project involves a large number of sections, forms, text blocks, a separate page is created on which all elements are collected. The page is called “UI” and consists of 4 artboards:
1. Elements of forms and their states

2. Text document styles
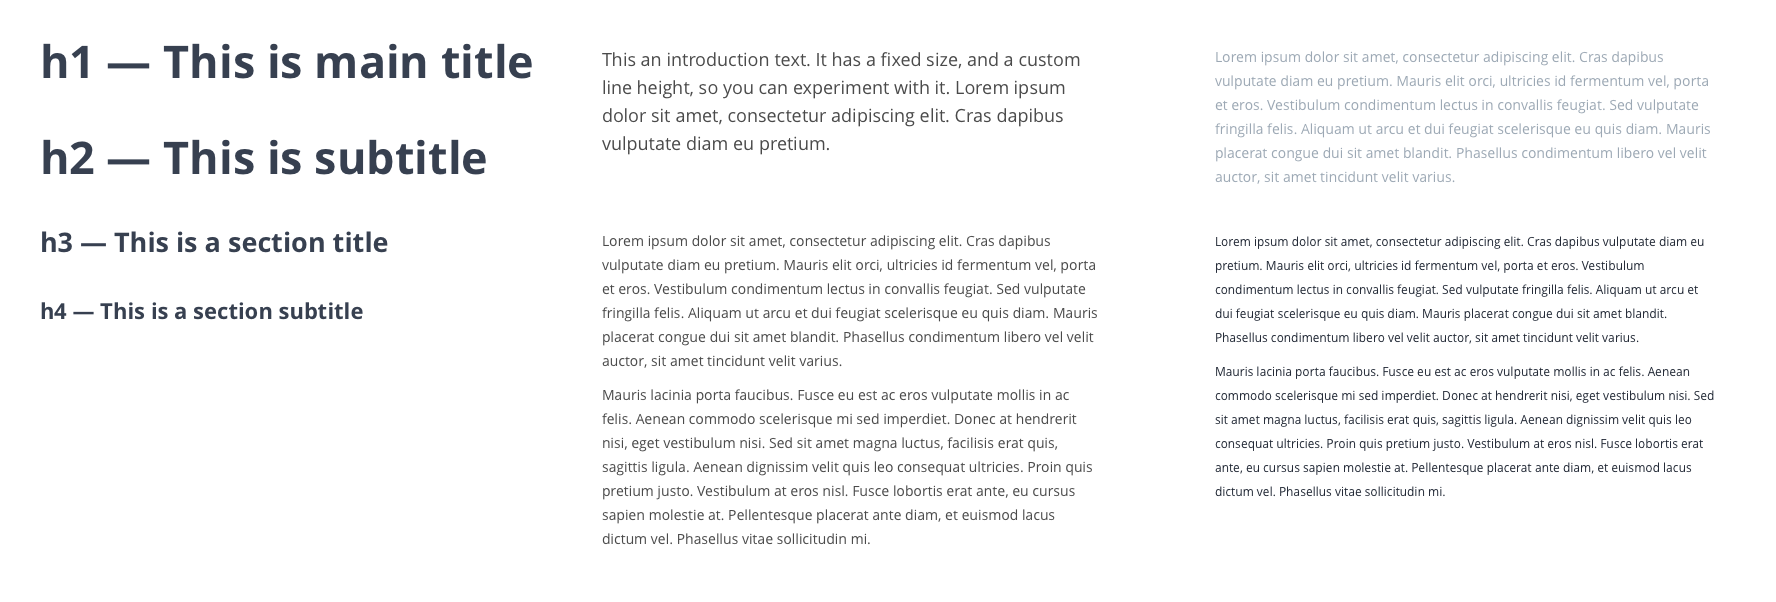
3. Interface elements
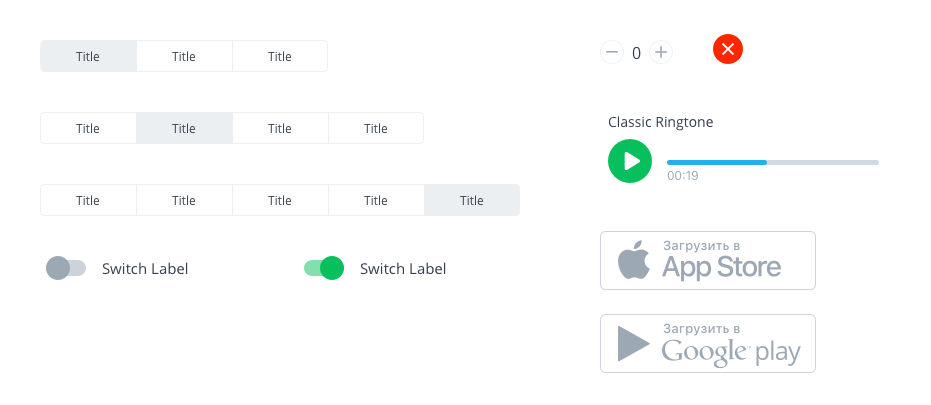
4. Icons

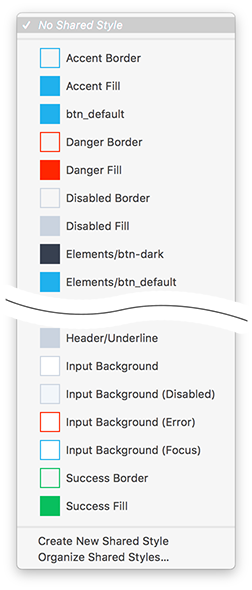
Logically, there should also be all the colors that are used in the layouts, but I add them to the Document Colors panel, which I can export and import into other sketch files, thanks to the Sketch Palettes plugin
Unfortunately, I could not force myself to use styles for texts and objects, since they cannot be arranged in the menu. As soon as there are more than 10 styles, it is simply impossible to navigate. If the developers made it possible to arrange styles into groups (as was done for characters), it would probably be convenient.
Currently, if I need to insert any element that has already been used in the layout, I open the “UI” page and copy it from there, so as not to search among the many artboards. If an element is not created in “UI”, then it must be created and must be added to the “UI” page.
In conclusion of this rule, I should mention the “Library” plugin from the “ Craft ” package, which some of the described gestures do automatically (collects text styles, used fonts and colors on a separate page). But with him I did not work out. Craft damn those how to arrange text styles and merges everything into one heap. It is more convenient when I manually create a library of styles and elements where nothing superfluous gets into and everything is ordered according to my rules.
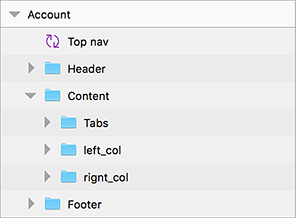
Rule number 3: Correctly name layers and groups. Keep the hierarchy
This rule applies not only to Sketch users, but also to Photoshop workers. We have to work with layout designers with our layouts, and the clearer they are for them, the faster the picture will become an excellent website or application. To do this, it is always clear to name layers, it is logical to group them and follow the sequence from top to bottom. That is, the header should be at the very top, the content in the middle, the footer at the bottom, etc.
Yes, and the designer himself, when it became a lot of layers, it is more convenient to navigate in them, if they are clearly named. For a quick search for a layer, Sketch has built-in functionality. To find an arrow in the layout, which I always call arrow, it is enough to write “arr” in the search and the Sketch will show all the layers and groups in the name of which there are these characters.
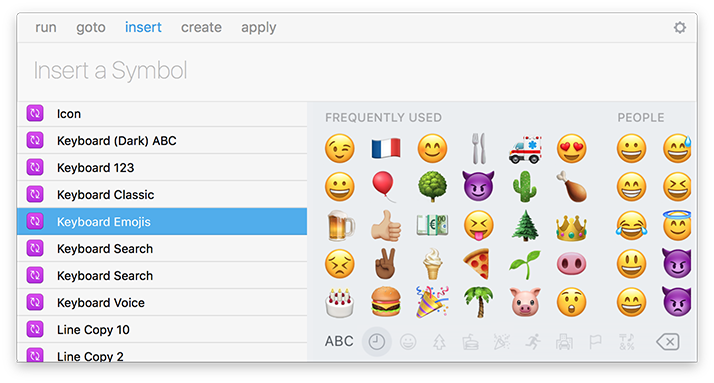
There is a convenient plugin, with much more functionality than the built-in search - Runner . He can also search for layers by name, but also run commands from the menu, create and insert symbols, apply styles.
If you use Principle to animate interfaces, then the correct naming of layers and their proper distribution into groups is also extremely important for it. But more about that another time.
Rule number 4: Use the grid. Vertical and horizontal rhythms
I start the grids after creating the page design layout. They are designed to organize all the elements on the artboard. Thanks to the grid, vertical and horizontal rhythms of the layout are created. The design becomes streamlined and systematized. That is, at first everything is developed “by eye”, and at the very end it is built into the grid system.
In the Sketch, the “Grid Settings ..." and "Layout Settings ..." items are responsible for setting the grid. For convenience, there are hot keys that will show or hide the grid. Control + G - show or hide the grid, Control + L - shows or hides the layout.

Last time I use an 8-pixel grid. Read more about it here .
If it is short, then simply use the sizes multiple to 8 pixels. For blocks, indents, line spacing, icons and other interface elements. When all elements are subject to the rule of multiplicity 8, you get a visually logical and consistent interface.
In order to make it easier to work with the eight-pixel grid in the Sketch, there is the nudg.it plugin. It allows you to set how many pixels the object will shift when you press Shift + Arrow. If it’s more convenient for you to work with a 5px grid, like the gorgeous Charmerstudio or the ingenious Area 17 , then nudg.it is easy to set up for the five-pixel pitch.
Total:
Thanks to the above simple rules and techniques, increases the productivity of working with Sketch. Moreover, not only the designer, but also the coder who gets the layout. Good design starts with order in layouts.
PS Surely, I forgot to mention some important rules. I will hear them from a respected community in the comments.
')
Source: https://habr.com/ru/post/320990/
All Articles