Hibernate for beginners
I came across (and not only me) the problem of deploying Hibernate and decided to try to cover this topic. Hibernate is a popular framework whose goal is to link OOP and a relational database. Working with Hibernate will reduce project development time in comparison with regular jdbc.
For a newbie of programming, setting up the framework is often difficult. Helping the community to highlight basic problems will help beginners learn programming languages faster. This article is intended only for beginners in Java who first deployed hibernate. I deployed hibernate based on licensed IDEA.
Maven framework for automating the assembly of a project based on POM, which allows you to connect dependencies from the Internet without downloading libraries to the project. POM (project object model) - a draft project description. Copy the name of the library in xml format from the site mvnrepository.com .
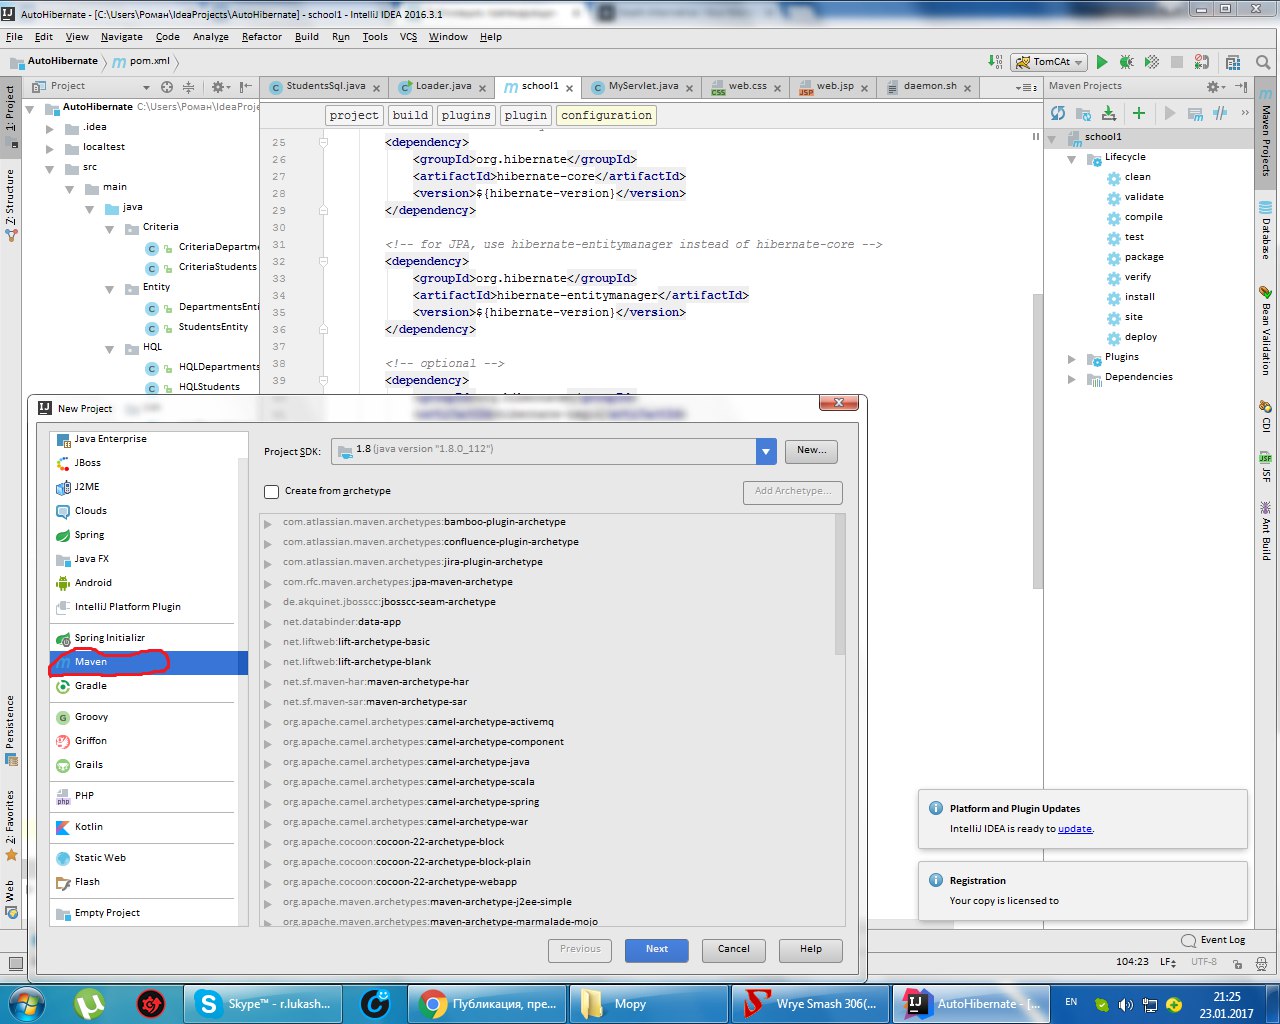
First, create the maven project structure:
')
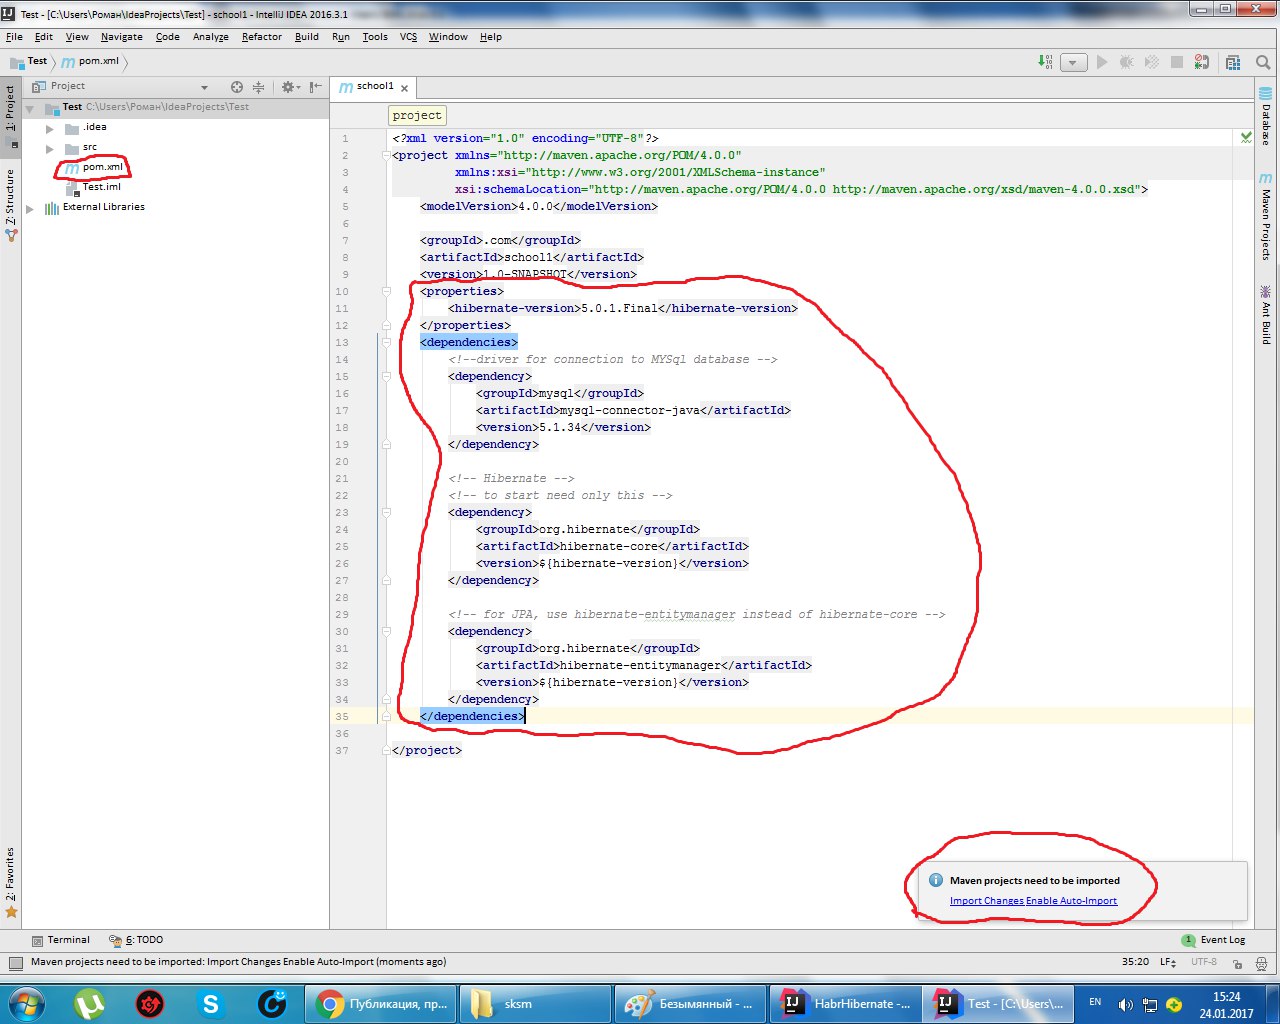
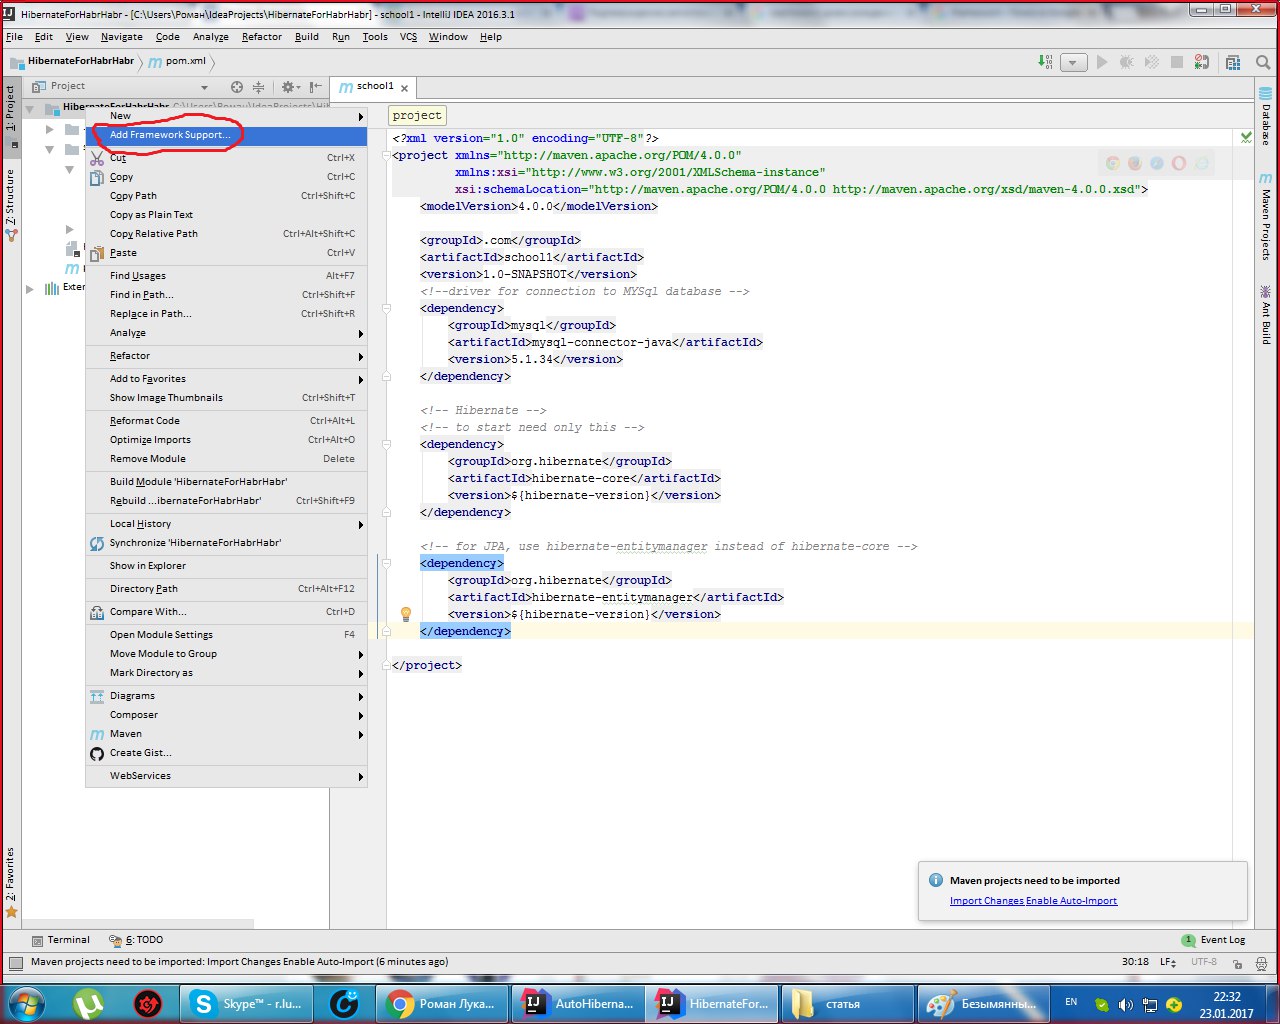
Then we insert into pom.xml. We will need two dependencies: hibernate-core and mysql-connector, but if you want more functionality, you need to connect more dependencies.
There are standard recommendations for connecting dependencies separately, but I do not do that.
And click on Import Changes Enable Auto-Import, automatically importing the changes.
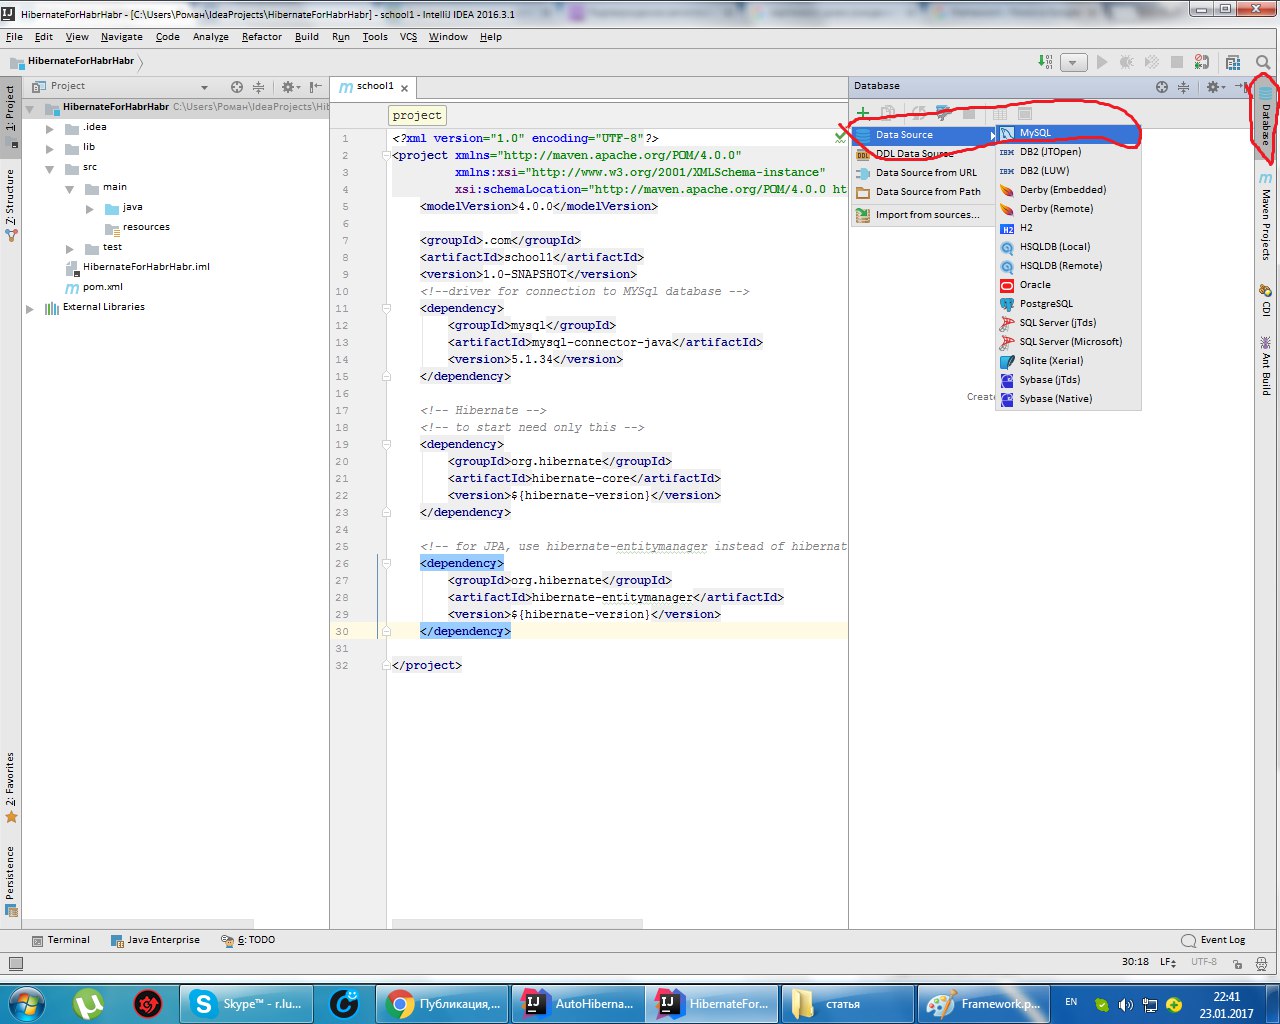
We connect to the database, which is deployed on the local computer, we select the MySQL database provider.
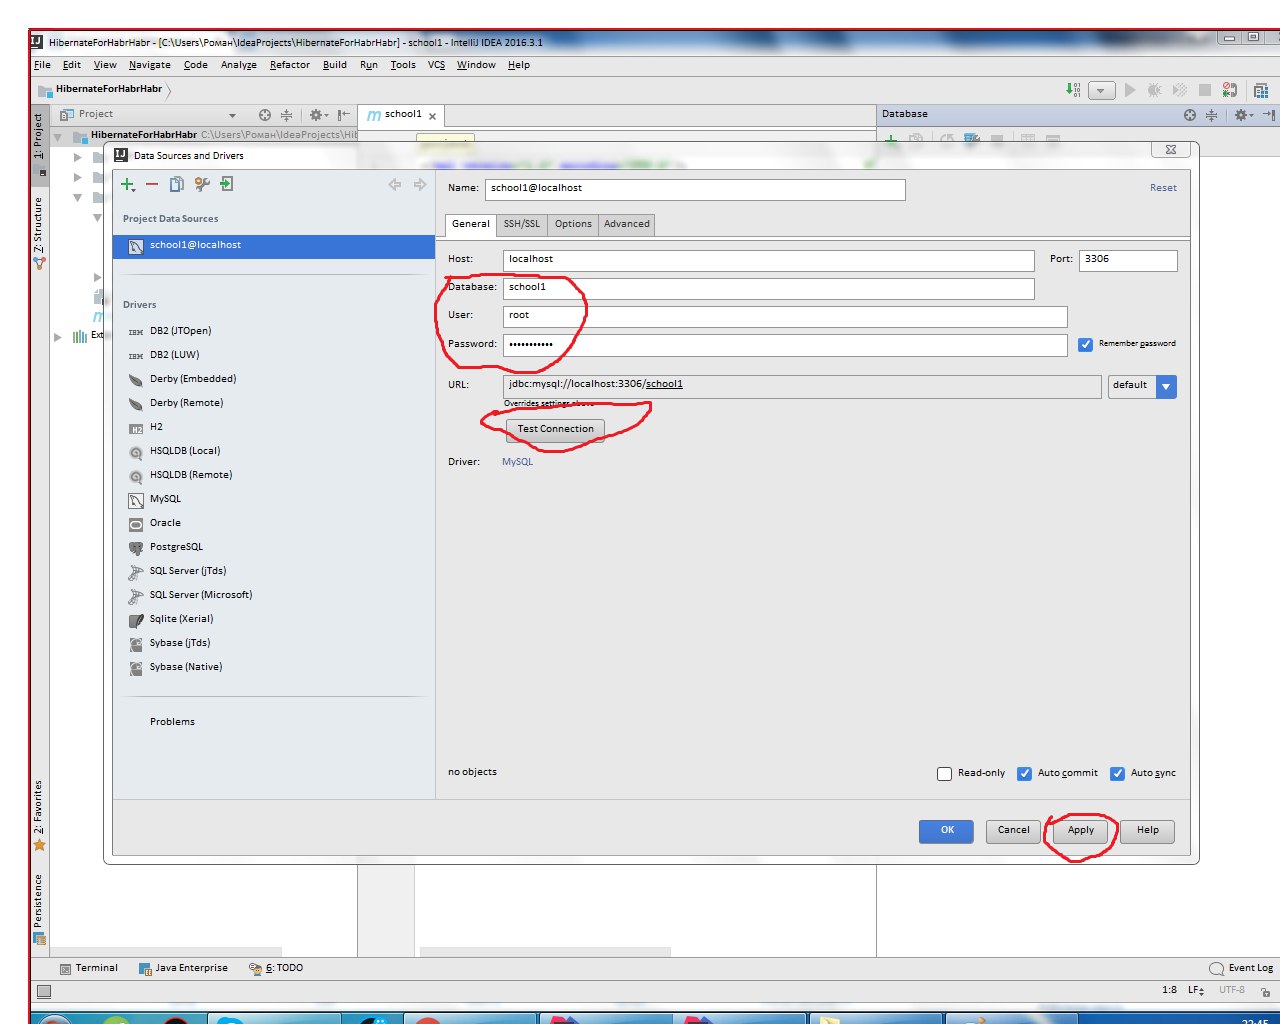
Enter the database name, username and password. Test the connection.
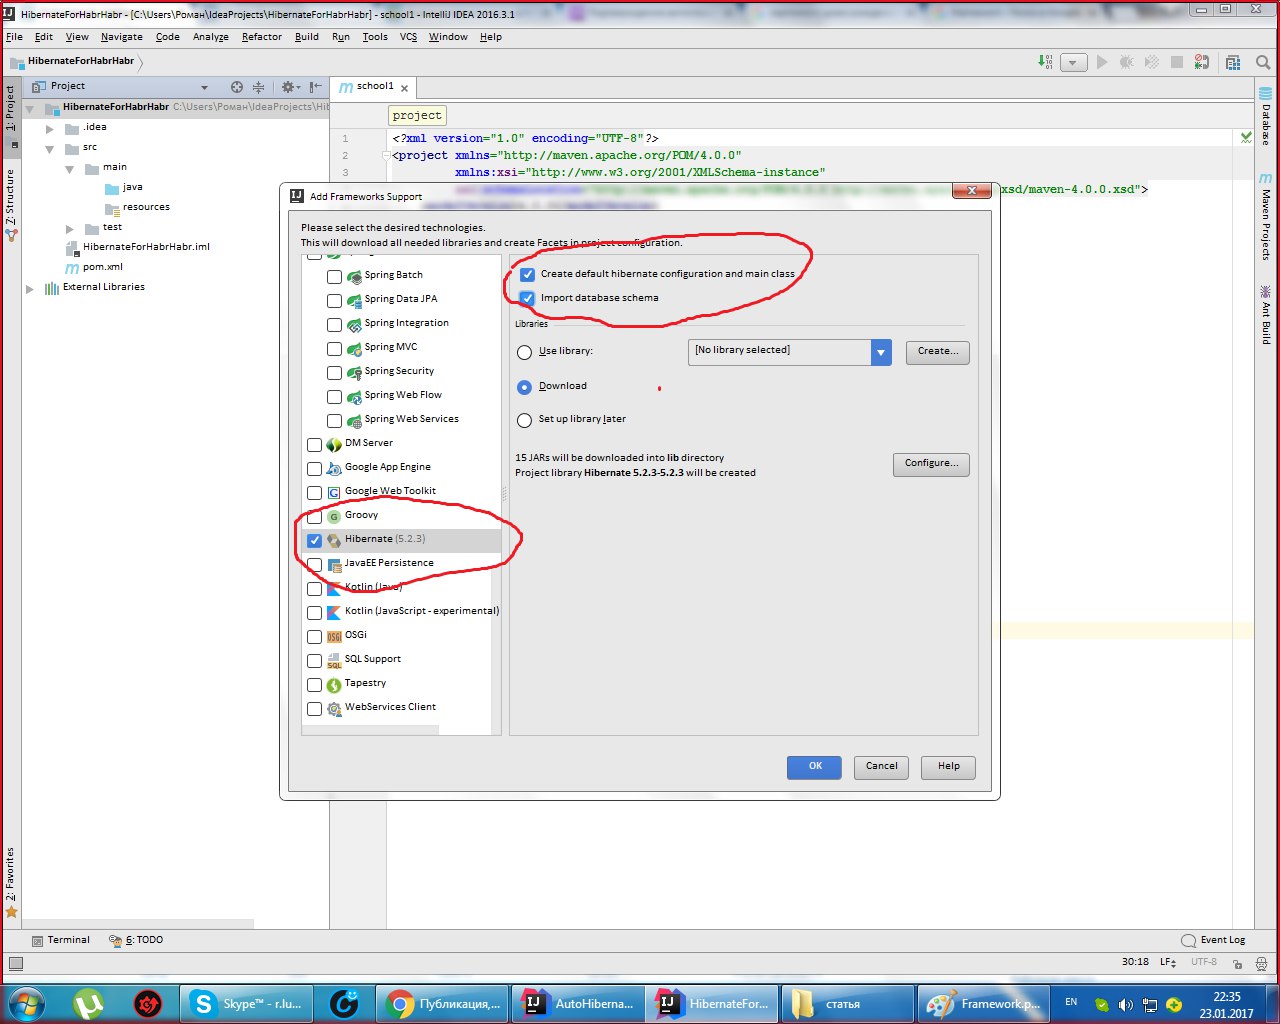
We select the project and through framework support we ask Hibernate to create for us Entity files and classes with Getter and Setter.
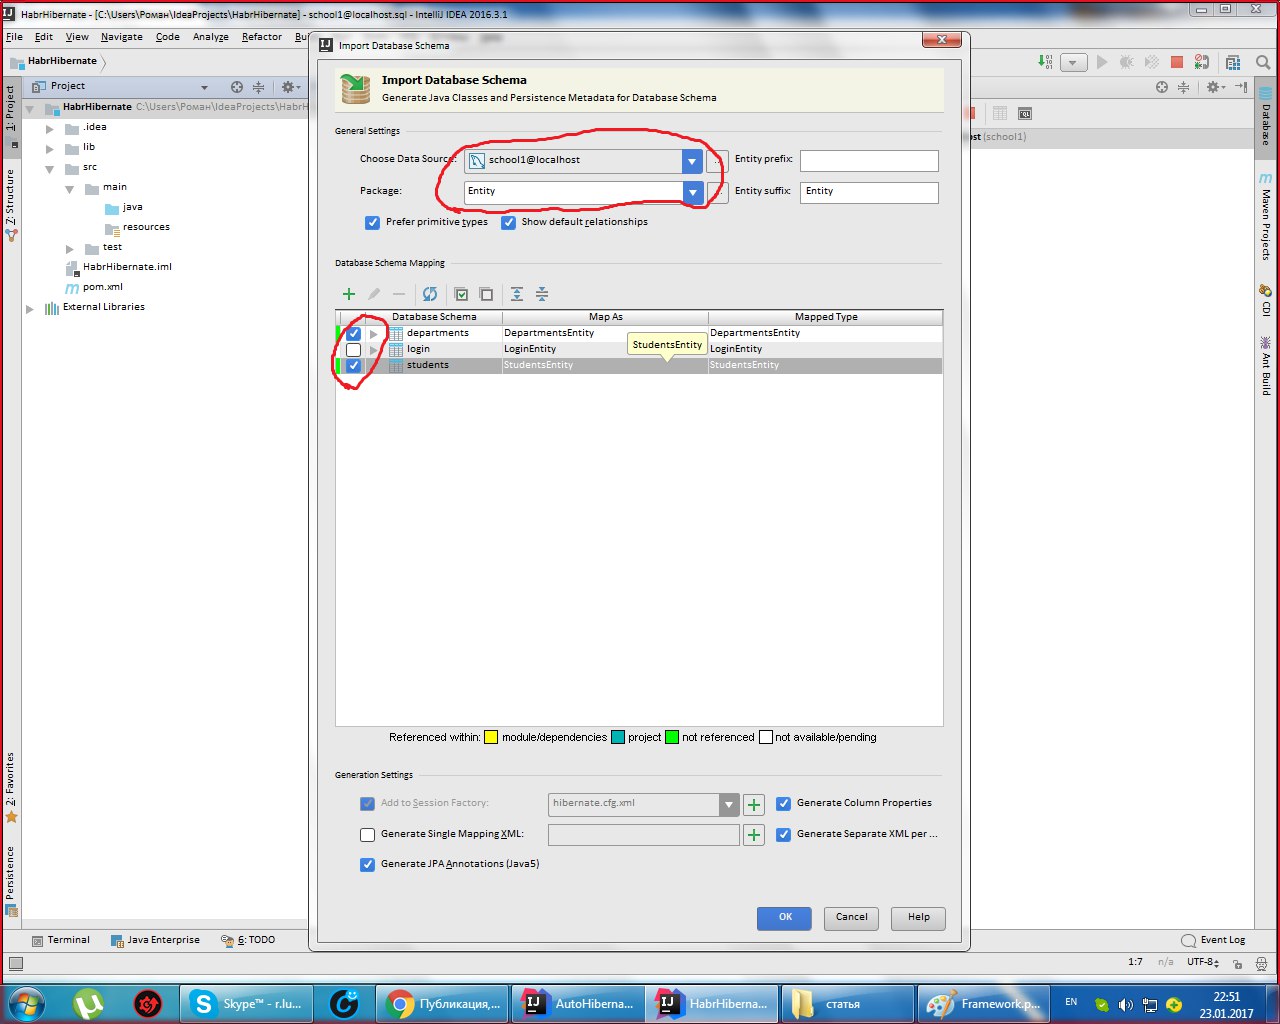
Select Generate Persistence Mapping through the Persistence stack, select jenerate Persistence Mapping, and in the window that appears, set the database schema, select prefix and
sufix to automatically generated names. The names of xml files and classes with annotations will be generated:
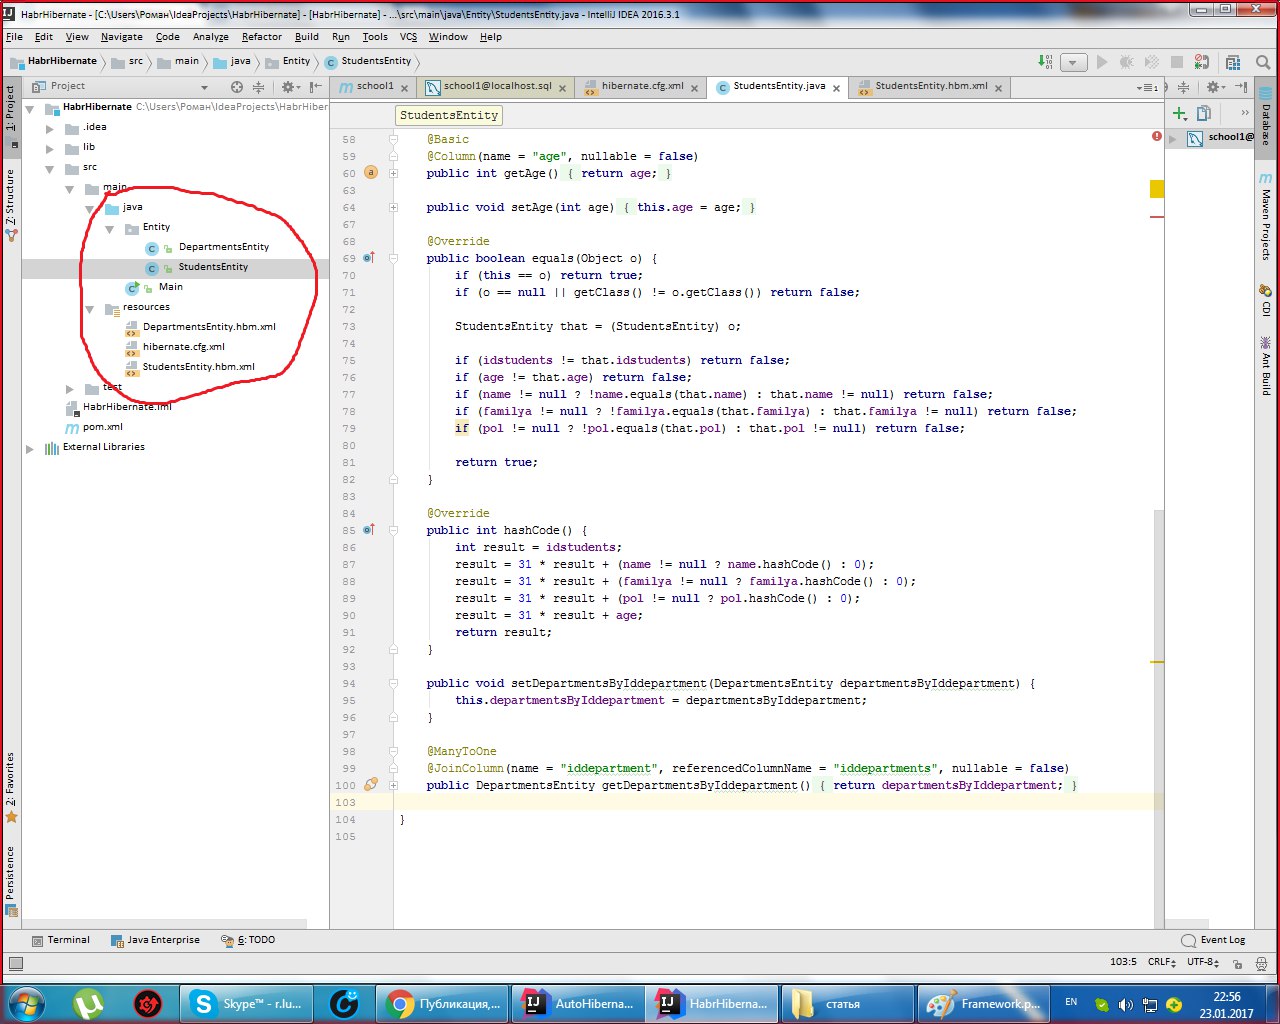
Scatter the files in this order: .xml-files should be in the folder with resources, and entities in the java folder.
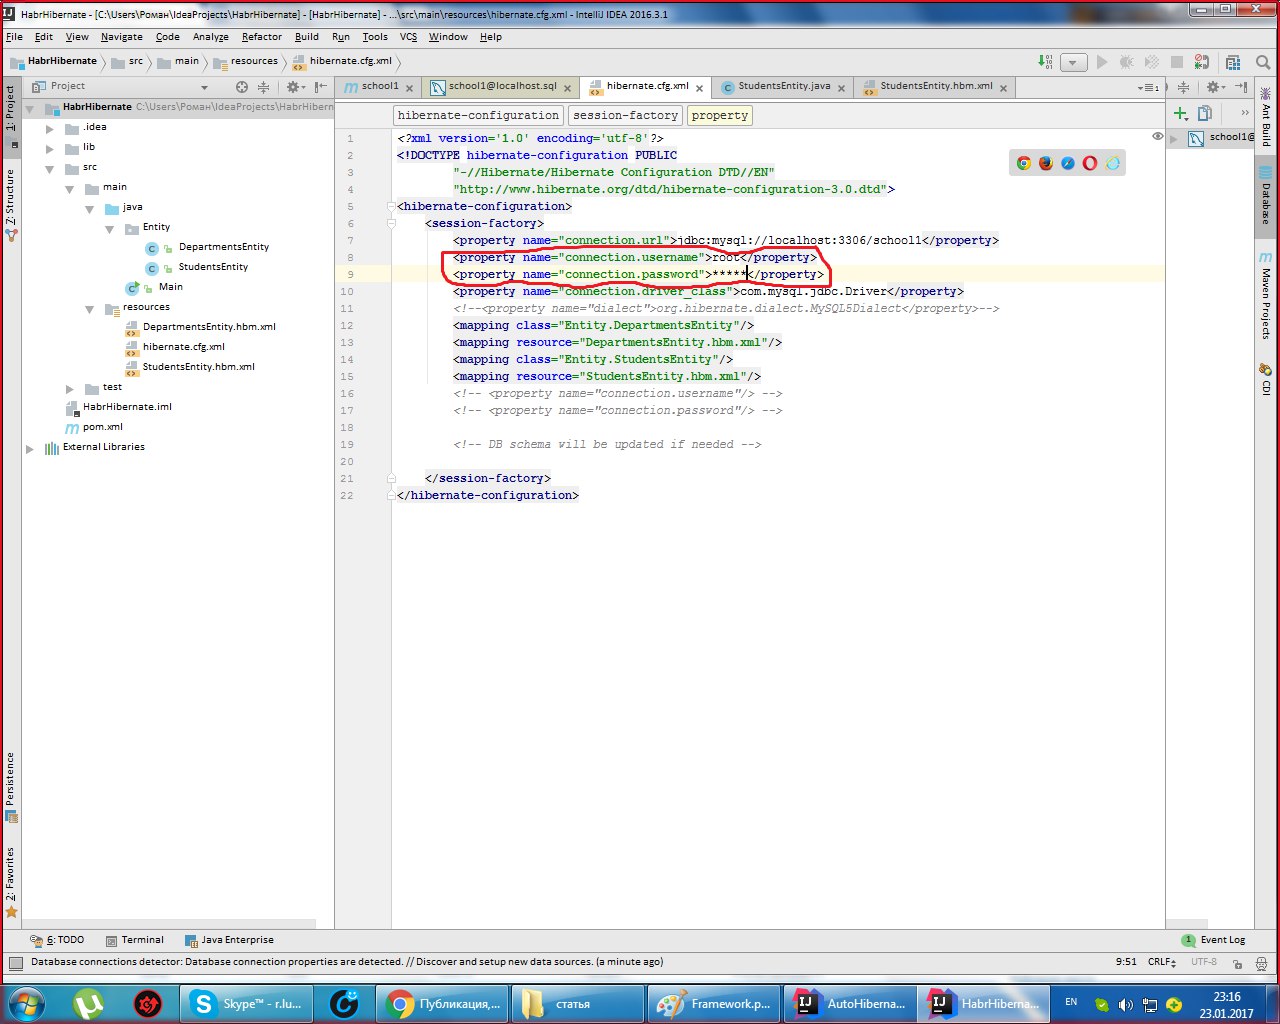
We add username and password in hibernate.cfg (I set the stars, and write in normal type).
That's all! Further through the main class we start the project.
This is my first article. I count on sensible criticism.
For a newbie of programming, setting up the framework is often difficult. Helping the community to highlight basic problems will help beginners learn programming languages faster. This article is intended only for beginners in Java who first deployed hibernate. I deployed hibernate based on licensed IDEA.
Maven framework for automating the assembly of a project based on POM, which allows you to connect dependencies from the Internet without downloading libraries to the project. POM (project object model) - a draft project description. Copy the name of the library in xml format from the site mvnrepository.com .
First, create the maven project structure:
')
Then we insert into pom.xml. We will need two dependencies: hibernate-core and mysql-connector, but if you want more functionality, you need to connect more dependencies.
There are standard recommendations for connecting dependencies separately, but I do not do that.
<properties> <hibernate-version>5.0.1.Final</hibernate-version> </properties> <dependencies> <!--driver for connection to MYSql database --> <dependency> <groupId>mysql</groupId> <artifactId>mysql-connector-java</artifactId> <version>5.1.34</version> </dependency> <!-- Hibernate --> <!-- to start need only this --> <dependency> <groupId>org.hibernate</groupId> <artifactId>hibernate-core</artifactId> <version>${hibernate-version}</version> </dependency> <!-- for JPA, use hibernate-entitymanager instead of hibernate-core --> <dependency> <groupId>org.hibernate</groupId> <artifactId>hibernate-entitymanager</artifactId> <version>${hibernate-version}</version> </dependency> </dependencies> And click on Import Changes Enable Auto-Import, automatically importing the changes.
We connect to the database, which is deployed on the local computer, we select the MySQL database provider.
Enter the database name, username and password. Test the connection.
We select the project and through framework support we ask Hibernate to create for us Entity files and classes with Getter and Setter.
Select Generate Persistence Mapping through the Persistence stack, select jenerate Persistence Mapping, and in the window that appears, set the database schema, select prefix and
sufix to automatically generated names. The names of xml files and classes with annotations will be generated:
Scatter the files in this order: .xml-files should be in the folder with resources, and entities in the java folder.
We add username and password in hibernate.cfg (I set the stars, and write in normal type).
That's all! Further through the main class we start the project.
This is my first article. I count on sensible criticism.
Source: https://habr.com/ru/post/320542/
All Articles