How is the League of Legends frame rendered?
Hi, my name is Tony Albrecht, I am one of the developers of the new Render Strike Team team running the Sustainability Initiative in the League of Legends . My team was assigned to make improvements to the LoL rendering engine, and we gladly set to work. In this article I will tell you how the engine works now . I hope it will lay a good foundation, on the basis of which I will later be able to talk about the changes we are making. This article will be a good excuse for me to study the rendering process step by step, so that we, as a team, fully understand what is happening inside.
I will explain in detail how LoL builds and displays every single frame of the game (do not forget that on the most powerful machines this happens more than 100 per second). The story will be mostly technical, but I hope that it will be easy to learn even to those who have no experience in rendering. For clarity, I will skip some difficult moments, but if you want to know the details, write about it in the comments [to the original article].
First, I will talk a little about the graphics libraries we have. League should work as efficiently as possible on a wide range of platforms. In fact, now Windows XP is the fourth most popular version of the OS in which they launch the game (only Windows 7, 10 and 8 are more popular). On Windows XP, ten million game sessions are played every month, so in order to maintain backward compatibility, we need to support DirectX 9 and we have to use only the functions it provides. We also use the comparable feature set of OpenGL 1.5 on machines running OS X (the situation will change soon).
')
So let's get started! To begin, we will learn how computers actually draw images.
Rendering for beginners
Most computers have a CPU (central processing unit) and a GPU (graphics processor). The CPU performs the logic and calculations of the game, and the GP retrieves the data of the triangles and textures from the CPU and displays them on the screen as pixels. Small GP programs, called shaders, allow you to influence the way rendering is performed. For example, you can change the way the textures are applied to the triangles or you can give the GP a command to perform calculations for each texel in the texture. Thus, we can simply superimpose a texture on a triangle, add or multiply several textures on a triangle, or perform more complex processes, such as embossed texturing, calculating lighting, reflections, or even highly realistic skin shaders . All visible objects are drawn in a non-displayable frame buffer, which is displayed only after the entire rendering is completed.
Let's take an example. Here is the image of Garen (Garen), consisting of 6,336 triangles that make up the "wire" frame and a solid textureless model. This model was created by our artists and exported to a format that the League engine can load and animate. (Note that Garin has a non-planar shading: this is a limitation of the application used for rendering research.)
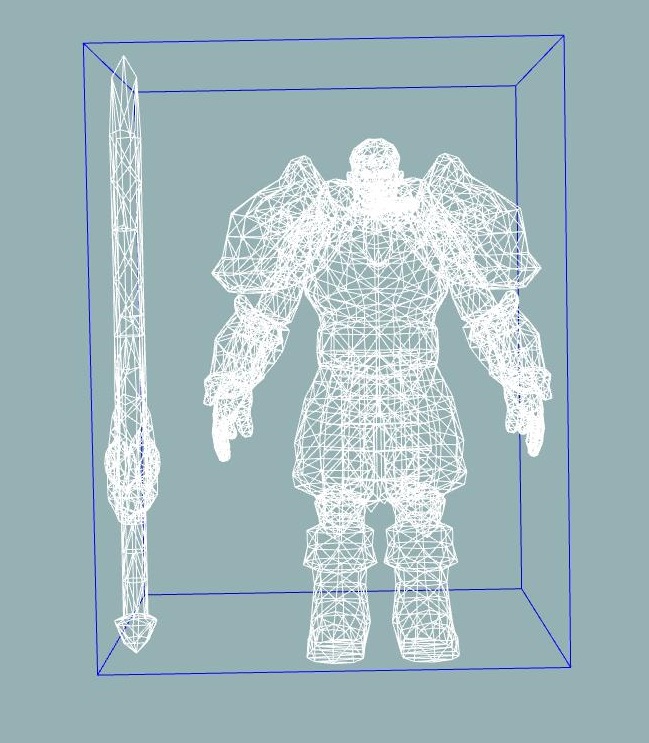
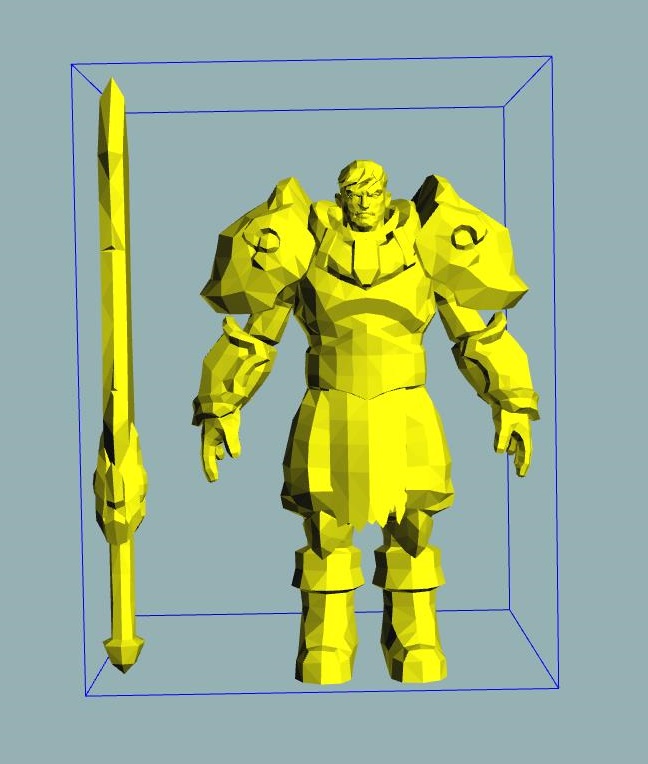
This model without texture is not only boring, but does not display a recognizable Garen. To breathe life into Garen, you need to apply a texture.
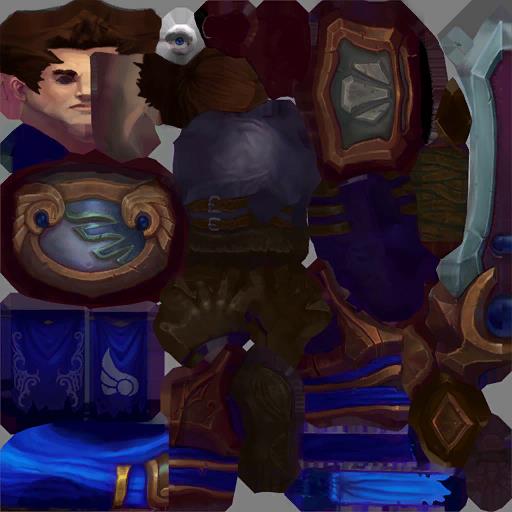
Before loading, Garen’s textures are stored on disk as DDS or TGA files, which themselves look like a horror scene. After correct imposition on the model, we will have the following result:
We are already starting to get something. The shader rendering our grids with skinning does not just apply texture, but we will look at it later.
These were the basics, but LoL needs to be rendered much more than the character’s model and texture. Let's look at the steps that make up the rendering of the next scene:
Rendering stage 0: fog of war
Before you start drawing parts of the scene, you must first prepare the fog of war and shadows (woo, mist and shadow, as ominous!). The fog of war is stored by the central processor as a 128x128 grid, which then scales to a square texture of 512x512 (for more details, read the article “A Story of Fog and War” ). Then we blur this texture and apply it to darken the relevant areas of the game and mini-map.


Render stage 1: shadows
Shadows are an integral part of the 3D scene. Without them, objects will appear flat. To create shadows that look like being cast off by a minion or a champion, we need to render them from a point of the light source. The distance from the light source to the shadow casting character is stored for each pixel in the RGB components, and we zero the alpha transparency component. This can be seen below. On the left, we have a shadow height field in the RGB of the besieged tower, minions, and two champions. On the right, we have only the alpha transparency component. These textures are trimmed to more clearly display the details of the shadows - the minions below, the tower and the champions are at the top.
In the end, we blur the shadows to give them a nice, smooth border (along with recently added optimization that increases the frame rate). As a result, we get a texture that can be superimposed on a static geometry to produce a shadow effect.
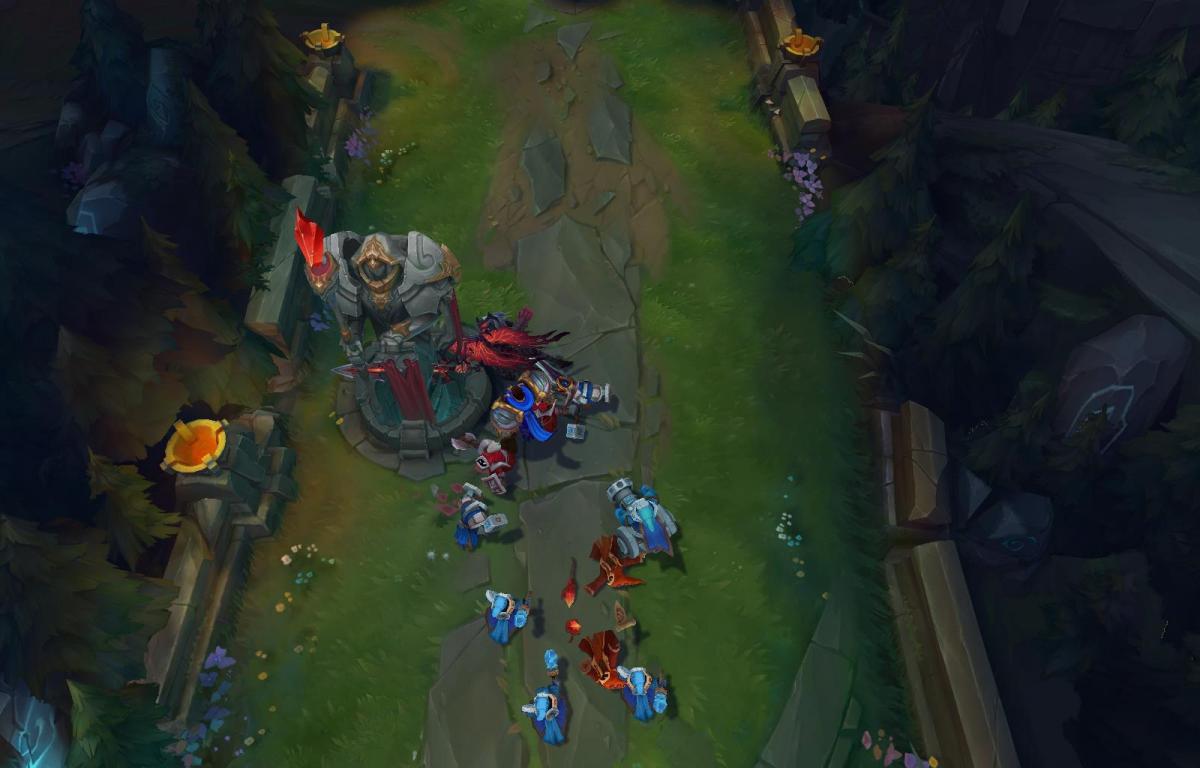
Render stage 2: static geometry
Having prepared the textures of fog of war and shadows, we begin to draw the rest of the scene in the frame. First of all, static geometry (it is called so, because it is motionless). This geometry combines the information of fog of war and shadows with its main texture, which gives us the following scene:
Notice that the shadows of the minions and the fog of war creep into the edges of the stage. Summoner's Rift Renderer does not render dynamic shadows for static geometry. Since the main light source does not move, we bake the shadows of static grids on their textures. This gives artists more control over the appearance of the map, as well as improves performance (rendering of shadows of static grids is not required). Shadows cast only minions, towers and champions.
Render stage 3: skinned meshes
So, we have relief and shadows, so we can begin to impose objects on them. Minions, champions and towers are superimposed first, i.e. all objects with movable hinges that need to move realistically.
Each animated grid consists of a skeleton (a skeleton of hierarchically connected bones) and a grid of triangles (see the image of Garen above). Each vertex of each triangle is tied to one to four bones, so when you move the bones, the vertices move with them like skin. Therefore they are called “skinned nets”. Our talented artists create animations and grids for all objects, and then export them to a format that is loaded into the League when the game starts.
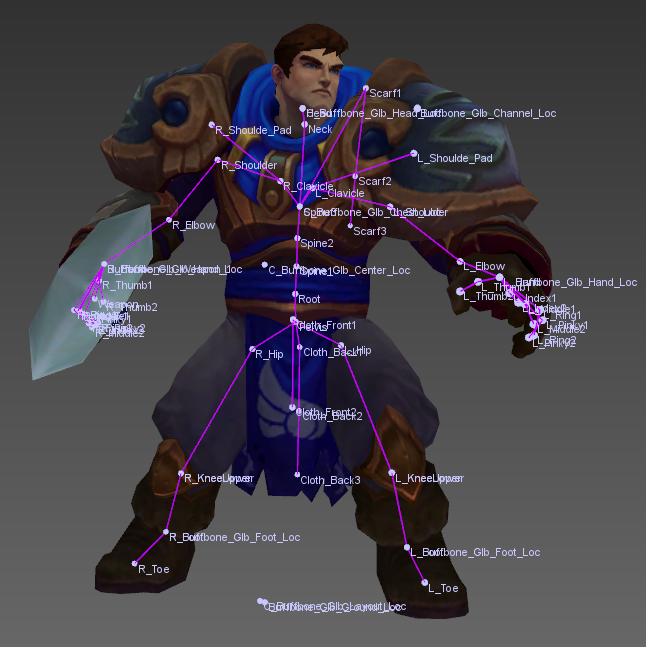
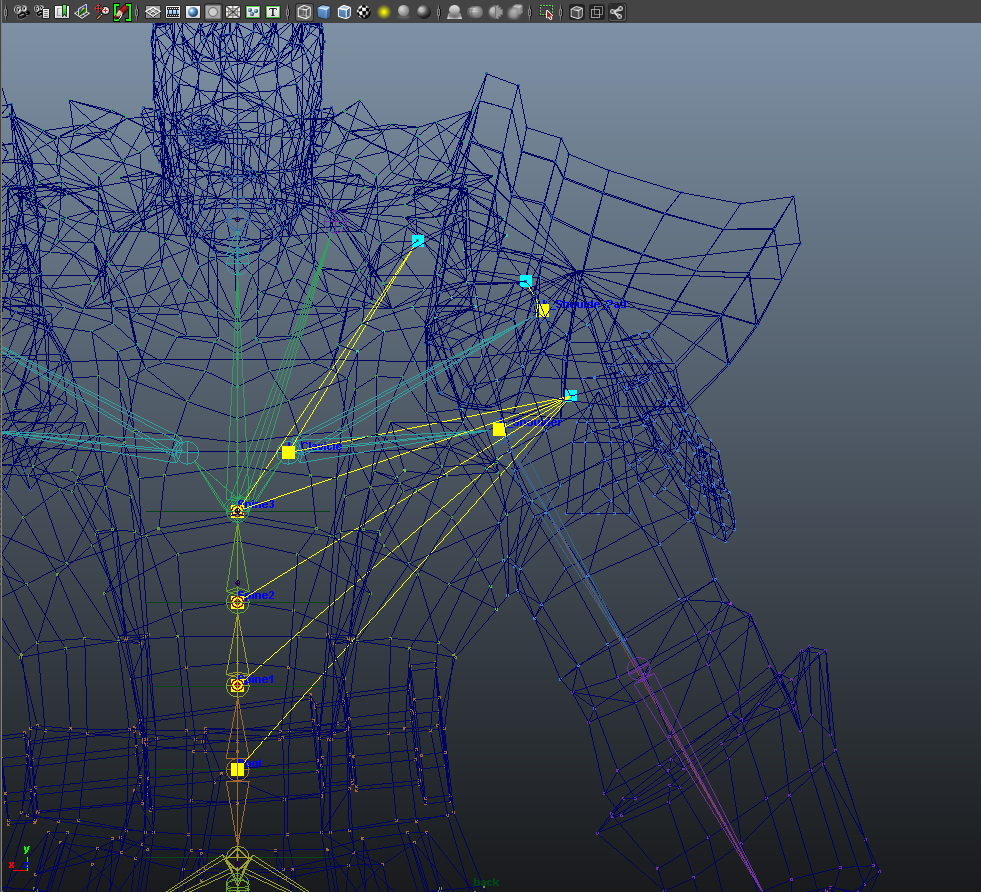
The images above show all the bones of the Garen mesh. The image on the left shows all his bones (with titles). In the image on the right, the selected vertices are shown in blue, and the yellow lines show the connections with the bones that control their position.
Skinning mesh shaders do not just draw skinned grids to the frame buffer, they also render their scaled depth to another buffer, which we later use to draw the contours. In addition, skinning shaders calculate the Fresnel reflections emitted by the lighting, calculate the reflections, and change the lighting for the fog of war.
Render stage 4: contours (delineation)
By default, skinning for grids with skinning is on, which provides clearer contours. This allows you to highlight meshes with skinning on the background, especially in areas with low contrast. In the images below, the delineation is disabled (left) and enabled (right).
The contours are created by obtaining the scaled depth from the previous stage and its processing by the Sobel operator to extract the face that we render on the skinned skin. This operation is performed separately for each grid. There is also a return method that uses a template buffer for GPUs that cannot render multiple objects at the same time.
Render stage 5: grass
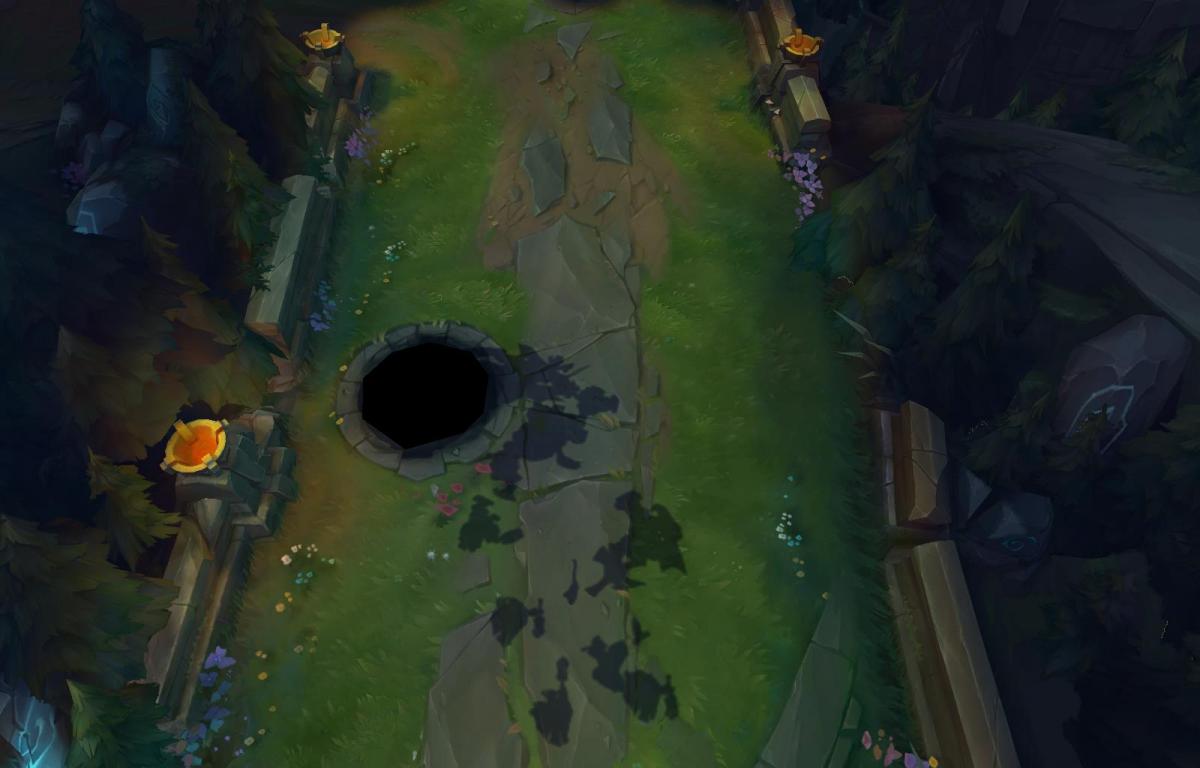
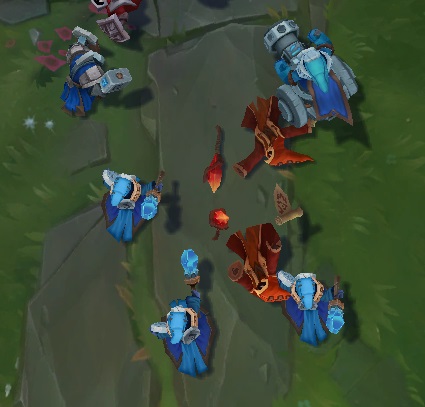
To determine what is involved in the rendering of water and grass, let's look at another scene.
Here is a frame without water and grass, just a static background geometry and several skinned meshes.
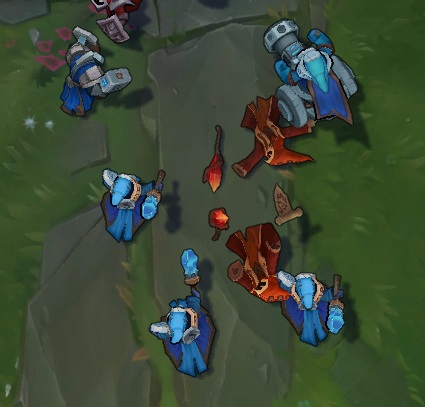
Note that grass shadows are already part of the texture of the static relief and are not dynamically rendered. Then we add grass:
Grass tufts are actually skinning nets. This allows us to animate them as they pass through the characters and give a pleasant sway from the breeze in the Summoner's Gorge.
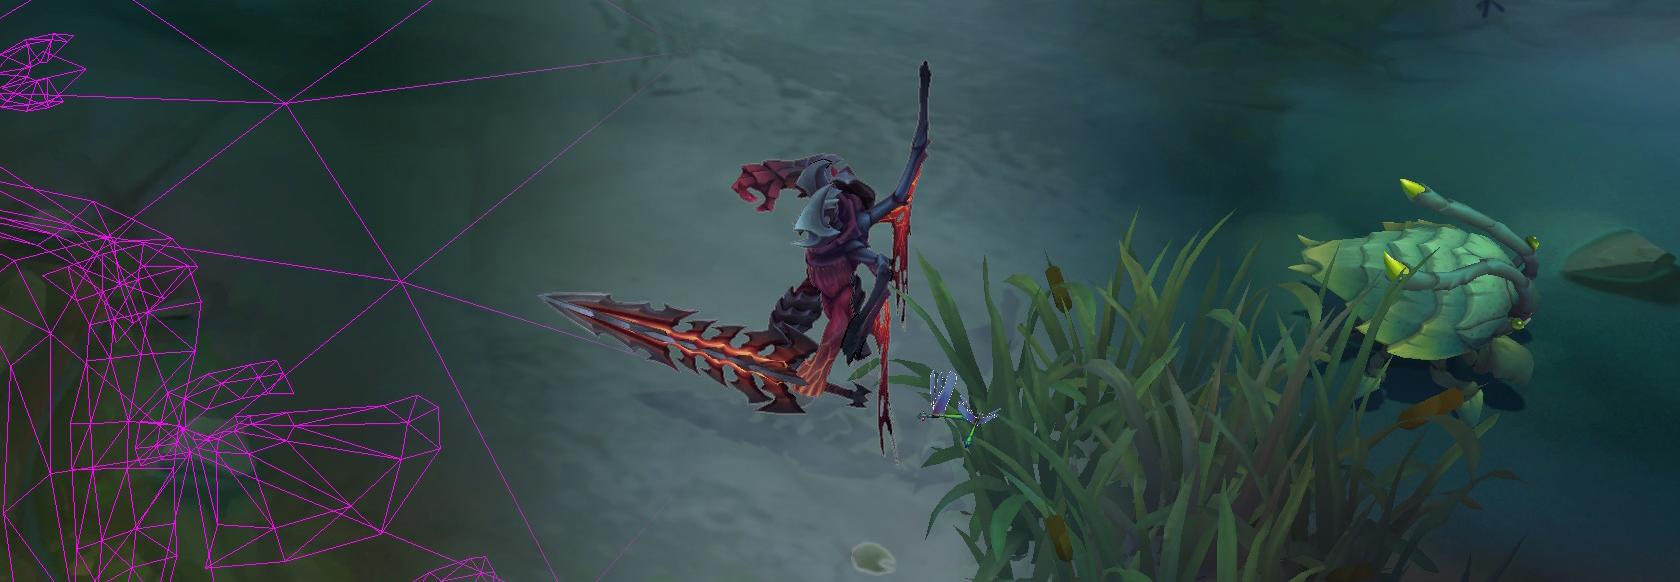
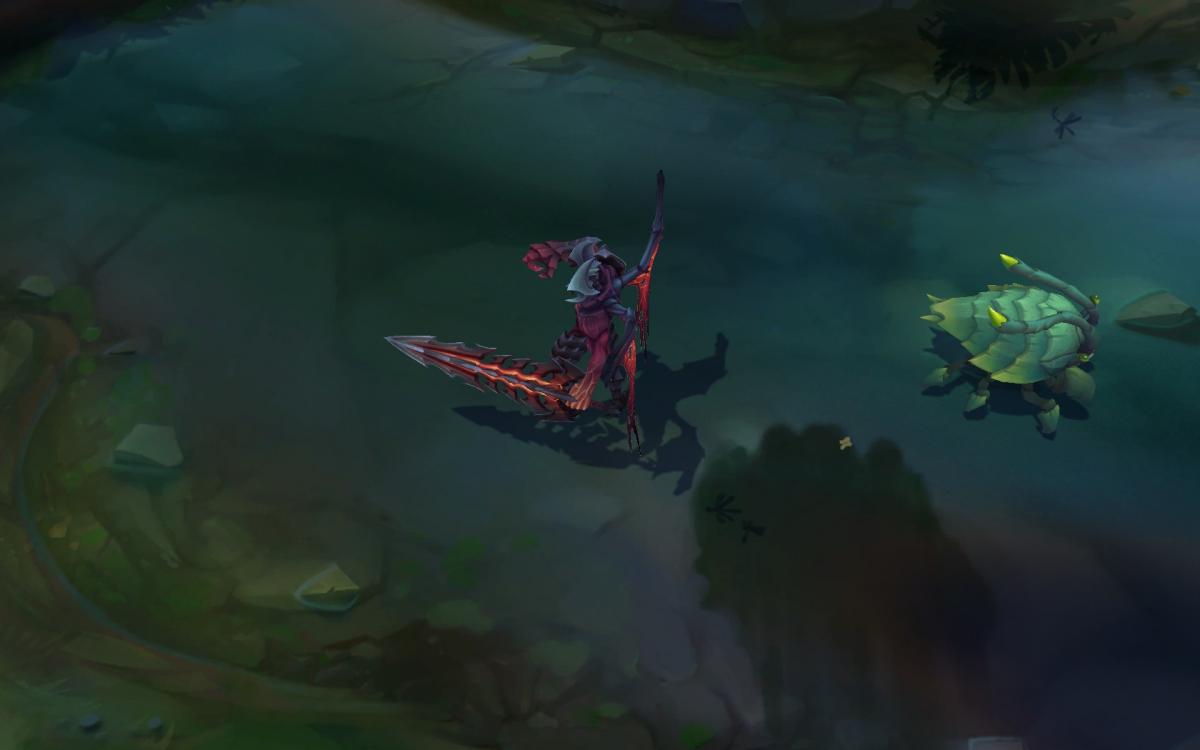
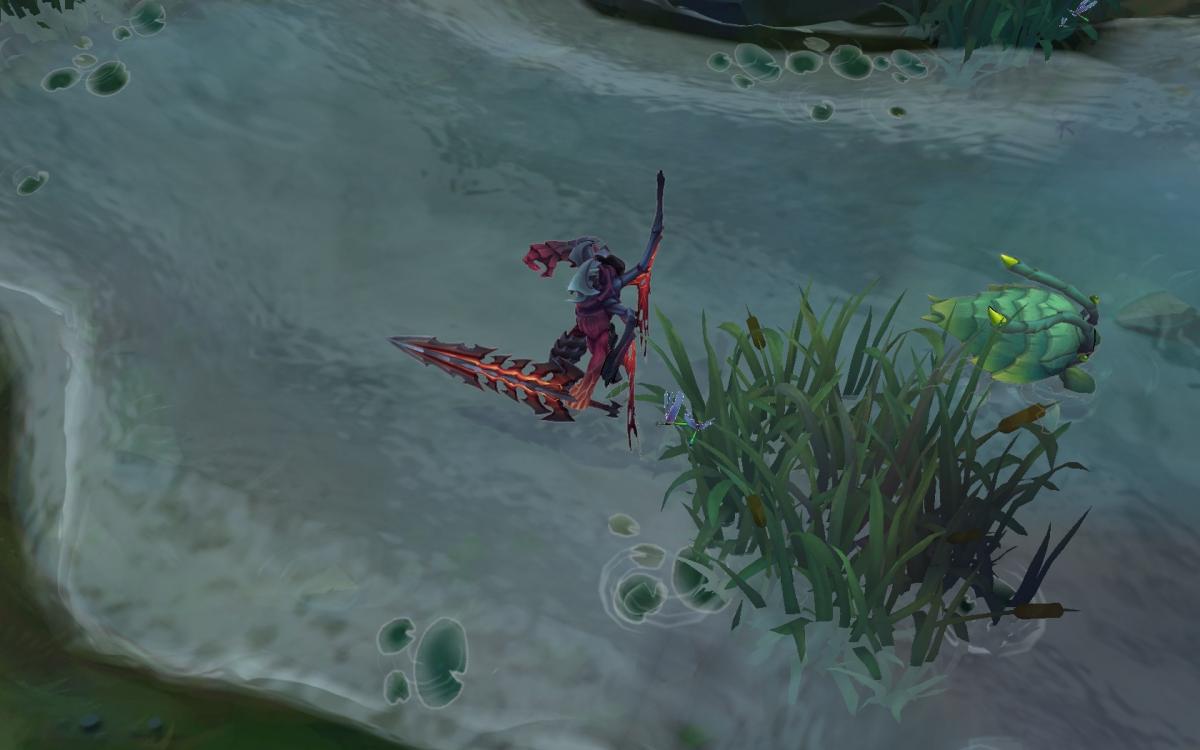
Render stage 6: water
After the grass, we render the water using translucent grids with slightly animated water textures. Then we add lily pads, ripples around the rocks and near the shore, insects. All of these objects are animated to bring a sense of life to the scene.
To enhance the effect of water (it may be too weak), I retained the transparency of the water and ignored the geometry under it. This emphasized the effects of water so that we can better take them into account in the analysis.
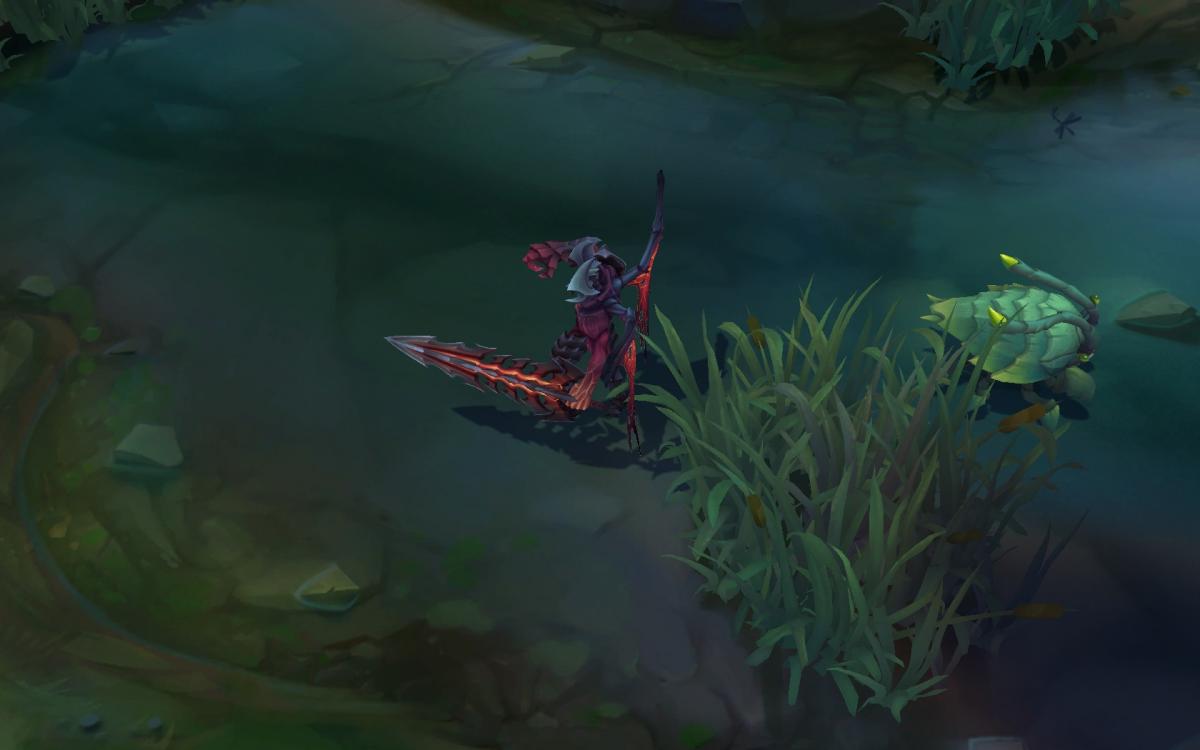
Selecting all the ripples as “wire” frames, we get:
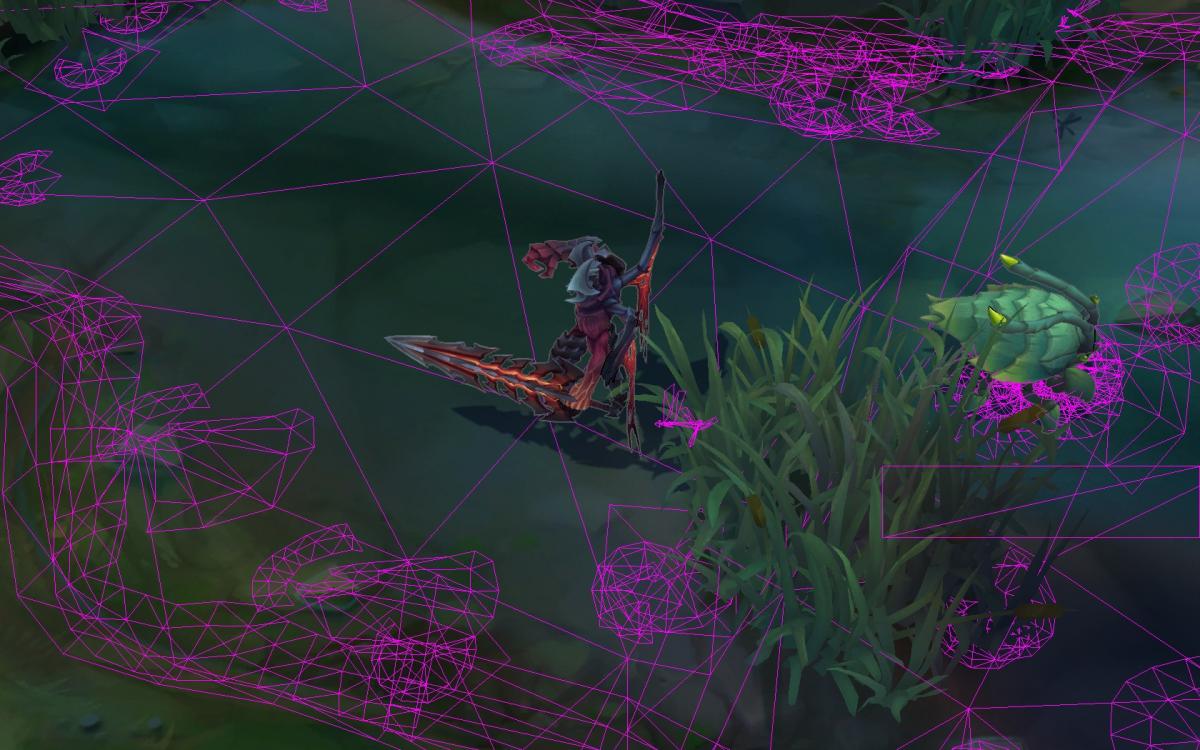
Now we can clearly see the effects of water along the banks of the river, as well as around stones and water lilies.
Under normal rendering and animation, water looks like this:

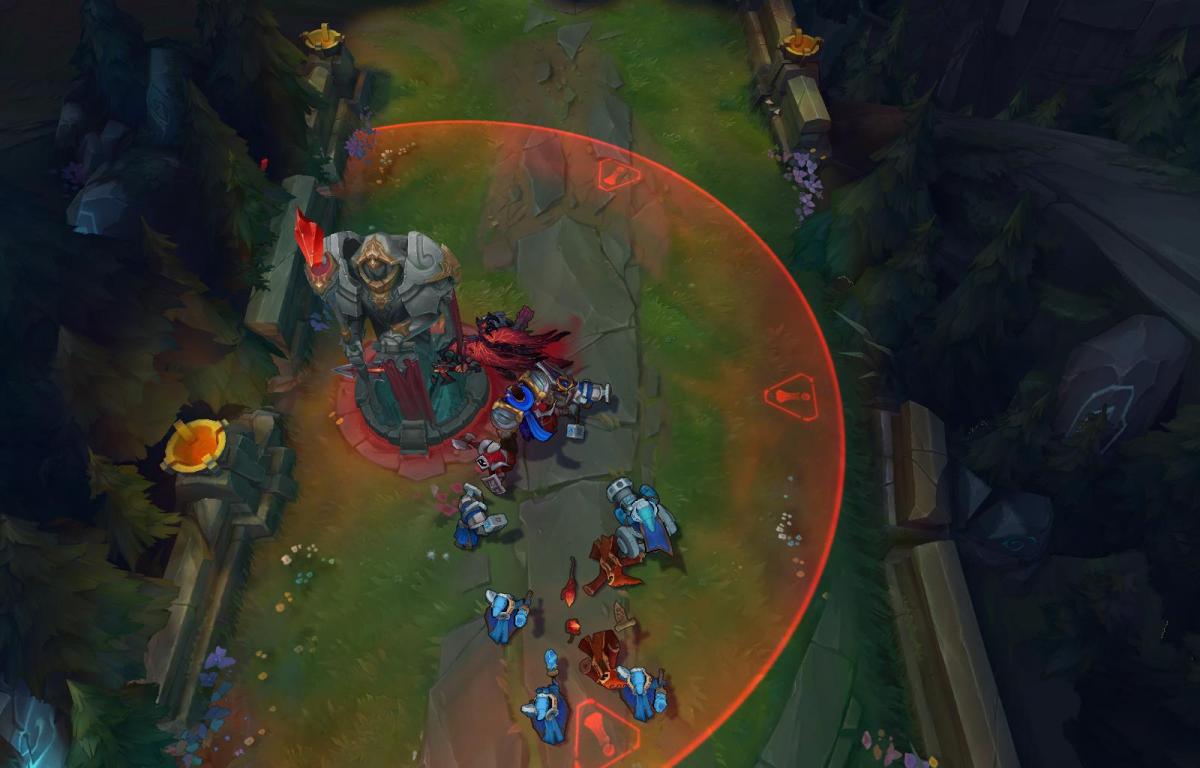
Render stage 7: decals
After overlaying grass and water, we add decals — simple geometric elements with flat texturing that are superimposed over the topography, for example, the tower range indicator in the figure below.
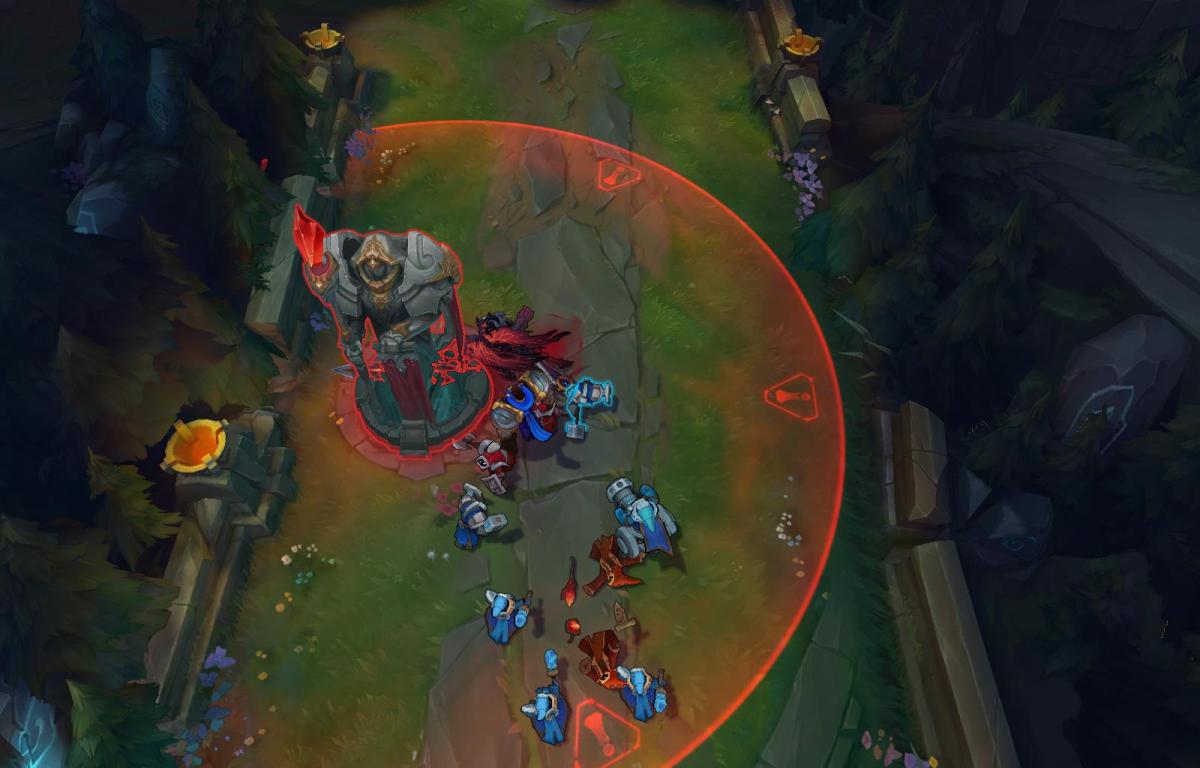
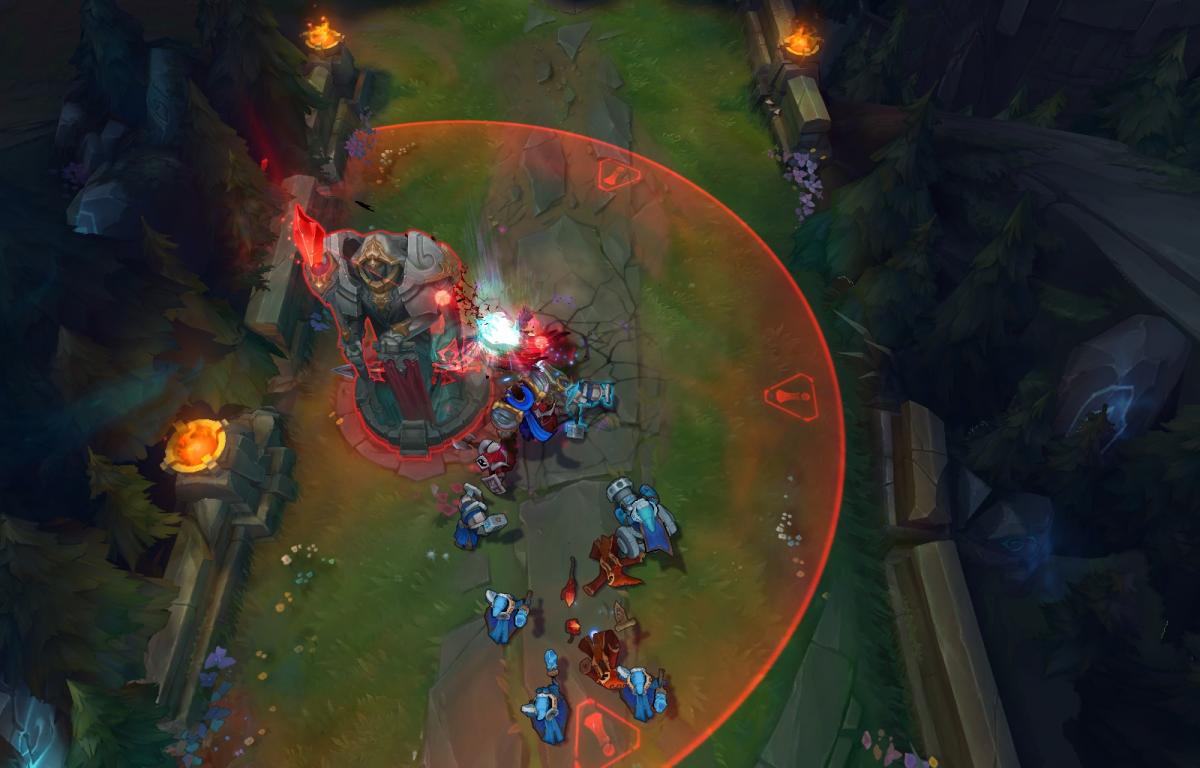
Render stage 8: special contours
Here we are dealing with thicker contours, triggered through mouse events or special activation states, as in the case of the tower outline in the figure below. This is done in much the same way as the outlines of skinned meshes were created, but here we also blur the outlines to make them thicker. This selection is noticeably even stronger, because it is performed in the rendering process later and can overlap the effects already imposed.
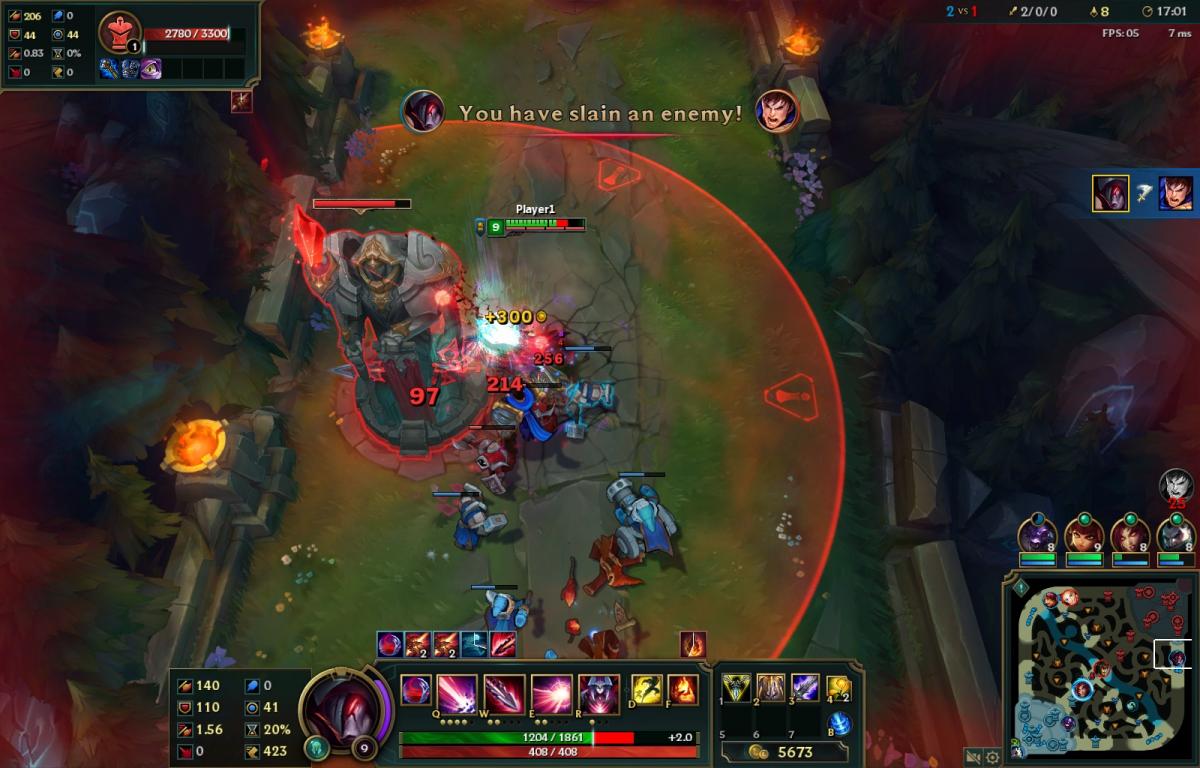
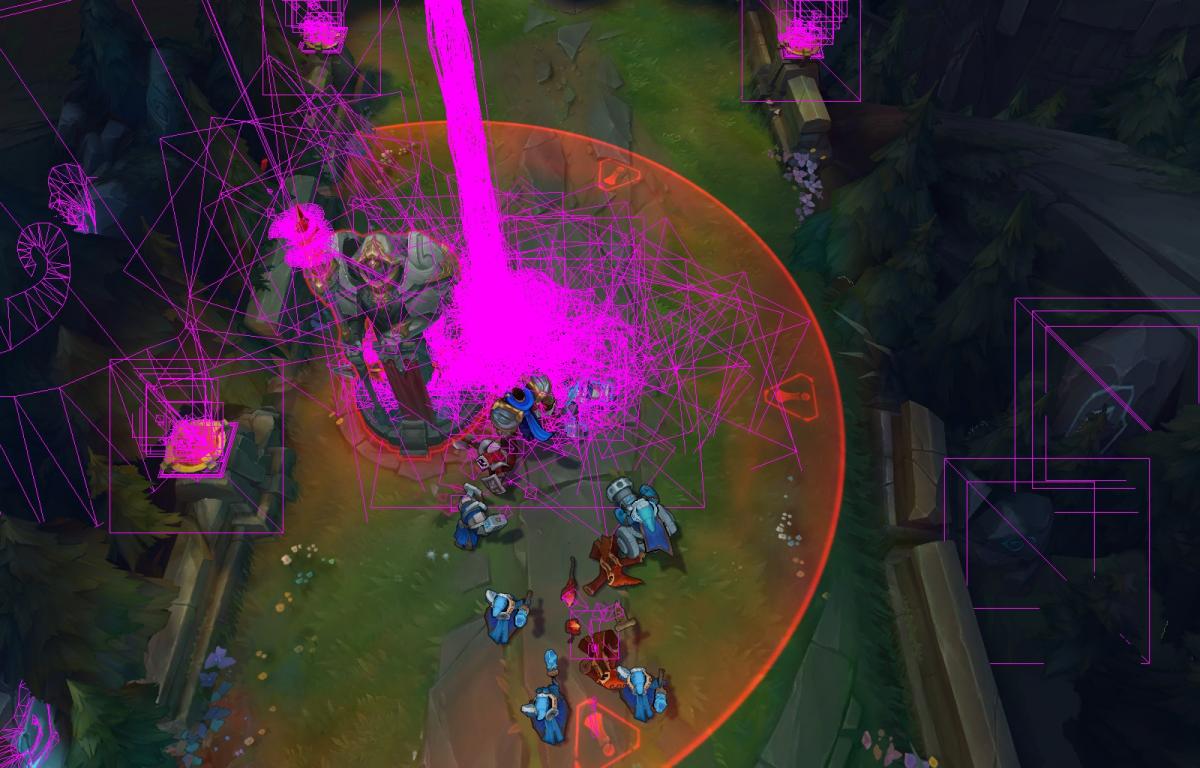
Render stage 9: particles
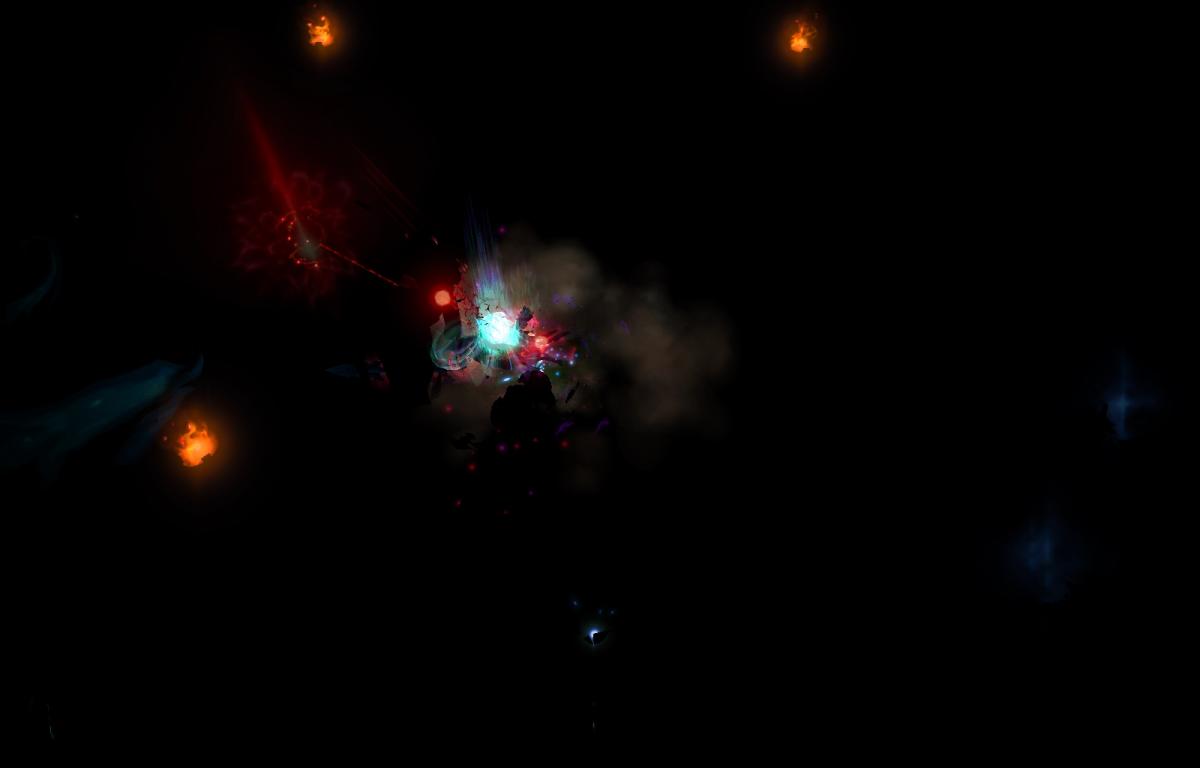
The next stage is one of the most important: particles. I already wrote about particles in this article . Each spell, buff, and effect is a particle system that needs to be animated and updated. In the scene we are considering, there is not so much action as, for example, in a 5-to-5 team battle, but still there are quite a lot of displayed particles.
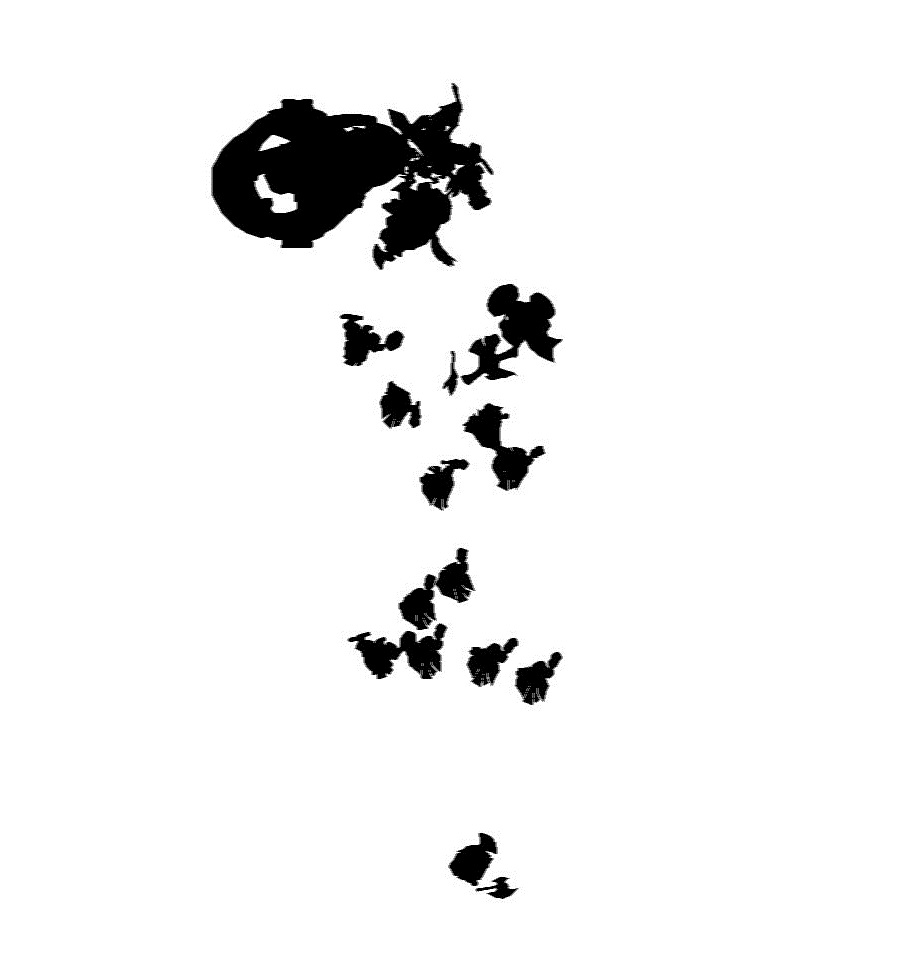
If we consider only particles (turning off the entire background scene), we get the following picture:
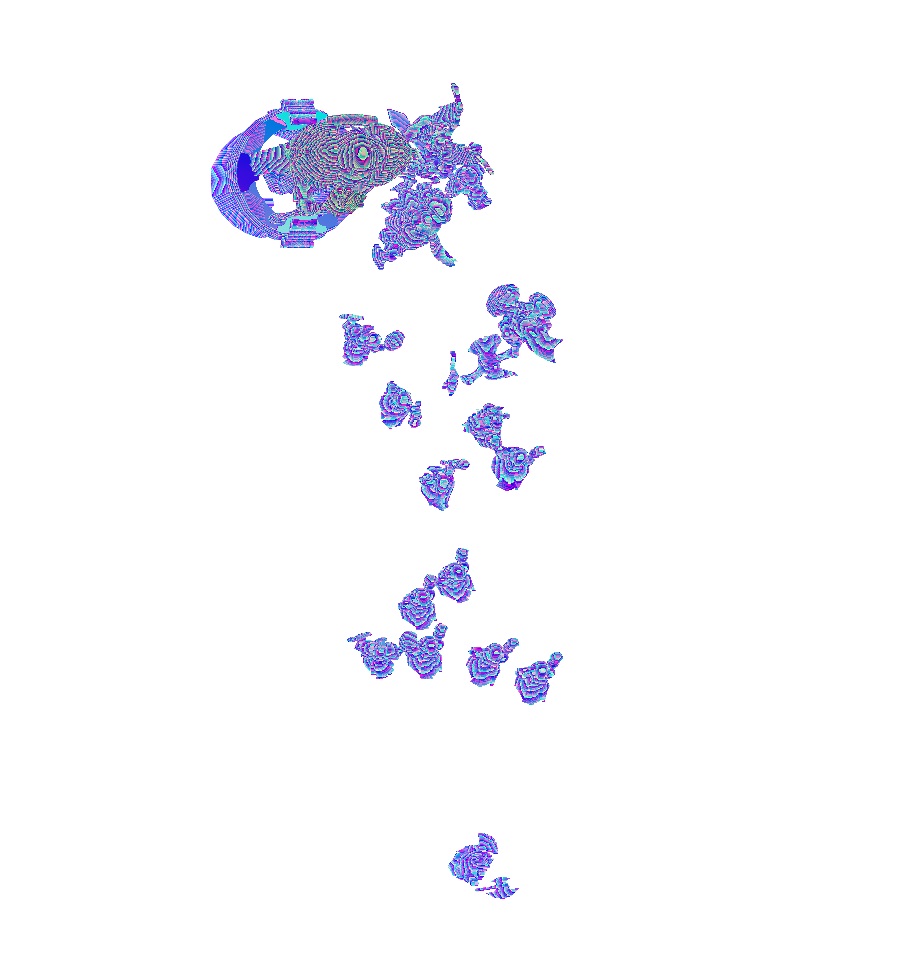
By rendering the triangles that make up the particles with purple outlines (without textures, only geometry), we get the following:
If the particles are drawn normally, we will get a more familiar look.
Render stage 10: post-processing effects
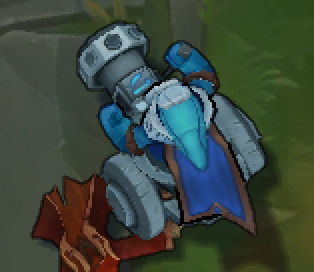
So, the basic parts of the scene are already rendered, and we can give it a bit more “shine”. This is done in two stages. First, we perform a smoothing pass (anti-alias, AA). It helps to smooth jagged edges, making the entire frame more clear. In a static image, this effect is almost imperceptible, but it greatly helps in eliminating the “pixel flicker” that can occur when moving high contour edges around the screen. In LoL, we use a smooth approximation algorithm with a fast approximation of Fast Approximate Anti-Aliasing (FXAA).
The image on the left is the minion before FXAA, and on the right after smoothing. Notice how the edges of the object are smoothed.

After completing the FXAA pass, we perform a gamma correction pass to adjust the brightness of the scene. As an optimization, we recently added the effect of reducing the saturation of the screen of death to the gamma-correction pass , which eliminated the need to replace all the shaders of the current visible grids for the death options that previously had their saturation decrease separately.
Render stage 11: damage and health bars
Then we render all the game indicators: health bars, damage text, screen text, and all non-post-processing full-screen effects, such as the damage effect on the image below.

Render stage 12: interface
Finally, the user interface is drawn. All texts, badges and objects are drawn on the screen as separate textures, overlapping everything under them. In the case we analyzed, it took approximately 1,000 triangles to draw the interface — about 300 to the minimap and 700 to everything else.
Putting it all together

And we get a fully rendered scene. There are about 200,000 triangles in the whole scene, 90,000 of them are used for particles. 28 million pixels are rendered for 695 draw calls. In order to play the game, all this work must be done as quickly as possible. To achieve 60 or more frames per second, all stages need to go in less than 16.66 milliseconds. And these are just calculations on the GPU side: all game logic, player input processing, collisions, particle handling, animation, and sending commands for rendering must also be performed in the central processor during the same time. If you play with 300 fps, then everything happens in less than 3.3 milliseconds!
Why do renderer refactoring?
You should now present the difficulties associated with rendering a single frame of the League game. But this is only the data output side: what you see on the screen is the result of thousands of calls to the functions of our rendering engine. It is constantly changing and evolving to better meet the current needs of rendering. This led to the fact that different forms of the rendering code coexist in the League code base, because we need to take into account new and maintain old equipment. For example, Summoner's Rift renders a little differently than Howling Abyss and Twisted Treeline. There are parts of the renderer remaining from the old versions of the League , and parts that have not yet revealed their full potential. The task of the Render Strike Team is to take all the rendering code and refactor it so that all rendering is performed through the same interface. If we perform our task well, the players will not notice the difference at all (except, perhaps, a slight increase in speed at different points). But after we finish, we will have a great opportunity to make simultaneous changes in all game modes of League .
I hope this tour of the League of Legends rendering process was interesting. I mentioned at the beginning of the article that I did not want to go into details. I wanted to ensure that as many people as possible began to better understand the processes taking place in each frame of each game in the League . If you have any questions, ask them in the comments [to the original article], and we will try to answer as much as possible.
Source: https://habr.com/ru/post/320320/
All Articles