We write a wrapper over the API, make a PIP packet out of it, connect Travis CI testing and look at open source licenses

Greetings, Habrahabr! This article will be useful for those wishing to familiarize themselves not only with the design of their own Python Package Index (PIP) package, but also with various supporting tools that help accompany development at all stages - using the example of the author’s work.
Required tools:
- Development environment - writing object-oriented code that works closely with the application interface (in our case, a web site), in other words - sending and processing requests to the API, and additional auxiliary files;
- Uploading their work to the general package directory - PyPI ;
- Github - creating a repository for the purpose of quality control, improvement and permanent updating of the library, general interaction with the open source code area;
- One of the free software licenses, in our case the MIT License ;
- Travis CI - continuous build and testing of a project under development in various environments (for example, different versions of a language or interpreter).
This list can be taken for the content of the article in the appropriate order.
I want to add that it is not necessary to go over the proposed materials, in which a lot of important and interesting information is indicated - you will still receive the necessary data to complete such a project and then decide whether you should use additional links.
')
Introduction
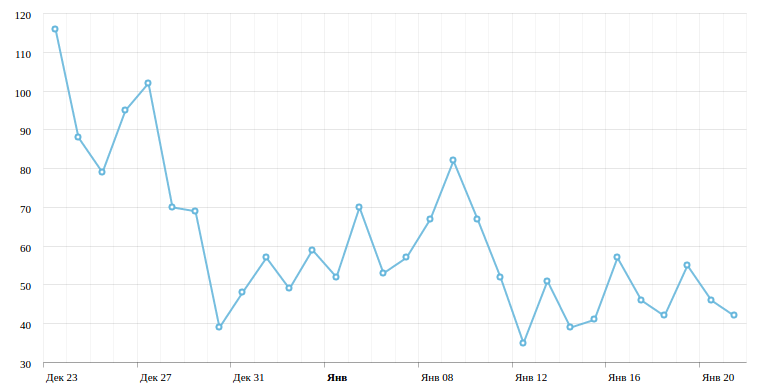
I am a regular visitor of various Internet resources, including one well-known Ukrainian community of programmers, and a part-time and constantly practicing programmer - therefore, due to a lack of ideas, I rushed to design the implementation of publication statistics (using the example of Habrahabr) (see figure below) for users of the site . It does not matter in what form the project will be implemented, but the intermediate task is the subject of discussion of the article - working with the API of this site , which is greatly facilitated by writing your own wrapper (PIP package), including undoubted additional advantages from the development - for example, an interesting new area and experience gained.
The design of the project, which is necessary for the implementation of the wrapper and its loading into the general catalog, differs from the final one, which is in turn proper for the quality maintenance of further work.
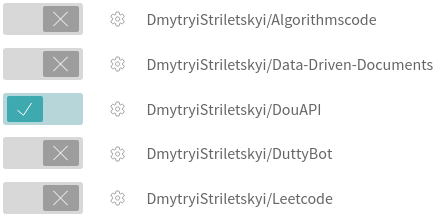
An example of the final version of DouAPI (link to github, keep it open in parallel with the article and contact for details of the described, do not forget to read the description of the repository). It does not contain the necessary files for testing and some auxiliary solutions (for example, take out a bulky code that performs formatting of strings or processing additional requests), but only because there is no such requirement at this stage of development.
The structure of the package itself should consist of the main directory, a subdirectory with the main and auxiliary files and the distribution file “setup.py”.

For greater clarity, it is worth starting the implementation description with the api.py module ( link to github ) - importing the Requests module, which allows you to handle HTTP requests at an improved level.
import requests Creating a separate class directly for accessing a specific method specified by the site’s API at a given URL. If your development will be limited by some factors and the creation of an additional class for requests is unnecessary - create a private method already in the main class, but if you don’t know how far the project goes, what features you want to add and what complexity is waiting for you - you won’t be , so as not to waste time rewriting code.
class DouAPI(object): def method(self, method, values=None): if values is not None: values['limit'] = 10000 response = requests.get('https://api.dou.ua/{0}/'.format(method), params=values) if response.status_code == 200: return response.json()['results'] else: message = 'A request to the Dou API was unsuccessful. The server returned HTTP {0} {1}.' return message.format(response.status_code, response.reason) Calling the “method” function, which accepts a method name that matches the required URL and key-value set ( HTTP Headers ), returns the result as a JSON format (the same set of value keys) in a successful case, and just the string with the error code and the reason answer otherwise (try not to do so; it’s better to create your own custom exceptions separately, as written here or here ).
The class that the programmer then applies to through the object (everything else that goes beyond the scope of the required tools should be wrapped in private variables and methods ) contains one “lenta” function that returns a class object with the query method, passing the name of the “articles” method and value keys (for example, category and author).
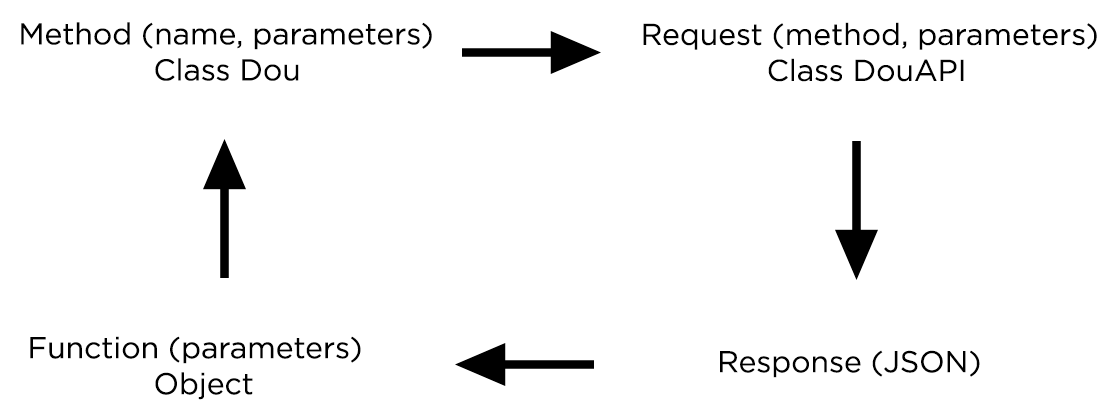
class Dou(): __slots__ = ('_dou') def __init__(self): self._dou = DouAPI() def lenta(self, category=None, tag=None, author=None, date_from=None, date_to=None): values = locals().copy() values.pop('self') values = {header:value for header, value in values.items() if value != None} return self._dou.method('articles', values=values) So in the end, an example of using a wrapper looks like - importing the required class, creating an object, accessing the class method, specifying the parameters of interest, we get back the data in JSON format.
from dou import Dou dou = Dou() news = dou.lenta(category = 'news', date_from='2016-06-01') print(news) If to illustrate the process, the interaction is as follows:
Now consider the moment with the file "__init__.py", which allows to initialize the implementation class at the directory access level, write the following into it ( link to github ).
from .api import Dou The final stage - “setup.py” ( link to github ) describes a series of data that is necessary to build a project from source (more here ) - becomes clearer in practice when interacting with archiving and distribution of a package. Describe something unnecessarily, everything should be intuitive to understand.
try: from setuptools import setup except ImportError: from distutils.core import setup setup( name='DouAPI', version='1.0.0', author='DmytryiStriletskyi', author_email='dmytryi.striletskyi@gmail.com', url='https://github.com/DmytryiStriletskyi/DouAPI', description='Dou API wrapper', download_url='https://github.com/DmytryiStriletskyi/DouAPI/archive/master.zip', license='MIT', packages=['dou'], install_requires=['requests'], classifiers=[ 'License :: OSI Approved :: MIT License', 'Programming Language :: Python :: 2.7', 'Programming Language :: Python :: 3.4', 'Programming Language :: Python :: 3.5', ] ) Python Package Index (PIP)
There are many instructions for installing packages in a common directory on the net, so in this article I will describe a single method that turned out to be the most convenient and productive for me:
- Register the profile in PyPI ;
- Install the “Twine” utility to register and download packages (read more here ) right at the root of the project - “pip install twine”;
- We complete the distribution kit - “python setup.py sdist”;
- The next stage is “wheels”, this is a modern distribution format (actually archived data) of packages - “python setup.py bdist_wheel” (more here and here );
- Registration of the project - it is necessary to transfer the specified metadata (“setup.py”), which are located in the PKG-INFO file (located inside the archived project);
- The final stage - download the package - “twine upload dist / *”.
A detailed manual is located at the link , there is a variant of using also a test server and authorization from the catalog - here in the network material is available in Russian.
The remaining interactions occur through a personal account in PyPI: deletion, editing, history log, releases, roles, and so on.
Package Repository
If the work done in the future can be claimed by the audience, you need to take the following number of measures: create a repository itself, issue the title page of the project (README.md), connect testing and choose a license. If everything is clear with the first two files, the following require clarification.
Open Source License
There are a wide variety of licenses, but MIT License , Apache License, and GPL occupy leading positions. I use the first one - it allows the use and modification of the code in any way (subject to the availability of copyright), and also has a small size. There are also disadvantages - there is no patent law inherent in other licenses, but for small projects this license fits well.
For example, this is how the license in my repository looks like - MIT License , Github will put the license in the top panel of the repository.
Testing the project
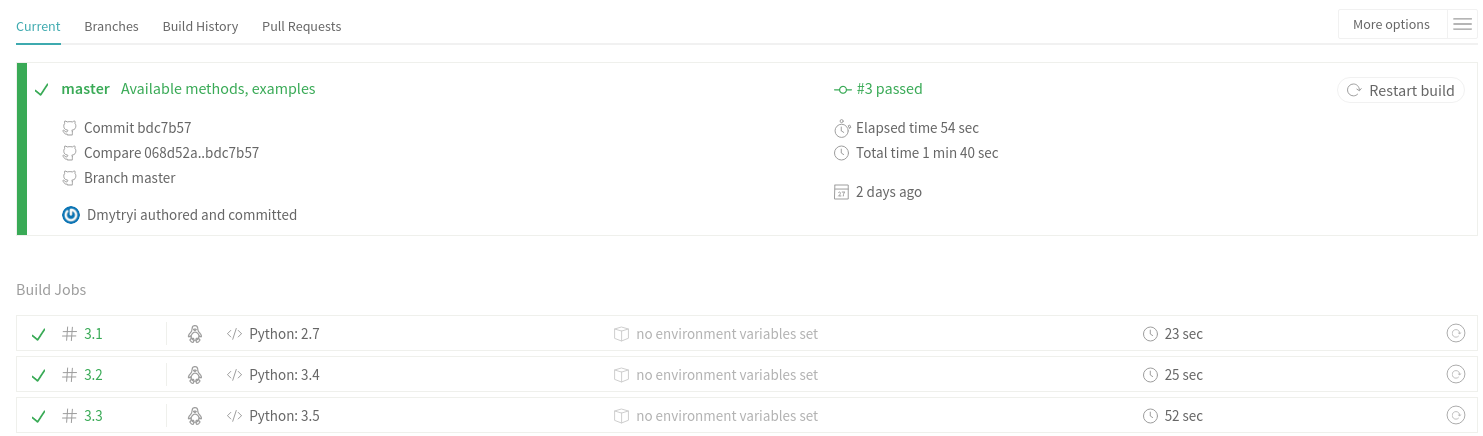
Travis CI - if you describe it in simple words, then every change in your project is tested on the environments you specified. This platform is quite easy to use - we place a file ( link to github ) with the name “.travis.yml” in the root directory, which indicates: programming language, necessary versions, language interpreters, which dependencies to install during integration and deployment on the server, plugin testing and some other parameters.
There are a lot of advantages, besides the testing itself - a convenient interface with many displays of testing status, errors, history, quick connection, checking user commits to your project before merging. Travis also reports results by mail.
First of all, install the hook on the repository, then add the file “.travis.yml”, then push the changes in the project and observe the results.
I would be glad if this article will help someone in the development of new material or awaken interest in this area. Send your questions and tips, if you have them, to private messages.
Source: https://habr.com/ru/post/320264/
All Articles