Alcatel Lucent - setting dect-phone
Hello, friends! I would like to share with you my experience on the settings of Dect phones based on Alcatel Lucent.
I will try to describe everything in detail to you, but first I will tell you why I undertook to write this post. When I needed to configure and add Dect phones to the network, unfortunately, I couldn’t find anything on the Internet to solve this problem.
So, let's begin…
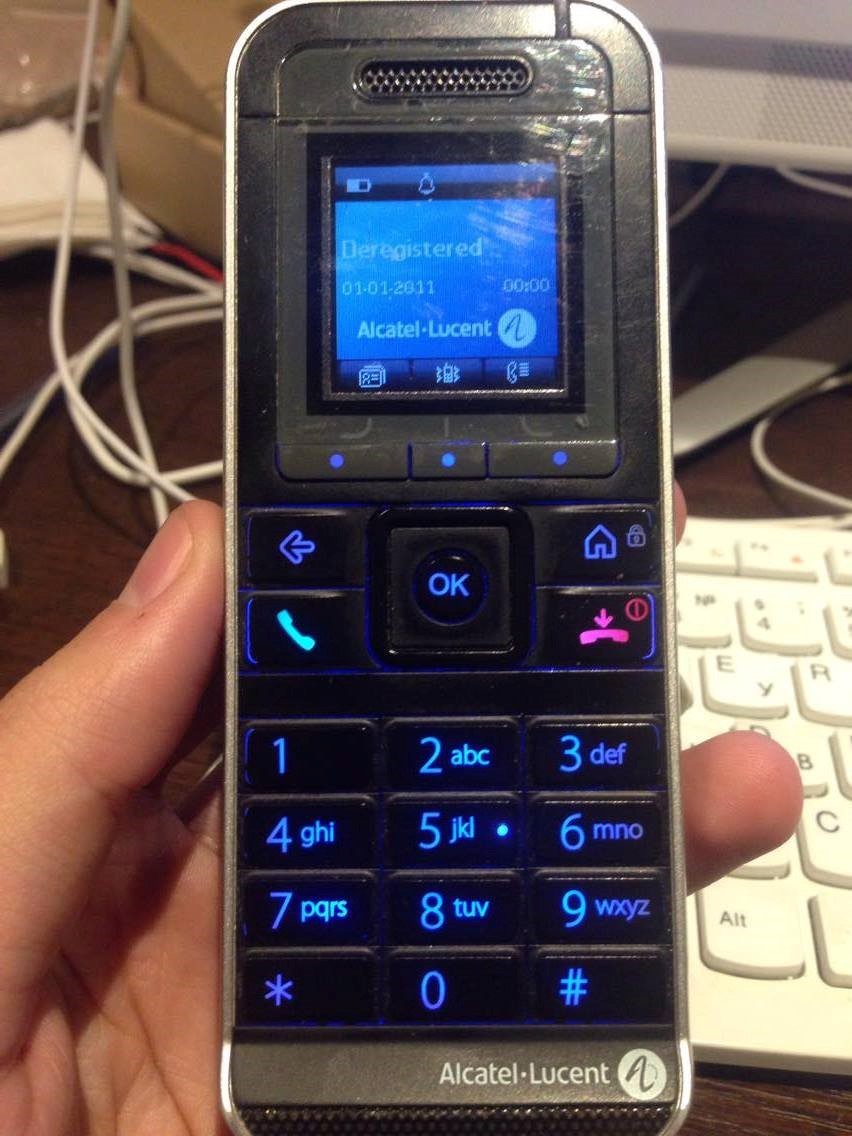
In my office (by the word “in the office”, MDF is meant by the people as “server”) there is an Alcatel-Lucent model: 8232 DECT Handset, which needed to be added to our local PBX (I’ll note that the telephone network in the institution, where I work, also Alcatel-ovsky - Alcatel-Lucent OmniPCX Enterprise).
')
• Open the command line (cmd.exe), enter the manage ip address of our mini PBX.
• Connect to PBX via telnet.
• Enter the command:
•> telnet 192.168.xx.xx - press ENTER, the User Authentication window appears.
• Enter the username and password.
Then this window opens (see example below):

• After that we introduce a new command on our mini PBX:
(1) xa000000> mgr
The “mgr” command will allow you to enter the menu and start administration.
Such a picture should appear (see below).

• Go down to Users, press ENTER.
This picture appears:
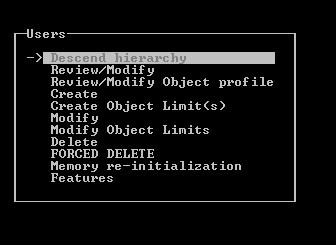
• Select the item "Create".
There is a window where we have to create our number, which will be attached to the Dect telephone model 8232.
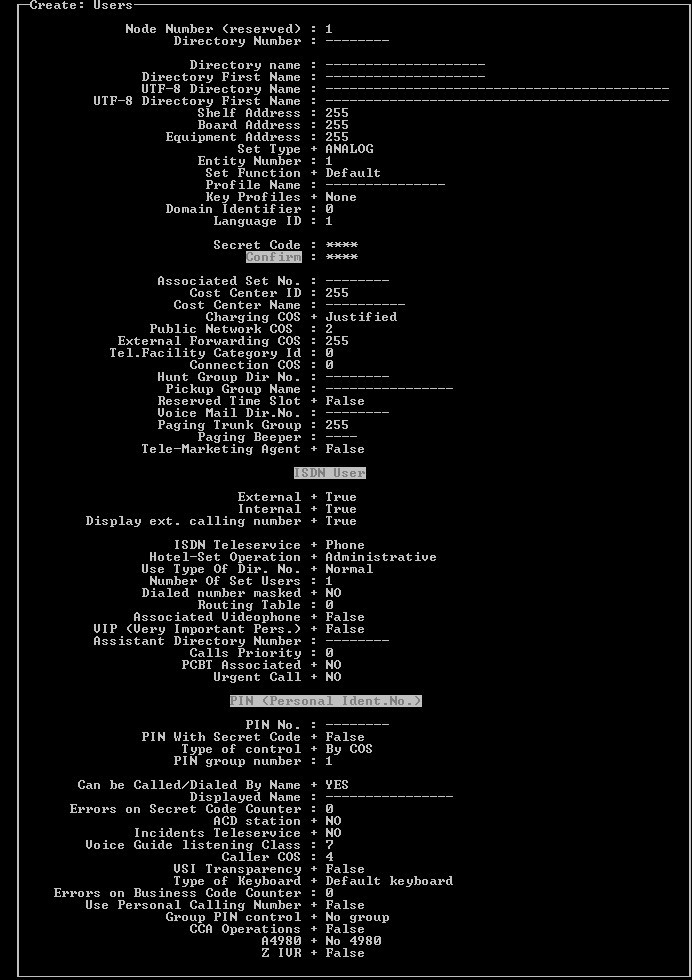
• In the top photo, where the Directory Number item indicates the number we would like to give to our phone. In my case, the number would be 8779.
• A Directory Name is the person to whom this number will belong, that is, you must specify the name of the employee or the position of the employee. I enter in this line: Test.
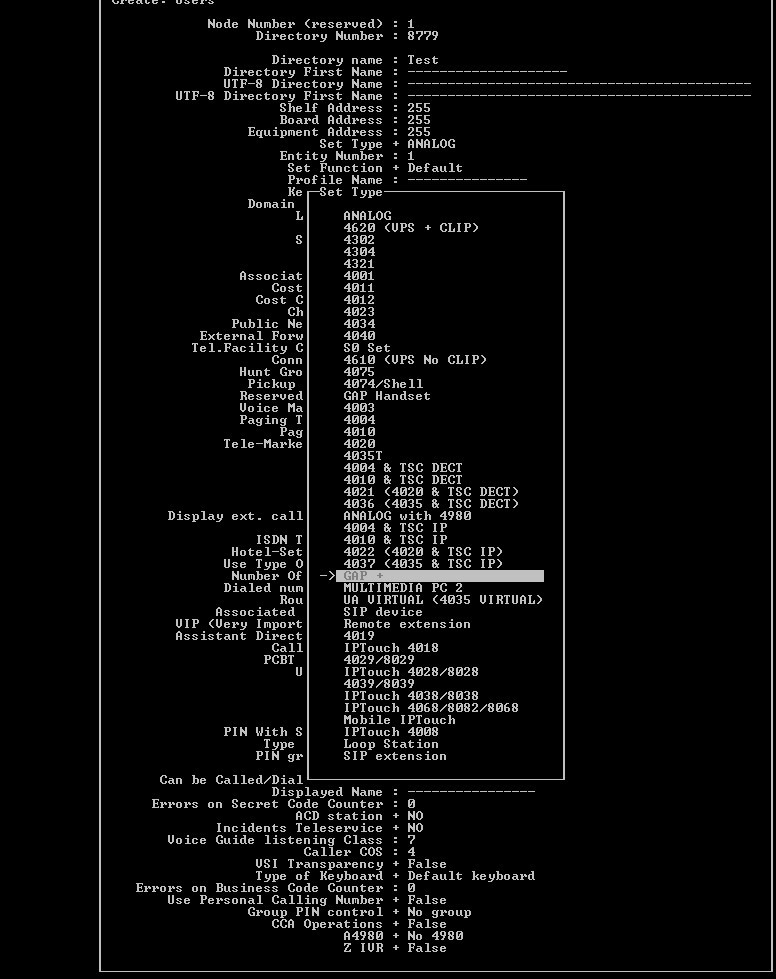
The most important thing here is not to forget to choose the type of phone.
• Where it says Set Type, go in and select GAP +.
• After selecting GAP +, carefully look at the item “Public Network COS”. This item gives priority to the owner of the number in the ability to make calls to mobile, to international calls. The higher the number, the more priority in calls from the owner of the number.
• Press F1, this window appears:
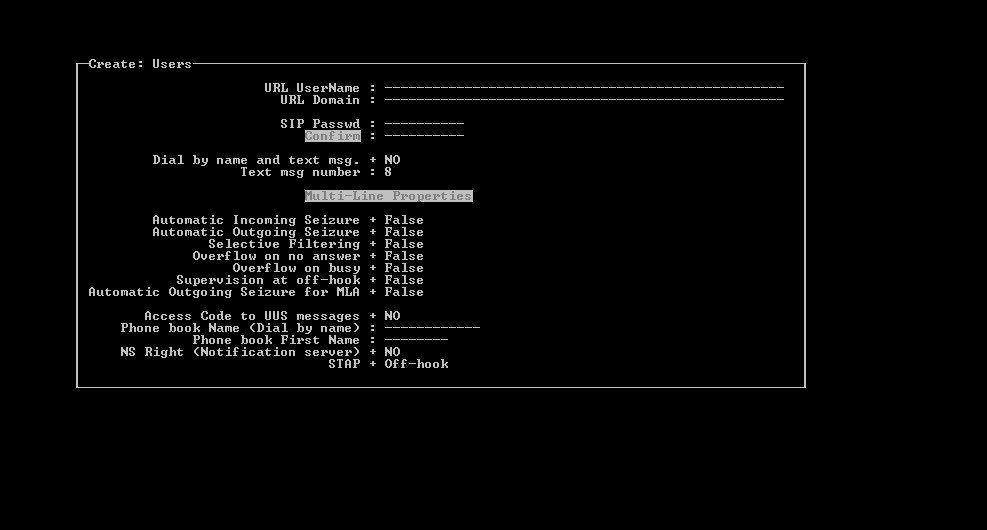
• Press F1 again.
We get this picture:

Now our room is ready, the most interesting remains.
• Add our number to the Dect-phone and check its operation.
We get a full-featured phone, which I mentioned above. For more information about Dect telephony, you can use such a source as: Wikipedia (there are many interesting articles about dect networks).
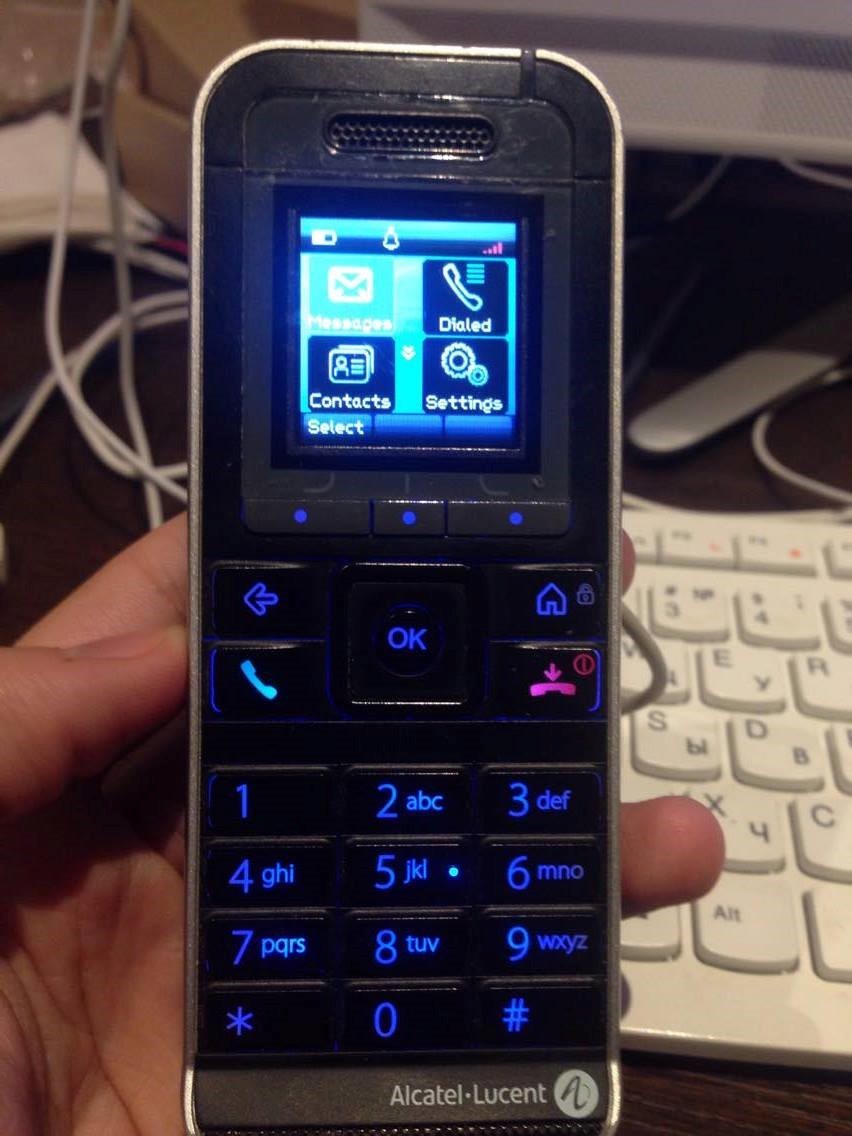
• To enter the menu, press the OK button in the middle. This picture should appear (see photo):
• Go down and find Settings → Reset settings and click OK. (see photo).
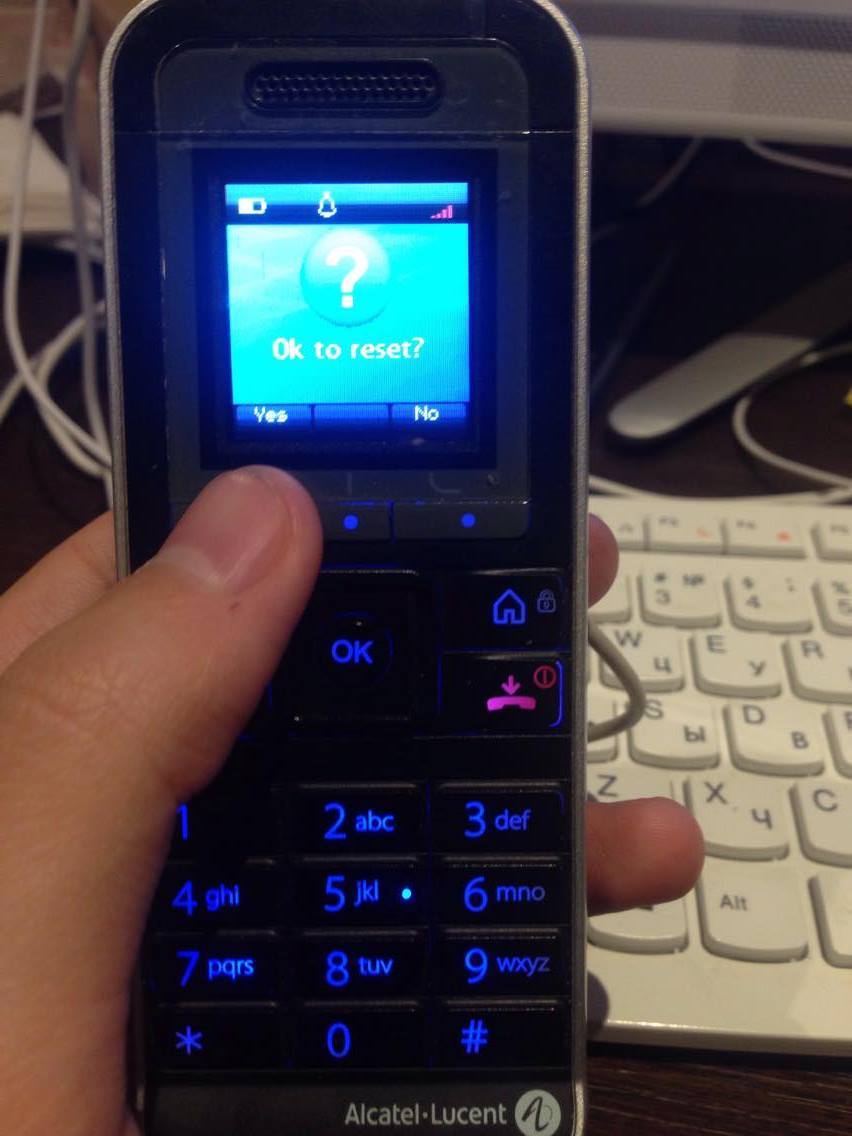
• We see such a picture (see photo).
• Press Yes (left button, my finger points to it, see photo).

Further, the most interesting:
• Phone asks for access code.
I have this code four zeros (0000), we enter further the phone reboots and turns on again (if after this the phone did not receive the deregister status, it should appear on the screen after the reboot, go down and do the deregister again).
Access code is the same: 0000.
Attention:
After resetting the settings and deregistera, the phone is like new. Now you need to add a number.
• Turn on the phone and he asks us: Make an autoinstall?
• Click Yes.
At the same time, we open the command line and connect via telnet to our mini PBX and enter the command indicated below.
I will emphasize one thing: on the Alcatel Lucent PBX, to confirm a command, you should always press F1, to cancel or go back after successfully adding the number, press F2.
The figure below shows the command we need to enter:

• After the question mark press Enter without changing anything. We accept the default conditions.
• This window appears:

• Press Enter again and voila.
• See how our Dect-phone accepted the number and was registered.
PS: It is necessary to know that during the above work, you should be at the nearest Access point for Dect-phones. Thank you for your time on this entry, I will be glad to help in this matter, and if you need to talk in depth, on this occasion with each person personally.
I will try to describe everything in detail to you, but first I will tell you why I undertook to write this post. When I needed to configure and add Dect phones to the network, unfortunately, I couldn’t find anything on the Internet to solve this problem.
So, let's begin…
In my office (by the word “in the office”, MDF is meant by the people as “server”) there is an Alcatel-Lucent model: 8232 DECT Handset, which needed to be added to our local PBX (I’ll note that the telephone network in the institution, where I work, also Alcatel-ovsky - Alcatel-Lucent OmniPCX Enterprise).
')
• Open the command line (cmd.exe), enter the manage ip address of our mini PBX.
• Connect to PBX via telnet.
• Enter the command:
•> telnet 192.168.xx.xx - press ENTER, the User Authentication window appears.
• Enter the username and password.
Then this window opens (see example below):
• After that we introduce a new command on our mini PBX:
(1) xa000000> mgr
The “mgr” command will allow you to enter the menu and start administration.
Such a picture should appear (see below).
• Go down to Users, press ENTER.
This picture appears:
• Select the item "Create".
There is a window where we have to create our number, which will be attached to the Dect telephone model 8232.
• In the top photo, where the Directory Number item indicates the number we would like to give to our phone. In my case, the number would be 8779.
• A Directory Name is the person to whom this number will belong, that is, you must specify the name of the employee or the position of the employee. I enter in this line: Test.
The most important thing here is not to forget to choose the type of phone.
• Where it says Set Type, go in and select GAP +.
• After selecting GAP +, carefully look at the item “Public Network COS”. This item gives priority to the owner of the number in the ability to make calls to mobile, to international calls. The higher the number, the more priority in calls from the owner of the number.
• Press F1, this window appears:
• Press F1 again.
We get this picture:
Now our room is ready, the most interesting remains.
• Add our number to the Dect-phone and check its operation.
We get a full-featured phone, which I mentioned above. For more information about Dect telephony, you can use such a source as: Wikipedia (there are many interesting articles about dect networks).
• To enter the menu, press the OK button in the middle. This picture should appear (see photo):
• Go down and find Settings → Reset settings and click OK. (see photo).
• We see such a picture (see photo).
• Press Yes (left button, my finger points to it, see photo).
Further, the most interesting:
• Phone asks for access code.
I have this code four zeros (0000), we enter further the phone reboots and turns on again (if after this the phone did not receive the deregister status, it should appear on the screen after the reboot, go down and do the deregister again).
Access code is the same: 0000.
Attention:
After resetting the settings and deregistera, the phone is like new. Now you need to add a number.
• Turn on the phone and he asks us: Make an autoinstall?
• Click Yes.
At the same time, we open the command line and connect via telnet to our mini PBX and enter the command indicated below.
I will emphasize one thing: on the Alcatel Lucent PBX, to confirm a command, you should always press F1, to cancel or go back after successfully adding the number, press F2.
The figure below shows the command we need to enter:
• After the question mark press Enter without changing anything. We accept the default conditions.
• This window appears:
• Press Enter again and voila.
• See how our Dect-phone accepted the number and was registered.
PS: It is necessary to know that during the above work, you should be at the nearest Access point for Dect-phones. Thank you for your time on this entry, I will be glad to help in this matter, and if you need to talk in depth, on this occasion with each person personally.
Source: https://habr.com/ru/post/320148/
All Articles