Step by Step Guide: Building JDK9 from Source on Windows 10
Recently, with the assembly of the JDK in Windows, everything became good and pleasant, so I will share my joy and sign for how it is done.
Every second who tries to collect something under Windows will receive a deep psychological trauma, and he expects the following emotions from the assembly in advance:

As for the JDK, if you don’t go off the gingerbread path and do exactly the same as in this manual, there will be no problems. Possible problems are indicated in the text.
')
The general meaning of what is happening: install compilers (JDK8, Visual Studio 2013), build environment (GNU / Cygwin) and a set of standard packages for it, compile Freetype sources, fill in the JDK repository, configure, make, java -version.
We will build Java and C ++ (since you are reading this article, you probably already know), so it's better not to build in a microwave oven. You need a workstation or laptop with a normal processor, and, preferably, an SSD instead of a hard drive for the project's build directory. In addition to the assembly, some time will be spent on downloading the source code and installing Visual Studio.
You will need an internet connection and windows admin rights. The problems of users of corporate infrastructure, where all this is not, are not considered here.
Every second who tries to collect something under Windows will receive a deep psychological trauma, and he expects the following emotions from the assembly in advance:
As for the JDK, if you don’t go off the gingerbread path and do exactly the same as in this manual, there will be no problems. Possible problems are indicated in the text.
')
The general meaning of what is happening: install compilers (JDK8, Visual Studio 2013), build environment (GNU / Cygwin) and a set of standard packages for it, compile Freetype sources, fill in the JDK repository, configure, make, java -version.
We will build Java and C ++ (since you are reading this article, you probably already know), so it's better not to build in a microwave oven. You need a workstation or laptop with a normal processor, and, preferably, an SSD instead of a hard drive for the project's build directory. In addition to the assembly, some time will be spent on downloading the source code and installing Visual Studio.
You will need an internet connection and windows admin rights. The problems of users of corporate infrastructure, where all this is not, are not considered here.
Install JDK8
for buta.
Download link .Installing Visual Studio 2013
(Express version will do).
Download link . If you install the full version, then during installation you will be given a choice of components: it is enough to install only those components that relate to C ++ and the Windows SDK.
When installing Express, there will be no choice - fortunately, it itself installs exactly what we need. It looks something like this: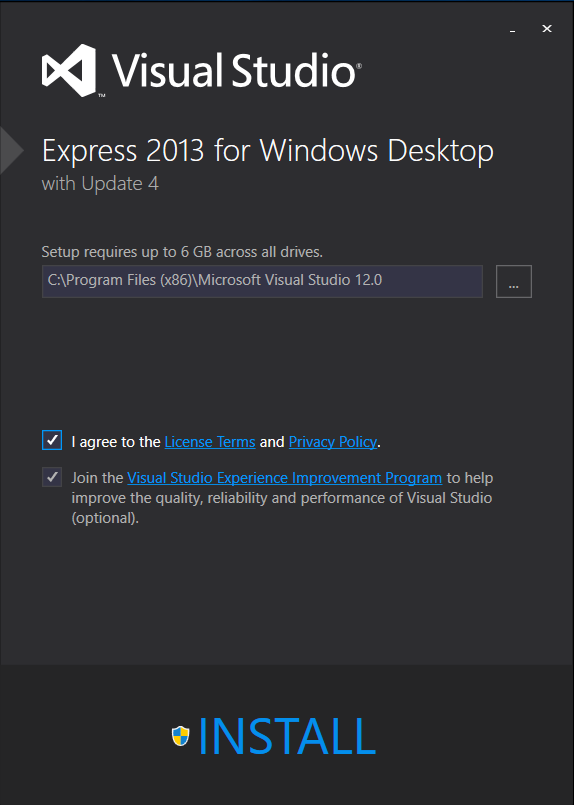

After installation, be sure to restart the operating system.
Important : Visual Studio 2013 needs to be installed. Not lower because the 2013 version is mentioned in the Build Readme. Not higher because if you try to build with Visual Studio 2015 installed, the JDK collector will see the compiler, but it will break with an error:C compiler cannot create executables
If you look in the config.log, the reason becomes clear:LINK : fatal error LNK1104: cannot open file 'LIBCMT.lib'
If stupid to doexport LINK="/NODEFAULTLIB:libcmt.lib"
then it will fall apart:unresolved external symbol mainCRTStartup.
If someone in the comments knows how to fix this error painlessly and start up in 2015, I will be very grateful. It is unpleasant to be locked onto an outdated version of the compiler, even if it is free.Install Cygwin.
Download link .
Important : it is now accepted to use msys2 instead of Cygwin. Unfortunately, the JDK build will immediately fail with an error:configure: error: /usr/bin/bash /x/git/openjdk9/common/autoconf/build-aux/config.sub x86_64-pc-msys failed
If you try to register msys in the same way as Cygwin is registered there, the error changes:unsupported operating system msys
If any hero in the comments tells how to properly register msys, that would be great.Installing packages for Cygwin
described in the Build Readme.
In parentheses is the category of the package, after the sign "-" for what we put it.
The purpose of each executable can be read in mana, but to collect this you do not need to know.- binutils (devel) - ar.exe
- make (devel) - make.exe
- m4 (interpreters) - m4.exe
- cpio (utils) - cpio.exe
- gawk (base, interpreters) - gawk.exe
- file (base) - file.exe
- zip (archive) - zip.exe
- unzip (archive) - unzip.exe
- procps-ng (system) - free.exe
For perturbed by such a large set of dependencies - say thank you for not having to install Python and Ruby! :)
For those who have never come across a couple of comments with Cygwin:- Installing packages looks something like this:
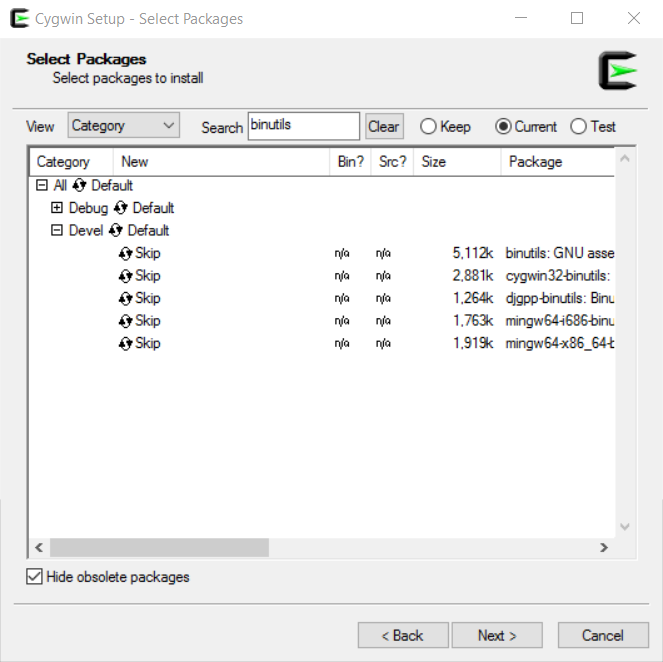
- There are many packages, for example, with the word binutils in the name.
You need to choose a package that exactly matches the name from the list corresponding to the group from the list. (Of course, if you know exactly what you are doing, your will :)) - The package ownership of groups in Cygwin changes from time to time. In particular, the groups listed in this list no longer coincide with the groups from the Build Readme. If the group from the list does not exist, select the appropriate one (and send me a personal message so that I update this instruction).
- When installing, you will be asked to specify the installation directories. Try to set the path with the shortest possible name, for example: C: / cygwin and C: / cygpack. Or even c: / cw and c: / cp. This will help to avoid errors with unnecessarily long file names that Windows Explorer cannot handle (NTFS can sometimes process them, and Explorer cannot yet).
- After the initial installation, Cygwin itself has no packages for managing packages. To install additional packages, you need to restart setup.exe. This program will not install Cygwin from scratch, but will only get what you need. Between restarts, the path to the directories is saved.
- The choice of the mirror affects the speed, but we need to download very few packages, so what to choose - on average, all the same. Choose the very first mirror in the list.
- Gui to install packages is a bit strange, but you figure it out :)
- As soon as you enter the package name in the search field, the corresponding list is redrawn automatically - you do not need to press enter.
- To install a package, you need to click the status button many times (arrows closed in uroboros with skip or something else) so that the status label changes to the version of the package that will be installed
- Sometimes the installer becomes bad in different ways. Don't panic. If the installation is in the middle, then the easiest way to get everything back is to remove C: / Cygwin, or wherever you install it. It is better not to hope that the checker checker for broken under-loaded packages will be able to find a breakdown, fix it by complete removal yourself.
No need to download make
In past instructions it was often supposed to download and prescribe your make. According to the latest observations, it does not make sense to do this, the make that the package installed in Cygwin is quite enough.
Moreover, the official site contains an outdated version of make, so with it you will get an error like:The specified make (by MAKE=/cygdrive/c/Program Files (x86)/GnuWin32/bin/make.exe) is not GNU make 4.0 or newer.
That is, you will have to make make either manually or search for already collected on questionable file dumps, as we once used to pick up rpm's on them.
If you really need your own make, then to use it, you need to set theMAKE=///make.exeparameter in configure. Yes, other parameters begin with -, for example - with-freetype, but MAKE should be in this form.No need to install DirectX SDK
If you really need it (Java 3D?), You know about it, and you know what to do. There will be no instructions here.We collect FreeType
It is necessary to collect FreeType, even if you really do not want to and you personally do not need it.- Download link .
There are two groups of downloads: two at the top (Complete package and Sources), and six lower (Binaries ... Original source). The Sources element is in both groups. We need to download the zipnik of the Sources element from the second group.
Note: Shakes a hundred years, what to do? Nothing can be done, this Sorsforge. When the download timer is displayed, try clicking on the try another mirror link and select something in France. The French do not stumble on speed. - Create the src / freetype / 2.3.5 / freetype-2.3.5 / lib directory
- Inside the src / freetype / 2.3.5 / freetype-2.3.5 / builds / win32 / visual directory is a solution for the Studio.
- Open up. If you have several Studios, it’s better to open out of harm's way in 2013. I tried the build from 2015, it also works.
- When opening a solution, Studio will ask for a one-way upgrade. We agree (if several items are displayed in the list, we agree for everyone).
- After that, the Studio may hang tightly, having ceased to be displayed in the Manager in addition. Windows task. This is where Sysinternals Process Explorer comes to the rescue:
technet.microsoft.com/ru-ru/sysinternals/processexplorer.aspx
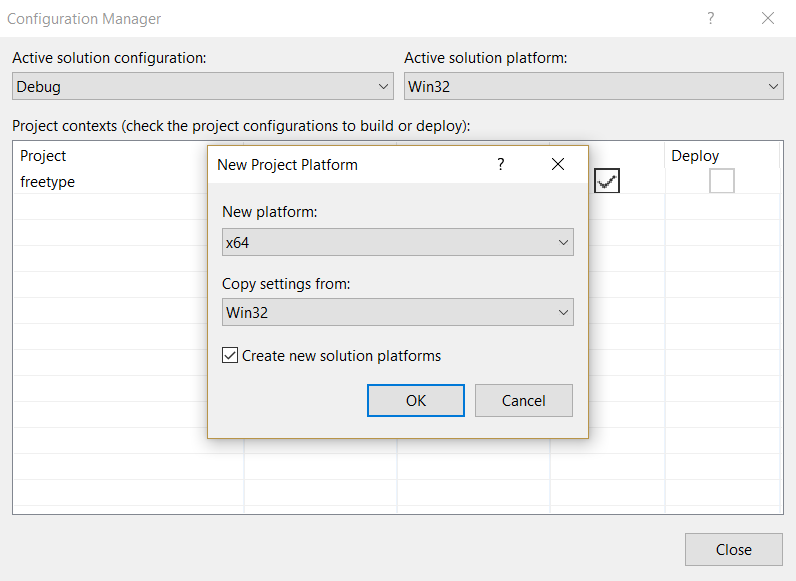
It is necessary to find in the tree devenv.exe, and first kill all its descendants. After that, you can kill devenv.exe itself (before that, it simply does not respond to the command to die). - We go to Configuration Manager, in the Platform dropout we select New, New platform: x64, Copy settings from: Win32, OK, Close.


- In the same place, choose the build type - Release Multithreaded (the default is Debug)

- In Solution Explorer, right click on the project freetype, properties.

- Specify the Output Directory: src / freetype / 2.3.5 / freetype-2.3.5 / lib (the directory is relative to the root of the downloaded FreeType). We check that the configuration type is set in the Static library (.lib).

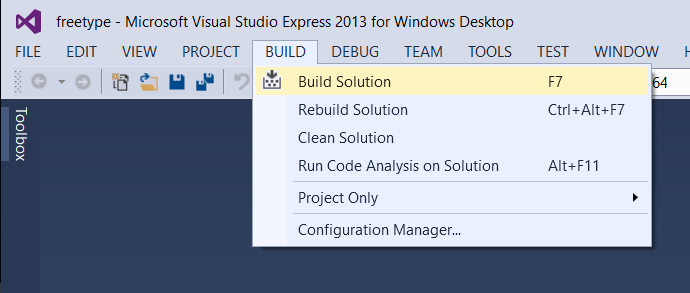
- Close the freetype Property Pages window. We collect the project through Build → Build solution.
- Now you need to change the build from lib to dll.
Repeat the steps:
In Solution Explorer, right click on the project freetype, properties. Specify the Output Directory: src / freetype / 2.3.5 / freetype-2.3.5 / lib. Check that the configuration type is set in the Dynamic library (.dll)
Close the freetype Property Pages window. We collect the project through Build → Build solution. - Open the src / freetype / 2.3.5 / freetype-2.3.5 / lib directory in Explorer and check the composition of the files: freetype.dll, freetype.lib, freetype.exp.
The key fact here is this: now we have in the same root directory (src / freetype / 2.3.5 / freetype-2.3.5) the inclusions (src / freetype / 2.3.5 / freetype-2.3.5 / include) and the libraries (src / freetype / 2.3.5 / freetype-2.3.5 / lib). - Done! Now we have a measly 600 kilobytes, for which we have been tormented for the last ten minutes.
- Download link .
Fill the JDK source from the repository
- Download and install Mercurial (TortoiseHg): tortoisehg.bitbucket.org/download/index.html
- Download the trees extension for Mercurial
File:
gist.githubusercontent.com/olegchir/8267049ed48f7975aa8ef7d7c1515349/raw/fbe90ac1c639f6c209bc7cebbdcc7ebbd848c734/trees.py
Remember where we downloaded (for example: C: /opt/trees.py)
Important! According to the instructions from here:
openjdk.java.net/projects/code-tools/trees
We would need to download this file:
hg.openjdk.java.net/code-tools/trees/raw-file/tip/trees.py
Unfortunately, at the time of this writing, the integration of this extension with the new version of Mercurial is broken. There is the following bug, with the attached patch:
bugs.openjdk.java.net/browse/CODETOOLS-7901672
To prevent you from patching trees on your own, I patched it and laid it out here:
gist.githubusercontent.com/olegchir/8267049ed48f7975aa8ef7d7c1515349/raw/fbe90ac1c639f6c209bc7cebbdcc7ebbd848c734/trees.py
In the future, when this ticket is closed, it is worth using the basic version. If you are reading this instruction, when the ticket is already closed - write me, I will correct this item. - Create a .hgrc file in the user's home directory (% USERPROFILE% \. Hgrc).
Since Windows has a bad attitude towards creating files starting with a dot, it’s easiest to open the Cygwin console and execute the command:touch /cygdrive/c/Users/olegchir/.hgrc
Inside the file we write:[extensions] purge = trees = C:\opt\trees.py
Slash on the way to the py-file - backward. - Open the console (cmd.exe), go to the directory where we want to store the source (cd C: \ git)
- Clone repository:
hg tclone http://hg.openjdk.java.net/jdk9/dev 9dev
It takes a lot of time.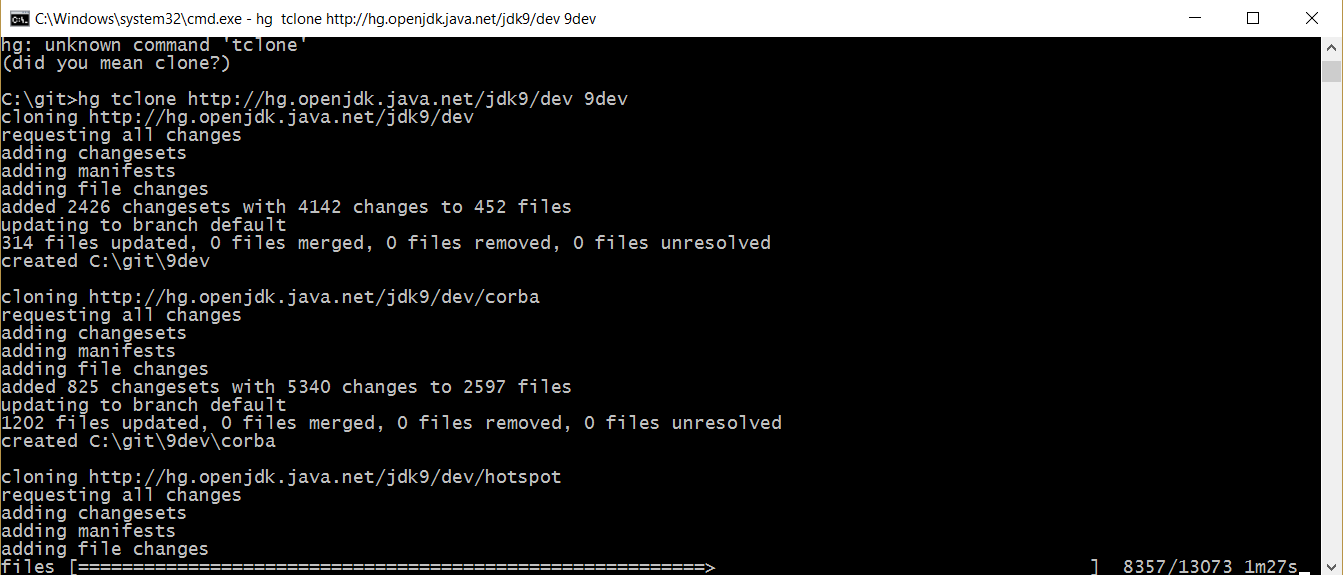
Important! In the future, the link may change. Watch the new link here: openjdk.java.net/guide/repositories.html
Important! Try to set the path with the shortest possible name, for example: C: / hg. This will help to avoid errors with unnecessarily long file names that Windows Explorer cannot handle (NTFS can sometimes process them, and Explorer cannot yet). It will help not to get into a stupid situation when you have already cloned the repository, but you still cannot delete it.
Unpleasant . When the error "abort: stream ended unexpectedly". First try restarting hg tclone a few more times. If the error continues to repeat, then you will have a chore of manual work. Remember which project was not unloaded to the end (for example, langtools). Restart everything with this argument:hg tclone -r 100 http://hg.openjdk.java.net/jdk9/dev 9dev
This will load only 100 changesets and allow the tclone operation to complete.
Immediately after this, go to the project directory that did not download (for example, langtools) and execute hg tpull -u 1000.
And then add 1000 changesets each:
hg tpull -u 1000
hg tpull -u 2000
hg tpull -u 3000
When the revisions end, you need to go to the root (9dev), and execute the “hg tpull -u” command there (without specifying the number of revisions).
If after that the same project falls, go back to it, and with a smaller step, resume the remaining revisions exactly to the end, go back to the root and repeat hg tpull -u without arguments.
If after that another project falls, go to its directory, and repeat until everything is bent to the end.
- Download and install Mercurial (TortoiseHg): tortoisehg.bitbucket.org/download/index.html
Putting JDK
- Open the Cygwin console (NOT cmd.exe), go to the directory with the cloned sources.
- Execute the command:
./configure --enable-debug --with-target-bits=64 --with-boot-jdk=/cygdrive/c/opt/Java/jdk1.8.0_111 --with-freetype=/cygdrive/c/my/opt/java/freetype-2.3.5-1-src/src/freetype/2.3.5/freetype-2.3.5
The paths to the files should coincide with those that we received during the execution of the instruction:
--with-boot-jdk points to the directory where you downloaded JDK8
--with-freetype points to the directory inside the freetype sources, where there are include and lib subdirectories, and in lib you have compiled .dll and .lib with 64-bit free type
paths to files must not be native, but begin with / cygdrive. - We wait for a long time until it is configured. Errors should not be.
The only expected error is when using Visual Studio Express:Cannot locate a valid Visual Studio or Windows SDK installation on disk
Usually it can be fixed a small dirty hack. Go to the MSVS installation directory (usually C: / Program Files (x86) / Microsoft Visual Studio 12.0 / VC).
We see that there is no amd64 directory, but there is x86_amd64.
Copy it with a new name: amd64.
Go inside amd64, and copy the file vcvarsx86_amd64.bat with a new name: vcvars64.bat
Restart configure with the new parameter: --with-tools-dir:./configure --enable-debug --with-target-bits=64 --with-boot-jdk=/cygdrive/c/opt/Java/jdk1.8.0_111 --with-freetype=/cygdrive/c/my/opt/java/freetype-2.3.5-1-src/src/freetype/2.3.5/freetype-2.3.5 --with-tools-dir="/cygdrive/c/Program Files (x86)/Microsoft Visual Studio 12.0/VC/bin/amd64" - As a result of running configure, we see the following text:
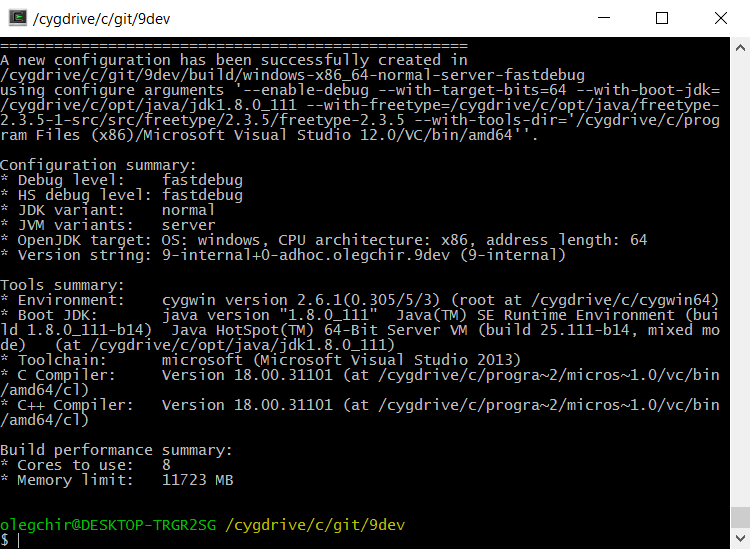
Configuration summary:
* Debug level: fastdebug
* HS debug level: fastdebug
* JDK variant: normal
* JVM variants: server
* OpenJDK target: OS: windows, CPU architecture: x86, address length: 64
* Version string: 9-internal + 0-adhoc.olegchir.openjdk9 (9-internal)
Tools summary:
* Environment: cygwin version 2.6.1 (0.305 / 5/3) (root at / cygdrive / c / cygwin)
* Boot JDK: java version "1.8.0_111" Java (TM) SE Runtime Environment (build 1.8.0_111-b14) Java HotSpot (TM) 64-Bit VM Server (build 25.111-b14, mixed mode) (at / cygdrive / c / opt / java / jdk1.8.0_111)
* Toolchain: microsoft (Microsoft Visual Studio 2013)
* C Compiler: Version 18.00.40629 (at /cygdrive/c/progra~2/micros~2.0/vc/bin/amd64/cl)
* C ++ Compiler: Version 18.00.40629 (at /cygdrive/c/progra~2/micros~2.0/vc/bin/amd64/cl)
Build performance summary:
* Cores to use: 8
* Memory limit: 20447 MB - Run the command: make
- We wait for a long time until we meet. At this point, a computer spends a lot of resources - it is worth switching to using another computer, or go to tea.
Check the launch
The directory builds / windows-x86_64-normal-server-fastdebug should appear inside the source directory
Using the console (cmd.exe) go to the directory type:
X: \ git \ openjdk9 \ build \ windows-x86_64-normal-server-fastdebug \ jdk \ bin
And execute the command: java -version
Version 9-internal must be printed.
Troubleshooting
In open source no one can hear your scream
PROFIT
Source: https://habr.com/ru/post/319078/
All Articles