Turn your smartphone into an IoT sensor using Bluemix. Application Development Example

Bluemix is a powerful platform that allows you to quickly, easily create, deploy and administer applications in the cloud. Bluemix is an implementation of the IBM Open Cloud Architecture based on Cloud Foundry open source platform-as-a-service (PaaS).
Using this platform and the IBM Watson IoT Paltform service, you can develop a Bluemix application that will allow you to process, visualize and store data received from a smartphone. This article shows how an ordinary smartphone can be turned into a reliable sensor connected to a network.
What is needed for application development?
')
1. Account in Bluemix (it is possible to register for free trial use). Also, developerWorks Premium members receive a one-year subscription to IBM Bluemix, plus credits of $ 240 to work with cloud technologies in Bluemix.
2. You also need to download and install the Cloud Foundry command line interface .
3. Smartphone with Android OS or iOS.
Immediately after receiving all of the above, you can start working on creating an IoT application in Bluemix. To do this, use the Node-RED mechanism. With it, you can, for example, create the Internet of Things service in order to send MQTT messages to the IBM IoT server in the cloud, as well as receive messages from the server.
The algorithm of action is as follows:
1. Log in to Bluemix with your account (or register for a free trial ).
2. Select Catalog.
3. Click on the Internet of Things Platform Starter.
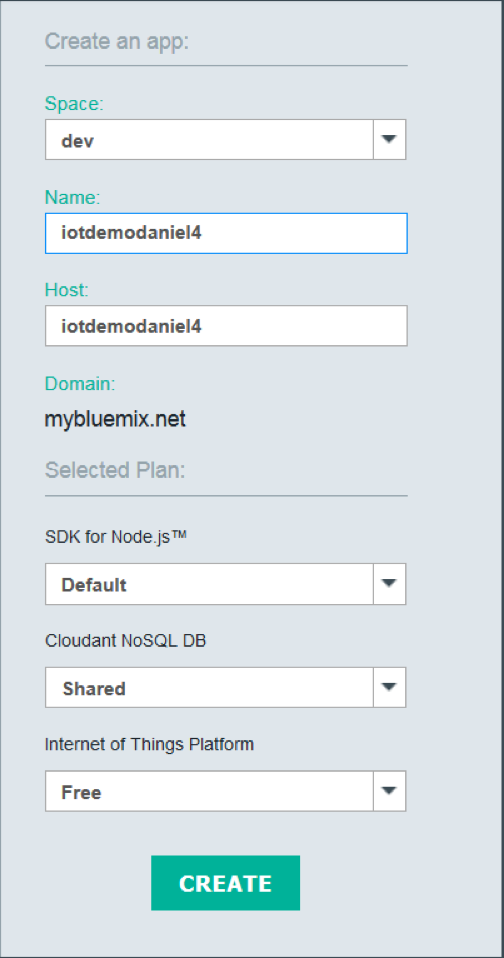
4. Specify the name of your application. This name will also be used as the host name, so it must be unique in Bluemix, for example, iot <your_name>. This example uses the name
iotdemodaniel4 .5. Click the Create button.
6. On the toolbar, select Dashboard and click on the created application (Cloud Foundry or CF APP).
7. Click on the Add a Service or API button.
8. In the left navigation area, select Internet of Things to filter the list of available services. Select the Internet of Things Platform service.

9. Leave all default values and press the Create button.
10. Now we see a message with the Restage button. Click this button to update the application.
Add devices that send MQTT messages to the IoT server
1. On the Bluemix Dashboard, select the application and the new service.
2. On the page of this service, click on the Launch Dashboard button.
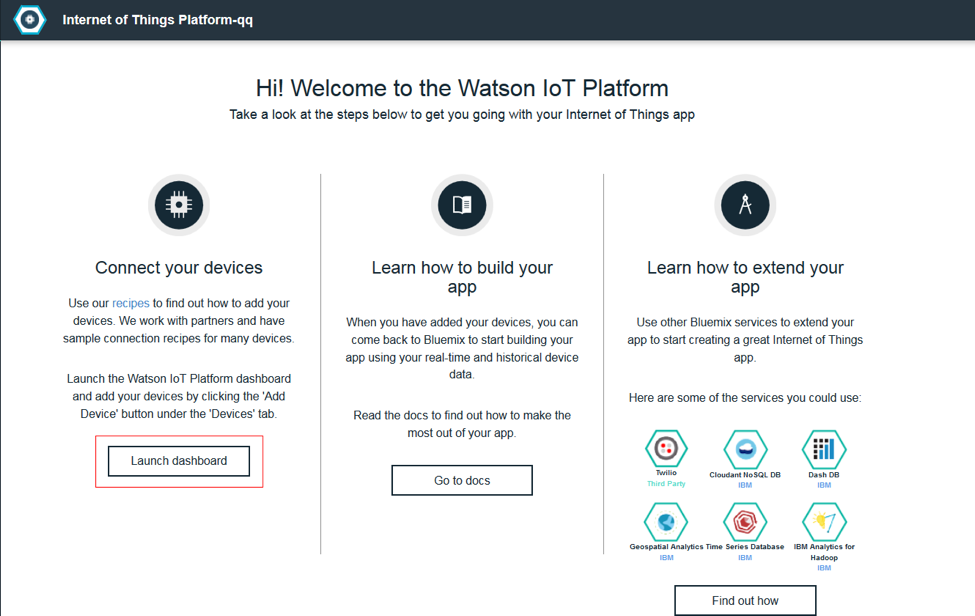
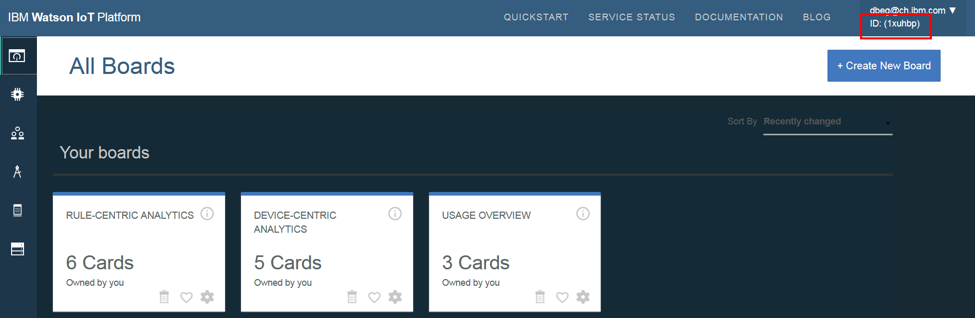
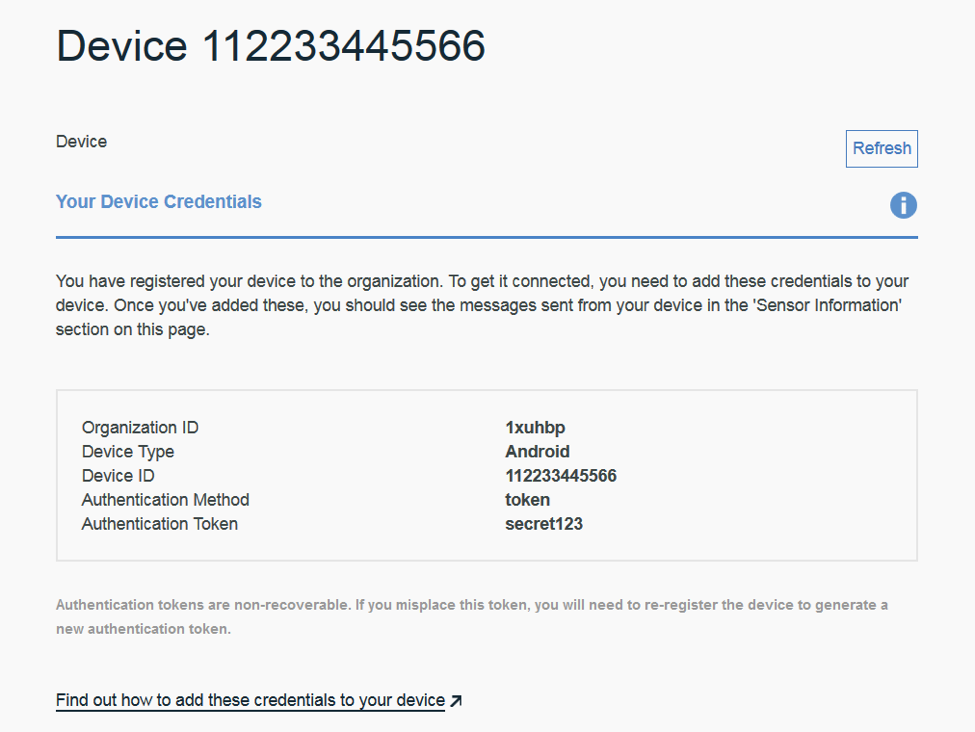
After that, the IBM Internet of Things server panel, a service independent of Bluemix, immediately appears. An application is assigned an Organization ID. It will be needed for the development of a mobile application. Below you can see the identifier with a value of 1xuhbp.
In the left menu that appears when you hover the mouse over it, select Devices. After that, select Add a device and click the Create device type button. You can have several types of devices, and the devices themselves can be many. The device type in this case is a group of devices with common characteristics. They may have the same sensors or some other elements. In the current case, the device type must be Android. This type must be used for the application that we will use later.

Click the Next button. After this, a page appears where you can enter various information about the device, including the serial number or model. In the demo example, we will not enter this data, so just click Next and then again. After that you should return to the Add Device dialog.
Again, click the Next button, where we specify the device ID. This may be, for example, the MAC address of the smartphone. It must be unique. The example shows an address of type "112233445566".
Leave the Meta Data field blank and click the Next button. We also leave the Authentication token field blank and click Next again.
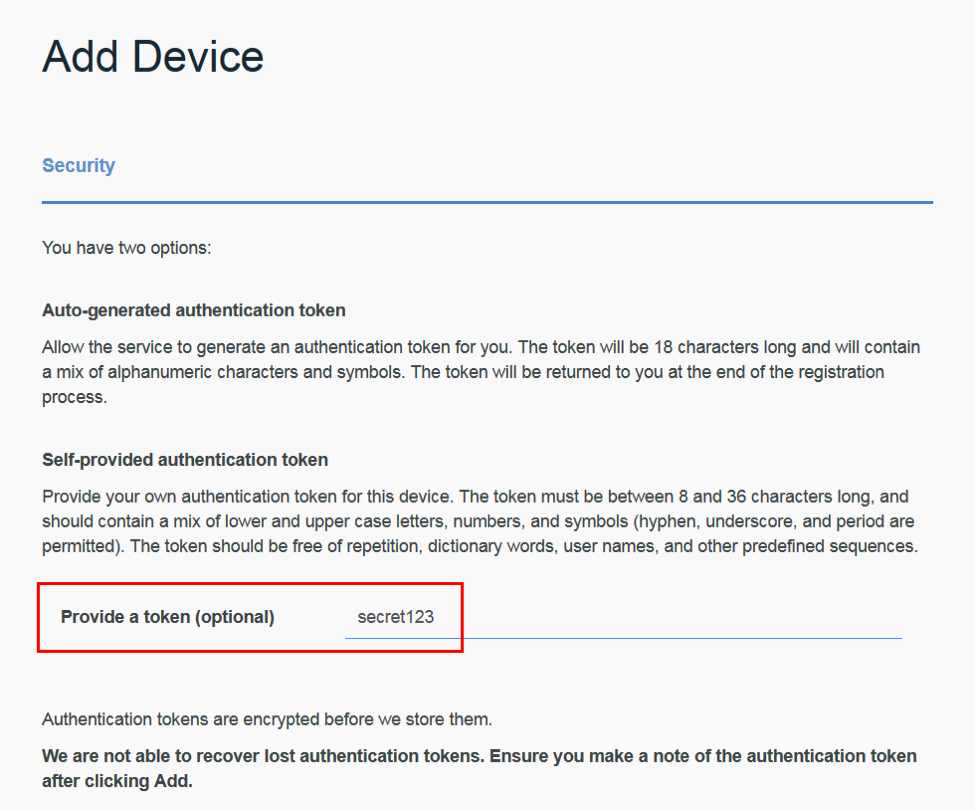
Specify the value of the authentication token. It is better to remember or write it down, because it will be needed later. Click Next.
Click, as proposed, Add, after which we see the generated device.
Close the dialog box. After that, we can send MQTT messages from the device to the IBM IoT server.
Install and configure the application for Android
In order for the smartphone to read and send sensor readings, you must use the IoT Starter for Android app. The source code can be obtained here .
1. After that, the phone needs to go to the Settings> Security menu and, on behalf of the device administrator, allow the installation of applications from unknown sources. To do this, put a mark in the Unknown sources field. Now it is possible to install .apk files not only from Google Play.
2. Open the browser in the phone and enter the following address:
ibm.box.com/v/iotstarterapp
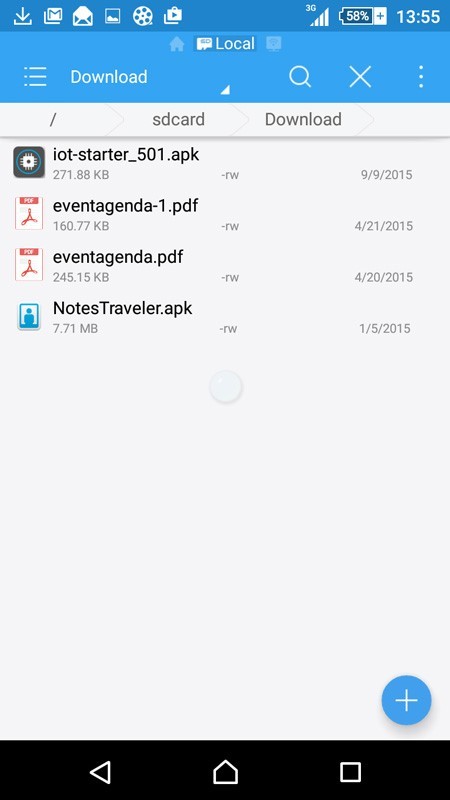
Redirecting to m.box.com and to the iot-starter_501.apk file

3. Click Download;
4. Using the file manager, look for the file in the Downloads directory;
5. In the same directory, click on the iot-starter_501.apk file and click Install.
The IoT Starter application after all the above actions will be installed on your Android device.
After that, you need to perform another important step - to configure the application for Android.
1. Run the IoT Starter app.
2. Specify the following parameters:
• Organization: The organization identifier that was displayed on the IBM IoT server (it was listed at the beginning of the “Adding a device that will send MQTT messages to the IoT server” step). In this guide, this identifier is set to y6spgy.
• Device ID: The device ID that you specified at the end of the “Add a device that will send MQTT messages to the IoT server” step. In this manual, this parameter has the value 112233445566.
• Auth Token: The authorization token that you specified during the "Adding a device that will send MQTT messages to the IoT server."

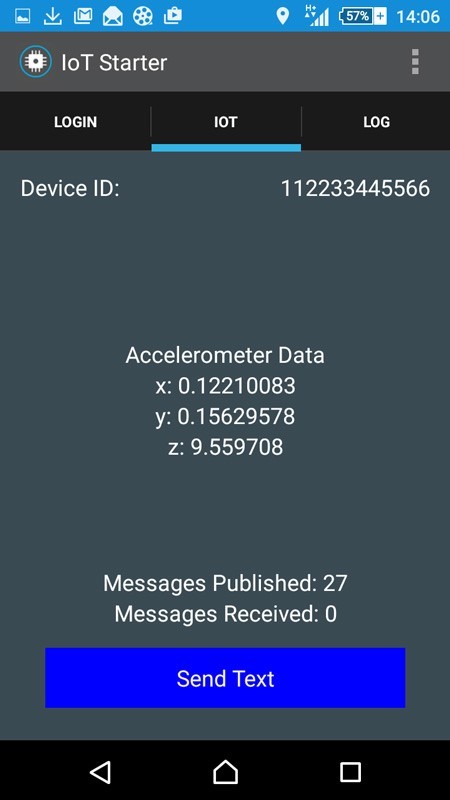
3. Click on the Activate Sensor button, after which the application will start collecting acceleration sensor readings on the smartphone, sending the collected information to the IBM IoT server. The application also displays information about the accelerometer and the number of received or sent messages.
We check the sending of messages from the smartphone to the IoT server
1. Open the IBM IoT server page for the organization on the computer (this data was specified in the step “Adding a device that will send MQTT messages to the IoT server”);
2. On the Devices tab, an Android OS device is already displayed.
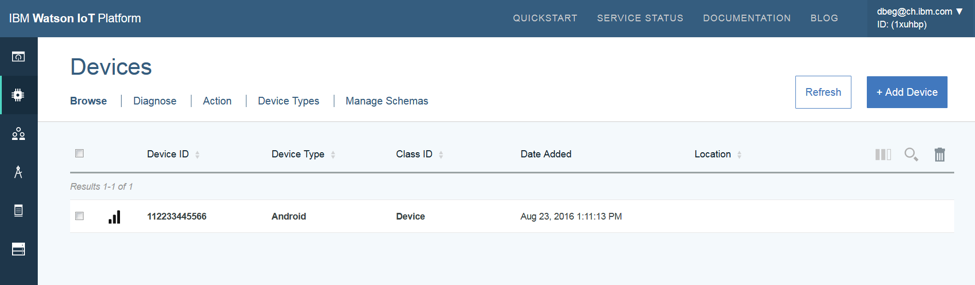
3. Click on the device identifier, then a window should appear with messages from the smartphone. For information about events, click on it.
Messages from the smartphone are sent in JSON format. They contain information about acceleration and position. You can now work with message data in a Bluemix environment.
We process messages in the stream Node-RED
In this section, we improve the Bluemix IoT application using the Node_RED stream to process messages from the smartphone and send messages back to the smartphone. The phone will respond by changing the background color of the application.
Node-RED is a visual tool that simplifies the transmission and processing of messages on the Internet of things.
You can run the application here .
1. Open Bluemix, select the Dashboard and on the Bluemix Dashboard and see if the Bluemix IoT application is running (created in step 1).
2. Open <<your application_name> .mybluemix.net in your browser, where is the name of the Bluemix IoT application created in step 1. In the Node-RED editor for the Bluemix application, click the Go to your Node-RED flow editor button.

3. The editor opens with an example stream.
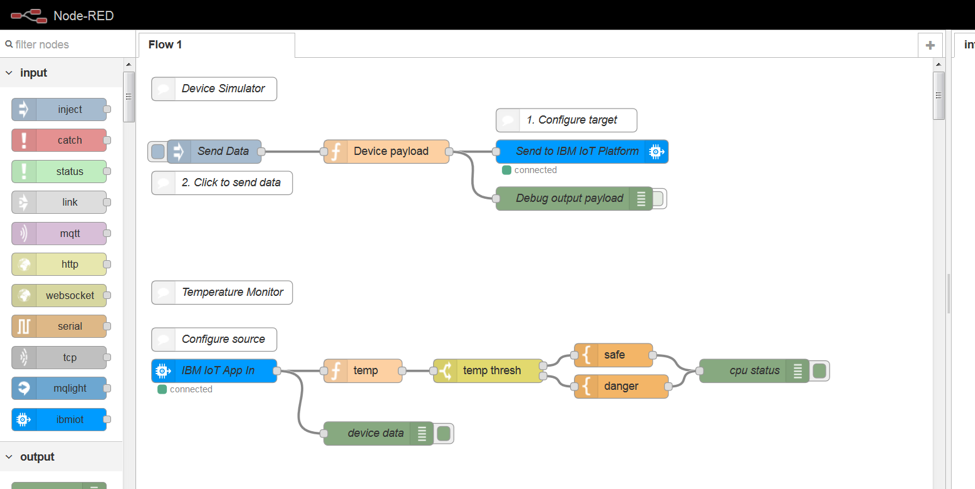
Using the drag-and-drop method in the editor, we begin to construct the message flow. You can create such a stream yourself by importing the code below. Before this, it is necessary to remove all existing nodes by deleting them using the Delete key.
4. Copy this code and paste it into a text editor.
5. In a text editor, see if all the code is in one line. If not, delete all line breaks. Copy the string to the clipboard.
6. In the Node-RED editor, press Ctrl-I to open the Import Nodes dialog box. Insert the code and click OK.

7. Now you need to adapt the stream to your specific parameters. The only meaningful parameter is the Device ID. Double click on the IBM IoT App out node. In the pop-up window, enter the device ID that was used previously (for example, 112233445566), and click OK.
8. In the editor, click Deploy. The stream should immediately become active.
9. Move the smartphone, turning and tilting it. At this time, the background should change its color in response to a change in the orientation of the Z axis.
10. In the Node-RED editor, click on the rectangle next to the msg.payload node. After that, click on the debug tab to debug. Here we should see the messages sent from the phone in JSON format.

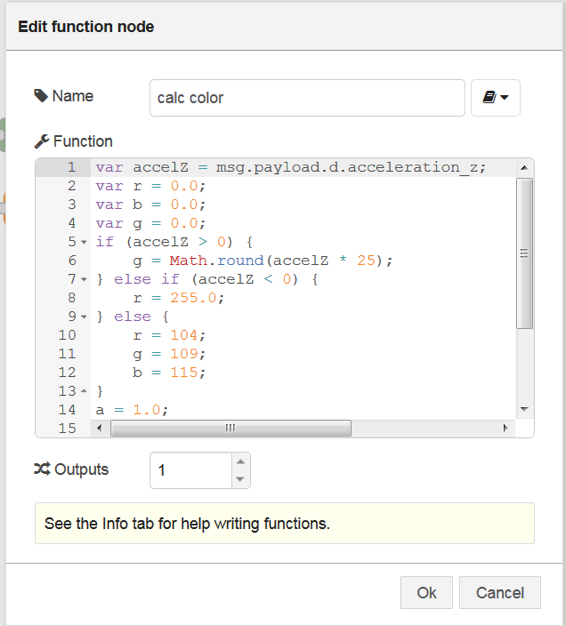
11. Explore the stream by double clicking on the calc color node. This allows you to calculate color values based on incoming position values relative to the Z axis, sending the calculation results as JSON data.
Create a Bluemix application to visualize sensor readings.
This is the final stage, during which we will create in Bluemix an additional application that receives a message from an IoT smartphone. The data will be visualized.
1. Download the iot-visualization-0.2.0.zip file from the iot-visualization project in Github. Unpack this archive.
2. Open Bluemix and select the Dashboard.
3. Click the Create App button.
4. Select WEB as an application type.
5. Choose the SDK for Node.js.
6. Click the Continue button and specify the name of the application. As before, the name must be unique in Bluemix, because it is used as the host name. Enter something like iotvisualizer <your_name> and click Finish.
7. After a few seconds, the message Your app is running should come.
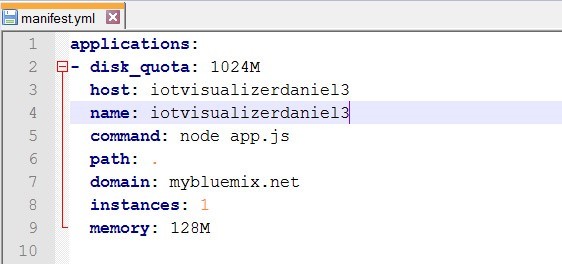
8. In the directory where the iot-visualization-0.1.0.zip archive is unpacked, look for the manifest.yml file and open it in a text editor. Change the host and name parameters to the selected application name. Save the file.
9. Open a command prompt window and go to the directory where iot-visualization-0.1.0.zip archive is unpacked.
10. Run the following Cloud Foundry commands:
cf api api.ng.bluemix.net
cf login -u <your_bluemix_login_id>
The cf login command is only required when you first use the cloud foundry command line tool. You may also need to enter your password in Bluemix. If you have more than one Bluemix organization (as opposed to the default settings), you will need to select one of them.
11. Deploy the application to Bluemix by running the following command:
cf push <your_application_name>
This command takes parameters from the manifest.yml file and then loads the code into Bluemix. After a while you should see something like this:
Ok
App was started using this command 'node app.js'.
12. On the Bluemix Dashboard, open the Overview page for your application. Click on the Bind a service or API button.
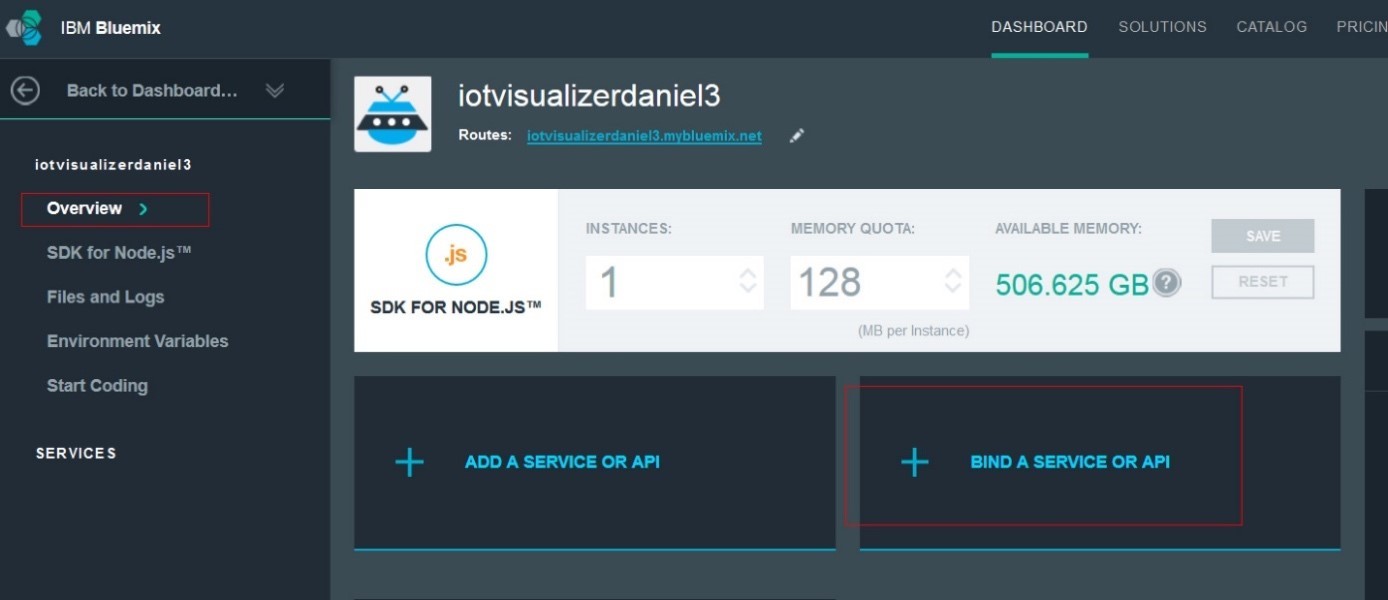
13. Select the Internet of Things service, which was defined at the stage “Creating an IoT application in Bluemix”. Click Restage to update the application. The application can now receive messages from the IBM IoT server.
14. To check the visualization application, open the page http: //.mybluemix.net in the browser
15. In the Device drop-down menu, select the device identifier.
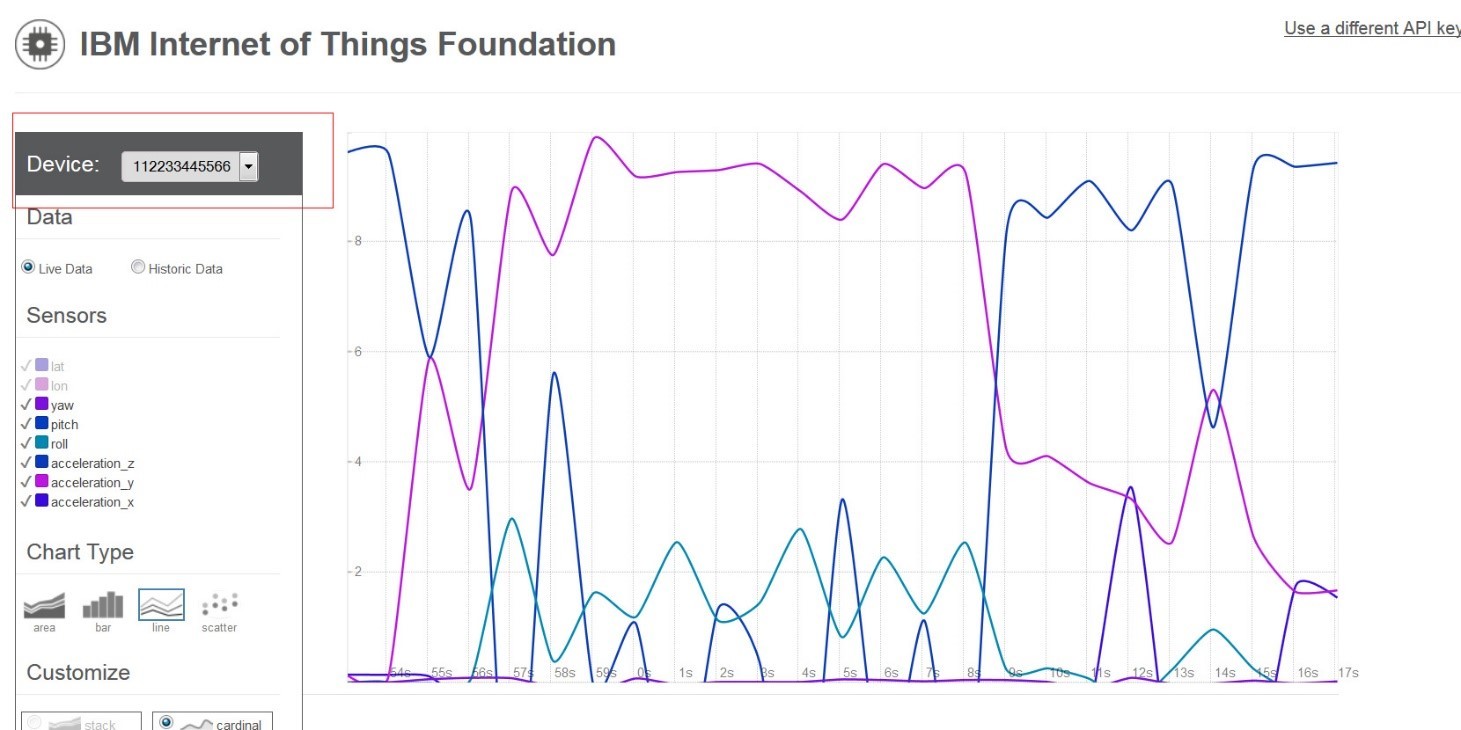
As you can see, creating an application that turns an ordinary smartphone into an IoT device is not so difficult if using Bluemix. In this environment, you can create much more complex and functional applications than what was shown above.
Source: https://habr.com/ru/post/318702/
All Articles