VR application from scratch on libgdx: part 1
Virtual reality is rapidly gaining popularity among users, but still remains inaccessible to many developers. The reason is trivial - many people write games in frameworks to which the Cardboard SDK cannot be screwed, and learning to work in another framework is not possible or just lazy. The same is with Libgdx, where, despite attempts to cross already with a hedgehog , it is still not possible to create VR games and applications. A couple of months ago I had a burning desire to create my own VR toy, and since I know Libgdx well and have been working with him for a long time, I have only one way to go: explore everything myself and implement my own VR
Disclaimer
Despite the fact that Libgdx is positioned as a cross-platform framework, this article provides an example of an application that is designed only for Android. There are two reasons for switching to a platform-dependent code:
1) The standard Gdx.input from Libgdx does not provide the ability to obtain "raw" data from the magnetometer (compass) of a smartphone. What was the problem to add 3 methods by analogy with the gyroscope and accelerometer I am not aware of, but this is what caused the output of all the work with the sensors in the android-module.
')
2) The wiki says that Libgdx does not support a gyroscope on iOS, as far as this information is relevant at the moment I am not up to date.
Sensors
So, we have a smartphone equipped with three sensors (ideally). You need to convert and filter this data to get a quaternion to rotate the camera in OpenGL. What is a quaternion, and how it is useful is well described here . I propose for a start to briefly review each type of sensor separately, in order to understand what we are dealing with.
Gyroscope
A gyroscope is a device that can react to changes in the orientation angles of the body to which it is attached. Mechanical gyroscopes are very well known for a long time, they are mainly used in various inertial systems for course stabilization and navigation.
Modern smartphones use MEMS gyros, which provide angular rotational speeds along three axes in the form of a vector.
 .
.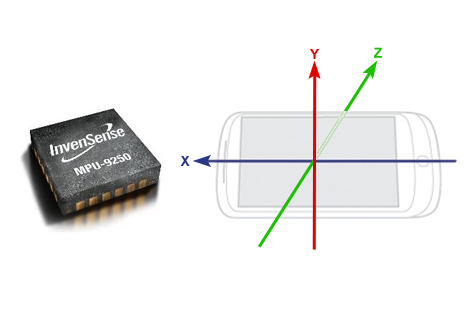
For us, it does not matter in what units of measurement the data comes in (radians or degrees), the only important thing is that they are directly proportional to the angular speeds of rotation of the device. Obviously, an ideal gyro at rest should produce zeros:
 but this is not the case with the MEMS gyroscope. In general, MEMS gyroscopes are the cheapest and most inaccurate of all those that exist; at rest, they have a strong zero drift. When integrating these angular velocities skipping around zero into orientation angles, the error begins to accumulate, resulting in a so-called gyro drift, which is well known to many fans to play VR toys. To reduce the zero drift, special signal filters and threshold values of angular velocities are used, but this is not a panacea, because firstly, this is a reason for so-called deterioration. VR experience (picture inertia and jerks appear), and secondly, it will not be possible to completely eradicate the drift. In this case, the other two sensors of the smartphone come to the rescue, with their help you can almost completely eliminate drift, while maintaining the VR experience.
Accelerometer
An accelerometer is a device that responds to accelerations of the body to which it is attached. The accelerometer of the smartphone gives the vector of accelerations along the axes
 , the unit of measurement is most often m / s, but for us this is also not critical. At rest, the accelerometer provides the direction of the gravity vector, we can use this feature to stabilize the horizon (Tilt correction). The accelerometer also has flaws. If the gyroscope is noisy mainly at rest, then the accelerometer on the contrary lays more in motion, so the combination of data from these two sensors must be approached wisely. In various INS for quadcopters, the Kalman filter is used, but I believe that in the case of VR, you can do with the usual complement, here and so there is something to load the processor of the smartphone.
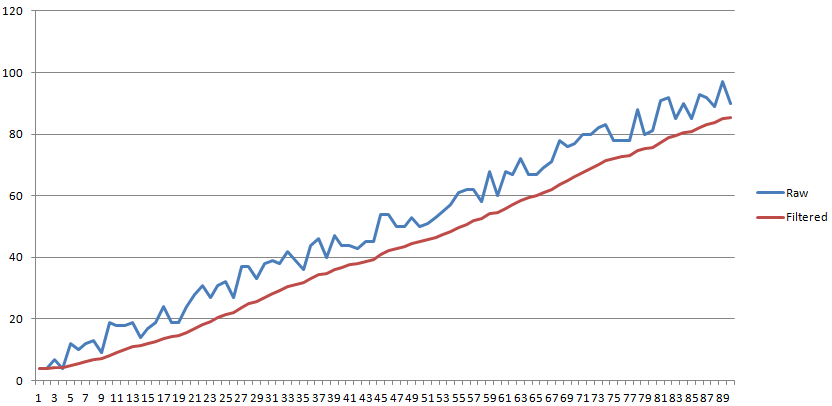
As a result, a bunch of gyroscope + accelerometer allows us to create games already, the same Cardboard SDK works this way. But there remains a drift around the vertical axis, which can be removed using a magnetometer. In the Cardboard SDK, the magnetometer is given to work with a magnetic button, therefore all drifting course is always present in all Cardboard games.
Magnetometer
Magnetometer - a device that reacts to magnetic fields. At rest, in the absence of electromagnetic and magnetic interference, the smartphone's magnetometer provides the direction of the magnetic induction field of the Earth
 , values are usually in microtesla (μT).
This invisible support in the form of the magnetic field of the planet allows us to eliminate arbitrary rotation around the vertical axis, thereby completely eliminating all drift. It is worth noting that magnetic drift correction does not always and everywhere work the way we want it. First, any external slightest fields from the magnets in the case of a smartphone or in a VR helmet cover will lead to unpredictable results. Secondly, the magnetic field strength is different in different parts of the planet, as is the direction of the magnetic induction vector. This means that the correction of the drift using a magnetometer will not work near the poles, because there the magnetic field lines are almost perpendicular to the earth's surface and do not carry any useful information about the orientation of the cardinal points. I hope there are no polar explorers among us?
Theory
To obtain the current quaternion of the phone, we need to cyclically obtain information from all sensors and perform operations on the basis of the quaternion obtained at the previous time instant. Let be
 - the required orientation quaternion, before the start of the cycle we assign it an initial value
  .
.1. Integrating gyro readings
As I said, the gyroscope provides an angular velocity vector. To get the angular coordinates from the angular velocities, we need to integrate them. This is done as follows:
1.1. Declare Quaternion
 and set it as:
Where
 - time elapsed from the previous iteration of the cycle;
1.2. We update q using the received
:  .
.As a result of the described actions, the quaternion q can already be used for rotation, however, due to the very low accuracy of the smartphone gyro, it is awfully floating on all three axes.
2. Align the horizon plane (Tilt Correction)
This will help us accelerometer. In short, for this we need to find a corrective quaternion and multiply it by the one obtained in the previous step. The correction quaternion, in turn, is formed using a vector-axis of rotation and angle of rotation.
2.1. Take the vector accelerometer as a quaternion:

2.2. Turn this accelerometer quaternion with our gyroscope quaternion:

2.3. Take the normalized vector part of the quaternion
 :
: 
2.4. With its help we find the vector defining the axis of rotation:
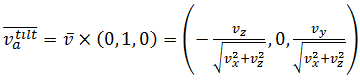
2.5. It now remains to find the angle:
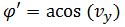
2.6. And adjust the quaternion from the gyroscope:
 where
where  - the smoothing factor, the smaller it is - the smoother and longer the horizon will stabilize, the optimal value in most cases is 0.1.
Everything, now q will not turn the camera upside down, only a small drift around the Y axis is possible.
3. We remove the drift around the Y axis using a magnetometer (Yaw Correction)
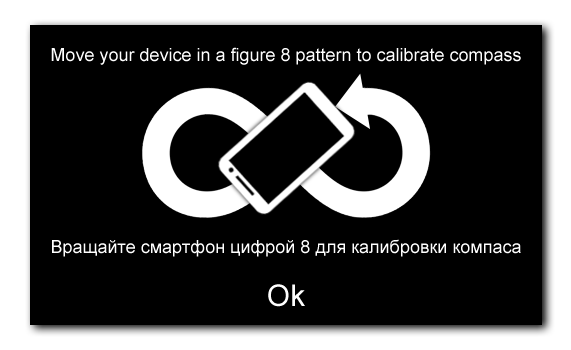
The compass of the smartphone is a rather capricious thing, it must be calibrated after each reboot, when brought up to massive glands or magnets. Loss of calibration in the case of VR leads to an unpredictable camera response to head rotation. In 99% of cases, the average user’s compass is not calibrated, so I strongly recommend keeping the default drift correction feature turned off, otherwise you can pick up negative reviews. In addition, it would be nice to display a warning about the need for calibration every time the application is started with correction enabled. Android itself takes over the calibration itself, to call it, you need to draw the number “8” or “∞” in the air several times with your smartphone.
It is a pity that Android does not provide any way to check the status of the compass calibration and to give a message like “everything is enough to wave”, here you have to rely on the intellectual abilities of the user. In principle, it is possible to be confused and consider strokes with an accelerometer, but of course we will not do this. Let us turn to the algorithm, which is not much different from the horizon correction with the accelerometer:
3.1. We also design the vector of the compass in the form of a quaternion:

3.2. And turn:
3.3. The rotation axis in this case is Y (0, 1, 0), so we only need the angle:

3.4. Adjust:
 where
where  - the same smoothing factor as above
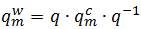
Now the drift will be completely absent if the magnetometer is normally calibrated and the user is not geographically too close to the poles of the Earth. It is worth noting that my method is somewhat different from the method used in the Oculus Rift . There the essence is as follows: for the last several iterations of the cycle, the rotation quaternion and the corresponding readings of the magnetometer are memorized (so-called reference points are created); We look further: if the readings of the magnetometer do not change, and the quaternion “goes” in this case, then the drift angle is calculated, and the quaternion turns in the opposite direction. This approach works well on the Oculus, but is not applicable on smartphones due to the too low accuracy of their magnetometers. I tried to implement the method from the article - on smartphones he jerks the camera and doesn’t really remove the drift at the same time.
Implementation
First, create an empty android project using gdx-setup.jar .

The typical android libgdx project is divided into two modules: android and core. The first module contains a platform-dependent code, while the second usually contains the logic of the game and draws. The interaction between the core module and android is carried out through interfaces, based on this we need to create 3 files:
- VRSensorManager - touch manager interface
- VRSensorManagerAndroid - its implementation
- VRCamera - a simple camera for drawing
And make changes to 2 project files:
- AndroidLauncher - starter class android project
- GdxVR - the main class of the application
I uploaded the project source to the githaba repository , I tried to document the code as much as possible, so I’ll only explain the main points in the article.
VRSensorManager
I brought all the work with the sensors and the calculation of the quaternion into the android module, to get the quaternion in the core module we use this interface.
VRSensorManager.java
package com.sinuxvr.sample; import com.badlogic.gdx.math.Quaternion; /** - */ interface VRSensorManager { /** */ boolean isGyroAvailable(); /** */ boolean isMagAvailable(); /** */ void startTracking(); /** */ void endTracking(); /** - * @param use - true - , false - */ void useDriftCorrection(boolean use); /** * @return */ Quaternion getHeadQuaternion(); } All methods here are intuitive, I think no one had any questions. The methods isGyroAvailable and isMagAvailable are not used anywhere in the example, but they can be useful to someone, I use them in my game.
VRSensorManagerAndroid
Theoretically, in the android module, you can only get the values from the sensors, and calculate the quaternion from them already in the core. I decided to combine everything in one place, so that the code could be more easily ported to other frameworks.
VRSensorManagerAndroid.java
package com.sinuxvr.sample; import android.content.Context; import android.hardware.Sensor; import android.hardware.SensorEvent; import android.hardware.SensorEventListener; import android.hardware.SensorManager; import com.badlogic.gdx.Gdx; import com.badlogic.gdx.math.MathUtils; import com.badlogic.gdx.math.Quaternion; import com.badlogic.gdx.math.Vector2; import com.badlogic.gdx.math.Vector3; /** Android. * . * : , + , + , * + + */ class VRSensorManagerAndroid implements VRSensorManager { /** */ private enum VRControlMode { ACC_ONLY, ACC_GYRO, ACC_MAG, ACC_GYRO_MAG } private SensorManager sensorManager; // private SensorEventListener accelerometerListener; // private SensorEventListener gyroscopeListener; // private SensorEventListener compassListener; // private Context context; // /** */ private final float[] accelerometerValues = new float[3]; // private final float[] gyroscopeValues = new float[3]; // private final float[] magneticFieldValues = new float[3]; // private final boolean gyroAvailable; // private final boolean magAvailable; // private volatile boolean useDC; // /** , headOrientation */ private final Quaternion gyroQuaternion; private final Quaternion deltaQuaternion; private final Vector3 accInVector; private final Vector3 accInVectorTilt; private final Vector3 magInVector; private final Quaternion headQuaternion; private VRControlMode vrControlMode; /** */ VRSensorManagerAndroid(Context context) { this.context = context; // sensorManager = (SensorManager) context.getSystemService(Context.SENSOR_SERVICE); // ( 100%, ) magAvailable = (sensorManager.getDefaultSensor(Sensor.TYPE_MAGNETIC_FIELD) != null); gyroAvailable = (sensorManager.getDefaultSensor(Sensor.TYPE_GYROSCOPE) != null); useDC = false; // vrControlMode = VRControlMode.ACC_ONLY; if (gyroAvailable) vrControlMode = VRControlMode.ACC_GYRO; if (magAvailable) vrControlMode = VRControlMode.ACC_MAG; if (gyroAvailable && magAvailable) vrControlMode = VRControlMode.ACC_GYRO_MAG; // gyroQuaternion = new Quaternion(0, 0, 0, 1); deltaQuaternion = new Quaternion(0, 0, 0, 1); accInVector = new Vector3(0, 10, 0); accInVectorTilt = new Vector3(0, 0, 0); magInVector = new Vector3(1, 0, 0); headQuaternion = new Quaternion(0, 0, 0, 1); // startTracking(); } /** */ @Override public boolean isGyroAvailable() { return gyroAvailable; } /** */ @Override public boolean isMagAvailable() { return magAvailable; } /** - */ @Override public void startTracking() { // sensorManager = (SensorManager)context.getSystemService(Context.SENSOR_SERVICE); Sensor accelerometer = sensorManager.getSensorList(Sensor.TYPE_ACCELEROMETER).get(0); accelerometerListener = new SensorListener(this.accelerometerValues, this.magneticFieldValues, this.gyroscopeValues); sensorManager.registerListener(accelerometerListener, accelerometer, SensorManager.SENSOR_DELAY_GAME); // if (magAvailable) { sensorManager = (SensorManager)context.getSystemService(Context.SENSOR_SERVICE); Sensor compass = sensorManager.getSensorList(Sensor.TYPE_MAGNETIC_FIELD).get(0); compassListener = new SensorListener(this.accelerometerValues, this.magneticFieldValues, this.gyroscopeValues); sensorManager.registerListener(compassListener, compass, SensorManager.SENSOR_DELAY_GAME); } // if (gyroAvailable) { sensorManager = (SensorManager)context.getSystemService(Context.SENSOR_SERVICE); Sensor gyroscope = sensorManager.getSensorList(Sensor.TYPE_GYROSCOPE).get(0); gyroscopeListener = new SensorListener(this.gyroscopeValues, this.magneticFieldValues, this.gyroscopeValues); sensorManager.registerListener(gyroscopeListener, gyroscope, SensorManager.SENSOR_DELAY_GAME); } } /** - */ @Override public void endTracking() { if (sensorManager != null) { if (accelerometerListener != null) { sensorManager.unregisterListener(accelerometerListener); accelerometerListener = null; } if (gyroscopeListener != null) { sensorManager.unregisterListener(gyroscopeListener); gyroscopeListener = null; } if (compassListener != null) { sensorManager.unregisterListener(compassListener); compassListener = null; } sensorManager = null; } } /** - */ @Override public void useDriftCorrection(boolean useDC) { // , this.useDC = useDC; } /** */ @Override public synchronized Quaternion getHeadQuaternion() { // switch (vrControlMode) { // case ACC_ONLY: updateAccData(0.1f); // Yaw ( ) headQuaternion.setFromAxisRad(0, 1, 0, -MathUtils.sin(accelerometerValues[0] / 200f)).mul(gyroQuaternion).nor(); gyroQuaternion.set(headQuaternion); break; // + ( , // , ) case ACC_MAG: updateAccData(0.2f); if (!useDC) { headQuaternion.setFromAxisRad(0, 1, 0, -MathUtils.sin(accelerometerValues[0] / 200f)).mul(gyroQuaternion).nor(); gyroQuaternion.set(headQuaternion); } else updateMagData(1f, 0.05f); break; // + case ACC_GYRO: updateGyroData(0.1f); updateAccData(0.02f); break; // - must have, case ACC_GYRO_MAG: float dQLen = updateGyroData(0.1f); updateAccData(0.02f); if (useDC) updateMagData(dQLen, 0.005f); } return headQuaternion; } /** * * @param driftThreshold - * @return - deltaQuaternion */ private synchronized float updateGyroData(float driftThreshold) { float wX = gyroscopeValues[0]; float wY = gyroscopeValues[1]; float wZ = gyroscopeValues[2]; // float l = Vector3.len(wX, wY, wZ); float dtl2 = Gdx.graphics.getDeltaTime() * l * 0.5f; if (l > driftThreshold) { float sinVal = MathUtils.sin(dtl2) / l; deltaQuaternion.set(sinVal * wX, sinVal * wY, sinVal * wZ, MathUtils.cos(dtl2)); } else deltaQuaternion.set(0, 0, 0, 1); gyroQuaternion.mul(deltaQuaternion); return l; } /** Tilt * @param filterAlpha - */ private synchronized void updateAccData(float filterAlpha) { // accInVector.set(accelerometerValues[0], accelerometerValues[1], accelerometerValues[2]); gyroQuaternion.transform(accInVector); accInVector.nor(); // accInVector UP(0, 1, 0) float xzLen = 1f / Vector2.len(accInVector.x, accInVector.z); accInVectorTilt.set(-accInVector.z * xzLen, 0, accInVector.x * xzLen); // accInVector UP(0, 1, 0) float fi = (float)Math.acos(accInVector.y); // Tilt- headQuaternion.setFromAxisRad(accInVectorTilt, filterAlpha * fi).mul(gyroQuaternion).nor(); gyroQuaternion.set(headQuaternion); } /** Yaw * @param dQLen - deltaQuaternion * @param filterAlpha - * */ private synchronized void updateMagData(float dQLen, float filterAlpha) { // deltaQuaternion if (dQLen < 0.1f) return; // magInVector.set(magneticFieldValues[0], magneticFieldValues[1], magneticFieldValues[2]); gyroQuaternion.transform(magInVector); // Yaw float theta = MathUtils.atan2(magInVector.z, magInVector.x); // headQuaternion.setFromAxisRad(0, 1, 0, filterAlpha * theta).mul(gyroQuaternion).nor(); gyroQuaternion.set(headQuaternion); } /** ( AndroidInput) */ private class SensorListener implements SensorEventListener { final float[] accelerometerValues; final float[] magneticFieldValues; final float[] gyroscopeValues; SensorListener (float[] accelerometerValues, float[] magneticFieldValues, float[] gyroscopeValues) { this.accelerometerValues = accelerometerValues; this.magneticFieldValues = magneticFieldValues; this.gyroscopeValues = gyroscopeValues; } // ( ) @Override public void onAccuracyChanged (Sensor arg0, int arg1) { } // @Override public synchronized void onSensorChanged (SensorEvent event) { if (event.sensor.getType() == Sensor.TYPE_ACCELEROMETER) { accelerometerValues[0] = -event.values[1]; accelerometerValues[1] = event.values[0]; accelerometerValues[2] = event.values[2]; } if (event.sensor.getType() == Sensor.TYPE_MAGNETIC_FIELD) { magneticFieldValues[0] = -event.values[1]; magneticFieldValues[1] = event.values[0]; magneticFieldValues[2] = event.values[2]; } if (event.sensor.getType() == Sensor.TYPE_GYROSCOPE) { gyroscopeValues[0] = -event.values[1]; gyroscopeValues[1] = event.values[0]; gyroscopeValues[2] = event.values[2]; } } } } Here, perhaps, I will make a couple of explanations. Sensor data is obtained using ordinary listeners, on this account on the Internet is full of manuals. I divided my work with quaternion into 3 methods in accordance with the theoretical part:
- updateGyroData - integration of gyro angular velocities
- updateAccData - stabilization horizon accelerometer
- updateMagData - compass drift correction
If we assume that there is always an accelerometer on the phone, there are only 4 possible sensor combinations, all of which are defined in the VRControlMode enumeration:
private enum VRControlMode { ACC_ONLY, ACC_GYRO, ACC_MAG, ACC_GYRO_MAG } The combination of sensors of a device is determined in the constructor, then when you call the getHeadQuaternion method, depending on it, a quaternion is formed in one way or another. The beauty of this approach is that it allows you to combine calls to the updateGyroData / updateAccData / updateMagData methods depending on the available sensors and to ensure that the application works even if the phone has only one accelerometer. Even better, if there is a compass in addition to the accelerometer in the phone, then this bundle can behave almost like a gyroscope, allowing you to rotate your head through 360 °. Although there can be no normal VR experience in this case, it’s still better than the heartless inscription “Your phone doesn't have a gyroscope”, is it? The useDriftCorrection method is also interesting, it allows you to enable / disable the use of a magnetometer on the fly without affecting the listeners (technically, it simply stops calling updateMagData).
Vrcamera
To display the image in the form of a stereo pair, we need 2 cameras separated by some distance from each other, called the parallax base. Therefore, VRCamera contains 2 instances of PerspectiveCamera. In general, in this class, only work with cameras is performed (by turning the quaternion and moving), I directly placed the stereo pair in the main GdxVR class.
Vrcamera.java
package com.sinuxvr.sample; import com.badlogic.gdx.Gdx; import com.badlogic.gdx.graphics.PerspectiveCamera; import com.badlogic.gdx.math.Matrix4; import com.badlogic.gdx.math.Quaternion; import com.badlogic.gdx.math.Vector3; /** VR * VRSensorManager update() */ class VRCamera { private PerspectiveCamera leftCam; // private PerspectiveCamera rightCam; // private Vector3 position; // VR private float parallax; // private Vector3 direction; // VR private Vector3 up; // UP VR private Vector3 upDirCross; // up direction ( 2, ) /** */ VRCamera(float fov, float parallax, float near, float far) { this.parallax = parallax; leftCam = new PerspectiveCamera(fov, Gdx.graphics.getWidth() / 2, Gdx.graphics.getHeight()); leftCam.near = near; leftCam.far = far; leftCam.update(); rightCam = new PerspectiveCamera(fov, Gdx.graphics.getWidth() / 2, Gdx.graphics.getHeight()); rightCam.near = near; rightCam.far = far; rightCam.update(); position = new Vector3(0, 0, 0); direction = new Vector3(0, 0, 1); up = new Vector3(0, 1, 0); upDirCross = new Vector3().set(direction).crs(up).nor(); } /** */ void update() { Quaternion headQuaternion = GdxVR.vrSensorManager.getHeadQuaternion(); // - // direction.set(0, 0, 1); headQuaternion.transform(direction); up.set(0, 1, 0); headQuaternion.transform(up); upDirCross.set(direction); upDirCross.crs(up).nor(); // float angle = 2 * (float)Math.acos(headQuaternion.w); float s = 1f / (float)Math.sqrt(1 - headQuaternion.w * headQuaternion.w); float vx = headQuaternion.x * s; float vy = headQuaternion.y * s; float vz = headQuaternion.z * s; // leftCam.view.idt(); // leftCam.view.translate(parallax, 0, 0); // + parallax X leftCam.view.rotateRad(vx, vy, vz, -angle); // leftCam.view.translate(-position.x, -position.y, -position.z); // position leftCam.combined.set(leftCam.projection); Matrix4.mul(leftCam.combined.val, leftCam.view.val); // rightCam.view.idt(); // rightCam.view.translate(-parallax, 0, 0); // + parallax X rightCam.view.rotateRad(vx, vy, vz, -angle); // rightCam.view.translate(-position.x, -position.y, -position.z); // position rightCam.combined.set(rightCam.projection); Matrix4.mul(rightCam.combined.val, rightCam.view.val); } /** */ void setPosition(float x, float y, float z) { position.set(x, y, z); } /** */ PerspectiveCamera getLeftCam() { return leftCam; } /** */ PerspectiveCamera getRightCam() { return rightCam; } /** , UP , */ public Vector3 getPosition() { return position; } public Vector3 getDirection() { return direction; } public Vector3 getUp() { return up; } public Vector3 getUpDirCross() { return upDirCross; } } The most interesting methods here are the constructor and update. The designer accepts the field of view angle (fov), the distance between the cameras (parallax), and the distance to the near and far clipping planes (near, far):
VRCamera(float fov, float parallax, float near, float far) In the update method, we take the quaternion from the VRSensorManager, move the cameras to (± parallax, 0, 0), rotate them, and then move them back to their original position. With this approach, there will always be a predetermined parallax base between the cameras, and the user will see the stereoscopic image for any orientation of the head. Please note that we directly work with view matrixes of cameras, which means that the direction and up vectors of cameras are not updated. Therefore, its 2 vectors are entered into VRCamera, and their values are calculated using quaternion.
AndroidLauncher
In the starter class, when you initialize the application, you need to create an instance of VRSensorManagerAndroid and transfer it to the main class of the game (in my case GdxVR):
@Override protected void onCreate (Bundle savedInstanceState) { super.onCreate(savedInstanceState); AndroidApplicationConfiguration config = new AndroidApplicationConfiguration(); config.useWakelock = true; config.useAccelerometer = false; config.useGyroscope = false; config.useCompass = false; vrSensorManagerAndroid = new VRSensorManagerAndroid(this.getContext()); initialize(new GdxVR(vrSensorManagerAndroid), config); } Also, do not forget to disable / register listeners when hiding / expanding the application:
@Override public void onPause() { vrSensorManagerAndroid.endTracking(); super.onPause(); } @Override public void onResume() { super.onResume(); vrSensorManagerAndroid.startTracking(); } Full starter class code:
AndroidLauncher.java
package com.sinuxvr.sample; import android.os.Bundle; import com.badlogic.gdx.backends.android.AndroidApplication; import com.badlogic.gdx.backends.android.AndroidApplicationConfiguration; public class AndroidLauncher extends AndroidApplication { private VRSensorManagerAndroid vrSensorManagerAndroid; // /** */ @Override protected void onCreate (Bundle savedInstanceState) { super.onCreate(savedInstanceState); AndroidApplicationConfiguration config = new AndroidApplicationConfiguration(); // libgdx config.useWakelock = true; config.useAccelerometer = false; config.useGyroscope = false; config.useCompass = false; config.numSamples = 2; // ( useAccelerometer .. ) vrSensorManagerAndroid = new VRSensorManagerAndroid(this.getContext()); initialize(new GdxVR(vrSensorManagerAndroid), config); } /** - */ @Override public void onPause() { vrSensorManagerAndroid.endTracking(); super.onPause(); } /** - */ @Override public void onResume() { super.onResume(); vrSensorManagerAndroid.startTracking(); } } Do not forget to put the room.g3db model file and texture.png file in the assets folder, they will be useful to us in the next step. You can download them from here . Any other model of any scene will do, I decided not to bother much and I took the finished model from the level of my own game, the 3D effect is well felt in it due to the presence of many small details.
Gdxvr
Finally, we come to the main class. First we need to declare in it our VRSensorManager and a constructor that receives a link to an instance of this class from AndroidLauncher:
static VRSensorManager vrSensorManager; GdxVR(VRSensorManager vrSensorManager) { GdxVR.vrSensorManager = vrSensorManager; } Complete code:
GdxVR.java
package com.sinuxvr.sample; import com.badlogic.gdx.ApplicationAdapter; import com.badlogic.gdx.Gdx; import com.badlogic.gdx.assets.AssetManager; import com.badlogic.gdx.graphics.GL20; import com.badlogic.gdx.graphics.g3d.Model; import com.badlogic.gdx.graphics.g3d.ModelBatch; import com.badlogic.gdx.graphics.g3d.ModelInstance; /** , , */ class GdxVR extends ApplicationAdapter { static VRSensorManager vrSensorManager; // private int scrHeight, scrHalfWidth; // viewport private AssetManager assets; // private ModelBatch modelBatch; // private ModelInstance roomInstance; // private VRCamera vrCamera; // VR /** */ GdxVR(VRSensorManager vrSensorManager) { GdxVR.vrSensorManager = vrSensorManager; } /** */ @Override public void create () { // scrHalfWidth = Gdx.graphics.getWidth() / 2; scrHeight = Gdx.graphics.getHeight(); // modelBatch = new ModelBatch(); assets = new AssetManager(); assets.load("room.g3db", Model.class); assets.finishLoading(); Model roomModel = assets.get("room.g3db"); roomInstance = new ModelInstance(roomModel); // (fov, parallax, near, far) vrCamera = new VRCamera(90, 0.4f, 0.1f, 30f); vrCamera.setPosition(-1.7f, 3f, 3f); // vrSensorManager.useDriftCorrection(true); } /** viewport- */ @Override public void render () { // Gdx.gl.glClearColor(0f, 0f, 0f, 1f); Gdx.gl.glClear(GL20.GL_COLOR_BUFFER_BIT | GL20.GL_DEPTH_BUFFER_BIT); // vrCamera.update(); // Gdx.gl.glViewport(0, 0, scrHalfWidth, scrHeight); modelBatch.begin(vrCamera.getLeftCam()); modelBatch.render(roomInstance); modelBatch.end(); // Gdx.gl.glViewport(scrHalfWidth, 0, scrHalfWidth, scrHeight); modelBatch.begin(vrCamera.getRightCam()); modelBatch.render(roomInstance); modelBatch.end(); } /** */ @Override public void dispose () { modelBatch.dispose(); assets.dispose(); } } In the create method, we know the screen sizes (width divided by 2, you know why), load the scene model, and then create and position the camera:
vrCamera = new VRCamera(90, 0.4f, 0.1f, 30f); vrCamera.setPosition(-1.7f, 3f, 3f); Even in the example, I turned on the drift correction, if someone after the launch has problems with the camera - look for the reason in compass calibration:
vrSensorManager.useDriftCorrection(true); In the render method, before all rendering, you must call the camera update:
vrCamera.update(); The stereo pair is implemented using a standard viewport. Adjust the viewport to the left half of the screen and draw a picture for the left eye:
Gdx.gl.glViewport(0, 0, scrHalfWidth, scrHeight); modelBatch.begin(vrCamera.getLeftCam()); modelBatch.render(roomInstance); modelBatch.end(); Then in the same way for the right:
Gdx.gl.glViewport(scrHalfWidth, 0, scrHalfWidth, scrHeight); modelBatch.begin(vrCamera.getRightCam()); modelBatch.render(roomInstance); modelBatch.end(); Conclusion
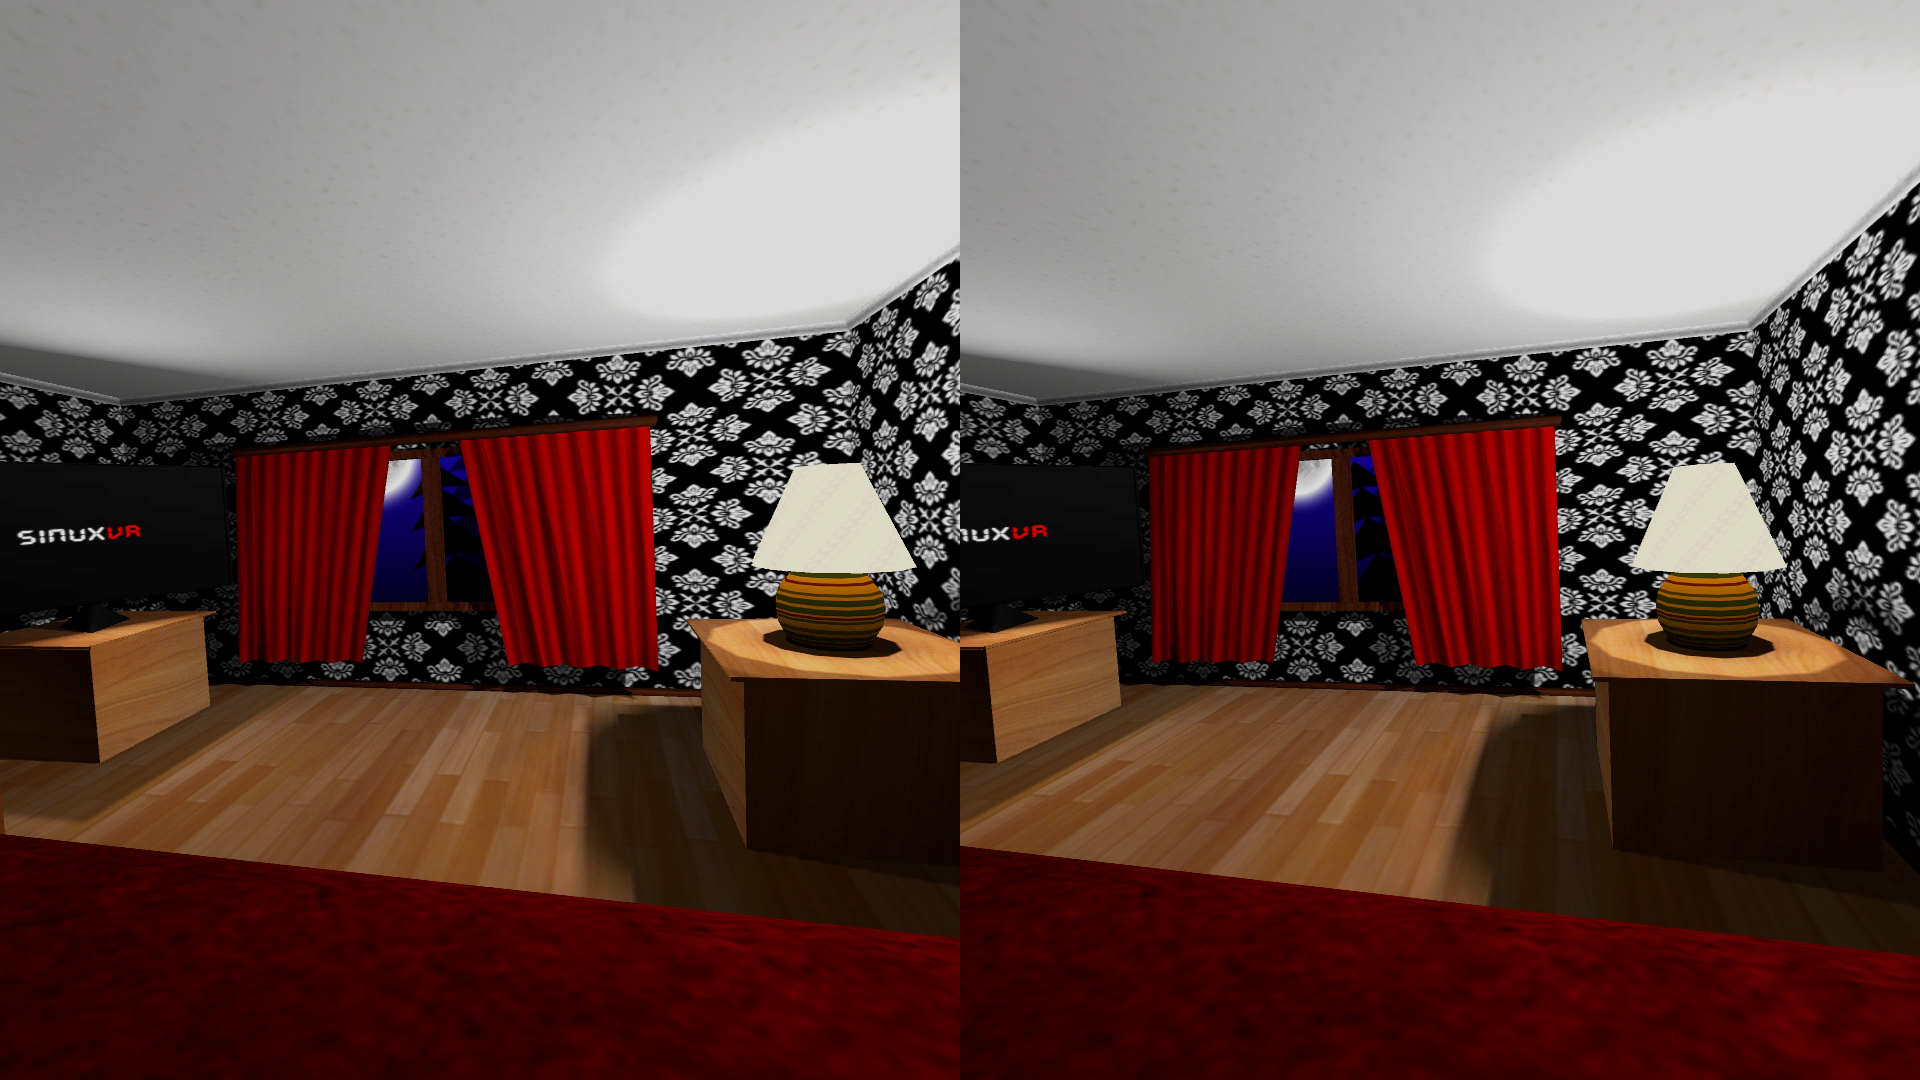
If everything was done correctly, then you can insert the smartphone into VR glasses and dive into the virtual world that you just created with your own hands:
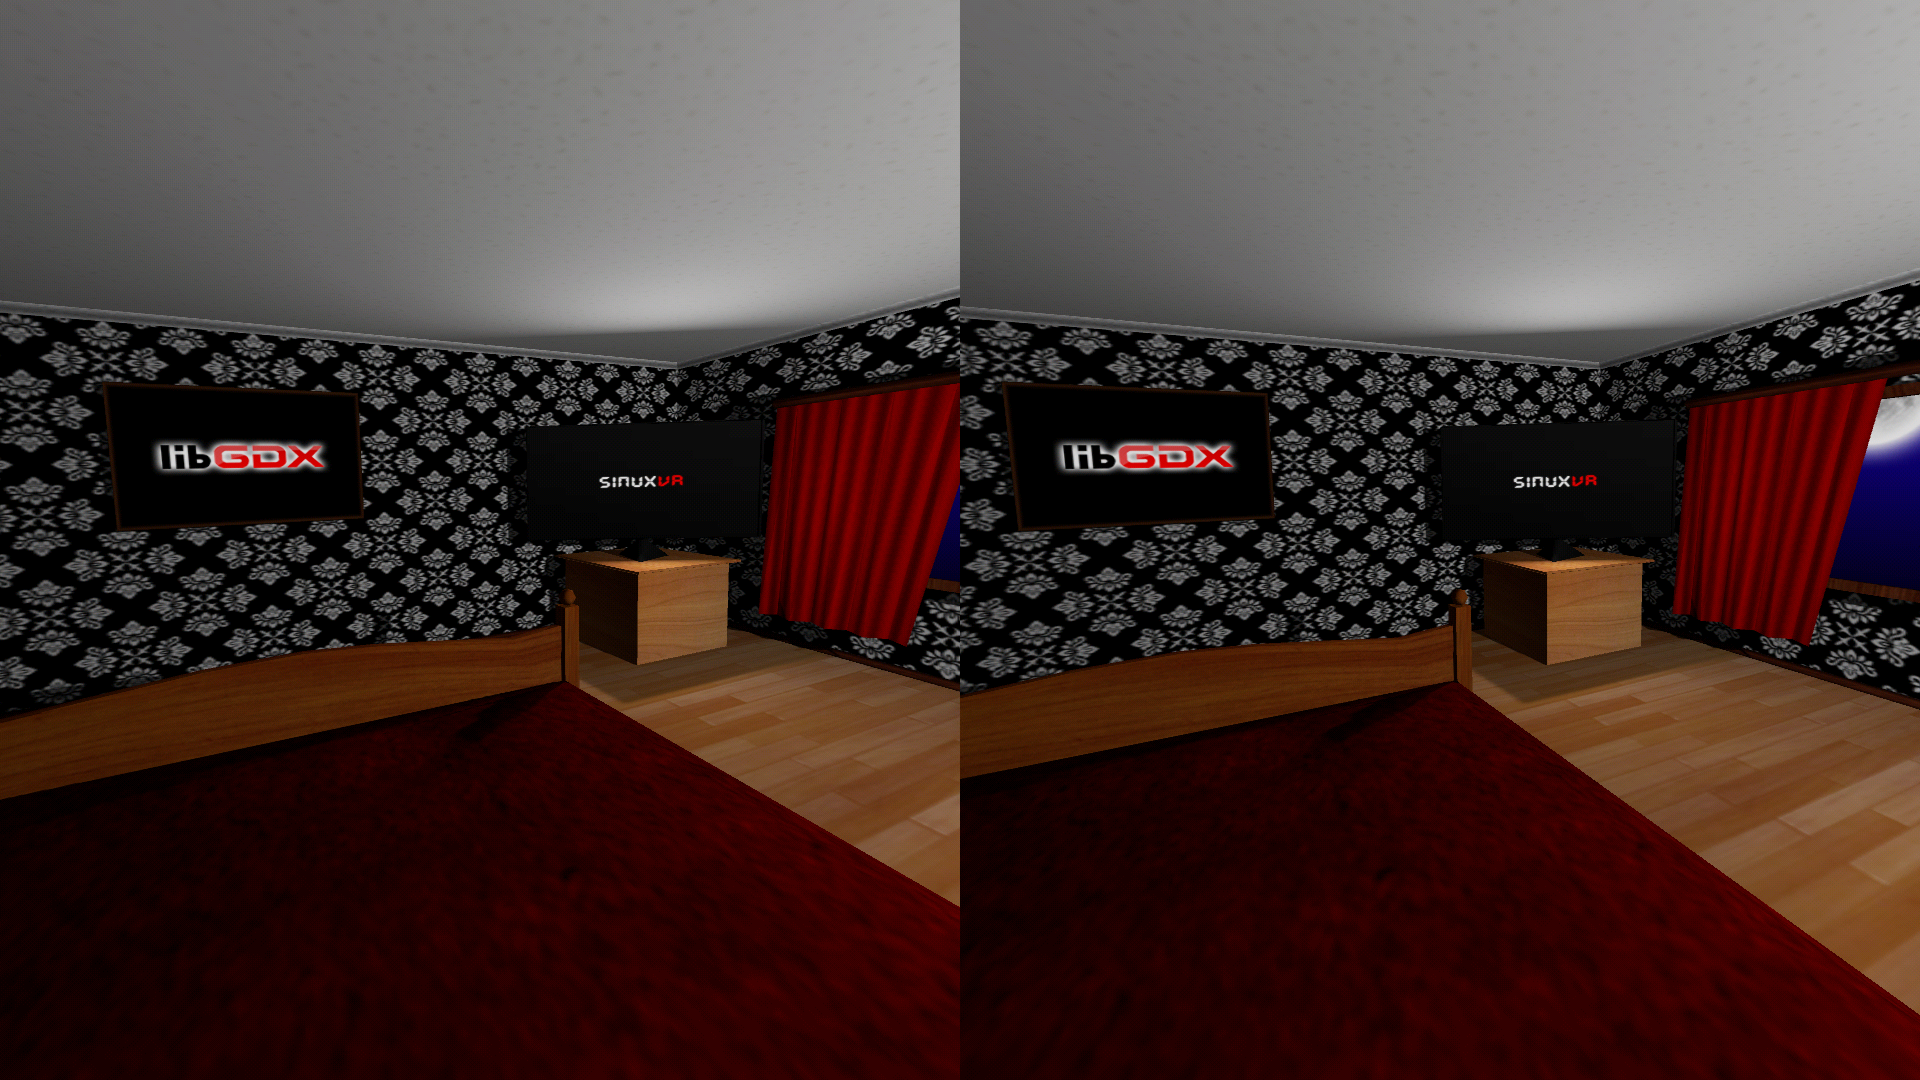
Welcome to the new reality! I will tell you about the work with sounds in the second part, and today I have everything. Thank you for your attention, if you have any questions - I will try to answer them in the comments.
Sources
Source: https://habr.com/ru/post/318278/
All Articles