Creating a blog engine with Phoenix and Elixir / Part 6. Markdown support

From the translator: “ Elixir and Phoenix are a great example of where modern web development is heading. Already, these tools provide high-quality access to real-time technologies for web applications. Sites with increased interactivity, multiplayer browser games, microservices - those areas in which these technologies will serve a good service. The following is a translation of a series of 11 articles that describe in detail the aspects of development on the Phoenix framework that would seem such a trivial thing as a blog engine. But do not hurry to sulk, it will be really interesting, especially if the articles encourage you to pay attention to the Elixir or become its followers.
In this section, we will include the Earmark library to add the ability to use Markdown markup.
At the moment, our application is based on:
')
- Elixir : v1.3.1
- Phoenix : v1.2.0
- Ecto : v2.0.2
- ExMachina : v1.0.2
- Earmark : v1.0.1
Where we stayed
Now in our blogging platform there are roles, users and posts. Also fixed some bugs, updated dependencies and prepared the initial data. We got a set of basic functionality, which is really good and stable. If you missed something or joined just now, then you can take the code from the 11092015 branch in the repository .
Implementing Markdown Support
We should probably give people the opportunity to use markup when writing posts. For example, Markdown is a markup language that is great for blogging, and is easily supported by the Elixir language. So let's turn on Markdown through a third-party library called Earmark . Let's start by adding a new dependency inside the deps function in the mix.exs file:
{:earmark, "~> 1.0.1"} And then execute the
mix do deps.get, compile command to make sure the library connection is correct. If everything went smoothly, we can proceed to work on templates and views.Refresh views
We start by providing a convenient way to convert post text to Markdown. We need to avoid adding
Earmark.to_html(data) for the entire project, because we don’t want to search for and rewrite this code if we decide to use other features or Earmark settings. To do this, we will write a function in the web/views/post_view.ex , which will become a single point if you need to change something. Open this file and add the following function: def markdown(body) do body |> Earmark.to_html |> raw end We have the source text
body , which we pass to the to_html function from the Earmark library. Since we expect to get HTML output suitable for posting, we use the raw function. I know that you thought: “Oh, the raw function seems to be extremely unsafe!” . The answer will be - "Yes, everything is so . " The problem is that we need to get raw html on the output in order to be able to render it. At the same time, I don’t want to cut out some potentially dangerous tags every time we display a post. So let's open the web/models/post.ex and add some code to solve the problem: def changeset(struct, params \\ %{}) do struct |> cast(params, [:title, :body]) |> validate_required([:title, :body]) |> strip_unsafe_body(params) end defp strip_unsafe_body(model, %{"body" => nil}) do model end defp strip_unsafe_body(model, %{"body" => body}) do {:safe, clean_body} = Phoenix.HTML.html_escape(body) model |> put_change(:body, clean_body) end defp strip_unsafe_body(model, _) do model end We wrote a decent amount of code. Now let's discuss what he does. First we made a change to the
changeset function. Added new call to strip_unsafe_body(model, …) . This call, using pattern matching, will select one of three functions. The first one includes the body parameter, equal to nil . The second is the body parameter, which we need to clear. And the third - for the control catch of the remaining calls.We use the
put_change function to replace the body text cleared using the html_escape function from Phoenix.HTML version. This function accepts text and returns the {:safe, cleaned_up_body} if successful.Writing code without tests grieves me, especially for such functionality as here. Let's test it out!
Writing tests
Since we are now dependent on this code, we need to test it properly.
defmodule Pxblog.PostTest do use Pxblog.ModelCase alias Pxblog.Post @valid_attrs %{body: "some content", title: "some content"} @invalid_attrs %{} test "changeset with valid attributes" do changeset = Post.changeset(%Post{}, @valid_attrs) assert changeset.valid? end test "changeset with invalid attributes" do changeset = Post.changeset(%Post{}, @invalid_attrs) refute changeset.valid? end test "when the body includes a script tag" do changeset = Post.changeset(%Post{}, %{@valid_attrs | body: "Hello <script type='javascript'>alert('foo');</script>"}) refute String.match? get_change(changeset, :body), ~r{<script>} end test "when the body includes an iframe tag" do changeset = Post.changeset(%Post{}, %{@valid_attrs | body: "Hello <iframe src='http://google.com'></iframe>"}) refute String.match? get_change(changeset, :body), ~r{<iframe>} end test "body includes no stripped tags" do changeset = Post.changeset(%Post{}, @valid_attrs) assert get_change(changeset, :body) == @valid_attrs[:body] end end First you need to change the declaration
@valid_attrs . We receive data from the controller in the form of a dictionary with string keys (not atoms). If we change nothing, then the tests will fall.Then import
get_change/2 from Ecto.Changeset to retrieve the modified value from the revision. Finally, we write several tests:- When in the body of the post there is a
scripttag. - When in the body of the post there is an
iframetag. - When in the body of the post there are no invalid tags.
Restart the tests. They should be green. We have to write another test, a little basic UI and everything will be ready!
Writing tests for Markdown helper
We also need to add a small test for a helper function for Markdown, which we wrote in the Post View module. The good news is that this test is very easy to write.
To do this, create the file
test/view/post_view_test.exs and fill it with the following content: defmodule Pxblog.PostViewTest do use Pxblog.ConnCase, async: true test "converts markdown to html" do {:safe, result} = Pxblog.PostView.markdown("**bold me**") assert String.contains? result, "<strong>bold me</strong>" end test "leaves text with no markdown alone" do {:safe, result} = Pxblog.PostView.markdown("leave me alone") assert String.contains? result, "leave me alone" end end Now run the tests, make sure they are green, and the tests will be finished.
User Interface Update
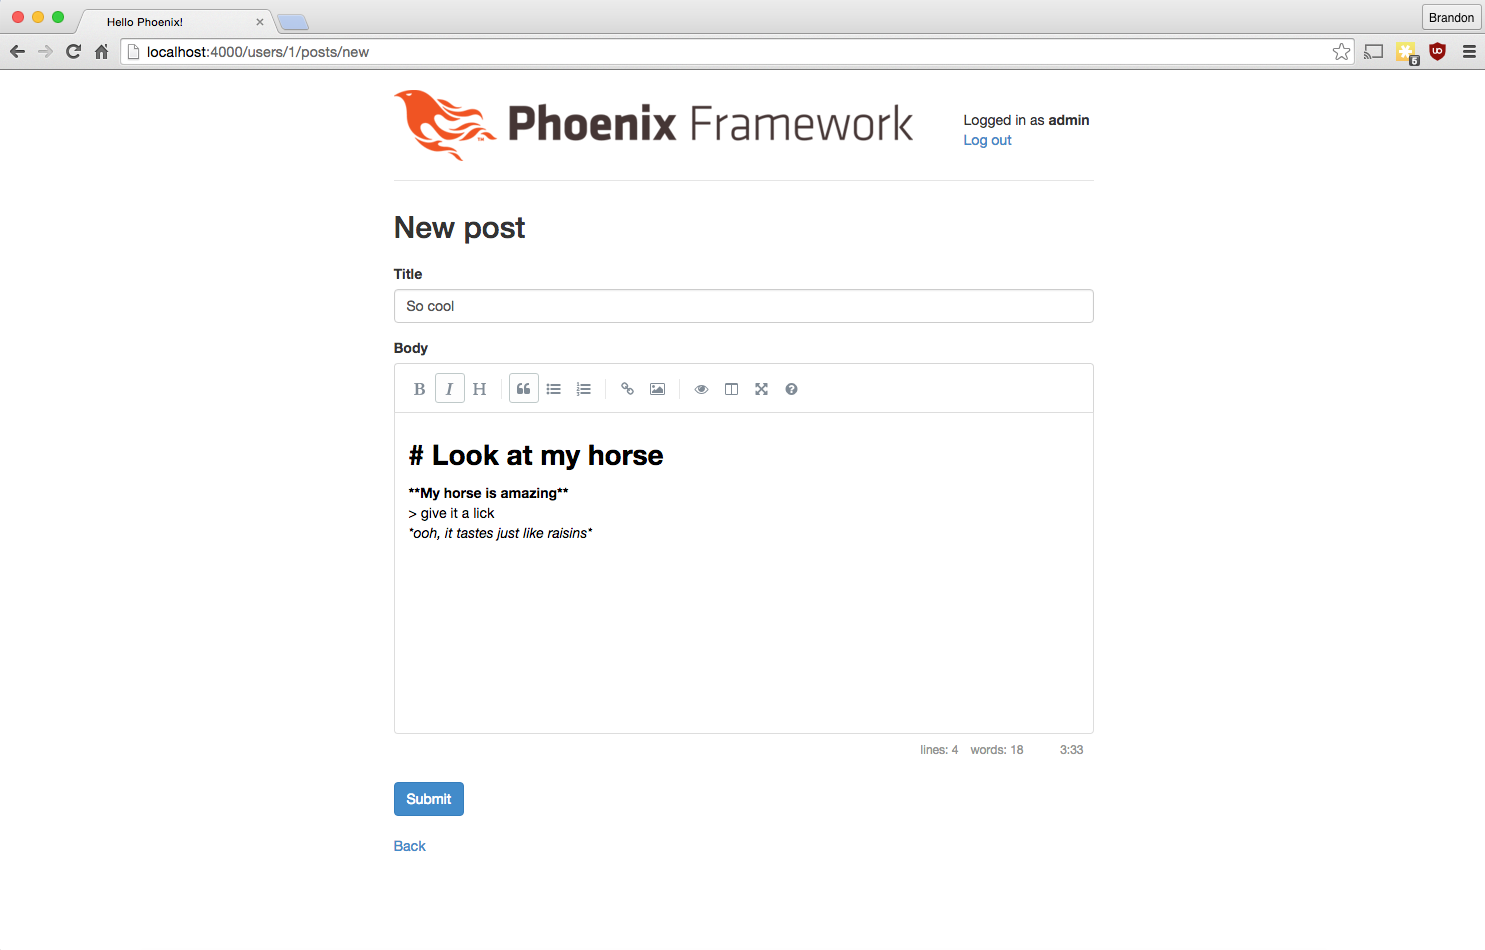
Right now we have the opportunity to add full-fledged posts, but the UI does not allow writing anything more than one line. We will change the standard form to work with the text area instead of the text field, and also connect a cool editor.
Open the
web/templates/post/form.html.eex and add the id parameter with the value "body-editor" . Finally, the line should look like this: <%= textarea f, :body, class: "form-control", id: "body-editor" %> Finally, add the following code down to our form template (
web/templates/post/form.html.eex ): <link rel="stylesheet" href="//cdn.jsdelivr.net/simplemde/latest/simplemde.min.css"> <script src="//cdn.jsdelivr.net/simplemde/latest/simplemde.min.js"></script> <script>var simplemde = new SimpleMDE();</script> After updating the page, you should see a very neat interface for writing posts. Begins to become like a real blogging platform!
Finally, open the
web/templates/post/show.html.eex file and replace the line with the post body output with the markdown(body) function that we defined in the view. <%= markdown(@post.body) %> Conclusion
Now we have an improved tool for editing / formatting posts and an editor that looks much, much nicer! You may want to correct the template a little, for example, add the ability to write comments. But comments are a great way to apply feeds, so let's put it off until the next article.
The complete version of the code from this part lies in the
add_markdown_support branch of our repository.Other series articles
- Introduction
- Authorization
- Adding Roles
- Process roles in controllers
- We connect ExMachina
- Markdown support
- Add comments
- We finish with comments
- Channels
- Channel testing
- Conclusion
Do not forget to subscribe to our newsletter, in which we post interesting articles on the Elixir twice in a week in Russian .
Good luck in learning!
Source: https://habr.com/ru/post/317550/
All Articles