Console to the masses. Go to the bright side. Part one

Introduction
Hello! This series of articles is a text version of my report on WSD in Kiev on November 26 . I decided to write to give a more detailed description of the topics that were covered, and to clarify some points. In addition, there is an opportunity to consider more examples, to hear opinions from you, dear reader. And, of course, share information with a wider audience.
Escape plan
- Terminal managers. Part one
- Terminal managers. Part two
- Bash scripts
- Automate routine tasks
An important point. It is assumed that the reader already has experience with the terminal on * nix OS. The examples use many utilities, such as
grep, find, xargs, echo, sed , and others. I will not dwell on these utilities in detail. Also there is no task to consider everything and everyone.We have a big team and I often see how people perform the same task in different ways. This also applies to work in the terminal. Meet is IE6.
')
Imagine the situation that your favorite browser does not know how to work with tabs. Moreover, when it closes at the most inappropriate moment, you cannot restore the session and continue working.
And this is how the majority of users imagine the terminal. Black screen, white characters.

Now imagine that your favorite browser added the ability to work in the terminal. In it, you can execute
git, npm, node and many other commands. Sounds like something unreal from the future. And no.
And in this series of articles I want to show that the terminal can be convenient and multifunctional, only you need to know how to prepare all this.
And so, let's get started. What topics will we look at? Consider terminal managers. Then bash scripts. And the last thing is how to automate the routine using bash scripts.
Repository
For convenience, I created a github repository with all the examples and topics that we will look at throughout the series of articles. So you can download and practice.
Slides
Available from this link . The presentation is made on the shower engine.
Where does it all work
This all works on Windows 10 stable , Mac OS X, Ubuntu . Ubuntu preference. All the examples I will show in Ubuntu. There is also a cool terminal emulator - this is ConEmu . True, it will not work to try the terminal managers.
Terminal managers. Part one. Screen
Let's start with the screen. I met him completely by accident. A colleague helped me in solving one problem. And he saw that I did not use the terminal manager. Then he said: “Hmm, let's fix this.” I installed the screen, helped me set up and showed a couple of basic keyboard shortcuts.
Installation
To install screen, just run the first command. After that, you can start it by typing the screen command in the terminal.
Basic shortcut keys
Why I did not display the entire list in the article, but added a link ?! It's simple. First, they are in the manual (
man screen ). Secondly, they do not need to learn, memorize, or something else there, just need to start using.Settings
By default, the screen is not very conveniently configured. It does not even have a status bar. Displays a message about the license and some other inconveniences. All this can be corrected using the configuration file. You need to place it in the user's home directory.
screen in
Let's look at the screen at work. How to run it, we already know. Enough to type screen. Before this, do not forget to place the settings file in the user's home directory.
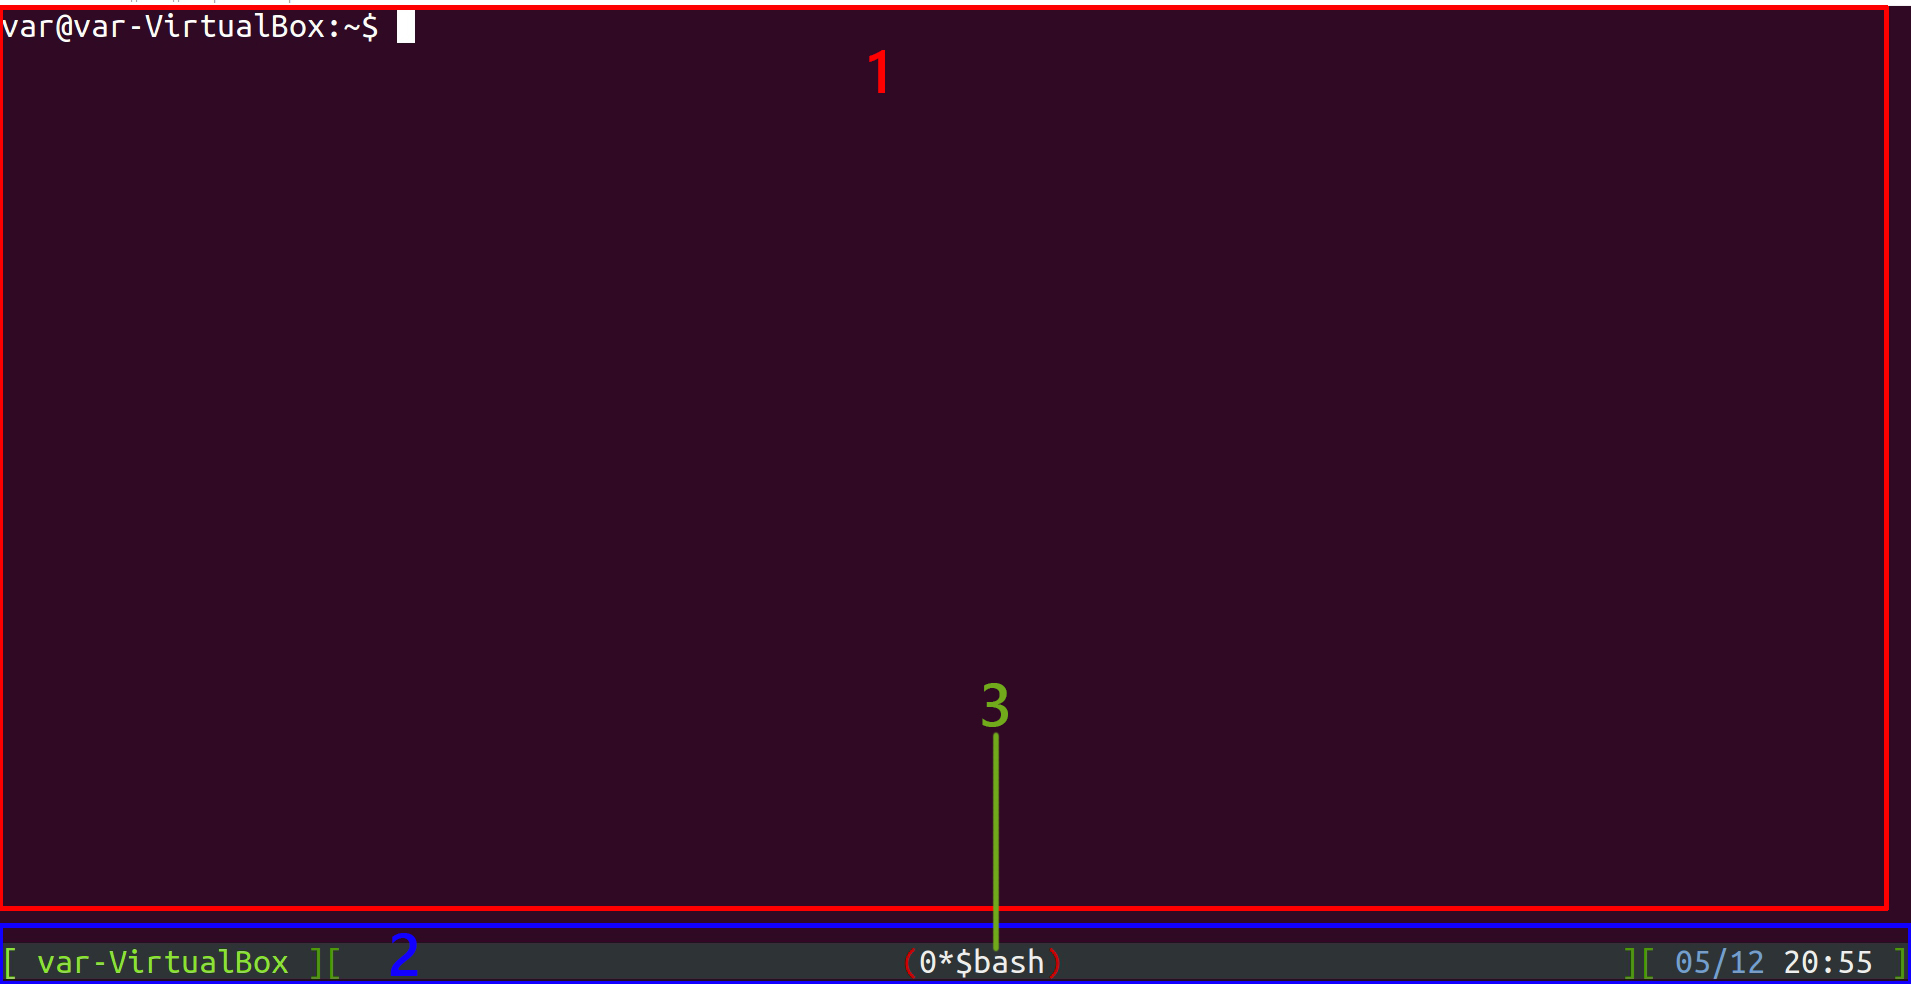
- Workspace. Layout.
- Status bar. It contains tabs and other elements.
- Tab with the default name.
We looked at the initial state of the screen. Let's now take it on the example of a more complex task.
For this we need a repository, which I mentioned above. Let's clone it to your computer:
git clone https://github.com/var-bin/terminalForCoder__WSD.git Next, run the screen. We will need 2 - 3 tabs. To create a new tab, you need to press the following keyboard shortcuts:
Ctrl + a, c - The next step is to rename the tabs. To do this, use:
Ctrl + a, A - To switch between tabs, use these keys:
Ctrl + a, int - (int - 0 - 9) Or
Ctrl + a, " - Tabbed a little practice. Now let's break our current region into two independent regions. This is done using the keyboard shortcut:
Ctrl + a, | - To be able to work in the second region, you need to go there and activate it explicitly. This can be done using:
Ctrl + a, Tab - Ctrl + a, c - Now let's run in the region to the left, for example, the midnight commander (any other utility) with the command:
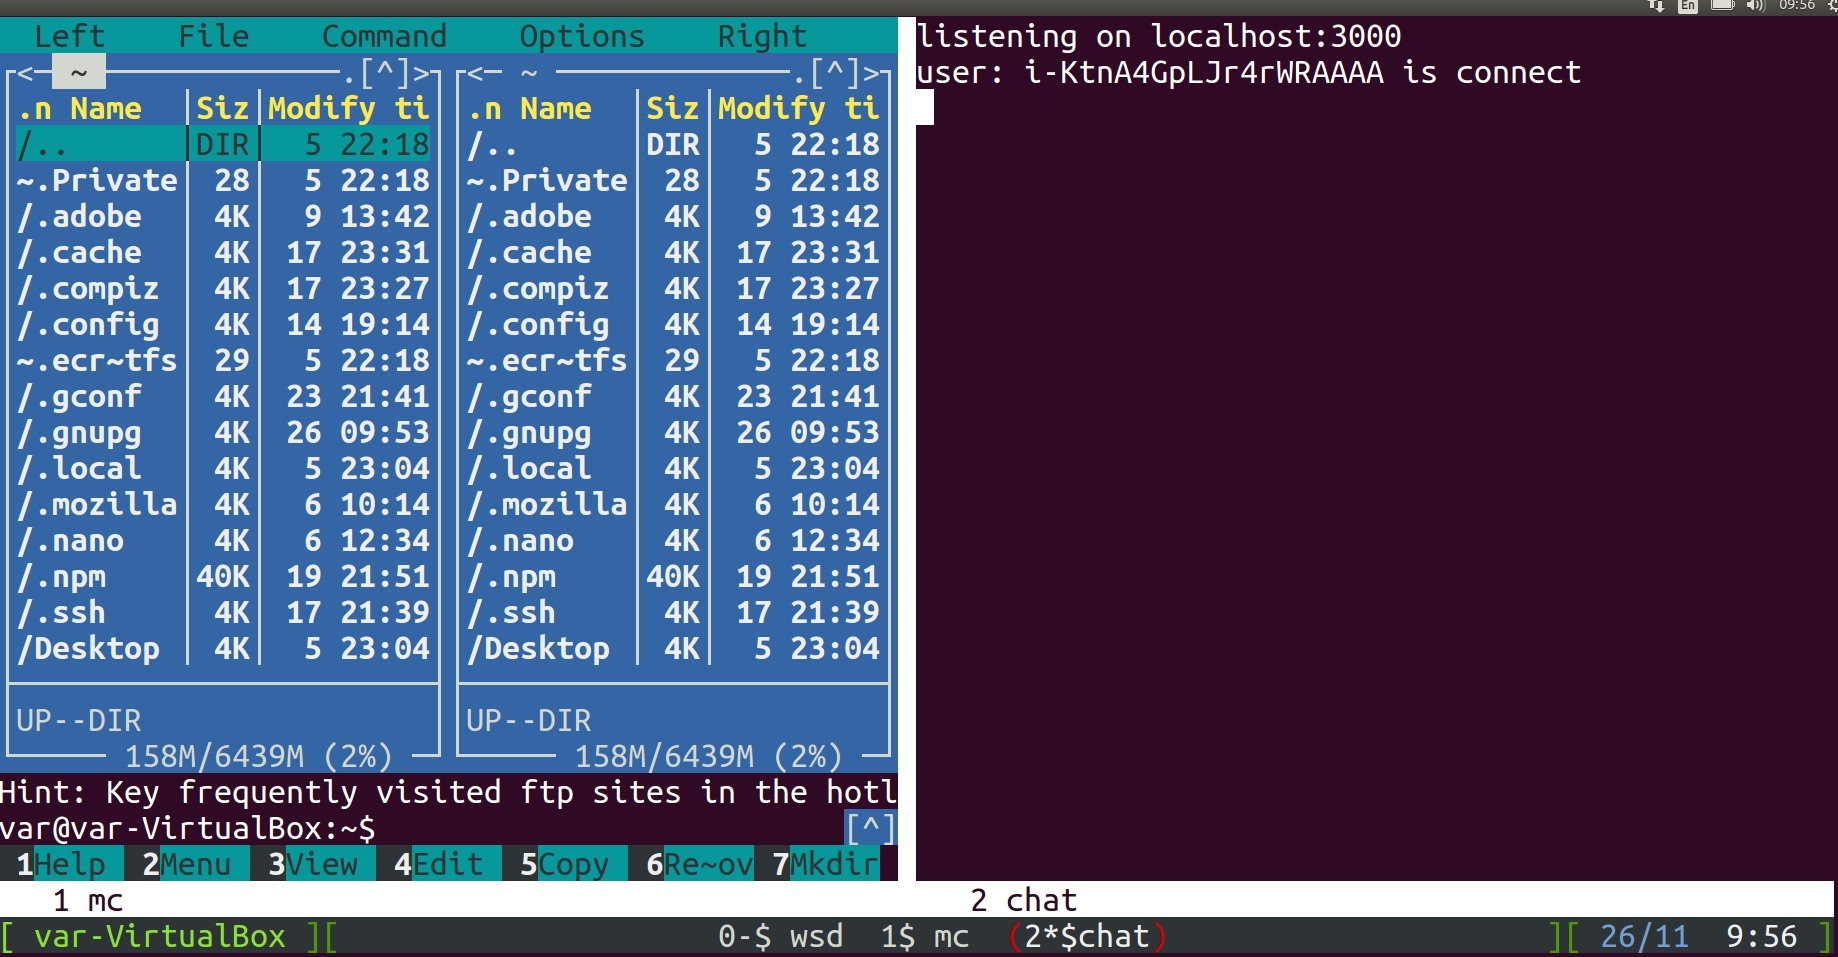
mc And in the region to the right, run our test application. This is a simple chat written in node.js and socket.io . This example is taken from the official site of socket.io. The only thing I added is a bit of logging so that we can see that it works. To do this, go to the directory
%repoName%/screen/chat-example . And execute commands: npm i node index.js %repoName% - the name of the directory in which it was replicated.If all is well, then you should see the line on the screen:
listening on localhost:3000 After that launch the browser and in the new tab go to
localhost:3000 . Type any message in the input line and press Enter . As you can see, everything works and you see this message also in the terminal. In the region where the node index.js command was node index.js .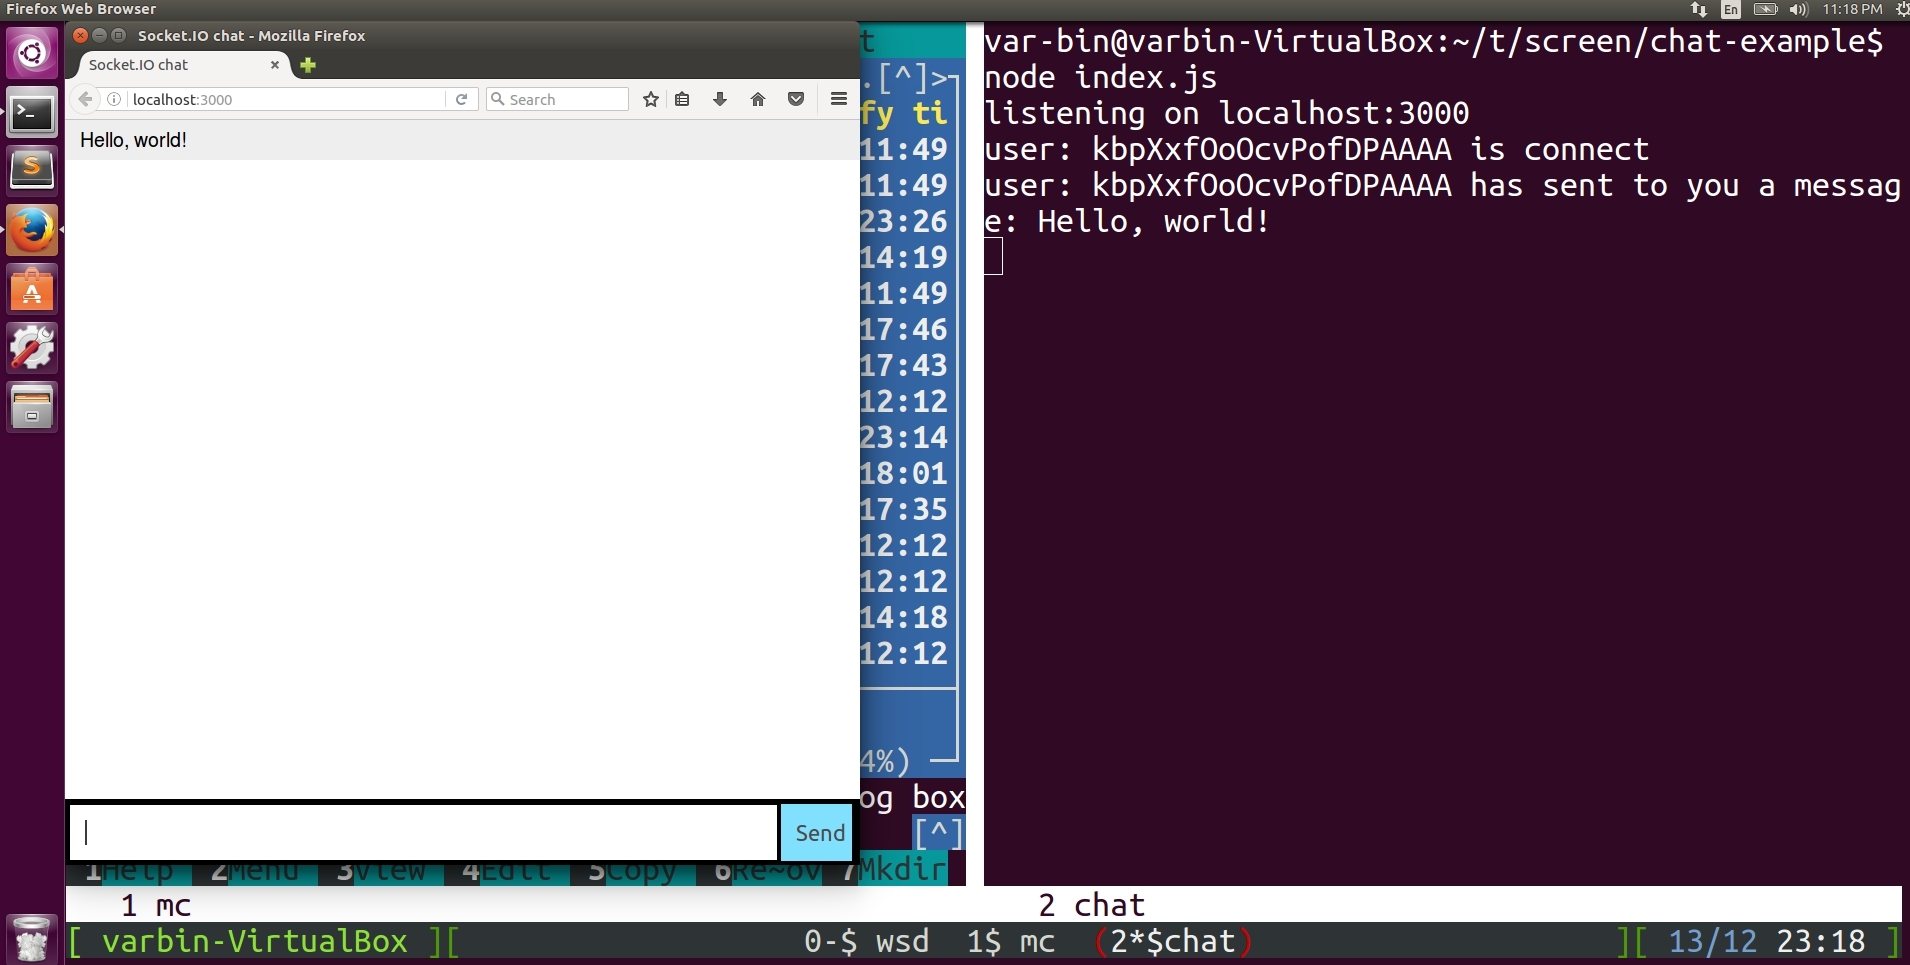
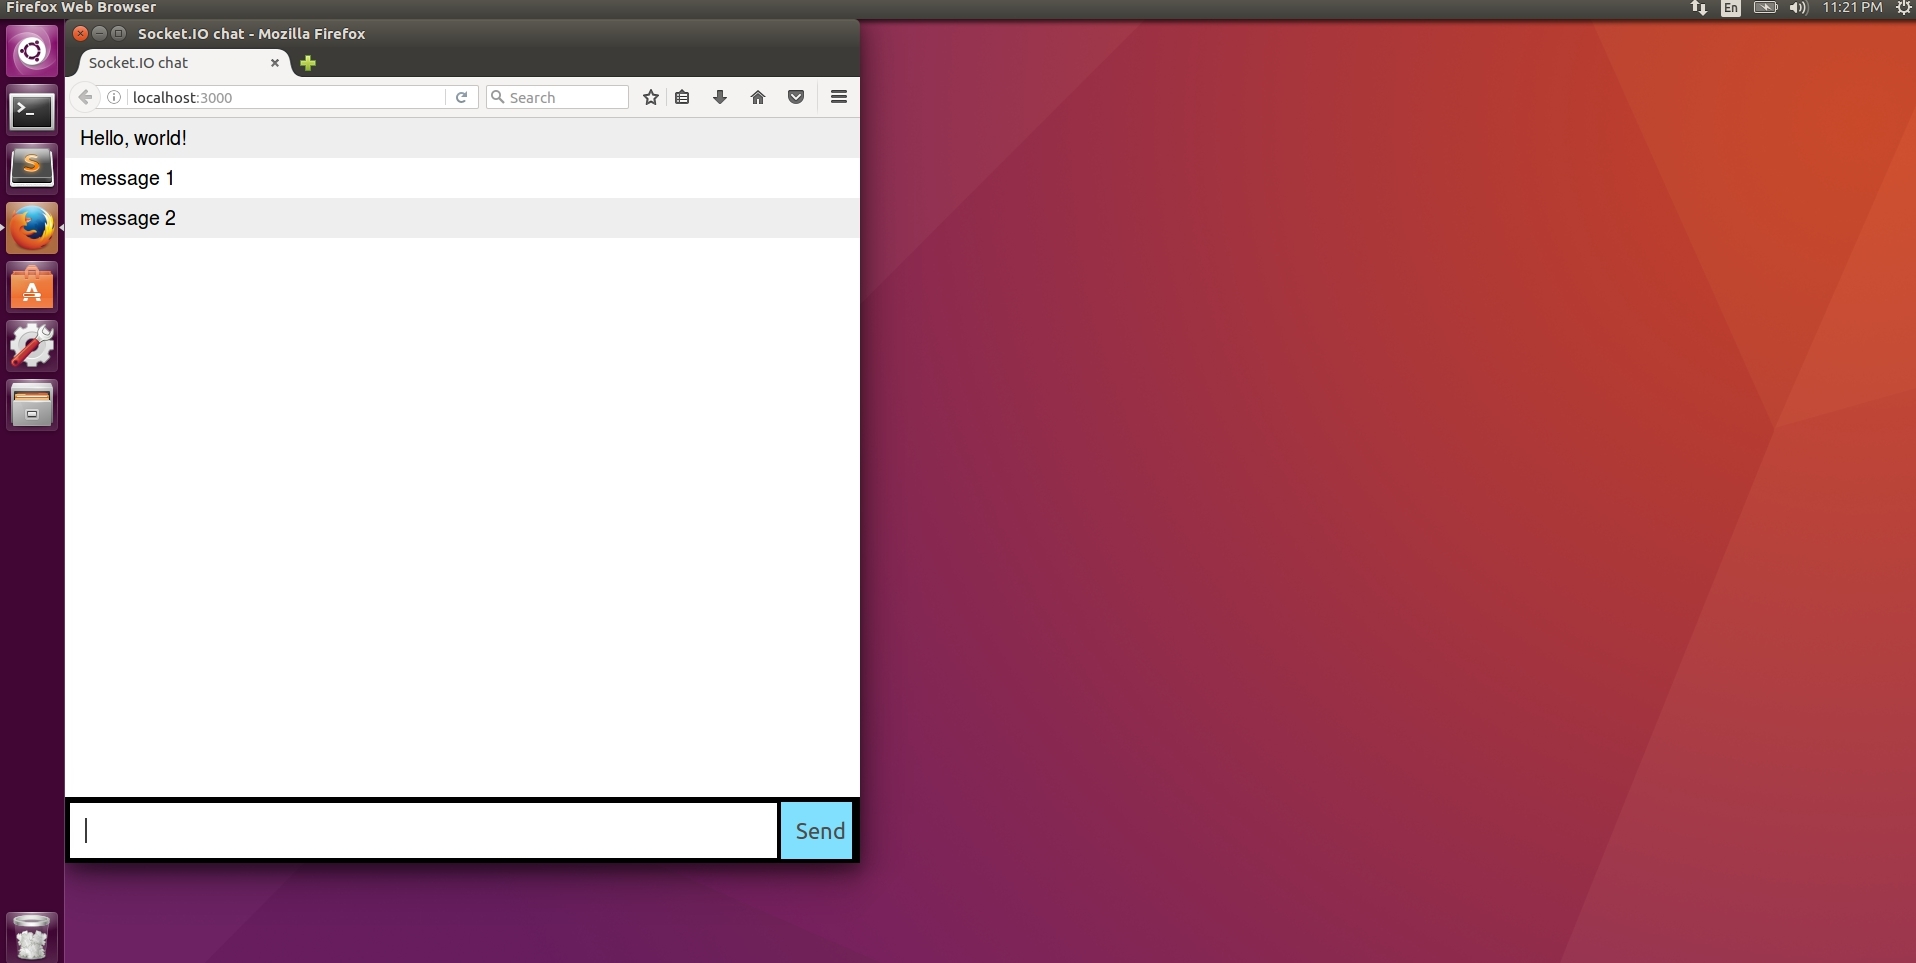
And now, the most interesting. Let's simulate a communication break. Close the terminal through the cross. But do not close the browser. And try to send some more messages. As you can see, everything continues to work. This is despite the fact that we have just closed the terminal.
This suggests that screen saved the session and all processes that were running. Let's connect back to this session. Start the terminal and execute the command:
screen -r 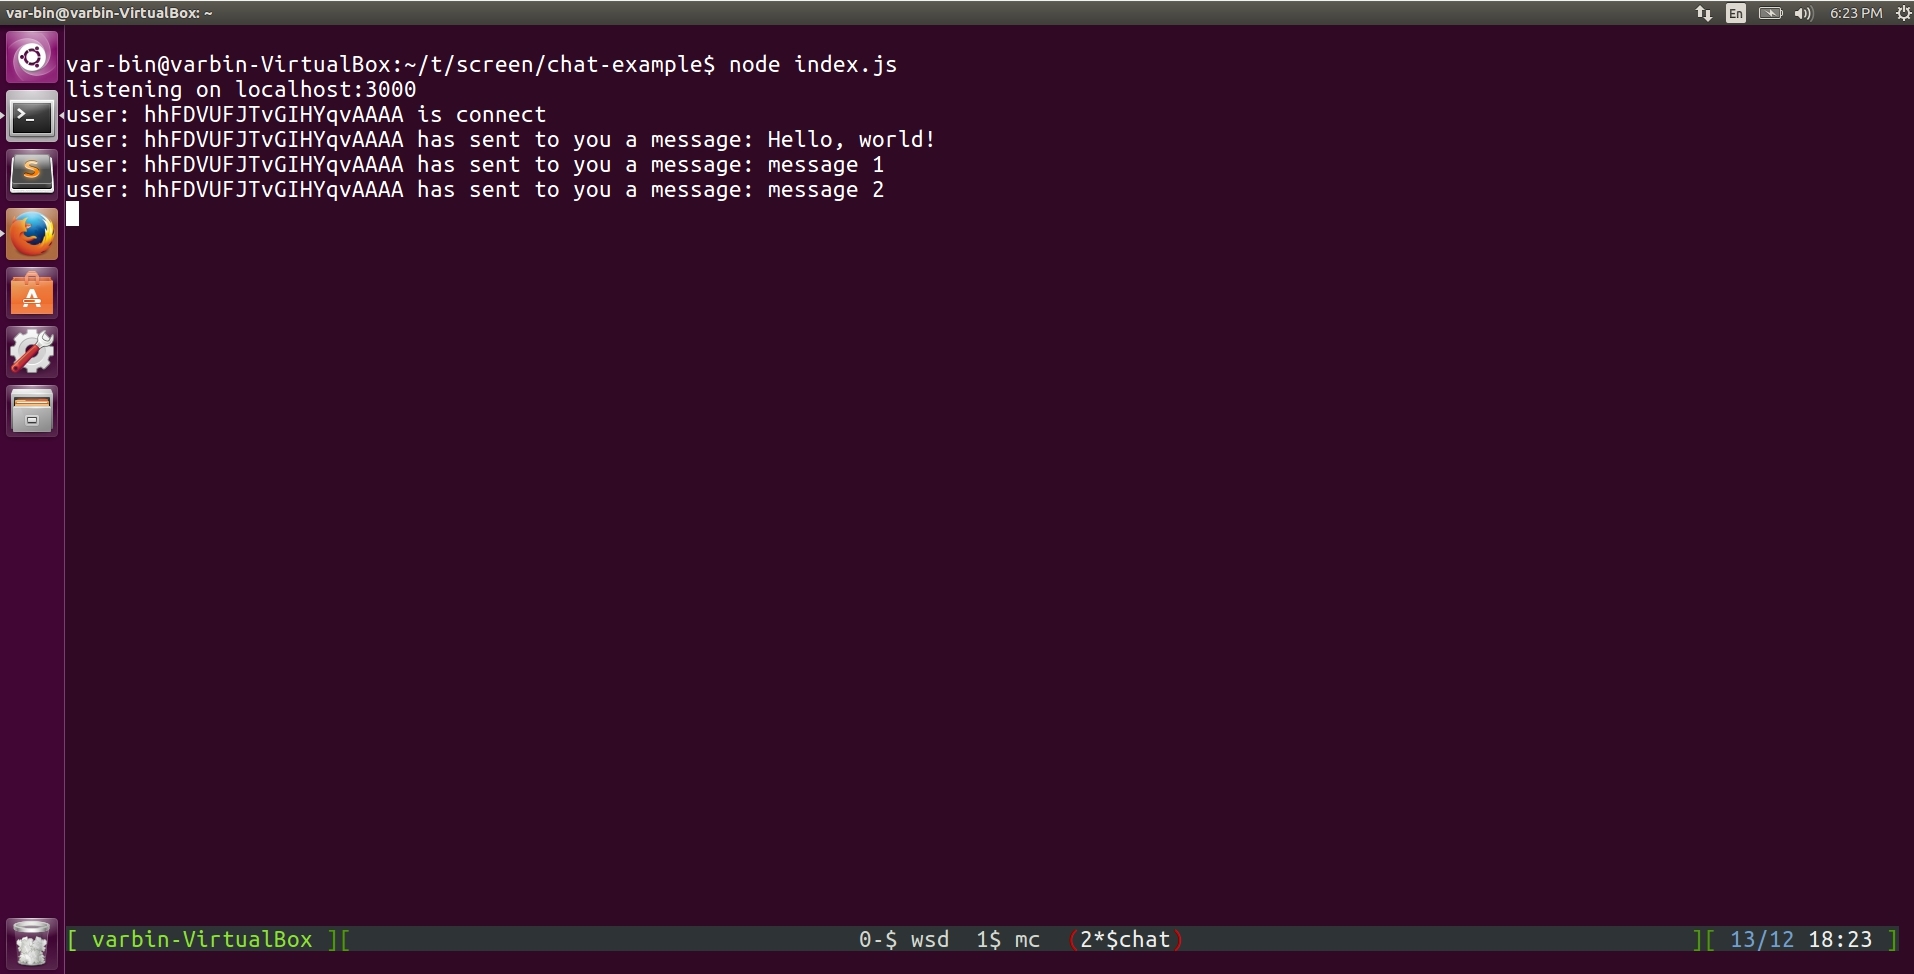
As you can see, the layout we created earlier did not survive. This is a pretty unpleasant surprise. In the settings of screen there are commands that allow you to configure the preservation of the previously created layout. But how much I have not tried, I did not start. And this is a situation when we have two or three tabs. And imagine a picture when we have six to ten tabs. Layout is divided into regions both vertically and horizontally. And at the most inopportune moment, we have a communication break. The only advantage is that all running processes will be saved.
I worked for a long time without terminal managers for one simple reason. I did not know about them! I thought it was normal to open several putty windows (windows + connection to a remote server) and switch between them using the
Alt + Tab shortcut. And somehow try to work in all this chaos.Now about the bad. screen cannot create layout for each tab. Also, the screen does not know how to preserve layout, if the connection is broken or something else is there. Before version 4.1, I could not do a vertical breakdown (for me this is critical). When you create a new region, you need to separately create a new window (
Ctrl+a, c ), make a transition to the desired directory, etc. To remove a region, you also need to suffer Ctrl+a :remove . For me, the screen was like a breath of fresh air in the middle of the metropolis. But in order to customize it “for yourself”, you need to spend a lot of time. And some Wishlist never managed to sip because of the limited implementation of the screen.Let's summarize. We reviewed one of the popular terminal managers, namely screen. We also looked at how to install and configure it. For example, consider the screen in the work. Once again I want to remind you: if you need to see what keyboard shortcuts are responsible for what, what settings you can still set for the screen, which options can be passed as arguments to the screen, and much more, then run the command:
man screen Looking a little ahead, in the next article we will look at a more advanced terminal manager, namely tmux. Also compare screen and tmux.
That's all. Thanks for attention. Who read to the end a special thank you. See you in the next article.
Source: https://habr.com/ru/post/317534/
All Articles