Automated recovery of MS SQL databases from backups

In this article, I would like to talk about how to use the Quick Maintenance & Backup for MS SQL utility to configure automatic recovery of databases from backups on a test instance of SQL Server on the network. At the same time create a backup will be a regular maintenance plan . The need for automated recovery may arise in the following cases:
- If you need to regularly update the database on the test servers.
- If you need to periodically check through the restoration of the created backups: full, differential and transaction logs.
On the net, you can find examples of scripts that allow you to automate these tasks to some extent. But most solutions require a good understanding of the T-SQL domain, and are likely to require changes to your Maintenance Plans. I will show how to do this in 15-20 minutes using the Quick Maintenance & Backup for MS SQL (QMB) utility. We use the XML recovery plan mechanism - it is an XML file with a sequence of backups that the utility can create. According to the information in the XML file, the program will receive a sequence of backups, create a T-SQL script for recovery and run it. Read more about this feature here .
Read more about the other features of the utility on the official website , as well as in this article .
Task
So, let's say there is a working SQL Server (Srv01) on which several databases with the Full Recovery Model are deployed. A maintenance plan has been created on the server with an arbitrary backup strategy. In my case it is:
')
Full backup - every week 24.00 on Sunday
Differential backup - every night at 24.00 except Sunday
Backup log - every day from 9.00 to 23.59 every 1 hour
Backups are created in the folder F: \ MS SQL \ Backup. In addition, for each database, SQL Server Agent creates separate subfolders.
Task: every day at 23:00 on the backup SQL Server (London) to restore the databases to the last possible state from the backups created on Srv01. Both servers are in the same local network. After each database is restored, its integrity must be checked (DBCC CHECKDB). Thus, every evening, except Sunday, there will be a recovery from the full backup, differential and transaction logs created during the day. On Monday, the recovery will be carried out from the full backup and transaction logs created during Monday. If for some reason the recovery fails, an email notification should be sent to the administrator.
It is clear that in order for a test SQL Server (London) to perform a recovery, it must have access to the backup files. There are two possible options:
- Share the folder F: \ MS SQL \ Backup on Srv01 so that it is available on London.
- Using QMB to copy backups to a shared network folder that is available on London.
Due to the additional reliability and simplicity of the settings, we will implement the second option, i.e. The utility will additionally copy files to a network folder.
General procedure
So, we need to do the following steps:
- Set up a shared network folder
- Install QMB utility
- Configure notifications and register two SQL Servers in the program: Srv01 and London.
- Create two new tasks in the program:
- Creating an XML recovery plan on a network drive
- XML plan recovery from a network drive
- Create two scripts in the program:
- The script, on the production server Srv01, performs the creation of an XML recovery plan in a shared folder with copying backup files to it. Start every 1 hour.
- The script, on a test server in London, performs a recovery from an XML plan from backups located in a shared folder. Start every day at 23.00.
Below we consider each step in more detail.
Install QMB
The utility can be downloaded here . Trial period - 30 days.
I put the utility on the London test server. In general, the program can be installed on any computer running around the clock, i.e. installation on SQL Server is optional. When installing the program, we leave all the default settings. The installer will install the QmbService service and the client.
SQL Server Registration and Configuring Notifications
When you first start the program will open the wizard. Let's move on to the next step and set the checkbox "Enable email-alerts" and enter the email address to receive notifications.
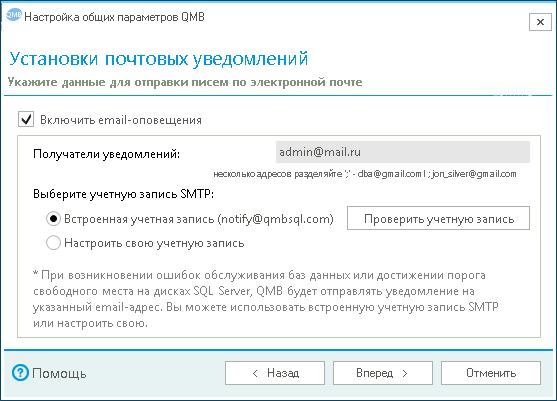
It is recommended to set up your own SMTP account for sending notifications, but for simplicity we will use the built-in one. Next, enter the name of the SQL Server and the account to connect to SQL Server. You must specify an account that has sysadmin privileges (sa default).
In the next step, the program will display the server version, license and indication of backup compression. All parameters are left by default and click the "Forward" button.
In the next window, you can set up tracking of free space on the disks. If this is not necessary, then remove all checkboxes from the disks.
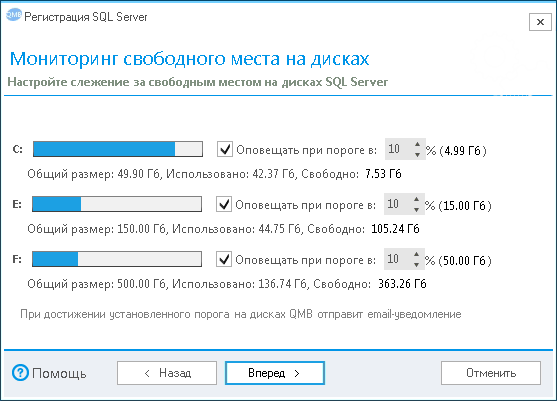
Click the "Forward" button.
We do not need to maintain the databases, so on the last page we will select “Create empty standalone script”. Then remove the checkbox "Create a standalone script to maintain the system databases" and click the "Finish" button.
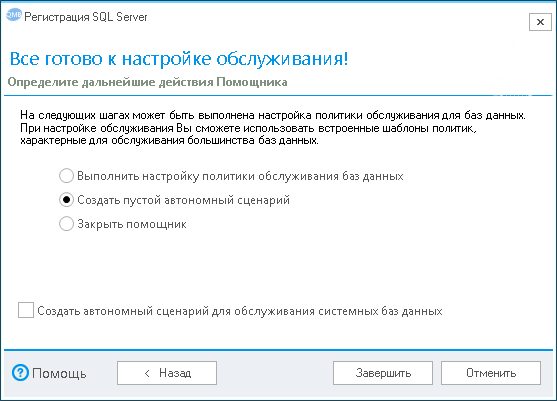
The program will register SQL Server and open the form of a new empty script.
Creating an XML Recovery Plan
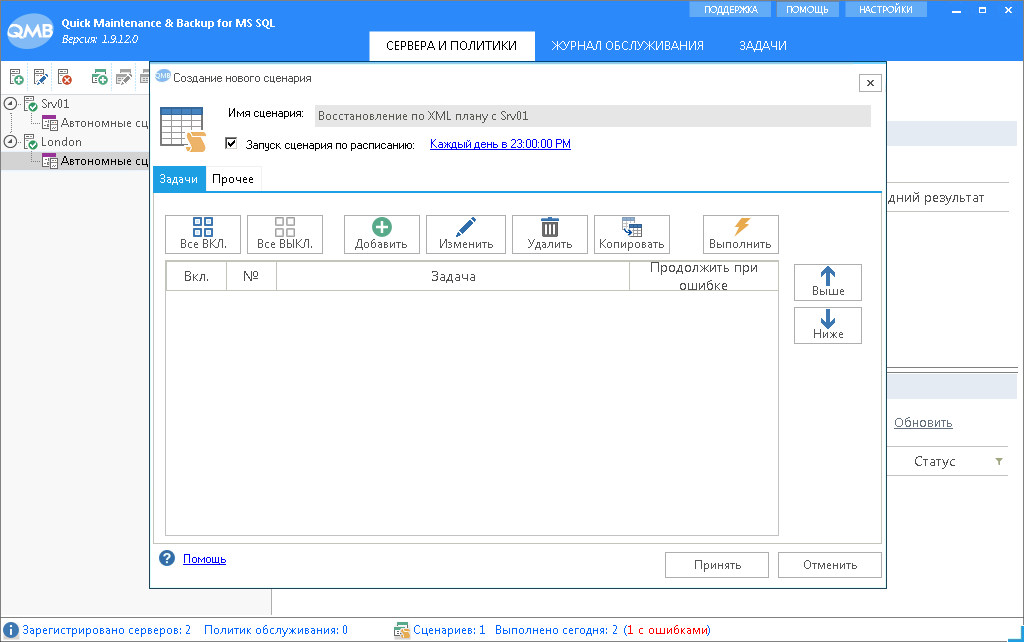
Any tasks in the program are executed within the framework of scripts. In the window of a new offline script, write its name in the creation of an XML recovery plan .

Add a task to the script that will create an XML recovery plan file. Click the "Add" button. A task selection form will open. Click the button
 "Add a new task." A new task form will open.
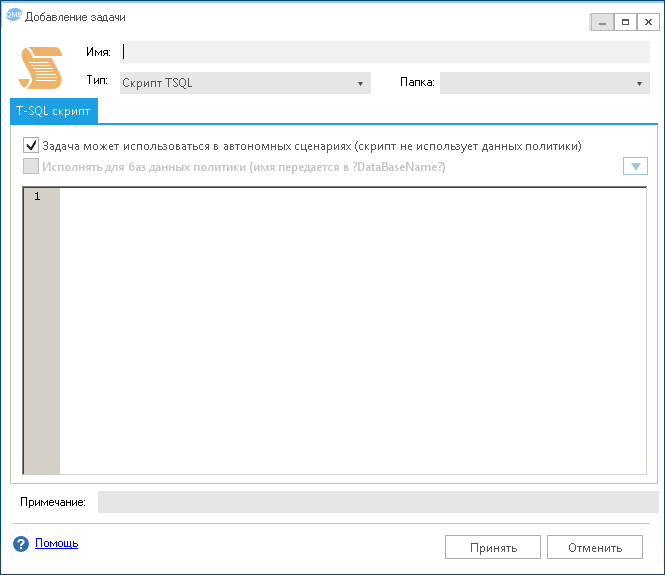
On the form you need:
- Change task type to "Create XML Recovery Plan"
- Create a new connection to the shared folder. In my case, this is the \\ Server \ Backup folder on the file server.
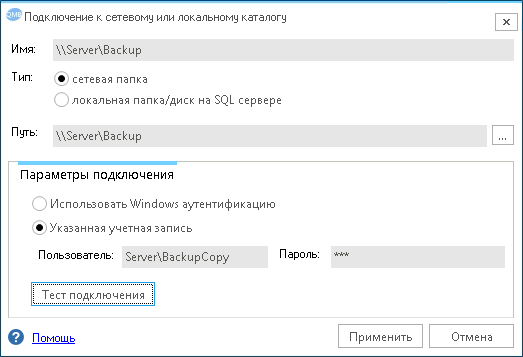
Note: For a network without a domain, the user name must be specified in the format: Computer \ User - Select the databases that will be included in the XML recovery plan. In my case, these are three bases - Account2013, Account2014, Account2015.
- Specify the name of the task - Creating an XML plan for Account2013, Account2014, Account2015.
After completing all the actions, the task form will look like in the figure below.

Pay attention to the feature “Copy missing backup files to a shared folder”. With this option, the program automatically copies the missing backup files from the local SQL Server disk to a network folder. At the same time, the program will determine the path to the source file independently from the information about the created backups, which SQL Server stores in the msdb system database.
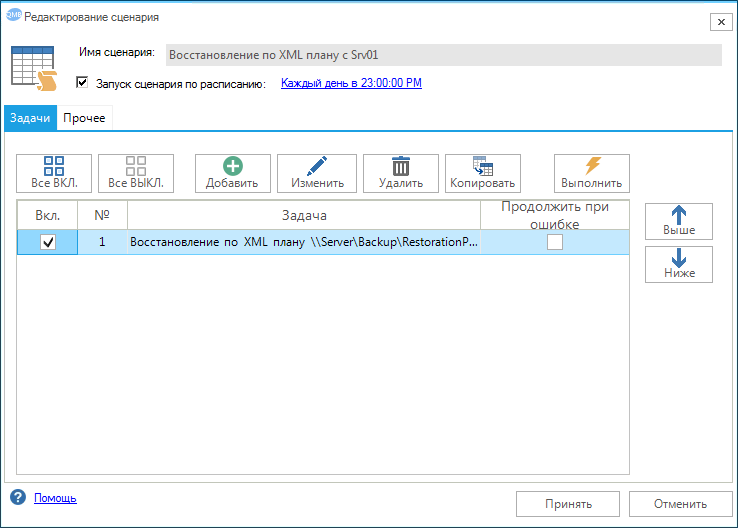
Click the Accept button and select the created task in the script. On the form of the script, set the flag “Run the script on a schedule” and specify the schedule: Every day, after 1 hour from 9:30 to 22:30. Let me remind you that the maintenance plan creates a backup of the log every hour from 9:00 to 23:59. Thus, QMB will update the XML recovery plan with a shift of 30 minutes (9:30, 10:30, 11:30, etc.). It should be noted that if backups were created by the QMB Maintenance Policy , the XML file of the recovery plan would be updated automatically.
The script should look like the image below.

Now check the script. To do this, click the Run button. If everything is configured correctly, the backup files will be copied to the network folder and the RestorationPlan.xml file will be created. If during the program the program does not find the necessary backup files, the task will end with an error. This way we will know in advance about potential problems. For example, quite often, administrators create a full backup of the database (without the COPY_ONLY parameter), and after the transfer they immediately delete it so that it does not take up space. However, this breaks the chain of backups and recovery to the current point in time becomes impossible. The program will identify this problem at the stage of creating an XML recovery plan.

Save the script. Now QMB every hour will re-create the XML recovery plan file and copy the new backup files that the SQL Server staff agent creates.
It should be noted that the task of creating an XML plan copies the files needed only for recovery to the last possible point in time. In this case, the files are copied without folders. All files will be placed in the specified network folder. The program has the ability to customize the copying of subfolders, and even deleting obsolete files in a network folder. This can be done through a custom task containing a CMD script or using the QMB Maintenance Policy .
Recovery on a test server
XML plan recovery is performed in the same way, using a special task placed in the script. However, recovery must be performed on a test SQL Server (London), therefore this server must also be registered in the program. To do this in the tree list on the left click the button
 "Register server". The process of registering a server is completely similar to that described earlier.
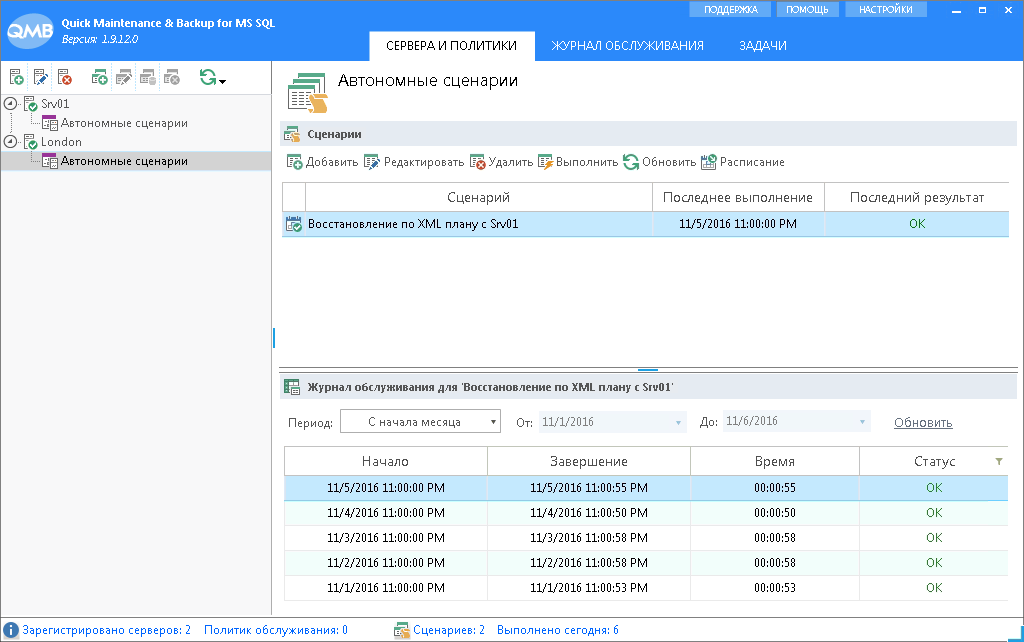
After registering the server, a stand-alone script window will open. Let 's enter the name Recovery by XML plan with Srv01 and specify its schedule: Every day at 23:00.
Now, from the form of the script, add a new task, in the same way as we created a task for creating an XML plan. However, now in the Type field we specify the XML plan recovery , select the previously created connection to the network folder and specify the XML file name. The Source Source switch determines which particular XML recovery plan databases need to be restored.
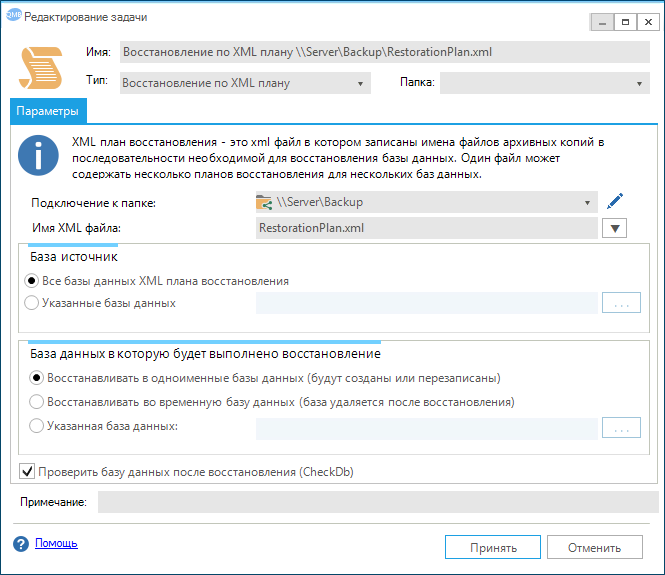
The database to which the recovery will be performed is determined by a switch of the same name. In our case, I will restore to the same database. This means that databases with similar names will be created / overwritten on SQL Server (in my case there are three databases: Account2013, Account2014, Account2015). Thus, these databases will be updated to the last state.
The Restore to a temporary database mode should be selected if the restore is performed to validate backup files and the restore procedure. In this mode, QMB will create a temporary database with the name qmbTempRestoreDb [Random index] , which will be deleted after restoring and checking its integrity.
Save the task and select it in our script.
To make sure that the recovery will be successfully run the script in manual mode. The program will consistently restore each database and test its integrity. Depending on the size of the database, the procedure can take considerable time.

Save the script. Now every day at 23:00 the program will automatically restore the databases and in case of failure send notifications to Email.
In addition, using the recovery plan XML file, the administrator can manually restore the databases to other SQL Servers using a program with a few clicks.
I am pleased to answer your questions in the comments or email support@qmbsql.ru
Thanks for attention!
Source: https://habr.com/ru/post/316822/
All Articles