Convert desktop app to appx using Desktop Bridge

With the release of Visual Studio 2017, you should be able to convert existing .NET / Win32 projects into the Windows Store application in a more comfortable way.
However, now to create an appx package from a .NET application, it is not at all necessary to install the 2017th studio. Enough SDK installed for Windows 10 and Visual Studio 2015 with Developer Command Prompt. What is good is the fact that after the Anniversary Update it is no longer necessary to download the image of the dozens and install some third-party software, if you have the source code of the project or the executable file.
I suggest creating an appx package from a .NET application using the Desktop Bridge (ex. Project Centennial) .
How can you do it now?
Create a root directory with the name, say, WPF2UWPApp. Let the name not confuse you, you can convert not only WPF applications, but also WinForms, Win32 and even VB6.
In this folder, copy the executable file of the application and all the necessary libraries.
')
Next, inside the folder, create an AppxManifest.xml file with similar content inside:
The contents of my AppxManifest.xml file
<?xml version="1.0" encoding="utf-8"?> <Package xmlns="http://schemas.microsoft.com/appx/manifest/foundation/windows10" xmlns:uap="http://schemas.microsoft.com/appx/manifest/uap/windows10" xmlns:rescap="http://schemas.microsoft.com/appx/manifest/foundation/windows10/restrictedcapabilities"> <Identity Name="WPF2UWPApp" ProcessorArchitecture="x86" Publisher="CN=AlexejSommer" Version="1.0.0.0" /> <Properties> <DisplayName>Simple WPF UWP App</DisplayName> <PublisherDisplayName>Alexej Sommer</PublisherDisplayName> <Description>Simple converted from WPF to UWP application</Description> <Logo>Assets\SampleAppx.150x150.png</Logo> </Properties> <Resources> <Resource Language="en-us" /> </Resources> <Dependencies> <TargetDeviceFamily Name="Windows.Desktop" MinVersion="10.0.14393.0" MaxVersionTested="10.0.14393.0" /> </Dependencies> <Capabilities> <rescap:Capability Name="runFullTrust"/> </Capabilities> <Applications> <Application Id="WPF2UWPApp" Executable="DemoWPFApp.exe" EntryPoint="Windows.FullTrustApplication"> <uap:VisualElements BackgroundColor="#464646" DisplayName="Simple WPF UWP App" Square150x150Logo="Assets\SampleAppx.150x150.png" Square44x44Logo="Assets\SampleAppx.44x44.png" Description="Simple converted from WPF to UWP application" > <uap:DefaultTile Wide310x150Logo="Assets\Wide310x150Logo.png"/> </uap:VisualElements> </Application> </Applications> </Package> In the manifest, we use a minimal set of logos. The 3 files SampleAppx.44x44.png, SampleAppx.150x150.png and Wide310x150Logo.png with the corresponding name permissions must be located inside the Assets subdirectory.
I am not going to publish this application in the Store, so I specified an arbitrary value as the CN publisher, and not associated with my Store account. As you may have noticed, I am not an insider now and am using the last stable build of tens - 10.0.14393.0
Once again the structure:
Inside the root directory is the AppxManifest.xml manifest file, the application file (in my case, this is the DemoWPFApp.exe file) and other supporting files and libraries. In addition, inside there is an Assets folder with logo files. At a minimum, these are the SampleAppx.44x44.png, SampleAppx.150x150.png, and Wide310x150Logo.png files. After creating the structure and editing the contents of the AppxManifest.xml file, you can start creating the application package.
Before creating a package, you can test the correctness of the manifest and the attached files by installing the application as a universal one, using its manifest. For a test installation, open PowerShell and execute the command (being in the same directory as the AppxManifest file)
Add-AppxPackage -Register ".\AppxManifest.xml" The -Register parameter registers the application in development mode. In order to register the finished application, you must also use the –DisableDevelopmentMode parameter.
The application will be installed as if it was installed from a ready-made appx package or downloaded from the Store. A link to it will even appear in the Start menu. Such testing is especially convenient if you add some UWP functionality to a .NET application and want to test it right away.
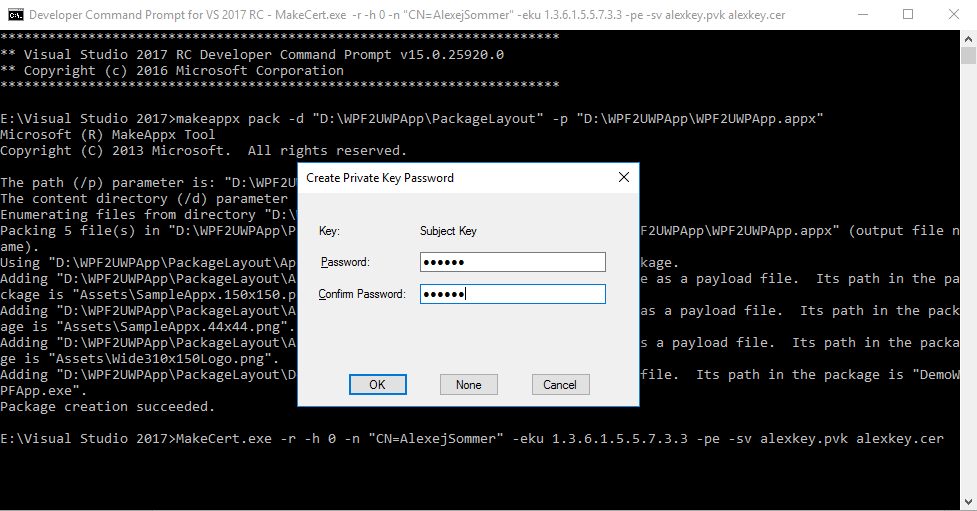
Let's return to the application packaging in appx. To do this, open the Developer Command Prompt. Run the following command, which creates the appx file:
makeappx pack -d "D:\WPF2UWPApp" -p "D:\WPF2UWPApp\WPF2UWPApp.appx" Copy the certificate file from the finished project or create a test certificate as described here: Sign an app converted with the Desktop Bridge
The MakeCert utility is inside the bin SDK folder. On my machine, this is C: \ Program Files (x86) \ Windows Kits \ 10 \ bin \ x64. The command syntax is:
MakeCert.exe -r -h 0 -n "CN=<publisher_name>" -eku 1.3.6.1.5.5.7.3.3 -pe -sv <my.pvk> <my.cer> The name of the publisher CN in the manifest must match the name in the certificate. The –eku 1.3.6.1.5.5.7.3.3 parameter is an enhanced key usage object identifier (OID), which is used to sign the code (szOID_PKIX_KP_CODE_SIGNING). Detailed information on the MakeCert parameters can be found on its MSDN page . There is also information that the utility is outdated and instead it is now recommended to use a PowerShell cmdlet called New-SelfSignedCertificate. However, even in the latest examples of using the Desktop Bridge, a MakeCert is still used.
In my case, the command is:
MakeCert.exe -r -h 0 -n "CN=AlexejSommer" -eku 1.3.6.1.5.5.7.3.3 -pe -sv alexkey.pvk alexkey.cer Note again that the CN is exactly the same as in the manifest. If you are prompted for a password, you can enter it or click None. Official documentation suggests not to use a password.
Next, move both the public and private keys to the certificate:
pvk2pfx.exe -pvk alexkey.pvk -spc alexkey.cer -pfx alexcert.pfx Now, using SignTool, you can sign our appx package with a certificate. Both files (alexcert.pfx and WPF2UWPApp.appx) should be located in the current folder:
signtool.exe sign /a /v /fd SHA256 /f "alexcert.pfx" "WPF2UWPApp.appx" If you decide to use a password, then the / p parameter will be added.
signtool.exe sign /a /v /fd SHA256 /f "alexcert.pfx" /p "<>" "WPF2UWPApp.appx" If you hurry now and try to install appx, then most likely during the installation you will receive an error message:
You need to either install a new certificate for this application package, or a new application package with trusted certificates. Your system administrator or application developer can help. The certificate chain has been processed, but completed in a root certificate that is not trusted (0x800B0109)
The fact is that:
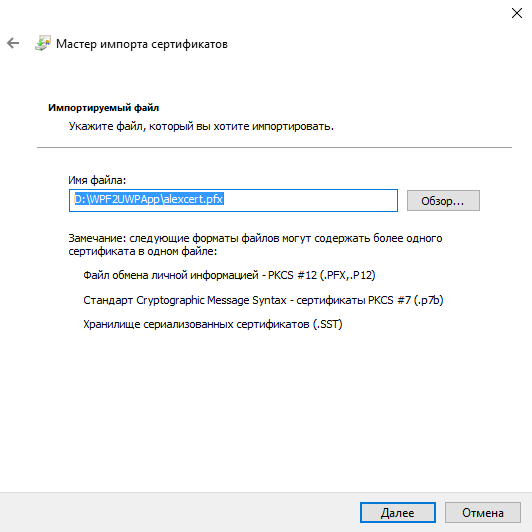
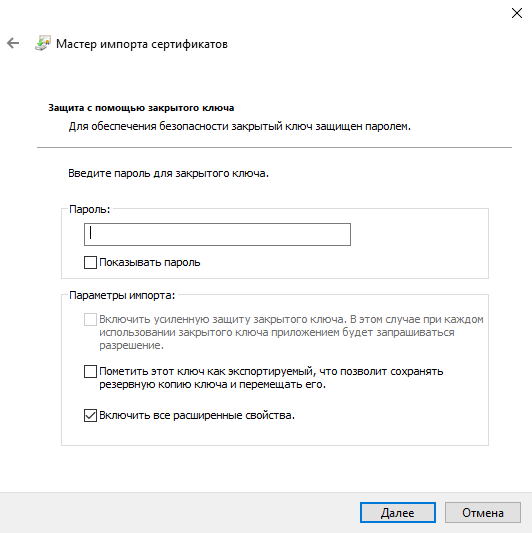
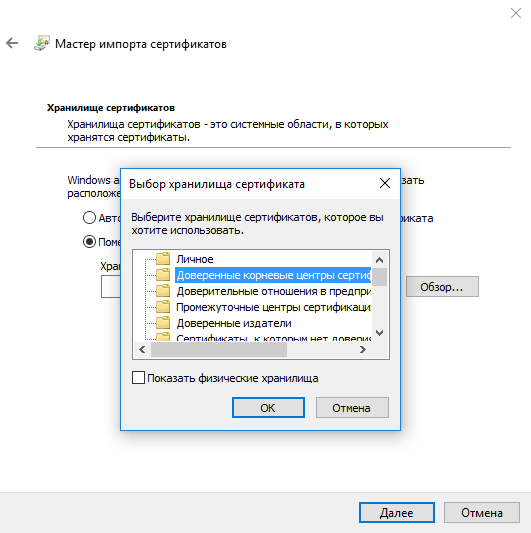
For Windows to consider the certificate trusted, the certificate must be located in the Certificates node (local computer)> Trusted Root Certification Authorities> Certificates or Certificates (local computer)> Trustees> Certificates .
So, before installing the application, you need to install a certificate. Double click on the certificate install it in the local computer storage
How to install the certificate in pictures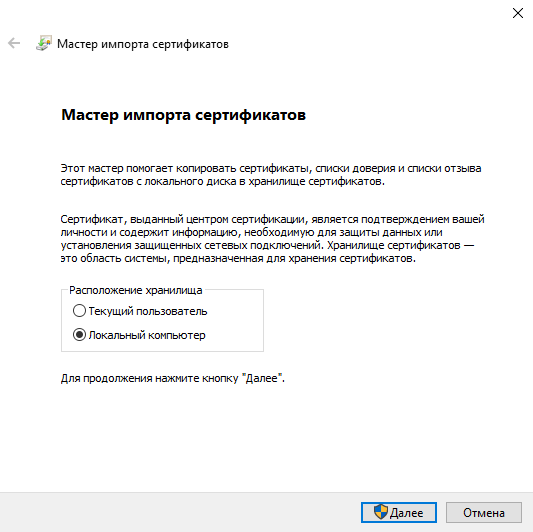

After installing the certificate, you can install the application itself by clicking on the appx file
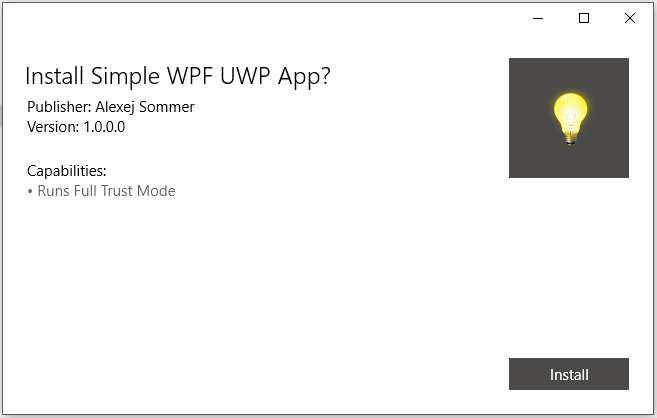
The bulb on the screenshot is the logo of my demo application.
How can this be done in Visual Studio 2017
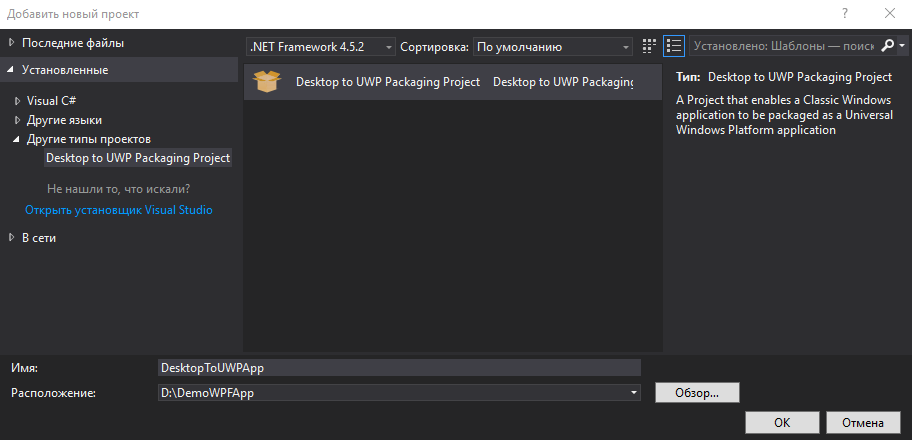
At the moment, Visual Studio 2017 is in the Release Candidate stage. To automatically create an appx package, you need to install the Desktop to UWP Packaging Project extension.
Open an existing project. Add the following project type to the solution:
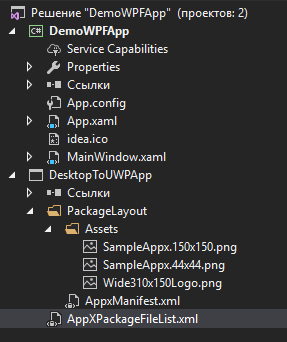
Create a PackageLayout folder. Inside it, create an Assets folder. In the PackageLayout folder, add the AppxManifest.xml manifest file (for now, you need to create the file manually). In Assets, copy the files SampleAppx.44x44.png, SampleAppx.150x150.png and Wide310x150Logo.png.
Do not forget that it is necessary not only to copy the files, but also to add them to the Visual Studio project.
The structure of our solution will be as follows:
In the project properties, specify the PackageLayout folder. If you did everything correctly, then in the Start Up Tile field you will be able to choose a tile from the drop-down list.

Now let's look at the contents of the AppXPackageFileList.xml file. By default it is:
<?xml version="1.0" encoding="utf-8"?> <Project ToolsVersion="14.0" xmlns="http://schemas.microsoft.com/developer/msbuild/2003"> <!-- <PropertyGroup> <MyProjectOutputPath>C:\MyProject\MyProject\bin</MyProjectOutputPath> </PropertyGroup> <ItemGroup> <LayoutFile Include="$(MyProjectOutputPath)\x86\Debug\MyProject.exe"> <PackagePath>$(PackageLayout)\MyProject.exe</PackagePath> </LayoutFile> </ItemGroup> --> </Project> As a result of the edits, you get something like this:
<?xml version="1.0" encoding="utf-8"?> <Project ToolsVersion="14.0" xmlns="http://schemas.microsoft.com/developer/msbuild/2003"> <PropertyGroup> <MyProjectOutputPath>$(PackageLayout)\..\..\DemoWPFApp\bin</MyProjectOutputPath> </PropertyGroup> <ItemGroup> <LayoutFile Include="$(MyProjectOutputPath)\Debug\DemoWPFApp.exe"> <PackagePath>$(PackageLayout)\DemoWPFApp.exe</PackagePath> </LayoutFile> </ItemGroup> </Project> Here, the directory from which .NET application files will be taken is set as MyProjectOutputPath. Climbing up two levels (that is what \ .. \ .. \) from the PackageLayout is the DemoWPFApp directory, inside which is the bin directory. That is, the folder is taken from the second draft decision.
Now it’s enough to assign the Desktop to UWP Packaging project to be auto-downloadable, run the project to run F5 and ... we have to get appx at the output. But so far it does not work. Tbd We are waiting for release.
As you can see, some of the handmade work is still there. You still need to manually create a directory structure, create a manifest, and modify the AppXPackageFileList file. I hope that in the release all this is automated.
Similar English article: Desktop Bridge - Manually converting a desktop application
Alternatives
Microsoft is actively working with partners to be able to simultaneously create both msi and appx installers. More information can be found at the following links:
» FireGiant WIX toolset extensions
» Flexera Software's InstallShield
» Advanced Installer
» InstallAware APPX Builder
In addition, Embarcadero announced support for the Desktop Bridge in its Embarcadero RAD Studio.
Why do you need it?
I will give some obvious options:
1. Publish the application to the Store.
2. Application Lifecycle. Universal applications can be installed and removed many times, without fear that they will leave behind any garbage.
3. The ability to add functionality to the .NET application that is available for UWP applications.
4. Distribution and testing through the device portal . Ops will thank you.
Source: https://habr.com/ru/post/316490/
All Articles