Remote backup of VMware cloud resources via self-service portal
November 16, Veeam Availability Suite 9.5. After the release, new features appeared not only among users, but also among service providers. The main news for us is a self-service portal for backing up a virtual infrastructure based on VMware vCloud Director.
We have already deployed the portal, and it is available to anyone who rents resources in the CloudLine cloud, uses our backup and is licensed by Veeam Enterprise Plus. Now, in order to backup a virtual machine, change the backup schedule, or restore the desired virtual machine, it is not necessary to contact DataLine technical support.
Below we will tell you how to turn all this on your own using Self-Service Backup Portal.
')
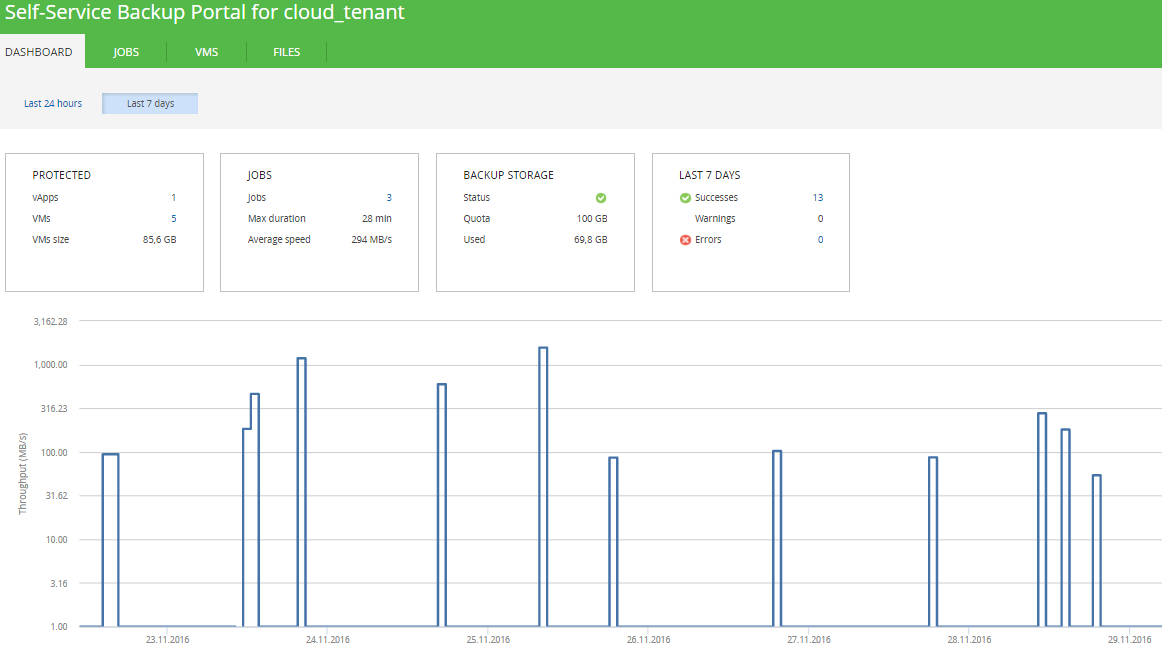
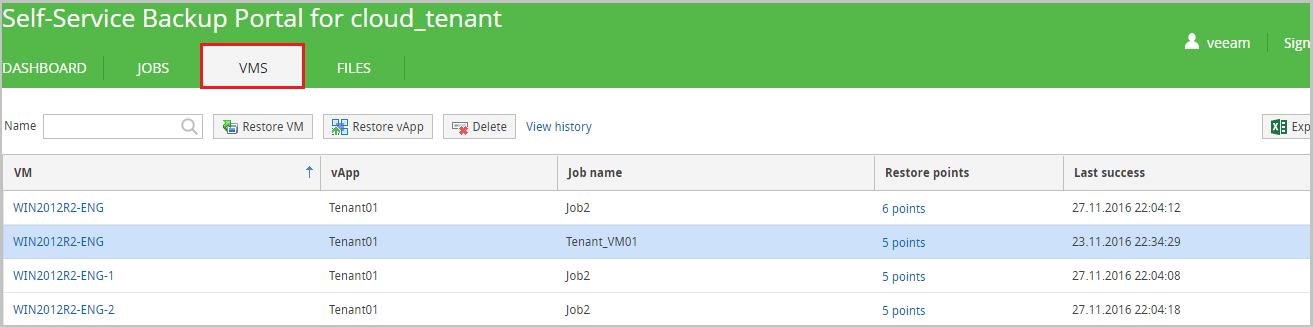
On the main Dashboard page, you can clearly see the statistics on objects, backup operations and available disk space for backups. In the Jobs tab, tasks are created and managed, in VMs , recovery of virtual machines, in Files , recovery of individual files.
For authorization on the self-service portal, the same account is used as for logging into the vCloud Director.
Important: when restoring via the self-service portal, the virtual machine will be overwritten. To restore nearby, in vCloud change the name of the VM. In this case, do not forget to reflect the changes in the Veeam task if you have tasks for this VM.
That's all. Ask questions in the comments.
Related articles:
→ Replication and disaster recovery to the cloud using Veeam Cloud Connect Replication
→ vCloud Director for the smallest (part 1): network setup
→ vCloud Director for the smallest (part 2): creating virtual machines
→ vCloud Director for the smallest (part 3): setting up a load balancer
→ vCloud Director for the smallest (part 4): everything about working with virtual machine templates
We have already deployed the portal, and it is available to anyone who rents resources in the CloudLine cloud, uses our backup and is licensed by Veeam Enterprise Plus. Now, in order to backup a virtual machine, change the backup schedule, or restore the desired virtual machine, it is not necessary to contact DataLine technical support.
Below we will tell you how to turn all this on your own using Self-Service Backup Portal.
Creating a backup job
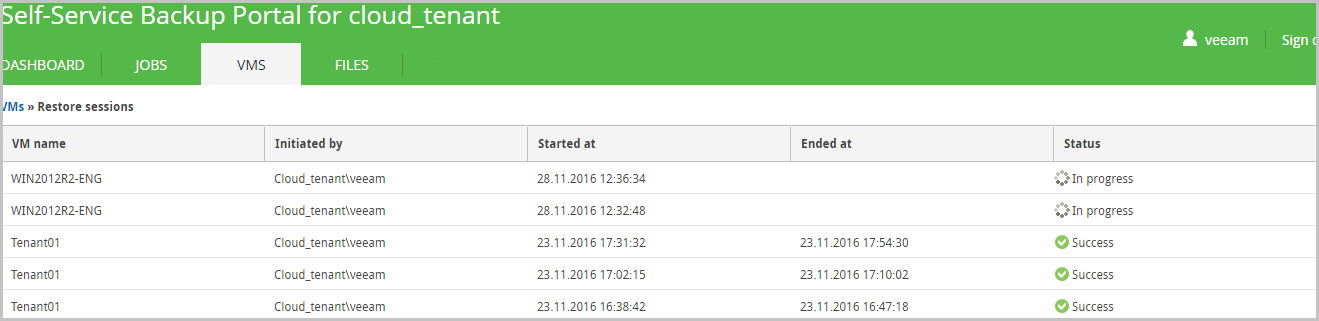
Virtual machine recovery
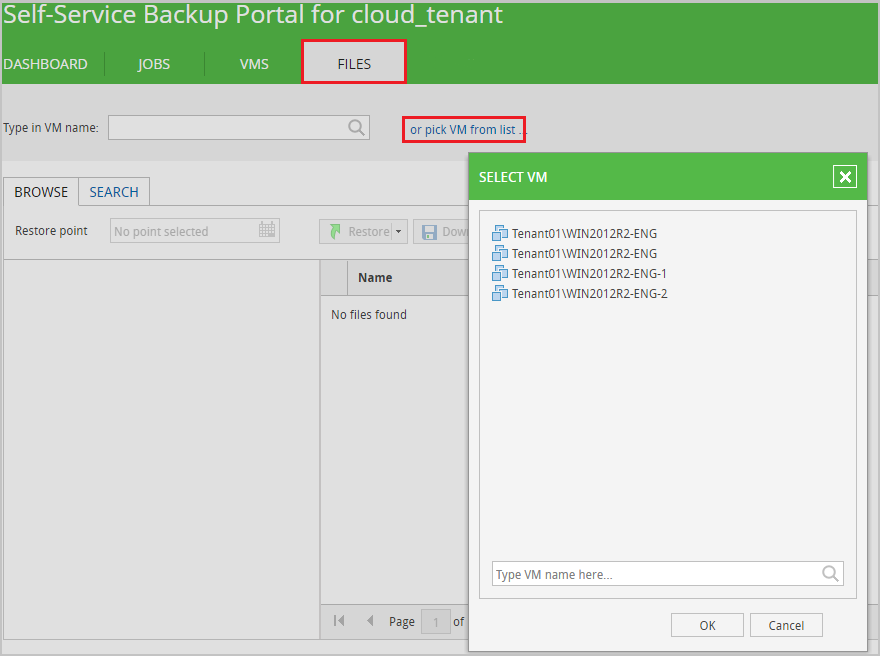
Restore individual virtual machine files
')
On the main Dashboard page, you can clearly see the statistics on objects, backup operations and available disk space for backups. In the Jobs tab, tasks are created and managed, in VMs , recovery of virtual machines, in Files , recovery of individual files.
For authorization on the self-service portal, the same account is used as for logging into the vCloud Director.
Creating a backup job
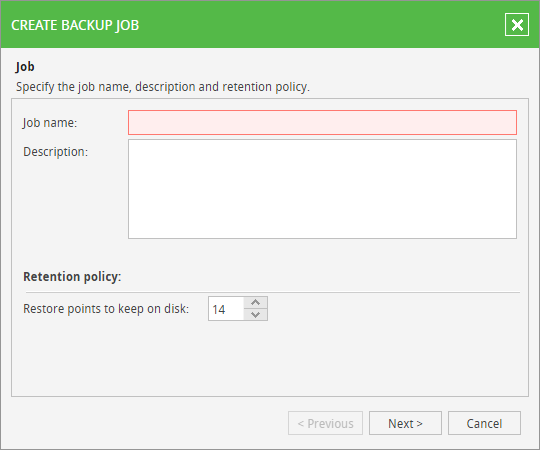
- Go to the Jobs tab and click Create.

- Specify a name, description, and data retention policy (number of recovery points). Click Next.
- Add the virtual machines you want to backup. Click Add.
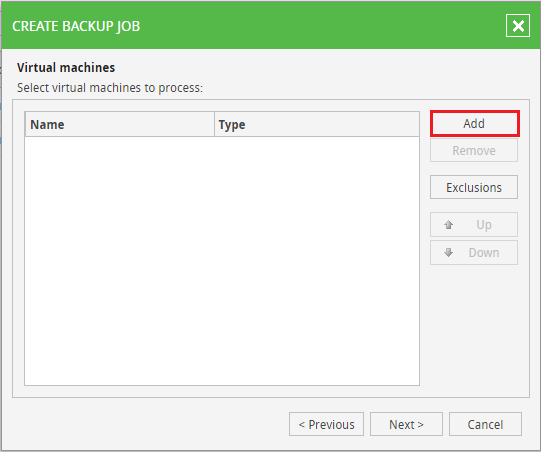
- Select one or more virtual machines in your organization. We recommend adding to the task no more than 10 VM with a total volume of no more than 1 TB. In this case, the task execution time will be optimal.
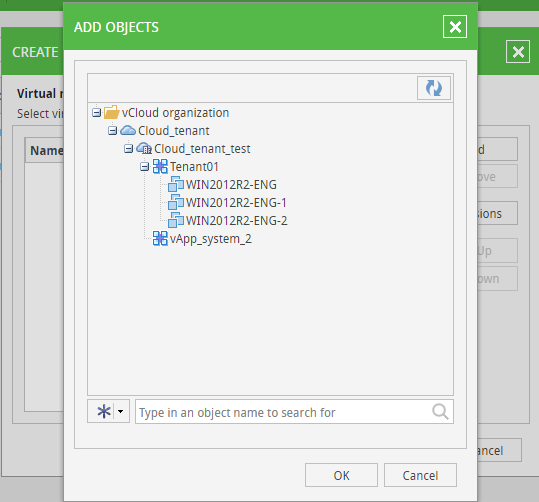
If you need to add many virtual machines at the same time, then you can select vApp or the entire organization. If in the future some machine will need to be removed from the backup, just add it to the exceptions (Exclusions). Also for each backup object you can set a priority (Up, Down): the objects at the top of the list will be processed first.
- For virtual machines on Windows, you can activate the consistent backup option for the application and system software installed on the virtual machine (Enable application-aware image-processing).
Enable the option Guest guest file system indexing if you want to get advanced file search capabilities in a virtual machine. If this option is disabled, then you will only be able to search in the selected backup.
Enter credentials (Guest OS credentials) to activate these features. Click Next.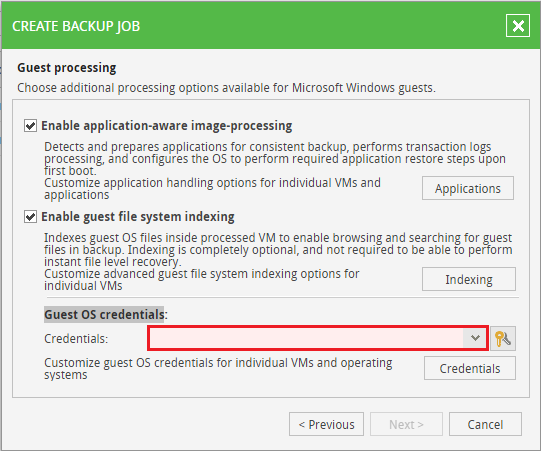
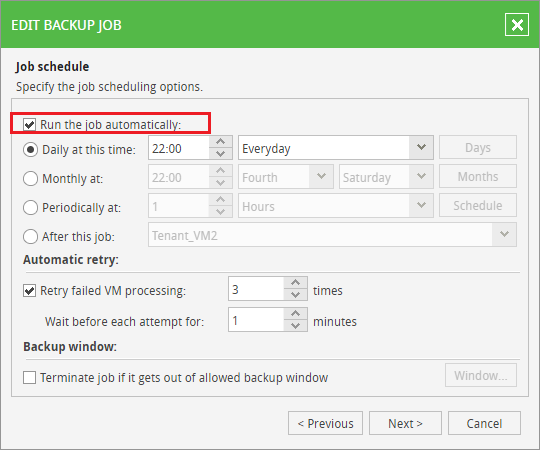
- Set up a schedule for automatic backups. Click Next.
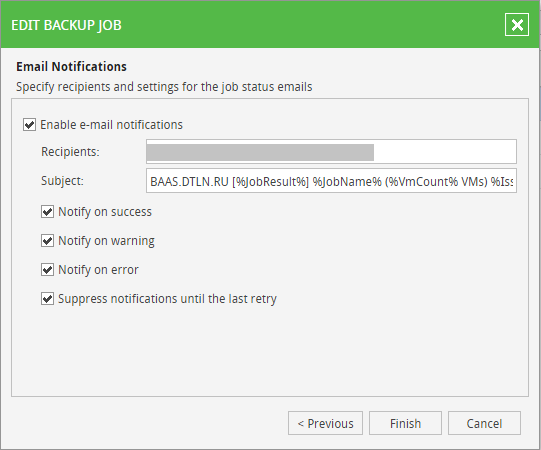
- If necessary, configure sending a notification about the backup status. Click Finish.
- A new task will appear in the list.
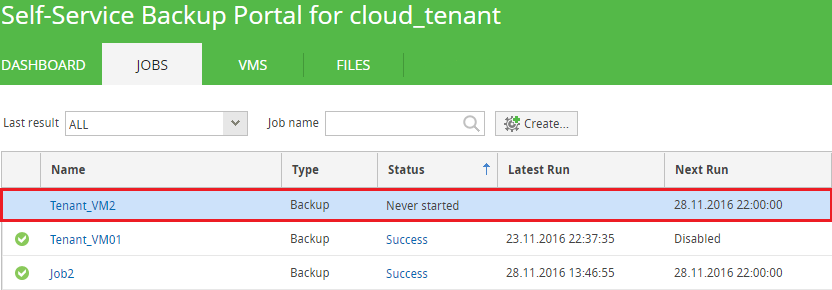
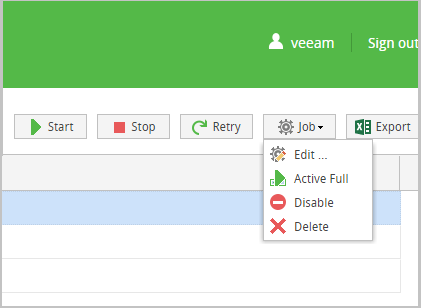
- On the control panel, any task can be:
- start manually - Start;
- restart - Retry;
- edit - Edit;
- make a full backup for this task - Active Full;
- disable / activate - Disable / Enable;
- Delete with or without all existing backups - Delete;
- export to Excel - Export.
Restore a virtual machine from backup
Important: when restoring via the self-service portal, the virtual machine will be overwritten. To restore nearby, in vCloud change the name of the VM. In this case, do not forget to reflect the changes in the Veeam task if you have tasks for this VM.
- Go to the VMs section and select the desired virtual machine. Click Restore VM if you want to restore as a separate virtual machine. If you need to restore the vApp to which the selected VM belongs, select Restore vApp. Consider the recovery scenario of a separate virtual machine.
- Select a restore point.
If necessary, activate the option to automatically start the VM after recovery (Power on VM after restoring).
When you activate Quick rollback (restore blocks only), all changes will be rolled back from the moment of the selected restore point. Click Restore.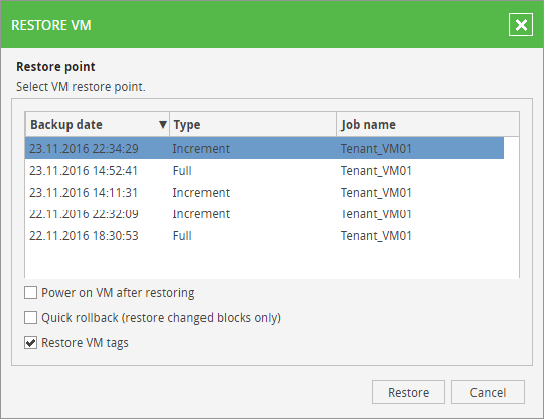
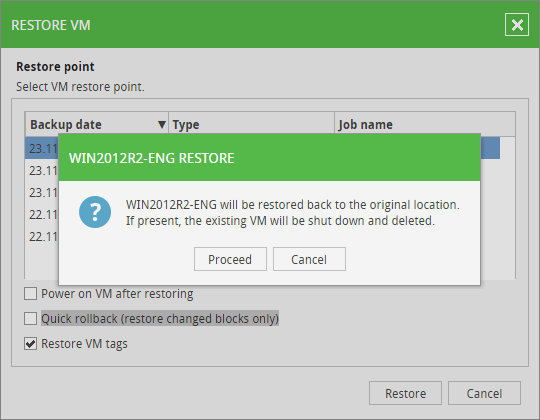
- Before starting the recovery, a warning will appear that the backup will be deployed on top of the running machine. A running machine will be shut down and removed.
- The recovery status will be displayed on the same tab.
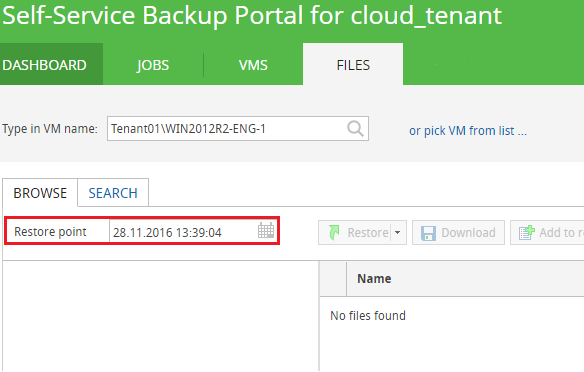
Restore individual files
- Go to the Files section. Select the virtual machine where the file is located.
- Select a restore point.
- Click on Mount backup.
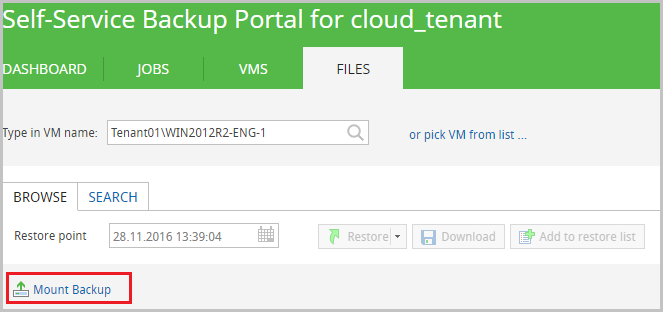
- Find the desired directory and file. The file can be restored to the original server or downloaded locally.
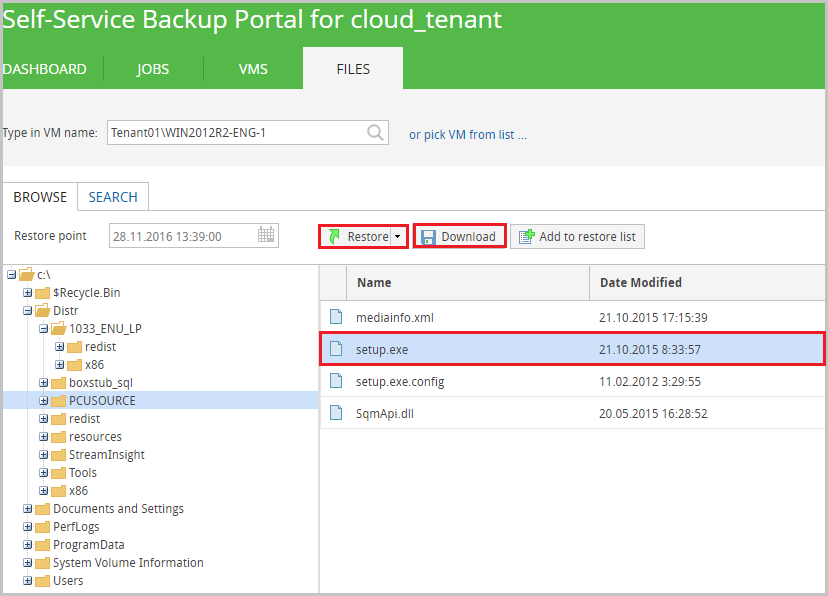
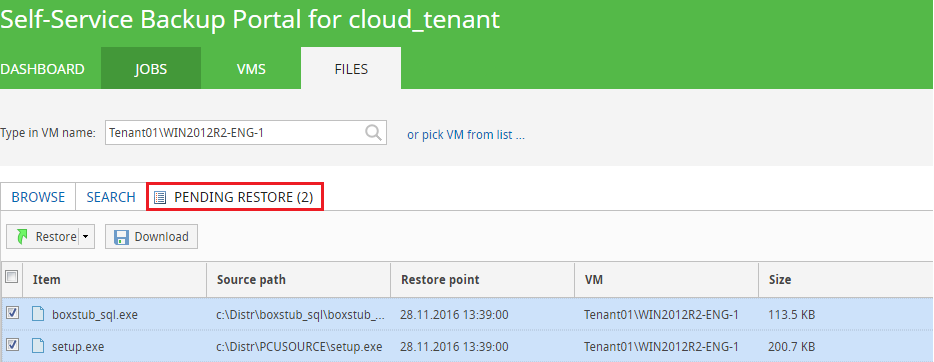
- If you need to restore several files from different directories, then add the necessary files to the restore list (Add to restore list). All files will be displayed in the Pending Restore tab, where they can also be restored or downloaded.
That's all. Ask questions in the comments.
Related articles:
→ Replication and disaster recovery to the cloud using Veeam Cloud Connect Replication
→ vCloud Director for the smallest (part 1): network setup
→ vCloud Director for the smallest (part 2): creating virtual machines
→ vCloud Director for the smallest (part 3): setting up a load balancer
→ vCloud Director for the smallest (part 4): everything about working with virtual machine templates
Source: https://habr.com/ru/post/316412/
All Articles