Trello Clone on Phoenix and React. Parts 10-12. Long Term Finish

- Introduction and selection of technology stack
- Initial setup of the Phoenix Framework project
- User Model and JWT Authentication
- Front-end for registration on React and Redux
- Initial database population and controller to enter the application
- Front-end authentication on React and Redux
- We configure sockets and channels
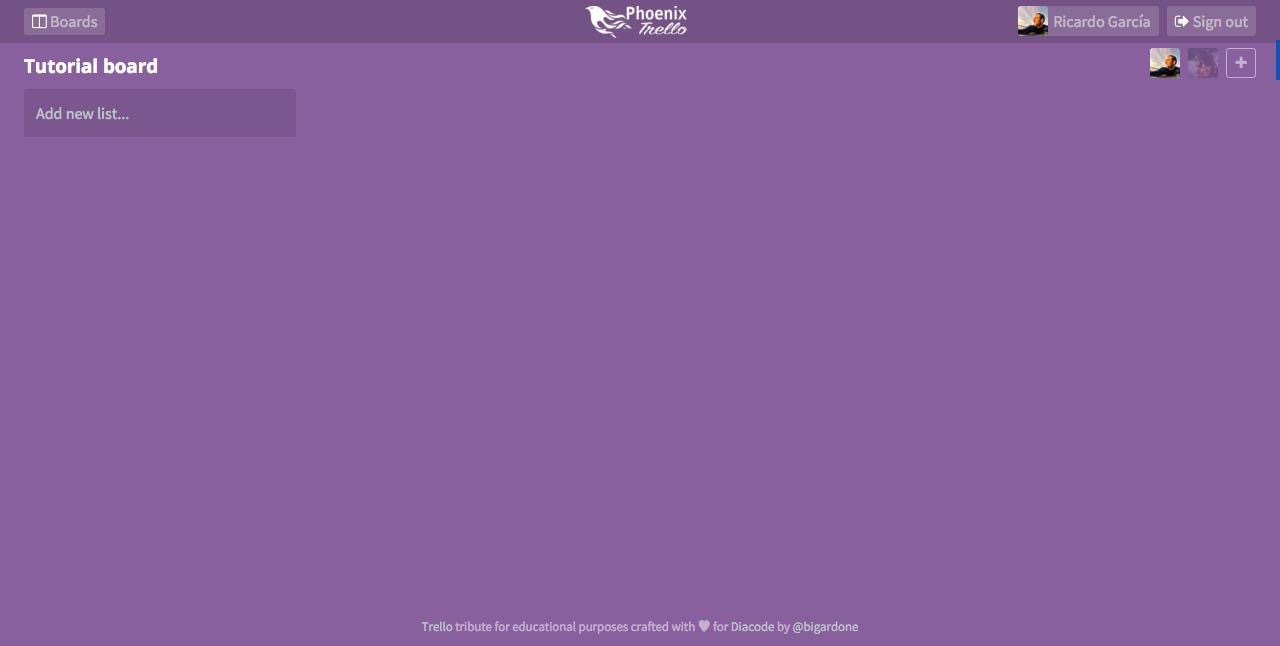
- We display the list and create new boards
- Add new board users
- We trace the connected users of boards
- Add lists and cards
- We spread the project on Heroku
This part is the final one, and it will be especially long, but I want to finish the cycle and go further. I also apologize for such a huge pause in its preparation and publication. However, this time was not wasted and gave material for new, this time original, articles - approx. translator
We trace connection of participants of boards
Warning from the author: this part was written before the appearance of the Presence functionality and is a small introduction to the basics of GenServer behavior.
Recall the previous part , in which we gave our users the opportunity to invite new participants to their boards. When adding an e-mail to an existing user, a new relationship was created between users and boards, and the new user data was transmitted through the channel (channel), with the result that his avatar was displayed to all board members who were online. At first glance, this is cool, but we can do much better and more useful if we can simply select the users who are currently online and browsing the board. Let's start!
Problem
Before we continue, let's think about what we want to achieve. So, in fact, we have a board and several participants who can unexpectedly visit its url, automatically connecting to the board channel. When this happens, the participant’s avatar must be shown without transparency, as opposed to offline members whose avatars must be translucent.
When a connected participant leaves the url of the board, exits the application or even closes the browser window, we need to notify all users connected to the board of the channel so that his avatar becomes translucent again, notifying that the user is no longer viewing the board. Let's look at several ways in which we can achieve this and their shortcomings:
- Managing the list of connected participants on the front-end in the Redux repository. At first glance, this may seem like a suitable solution, but it will only work for participants who have already connected to the board channel. Recently logged in users will not have this data.
- Use the database to store the list of connected participants. This may also be an appropriate way, but it will force us to constantly twitch the database with requests from the list of participants and its updates for any connection or exit of the participant, not to mention mixing data with very specific user behavior.
So where can we store this information so that we can access it for all users quickly and efficiently? Easy. In ... have patience ... a permanent state-saving process.
GenServer Principles
Although the phrase permanent state-saving process may sound daunting at first, this is much easier to implement than you would expect, thanks to Elixir and his GenServer .
GenServer is a process similar to any other Elixir process, and can be used to store state, asynchronous code execution, and the like.
Imagine this as a small process running on our server and having an associative array (map) containing a list of connected users for each board. Something like this:
%{ "1" => [1, 2, 3], "2" => [4, 5] } Now imagine that this process has an available interface for self-initialization and updating the associative state array, for adding and removing boards and connected users. Well, this is, in general, a GenServer process, and I say “overall” as long as it will also have corresponding benefits such as tracing, error reporting, and tracking capabilities (supervision).
BoardChannel Monitor
So, let's create the most initial version of this process, which will store the tracking data of the list of connected board members:
# /lib/phoenix_trello/board_channel/monitor.ex defmodule PhoenixTrello.BoardChannel.Monitor do use GenServer ##### # Client API def start_link(initial_state) do GenServer.start_link(__MODULE__, initial_state, name: __MODULE__) end end Working with GenServer, you need to consider both the API functions for external clients and their server implementation. The first step is to implement the start_link function, which will actually launch GenServer, passing the initial state to it, - in our case, an empty associative array - between the module name and the server name. We want to start this process during the launch of the application, so add it to the list of descendants in our supervision tree:
# /lib/phoenix_trello.ex defmodule PhoenixTrello do use Application def start(_type, _args) do import Supervisor.Spec, warn: fals e children = [ # ... worker(PhoenixTrello.BoardChannel.Monitor, [%{}]), # ... ] # ... end end Now, each time the application starts, it will automatically call the start_link function, which we have just created, passing as an initial state the empty associative array %{} . If the execution of the Monitor interrupted for any reason, the application will re-launch it with a new empty associative array. Wow, isn't it? Now, having configured all this, let's start adding participants to the array of Monitor states.
Handling Member Connections
To do this, we need to add both the client function and the corresponding server handler of the feedback function (hereinafter simply callback functions):
# /lib/phoenix_trello/board_channel/monitor.ex defmodule PhoenixTrello.BoardChannel.Monitor do use GenServer ##### # Client API # ... def member_joined(board, member) do GenServer.call(__MODULE__, {:member_joined, board, member}) end ##### # Server callbacks def handle_call({:member_joined, board, member}, _from, state) do state = case Map.get(state, board) do nil -> state = state |> Map.put(board, [member]) {:reply, [member], state} members -> state = state |> Map.put(board, Enum.uniq([member | members])) {:reply, Map.get(state, board), state} end end end When the member_joined/2 function is member_joined/2 , passing it the board and the user, we will make an appeal to the GenServer process with the message {:member_joined, board, member} . For this reason, we need a server handler for the callback function. The handle_call/3 function from GenServer receives the request message, the sender and the current state. So in our case we will try to get the board from the state and add the user to its list of users. In case the board is not there yet, we will add it with a new list containing the logged in user. In response, we will return the list of users belonging to this board.
Where should I call the member_joined method? From BoardChannel at the time of user connection:
# /web/channels/board_channel.ex defmodule PhoenixTrello.BoardChannel do use PhoenixTrello.Web, :channel alias PhoenixTrello.{User, Board, UserBoard, List, Card, Comment, CardMember} alias PhoenixTrello.BoardChannel.Monitor def join("boards:" <> board_id, _params, socket) do current_user = socket.assigns.current_user board = get_current_board(socket, board_id) connected_users = Monitor.user_joined(board_id, current_user.id) send(self, {:after_join, connected_users}) {:ok, %{board: board}, assign(socket, :board, board)} end def handle_info({:after_join, connected_users}, socket) do broadcast! socket, "user:joined", %{users: connected_users} {:noreply, socket} end # ... end Thus, when it connects, we use Monitor to track it, and send via the socket an updated list of current users of the board. Now we can process this newsletter on the front-end to update the status of the application with a new list of connected users:
// /web/static/js/actions/current_board.js import Constants from '../constants'; const Actions = { // ... connectToChannel: (socket, boardId) => { return dispatch => { const channel = socket.channel(`boards:${boardId}`); // ... channel.on('user:joined', (msg) => { dispatch({ type: Constants.CURRENT_BOARD_CONNECTED_USERS, users: msg.users, }); }); }; } } The only thing left to do is to change the transparency of the avatar, depending on whether the board member is on this list or not:
// /web/static/js/components/boards/users.js export default class BoardUsers extends React.Component { _renderUsers() { return this.props.users.map((user) => { const index = this.props.connectedUsers.findIndex((cu) => { return cu.id === user.id; }); const classes = classnames({ connected: index != -1 }); return ( <li className={classes} key={user.id}> <ReactGravatar className="react-gravatar" email={user.email} https/> </li> ); }); } // ... } Handle user trips
The process of disconnecting the user from the board is almost the same First, let's update the Monitor by adding the necessary client function and the corresponding server callback function to it:
# /lib/phoenix_trello/board_channel/monitor.ex defmodule PhoenixTrello.BoardChannel.Monitor do use GenServer ##### # Client API # ... def member_left(board, member) do GenServer.call(__MODULE__, {:member_left, board, member}) end ##### # Server callbacks # ... def handle_call({:member_left, board, member}, _from, state) do new_members = state |> Map.get(board) |> List.delete(member) state = state |> Map.update!(board, fn(_) -> new_members end) {:reply, new_members, state} end end As you can see, this is almost the same functionality as member_join , but deployed in reverse order. The function searches the board for the condition and deletes the participant, and then replaces the current list of board members with a new one and returns it in the reply. Just as in the case of the connection, we will call this function from the BoardChannel , so let's update it:
# /web/channels/board_channel.ex defmodule PhoenixTrello.BoardChannel do use PhoenixTrello.Web, :channel # ... def terminate(_reason, socket) do board_id = Board.slug_id(socket.assigns.board) user_id = socket.assigns.current_user.id broadcast! socket, "user:left", %{users: Monitor.user_left(board_id, user_id)} :ok end end When the connection to the channel is interrupted, the handler will send the updated list of participants via the socket, as we did before. To interrupt the connection to the channel, we will create an action creator, which we will use when unmounting the current board view; we also need to add a handler for mailing user:left :
// /web/static/js/actions/current_board.js import Constants from '../constants'; const Actions = { // ... connectToChannel: (socket, boardId) => { return dispatch => { const channel = socket.channel(`boards:${boardId}`); // ... channel.on('user:left', (msg) => { dispatch({ type: Constants.CURRENT_BOARD_CONNECTED_USERS, users: msg.users, }); }); }; }, leaveChannel: (channel) => { return dispatch => { channel.leave(); }; }, } Do not forget to update the BoardShowView component in order to process the leaveChannel action constructor leaveChannel :
// /web/static/js/views/boards/show.js import Actions from '../../actions/current_board'; // ... class BoardsShowView extends React.Component { // ... componentWillUnmount() { const { dispatch, currentBoard} = this.props; dispatch(Actions.leaveChannel(currentBoard.channel)); } } // ... And that is all! To test the result, simply open two different browsers and log in to the application with different users. Then go to the same board in both and play, logging in and out of the board by one of the users. You'll see how the transparency of his avatar will change back and forth, which is pretty cool.
I hope you enjoyed working with GenServer just as I did the first time. But we have affected only a small part. GenServer and Supervisor are very rich tools from the proposed Elixir , and fully integrated and bulletproof (in the original, the author uses the term bullet proof, implying, apparently, Erlang / Elixir functionality for tracking the life cycle of processes and restarting them if necessary - interpreter ) that do not require third-party dependencies to work with — in contrast, for example, Redis . In the following part, we will continue to create lists and cards in real time using sockets and pipes.
Add lists and cards
In the previous section, we created a simple but already useful mechanism for tracking connected users to the channel using OTP and GenServer functionality. We also learned to send this list through the channel, so that each participant will be able to see who else is viewing the board at the same time. Now it's time to allow participants to add a few cards and lists, while changes will appear on their screens immediately ... Let's do it!
Migrations and models
A board can have several lists ( lists ), which, in turn, can also have several cards, so let's keep this in mind and start by generating the List model using the following mix task in the console:
$ mix phoenix.gen.model List lists board_id:references:board name:string ... ... $ mix ecto.migrate By this we will create in the database table lists and the corresponding model:
# web/models/list.ex defmodule PhoenixTrello.List do use PhoenixTrello.Web, :model alias PhoenixTrello.{Board, List} @derive {Poison.Encoder, only: [:id, :board_id, :name]} schema "lists" do field :name, :string belongs_to :board, Board timestamps end @required_fields ~w(name) @optional_fields ~w() def changeset(model, params \\ :empty) do model |> cast(params, @required_fields, @optional_fields) end end The generation of the Card model is very similar:
$ mix phoenix.gen.model Card cards list_id:references:lists name:string ... ... $ mix ecto.migrate The resulting model will look something like this:
# web/models/card.ex defmodule PhoenixTrello.Card do use PhoenixTrello.Web, :model alias PhoenixTrello.{Repo, List, Card} @derive {Poison.Encoder, only: [:id, :list_id, :name]} schema "cards" do field :name, :string belongs_to :list, List timestamps end @required_fields ~w(name list_id) @optional_fields ~w() def changeset(model, params \\ :empty) do model |> cast(params, @required_fields, @optional_fields) end end Do not forget to add a set of cards to the scheme lists :
# web/models/list.ex defmodule PhoenixTrello.List do # ... @derive {Poison.Encoder, only: [:id, :board_id, :name, :cards]} # ... schema "lists" do # .. has_many :cards, Card end # ... end Now we can move forward to the frontend and create the necessary components.
List form component
Before continuing, let's recall the render function of the BoardsShowView component:
// web/static/js/views/boards/show.js //... //... _renderLists() { const { lists, channel, id, addingNewCardInListId } = this.props.currentBoard; return lists.map((list) => { return ( <ListCard key={list.id} boardId={id} dispatch={this.props.dispatch} channel={channel} isAddingNewCard={addingNewCardInListId === list.id} {...list} /> ); }); } render() { const { fetching, name } = this.props.currentBoard; if (fetching) return ( <div className="view-container boards show"> <i className="fa fa-spinner fa-spin"/> </div> ); return ( <div className="view-container boards show"> <header className="view-header"> <h3>{name}</h3> {::this._renderMembers()} </header> <div className="canvas-wrapper"> <div className="canvas"> <div className="lists-wrapper"> {::this._renderLists()} {::this._renderAddNewList()} </div> </div> </div> {this.props.children} </div> ); } In contrast to the BoardMembers component that we created last, we also need to draw all the lists related to the current board. At the moment we have no lists, so let's move on to the _renderAddNewList function:
// web/static/js/views/boards/show.js // ... _renderAddNewList() { const { dispatch, formErrors, currentBoard } = this.props; if (!currentBoard.showForm) return this._renderAddButton(); return ( <ListForm dispatch={dispatch} errors={formErrors} channel={currentBoard.channel} onCancelClick={::this._handleCancelClick} /> ); } _renderAddButton() { return ( <div className="list add-new" onClick={::this._handleAddNewClick}> <div className="inner"> Add new list... </div> </div> ); } _handleAddNewClick() { const { dispatch } = this.props; dispatch(Actions.showForm(true)); } _handleCancelClick() { this.props.dispatch(Actions.showForm(false)); } // ... The _renderAddNewList function first checks whether the currentBoard.showForm property is set to true , so that it currentBoard.showForm Add New List ... button instead of the ListForm component.
When the user clicks a button, the corresponding action (action) will be sent to the repository and set the showForm property to true , which will cause the form to display. Now create a form component:
// web/static/js/components/lists/form.js import React, { PropTypes } from 'react'; import Actions from '../../actions/lists'; export default class ListForm extends React.Component { componentDidMount() { this.refs.name.focus(); } _handleSubmit(e) { e.preventDefault(); const { dispatch, channel } = this.props; const { name } = this.refs; const data = { name: name.value, }; dispatch(Actions.save(channel, data)); } _handleCancelClick(e) { e.preventDefault(); this.props.onCancelClick(); } render() { return ( <div className="list form"> <div className="inner"> <form id="new_list_form" onSubmit={::this._handleSubmit}> <input ref="name" id="list_name" type="text" placeholder="Add a new list..." required="true"/> <button type="submit">Save list</button> or <a href="#" onClick={::this._handleCancelClick}>cancel</a> </form> </div> </div> ); } } 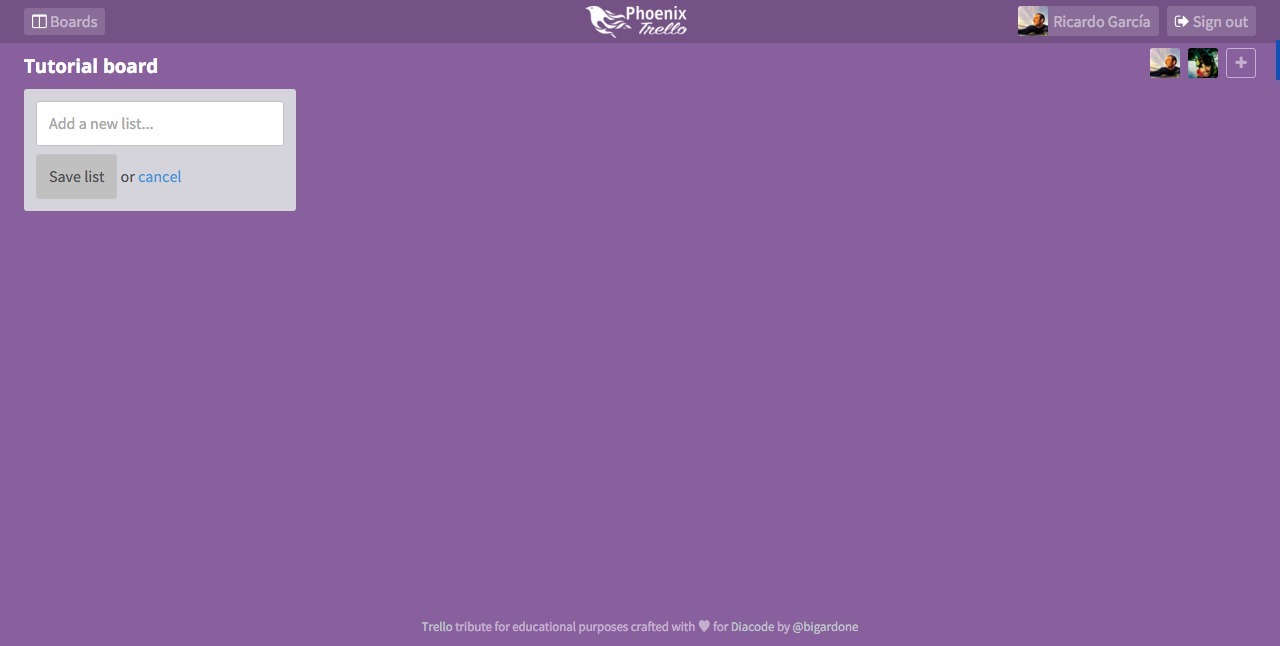
This is a very simple component with a form containing a text field for the list name, a submit button, and a cancel link that will direct the same action that we described, but setting the showForm to false to hide the form. When the form is submitted, the component, along with the username, will send the action constructor save , which will send the name to the BoardChannel channel lists:create BoardChannel :
// web/static/js/actions/lists.js import Constants from '../constants'; const Actions = { save: (channel, data) => { return dispatch => { channel.push('lists:create', { list: data }); }; }, }; export default Actions; Board channel
The next step is to teach BoardChannel handle lists:create message, so let's do this:
# web/channels/board_channel.ex defmodule PhoenixTrello.BoardChannel do # ... def handle_in("lists:create", %{"list" => list_params}, socket) do board = socket.assigns.board changeset = board |> build_assoc(:lists) |> List.changeset(list_params) case Repo.insert(changeset) do {:ok, list} -> list = Repo.preload(list, [:cards]) broadcast! socket, "list:created", %{list: list} {:noreply, socket} {:error, _changeset} -> {:reply, {:error, %{error: "Error creating list"}}, socket} end end # ... end Using the board attached to the channel, the function will build a changeset for the List model based on the received parameters ( list_params ) and add it to the database. If everything is :ok , the created list will be sent via the channel to all connected users , including the creator, so we do not need to answer something, and we simply return :noreply . If by some miracle an error occurs while adding a new list, an error message will be returned only to the creator , so that he will know that something has gone wrong.
Converter
We are almost done with the lists. The channel sends the created sheet, so we add a handler to the frontend in the action constructor of the current board where the connection to the channel occurred:
// web/static/js/actions/current_board.js import Constants from '../constants'; const Actions = { // ... connectToChannel: (socket, boardId) => { return dispatch => { const channel = socket.channel(`boards:${boardId}`); // ... channel.on('list:created', (msg) => { dispatch({ type: Constants.CURRENT_BOARD_LIST_CREATED, list: msg.list, }); }); }; }, // ... } Finally, we need to update the converter (reducer) of the board to add the list to the new version of the state, which it returns:
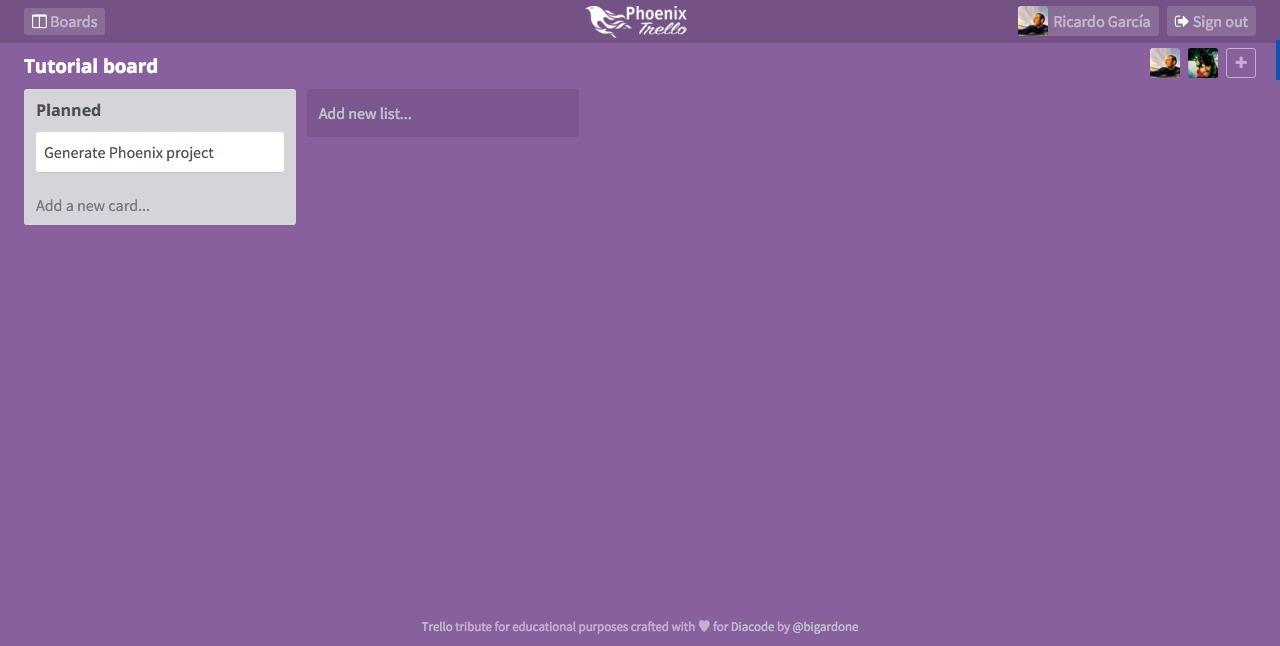
// web/static/js/reducers/current_board.js import Constants from '../constants'; export default function reducer(state = initialState, action = {}) { switch (action.type) { //... case Constants.CURRENT_BOARD_LIST_CREATED: const lists = [...state.lists]; lists.push(action.list); return { ...state, lists: lists, showForm: false }; // ... } } We also need to set the showForm attribute to false to automatically hide the form and show the Add New List button again ... along with the list we just created:

Component List
Now there is at least one list on the board, and we can create the List component, which we will use for drawing:
// /web/static/js/components/lists/card.js import React, {PropTypes} from 'react'; import Actions from '../../actions/current_board'; import CardForm from '../../components/cards/form'; import Card from '../../components/cards/card'; export default class ListCard extends React.Component { // ... _renderForm() { const { isAddingNewCard } = this.props; if (!isAddingNewCard) return false; let { id, dispatch, formErrors, channel } = this.props; return ( <CardForm listId={id} dispatch={dispatch} errors={formErrors} channel={channel} onCancelClick={::this._hideCardForm} onSubmit={::this._hideCardForm}/> ); } _renderAddNewCard() { const { isAddingNewCard } = this.props; if (isAddingNewCard) return false; return ( <a className="add-new" href="#" onClick={::this._handleAddClick}>Add a new card...</a> ); } _handleAddClick(e) { e.preventDefault(); const { dispatch, id } = this.props; dispatch(Actions.showCardForm(id)); } _hideCardForm() { const { dispatch } = this.props; dispatch(Actions.showCardForm(null)); } render() { const { id, connectDragSource, connectDropTarget, connectCardDropTarget, isDragging } = this.props; const styles = { display: isDragging ? 'none' : 'block', }; return ( <div id={`list_${id}`} className="list" style={styles}> <div className="inner"> <header> <h4>{this.props.name}</h4> </header> <div className="cards-wrapper"> {::this._renderCards()} </div> <footer> {::this._renderForm()} {::this._renderAddNewCard()} </footer> </div> </div> ); } } In the same way as in the case of lists, first focus on drawing the form of cards. In general, we will use the same approach to drawing or hiding a form, using the property ( prop ), transmitted by the main component of the board, and directing the action to change this property of the state.

Card Form Component
This component will be very similar to the ListForm component:
// /web/static/js/components/cards/form.js import React, { PropTypes } from 'react'; import Actions from '../../actions/lists'; import PageClick from 'react-page-click'; export default class CardForm extends React.Component { _handleSubmit(e) { e.preventDefault(); let { dispatch, channel } = this.props; let { name } = this.refs; let data = { list_id: this.props.listId, name: name.value, }; dispatch(Actions.createCard(channel, data)); this.props.onSubmit(); } componentDidMount() { this.refs.name.focus(); } _handleCancelClick(e) { e.preventDefault(); this.props.onCancelClick(); } render() { return ( <PageClick onClick={::this._handleCancelClick}> <div className="card form"> <form id="new_card_form" onSubmit={::this._handleSubmit}> <textarea ref="name" id="card_name" type="text" required="true" rows={5}/> <button type="submit">Add</button> or <a href="#" onClick={::this._handleCancelClick}>cancel</a> </form> </div> </PageClick> ); } } As before, when sending a form, we send an action to create a card with the name provided by the user. For this, the action constructor will send a new message to the channel:
// /web/static/js/actions/lists.js import Constants from '../constants'; const Actions = { // ... createCard: (channel, data) => { return dispatch => { channel.push('cards:create', { card: data }); }; }, }; // ... Let's add a handler to BoardChannel :
# web/channels/board_channel.ex def handle_in("cards:create", %{"card" => card_params}, socket) do board = socket.assigns.board changeset = board |> assoc(:lists) |> Repo.get!(card_params["list_id"]) |> build_assoc(:cards) |> Card.changeset(card_params) case Repo.insert(changeset) do {:ok, card} -> broadcast! socket, "card:created", %{card: card} {:noreply, socket} {:error, _changeset} -> {:reply, {:error, %{error: "Error creating card"}}, socket} end end In the same way that creating a list, a new Card entry will be created by associating with the board attached to the channel, and with the list passed as a parameter. If the creation was successful, the recording will be forwarded to all participants connected to the channel. Finally, add a callback function to the js channel:
// web/static/js/actions/current_board.js //... channel.on('card:created', (msg) => { dispatch({ type: Constants.CURRENT_BOARD_CARD_CREATED, card: msg.card, }); }); // ... And add a new card to the state through the converter:
// web/static/js/reducers/current_board.js // ... case Constants.CURRENT_BOARD_CARD_CREATED: lists = [...state.lists]; const { card } = action; const listIndex = lists.findIndex((list) => { return list.id == card.list_id; }); lists[listIndex].cards.push(card); return { ...state, lists: lists }; // ... And it's all! The card will appear on the screen of each connected participant.
Now what?
In this section, we completed the creation of the basic functionality required for user registration, logging in, creating boards, inviting other people to them, and working in real time by adding lists and cards. The final version in the repository has significantly more features, such as editing lists, sorting lists and cards by moving them, displaying more detailed information about the cards, where you can also assign participants to them and even add comments and color labels, but we will not detail talk about none of them, otherwise it would be a perpetual training. :-D
But do not worry, there is one more part left, where we will talk about how to share the result with the whole world, putting it on Heroku .
We spread the project on Heroku
We finally did it (and I, too, approx. Translator) . After 5 (in the original - 11 - approx. Translator) publications, we learned how to set up a new Phoenix project with Webpack , React and Redux . We created a secure authentication system based on JWT tokens, created migrations for our database schemas required, programmed sockets and channels for real-time functionality, and built the GenServer process to track connected board members. It is time to share all this with the world, putting the project on Heroku . Let's do that!
Customize Heroku
Before moving on, suppose that we already have a Heroku account and the Heroku Toolbelt installed . To put the Phoenix application on Heroku , we need to use two different buildpacks (build sets), so we will create a new application using multi-buildpack :
$ heroku create phoenix-trello --buildpack https://github.com/ddollar/heroku-buildpack-multi Heroku git- heroku , . , Phoenix :
- heroku-buildpack-elixir : Elixir.
- heroku-buildpack-phoenix-static : .
.buildpacks :
# .buildpacks https://github.com/HashNuke/heroku-buildpack-elixir https://github.com/gjaldon/phoenix-static-buildpack , Elixir, , elixir_buildpack.config :
# elixir_buildpack.config # Elixir version elixir_version=1.2.3 # Always rebuild from scratch on every deploy? always_rebuild=true Elixir, , , . phoenix_static_buildpack.config :
# phoenix_static_buildpack.config # We can set the version of Node to use for the app here node_version=5.3.0 # We can set the version of NPM to use for the app here npm_version=3.5.2 Webpack node npm . compile , , :
# compile info "Building Phoenix static assets" webpack mix phoenix.digest , mix- phoenix.digest webpack , .
, , prod.exs , :
# config/prod.exs use Mix.Config # ... config :phoenix_trello, PhoenixTrello.Endpoint, # .. url: [scheme: "https", host: "phoenix-trello.herokuapp.com", port: 443], # .. secret_key_base: System.get_env("SECRET_KEY_BASE") # .. # Configure your database config :phoenix_trello, PhoenixTrello.Repo, # .. url: System.get_env("DATABASE_URL"), pool_size: 20 # Configure guardian config :guardian, Guardian, secret_key: System.get_env("GUARDIAN_SECRET_KEY") , : URL Heroku SSL-. , secret_key_base , ( url ) secret_key guardian. Heroku , , :
$ mix phoenix.gen.secret xxxxxxxxxx $ heroku config:set SECRET_KEY_BASE="xxxxxxxxxx" ... ... $ mix phoenix.gen.secret yyyyyyyyyyy $ heroku config:set GUARDIAN_SECRET_KEY="yyyyyyyyyyy" ... ... !
Publication
:
$ git push heroku master ... ... ... , , , Erlang Elixir , node , npm . , :
$ heroku run mix ecto.migrate , !
Conclusion
Phoenix Heroku . , . , , . , . , .
PS As always, please report typos in any way. If you have the best wording of any phrase - do not be lazy to write to me, at least in a personal, at least in the comment, I will update it. Well, the answer to the question of whether to continue such publications, will give a rating of the material.
')
Source: https://habr.com/ru/post/316108/
All Articles