ASP.NET Core: Your first Mac application using Visual Studio Code
We present you the latest article from the cycle on developing ASP.NET Core . In this article, you will learn how to write your first ASP.NET Core application on a Mac.
1. ASP.NET Core on Nano Server .
2. Creating the web service front end for the application .
3. Create the first web API using ASP.NET Core MVC and Visual Studio .
4. Deploy a web app in Azure App Service using Visual Studio .
5. Your first application on a Mac using Visual Studio Code .
First you need to download and install .NET Core and Visual Studio Code with the C # extension .
')
ASP.NET Core project, you need to create this instruction.
Run Visual Studio Code.
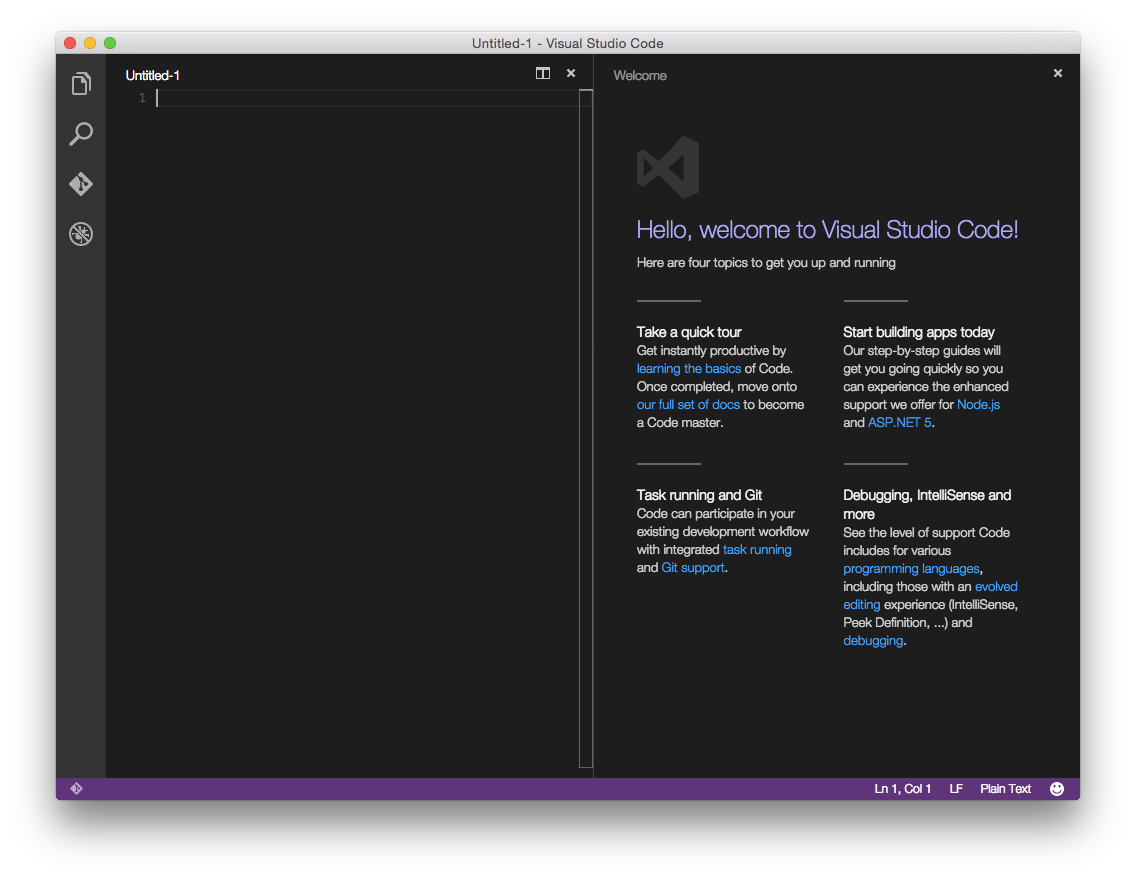
Select File → Open and navigate to an empty ASP.NET Core application.

In the Terminal or bash shell, run the
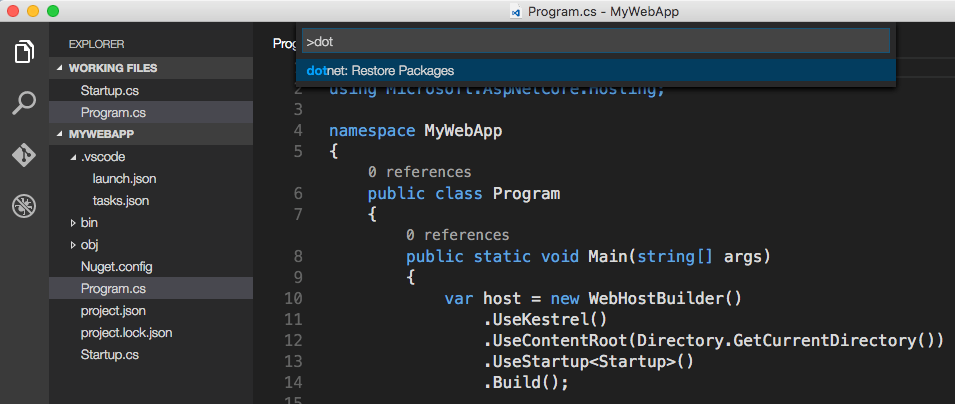
You can execute commands directly in Visual Studio Code, including
This empty project template simply displays “Hello World!”. Open Startup.cs in Visual Studio Code to see how it is configured:

For those who are just starting to use Visual Studio Code (or Code, for short), it should be noted that this product not only has a convenient, simple and responsive interface that provides quick work with files, but it also provides the tools for the most efficient writing code.
In the left navigation pane are four icons representing the four viewlets:
Explore viewlet allows you to quickly navigate through the directory system, and also facilitates the review of the files with which you work. If there are unsaved changes in the files, a special icon on the screen will notify about it; simplifies the process of creating new files and folders (for this you do not need to open a new window). It is also convenient to use the Save All command available in the menu that appears when you hover the mouse.
Code integrates with Git if it is installed on your computer. With the help of the Git viewlet you can create new repositories, confirm the code change, send changes.

Debug viewlet supports interactive debugging of applications.
In addition, the Code Editor has many great features. You will see that unused using statements will be underlined and can be removed automatically with
In this example, we use Kestrel as a web server. Its configuration is stored in the project.json file, in which it is listed as a dependency.
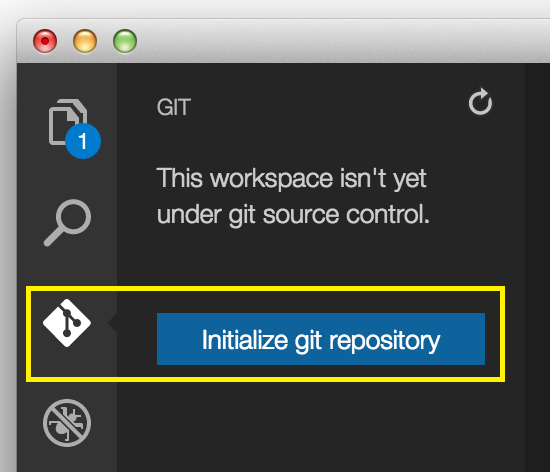
After creating the application, you can use Git integration built into the Visual Studio Code to send updates to Microsoft Azure .
Initialize Git in the folder in which you work. Click on the Git viewlet, then click on the
Add a confirmation message and press enter, or click on the “tick” button to confirm the files.

Git tracks changes, so if you updated the file, the Git viewlet will display the files that have changed since the last confirmation.
You can deploy the application to Azure Web Apps using Git.
Write the Git URL for the web app in the Azure portal:

In the Terminal window, add the
To deploy the application, send it to the master repository.

Open the newly deployed application in the browser.
The first cycle of articles on ASP.NET Core
1. ASP.NET Core on Nano Server .
2. Creating the web service front end for the application .
3. Create the first web API using ASP.NET Core MVC and Visual Studio .
4. Deploy a web app in Azure App Service using Visual Studio .
5. Your first application on a Mac using Visual Studio Code .
Preparing the development environment and building application templates with Yeoman
First you need to download and install .NET Core and Visual Studio Code with the C # extension .
')
ASP.NET Core project, you need to create this instruction.
Developing ASP.NET Core Applications on Mac with Visual Studio Code
Run Visual Studio Code.
Select File → Open and navigate to an empty ASP.NET Core application.
In the Terminal or bash shell, run the
dotnet restore command to restore the dependencies of the project. Another way is to execute the command shift p in Visual Studio Code and then type dot , as shown below:You can execute commands directly in Visual Studio Code, including
dotnet restore and use other tools specified in the project.json file , as well as perform the tasks specified in the .vscode / tasks.json file .This empty project template simply displays “Hello World!”. Open Startup.cs in Visual Studio Code to see how it is configured:
For those who are just starting to use Visual Studio Code (or Code, for short), it should be noted that this product not only has a convenient, simple and responsive interface that provides quick work with files, but it also provides the tools for the most efficient writing code.
In the left navigation pane are four icons representing the four viewlets:
- Explore
- Search
- Git
- Debug
- Extensions
Explore viewlet allows you to quickly navigate through the directory system, and also facilitates the review of the files with which you work. If there are unsaved changes in the files, a special icon on the screen will notify about it; simplifies the process of creating new files and folders (for this you do not need to open a new window). It is also convenient to use the Save All command available in the menu that appears when you hover the mouse.
Code integrates with Git if it is installed on your computer. With the help of the Git viewlet you can create new repositories, confirm the code change, send changes.
Debug viewlet supports interactive debugging of applications.
In addition, the Code Editor has many great features. You will see that unused using statements will be underlined and can be removed automatically with
command . if the light bulb icon is displayed on the screen. You can also see how many references to classes and methods are in the project. If you switch from Visual Studio, you can use many familiar keyboard shortcuts, for example, command kc , to comment out a block of code or command ku to uncomment it.Local Launch with Kestrel
In this example, we use Kestrel as a web server. Its configuration is stored in the project.json file, in which it is listed as a dependency.
{ "dependencies": { "Microsoft.NETCore.App": { "version": "1.0.0", "type": "platform" }, "Microsoft.AspNetCore.Diagnostics": "1.0.0", "Microsoft.AspNetCore.Mvc": "1.0.0", "Microsoft.AspNetCore.Razor.Tools": { "version": "1.0.0-preview2-final", "type": "build" }, "Microsoft.AspNetCore.Server.IISIntegration": "1.0.0", "Microsoft.AspNetCore.Server.Kestrel": "1.0.0", "Microsoft.AspNetCore.StaticFiles": "1.0.0", } } - Run the
dotnet runcommand to start the application. - Enter in the address bar
localhost:5000. - To stop the web server, press
Ctrl+C
Publish to Azure
After creating the application, you can use Git integration built into the Visual Studio Code to send updates to Microsoft Azure .
Git initialization
Initialize Git in the folder in which you work. Click on the Git viewlet, then click on the
Initialize Git repository button.Add a confirmation message and press enter, or click on the “tick” button to confirm the files.
Git tracks changes, so if you updated the file, the Git viewlet will display the files that have changed since the last confirmation.
Azure website initialization
You can deploy the application to Azure Web Apps using Git.
- Create a new web application in Azure. If you do not have an account in Azure, you can create a free trial account.
- Enable for web-based application in Azure support for continuous deployment with Git.
Write the Git URL for the web app in the Azure portal:
In the Terminal window, add the
azure remote repository with the Git URL you wrote down earlier. git remote add azure https://ardalis-git@firstaspnetcoremac.scm.azurewebsites.net:443/firstaspnetcoremac.git To deploy the application, send it to the master repository.
git push azure master Open the newly deployed application in the browser.
Hello World ! Should appear.Source: https://habr.com/ru/post/315780/
All Articles