Here tuk open
Hello everyone again! This weekend I spoke at DevFest Siberia 2016 with an IoT intercom project. It was an incredibly atmospheric conference. But the conversation is not about her. During the report, I promised that I will separately tell on Habré how to organize an analogue of the Knock Knock technology from Google DUO in the intercom.
A little help from Google :
“When you call a contact in Duo, the caller can see your video if you are one of his contacts. You will see the subscriber only after he answers the call. ”
In this tutorial we will make the code for the intercom, so that one party will be able to call, the other party will be able to receive calls. It’s strange if you called the intercom, it’s like a call to a payphone.
')
To make a full video chat, simply combine the code of both examples on the same page.
Caller
Let's do some html + css to make it beautiful. What will be the result, you can look at the KDPV article.
<!DOCTYPE html> <html lang="en"> <head> <meta charset="UTF-8"> <meta name="viewport" content="width=device-width"> <title>Intercom</title> <script type="text/javascript" src="//cdn.voximplant.com/edge/voximplant.min.js"></script> <link href="https://fonts.googleapis.com/icon?family=Material+Icons" rel="stylesheet"> </head> <body> <!-- , , --> <div class="it_remote_wrapper"> <div class="it_remote_video"></div> </div> <!-- , --> <div class="it_local_video"></div> <!-- --> <div class="it_exit_link"> <i class="material-icons">call_end</i> </div> <!-- --> <div class="it_connecting"> <br> <br> </div> <!-- --> <audio src="/assets/31800_81339-lq.mp3" id="beeptone" loop autoplay></audio> </body> </html> The host
<div class="mdl-layout mdl-js-layout"> <main class="mdl-layout__content"> <h1>Please, wait incoming call.</h1> </main> <div class="callpopup"> <div class="it_remote_wrapper"> <div class="it_remote_video"></div> </div> <div class="it_local_video"></div> <div class="it_exit_link"> <i class="material-icons">call_end</i> </div> <div class="it_start_link"> <i class="material-icons">call</i> </div> <div class="it_connecting"> Incoming call </div> </div> There is nothing special to say about the layout. This is a matter of taste and preferences.
Now add the script to Voximplant.
VoxEngine.forwardCallToUserDirect(function(call1,call2){ call2.addEventListener(CallEvents.InfoReceived,function(e){ call1.sendMessage(e.body); }); },true); This code allows you to make a call in P2P mode and transfer between your phones your own signaling about the beginning of the call. Here it is worthwhile to talk about how the call will generally take place and how this script differs from a normal call.
In general, the scheme is as follows:
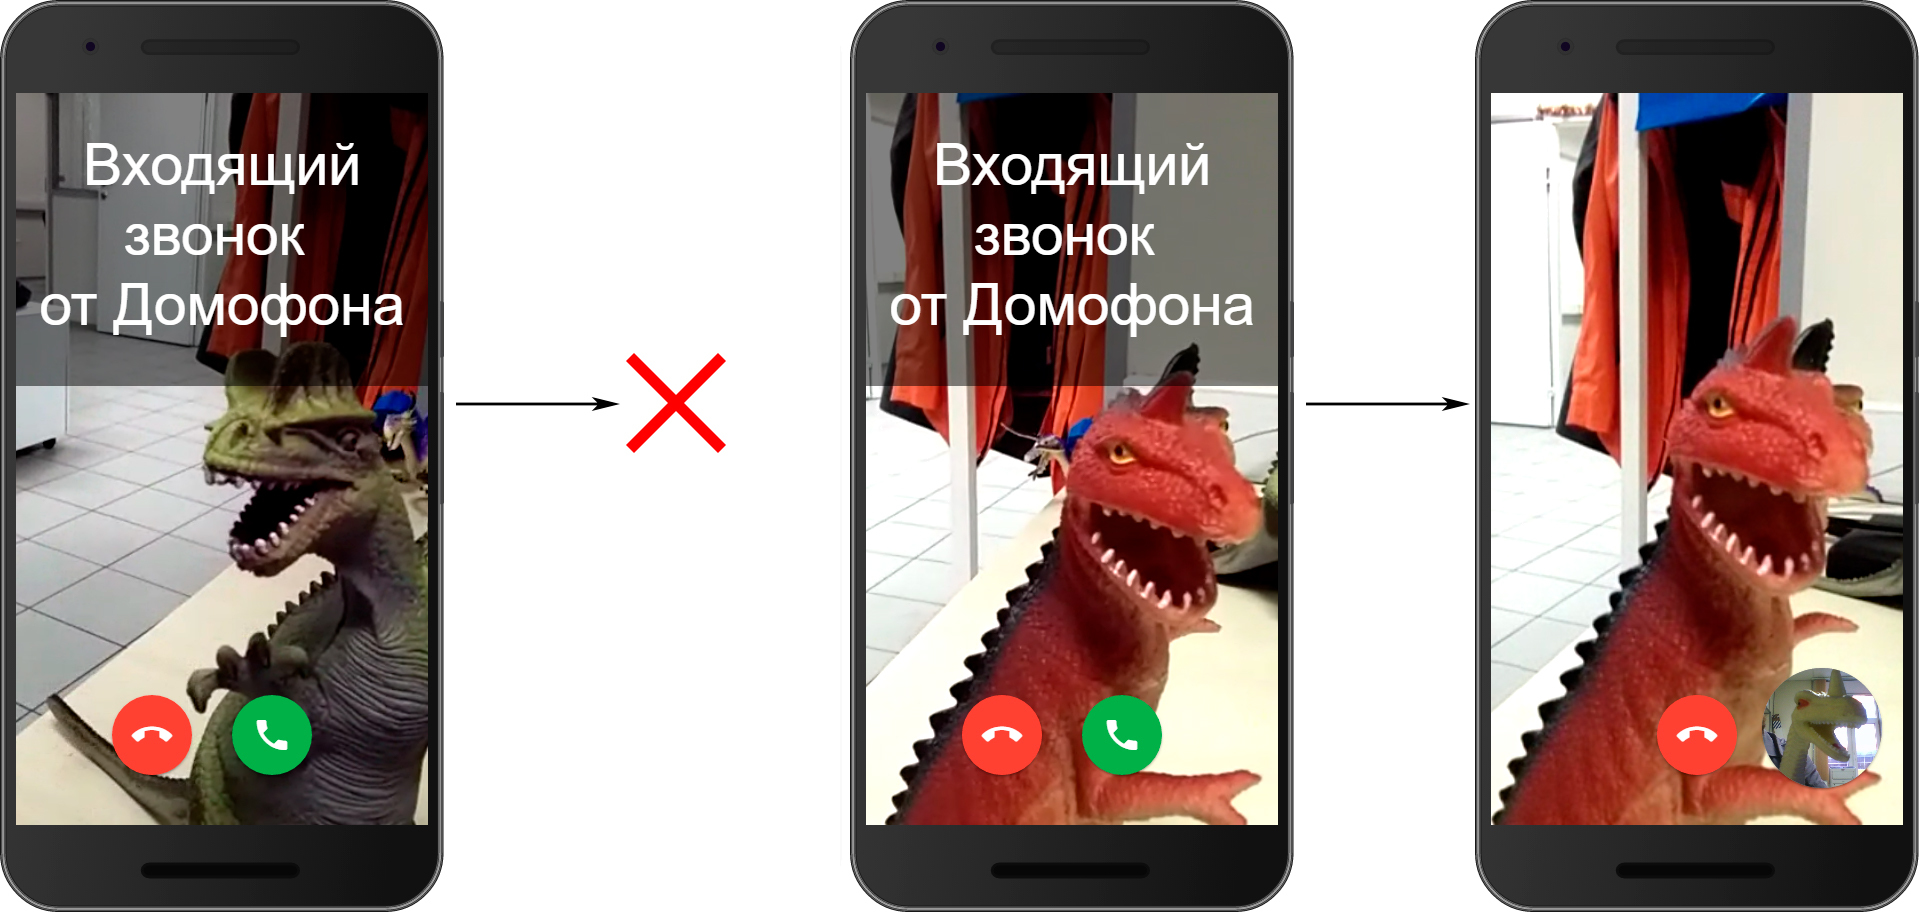
- Pavel A calls Paul B
- Pavel B takes the call, but does not send his media streams
- Pavel B sees Pavel A and seemingly decides whether to answer
- Pavel B decides to answer and sends his media streams to Paul A
- ... Renegotiation ...
- PROFIT!
The main difference is in the application of renegotiation on the client.
Let's write the customer code.
The first part is the WebSDK initialization and login. For two sides, it will be identical.
var vox = VoxImplant.getInstance(); vox.init({micRequired: true, videoSupport:true, progressTone:true }); vox.addEventListener(VoxImplant.Events.SDKReady, function(){ vox.connect(); }); var call; vox.addEventListener(VoxImplant.Events.ConnectionEstablished,function(){ vox.showLocalVideo(true); vox.login(settings.users[0].name+"@"+settings.app_name+"."+settings.account_name+".voximplant.com",settings.users[0].pass); vox.addEventListener(VoxImplant.Events.AuthResult,function(e){ }); }); Next, make the caller's code show your own video in full screen.
vox.showLocalVideo(true); var localvideo = document.querySelector('#voximplantlocalvideo'); document.querySelector('.it_remote_video').appendChild(localvideo); localvideo.style.height = "100%"; localvideo.play(); // play , And when we receive information about taking a call on our own alarm system (more on that later), we will show the video of the receiving party there, and we will remove our video in the corner.
call.addEventListener(VoxImplant.CallEvents.MessageReceived,function(e){ if(e.text=="CONNECTED"){ document.querySelector('.it_local_video').style.display = "block"; document.querySelector('.it_local_video').appendChild(localvideo); document.querySelector('.it_connecting').style.display = "none"; localvideo.style.height = "140px"; localvideo.style.marginLeft = "-40px"; localvideo.play(); var remotevideo = document.getElementById(call.getVideoElementId()); document.querySelector('.it_remote_video').appendChild(remotevideo); remotevideo.style.height = "100%"; remotevideo.removeAttribute("height"); remotevideo.removeAttribute("width"); remotevideo.play(); } }); Well, make the call to the second side.
call = vox.call(settings.users[1].name,true); Now the second side.
Initialization insert from the first client.
Now we need to tricky to accept the challenge. We will not transmit sound and video.
Now we will write the call acceptance code. From the SDK point of view, this will be an auto answer.
vox.addEventListener(VoxImplant.Events.IncomingCall,function(e){ e.call.sendAudio(false); document.querySelector('.callpopup').style.display = 'block'; call = e.call; call.answer(); call.addEventListener(VoxImplant.CallEvents.Connected,function () { call.mutePlayback(); var remotevideo = document.getElementById(call.getVideoElementId()); document.querySelector('.it_remote_video').appendChild(remotevideo); remotevideo.style.height = "100%"; remotevideo.removeAttribute("height"); remotevideo.removeAttribute("width"); remotevideo.play(); }); call.addEventListener(VoxImplant.CallEvents.Disconnected,cancelCall); call.addEventListener(VoxImplant.CallEvents.Disconnected,Failed); }) Notice that we silence the sound from the caller. A little later, it will help us start a conversation faster.
Now we will see the caller. It remains to describe the button "Answer" and "End".
Let's start with “Otbyboy”:
function cancelCall() { if(typeof call!="undefined") call.hangup(); document.querySelector('.it_remote_video').removeChild(document.querySelector('.it_remote_video').childNodes[0]); document.querySelector('.it_connecting').style.display = "block"; document.querySelector('.it_exit_link').style.marginLeft = '-110px'; document.querySelector('.it_start_link').style.display = 'block'; document.querySelector('.callpopup').style.display = 'none'; document.querySelector('.it_local_video').style.display = 'none'; } The "Answer" button is amazing. Its handler contains exactly half the magic for the work of the example. As soon as the user clicks it, we will connect the audio and video stream to sdk and perform renegotiation.
function answerCall(){ document.querySelector('.it_exit_link').style.marginLeft = '-40px'; document.querySelector('.it_start_link').style.display = 'none'; vox.showLocalVideo(true); var localvideo = document.querySelector('#voximplantlocalvideo'); document.querySelector('.it_local_video').appendChild(localvideo); document.querySelector('.it_local_video').style.display = 'block'; document.querySelector('.it_connecting').style.display = "none"; localvideo.style.height = "140px"; localvideo.style.marginLeft = "-40px"; localvideo.play(); call.unmutePlayback(); call.sendAudio(true); call.sendVideo(true); call.sendMessage('CONNECTED'); } Link to the repository with the finished project → github.com/voximplant/demo_callstats.io
To deploy it, run:
npm install npm start In the process, you will need to enter your api_key and account_id
Source: https://habr.com/ru/post/315774/
All Articles