7 Tips for Unity Indie Game Localization
Unity is one of the most popular game engines among independent developers. This is a powerful tool that opens access to the gaming industry, even the smallest publishers and single developers.
The problem of an independent way is that you should always try to meet the standards and workload of large teams. Unity eases the task by simplifying the development process so that one person can handle it.
This also applies to localization, thanks to which you can introduce the whole world to your game. However, you need to be careful, because the localization of the game is a difficult process. Let's take a look at the best way to do it in Unity.
Smart Localization (free and paid versions)
')
A good start to localizing a Unity project is to choose a ready-made extension called Smart Localization , developed by janeTech. The extension has two versions: free and paid version of Pro.
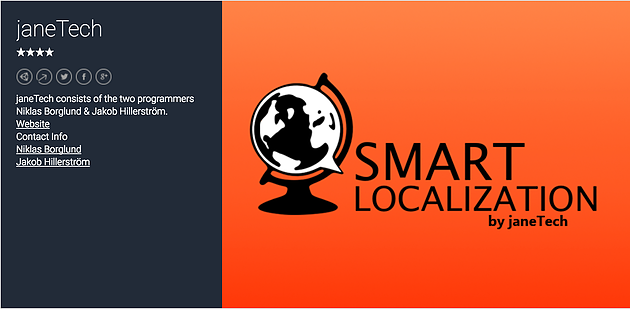
This is what you can trust in Smart Localization:
And that is all. Don't even waste time using the translation feature provided by Microsoft Translator. The author says that it is intended only to create temporary translations in the development process, and not final translations. But even when used in this capacity, it can cause problems with the length of text lines and the size of game elements.
I2 Localization ($ 45)
Among paid assets, I2 Localization , developed by gaming studio Inter Illusion , will definitely be useful.

The most convenient features of this asset are the synchronization with Google spreadsheets and the automatic display of text from right to left for Arabic .
“I2 Localization is generally a great tool for localization. [...] First and foremost is the ability to import data directly from Google Spreadsheets even after the release of the game. This is extremely useful because most localization companies provide results in an Excel file, which can be quickly transferred to Google Spreadsheets and imported all the data.
The second function, which I like, allows you to process hardcoded text in code. Instead of creating constructs from loops or switch, you can use a single string to translate the text: I2.Loc.ScriptLocalization.Get (""); ".
Daniel bathoff
Both extensions are popular with Unity developers (especially the free version of Smart Localization, for obvious reasons). These are useful tools, but use them carefully. No extension will solve all localization issues, and certainly will not perform the localization process for you.
Therefore…
You cannot get away from this if you are serious about selling your game in foreign markets. You need professional video game translators, and the sooner you start working with them, the better.
Prepare the first draft of translations before the start of development.
You will save a lot of time if you are coding the game after the localization process is completed. Pay particular attention to the length of words and sentences in each translation compared to the English version (or other basic language). So you can make the necessary changes in the design or again refer to the translator and work on alternatives.
If you do localization after the development is completed, it will turn into a nightmare.
After the start of development, the first thing to do in terms of localization is to choose the formatting mode for text strings . Here you make a choice not only from the point of view of development: it will determine how easy or difficult it will be to add new languages to the game in the future or modify existing translations.
Unity supports many formats, the most popular ones are:
You can also create your own format if you want. However, errors are likely, and this is one of the most difficult options for localization. Therefore, in this article we will not consider it.
If you are developing a game in JavaScript, then JSON will be the most correct. This is a simple and easy format used by many developers over the years. In addition, it is fast in processing. In addition to the benefits for the developer, it is very easy to read, even for those who are not engaged in development. This is an important plus for future translations and edits.
Many developers still work with XML, and this is a good choice if you prefer to work with this markup language. This is not the most effective language and is harder to read, so keep this in mind when creating the game.
In terms of translations, other options are much more problematic, but you need to stick to the language that is most convenient. Interact tightly with the translator to simplify his work as much as possible, because it will reduce the number of errors.
Choosing the most efficient way to structure strings can be a real problem. There are no clearly defined instructions for this process. Unity gives the developer the freedom to choose the structure. Freedom is, of course, always good, but it also increases the likelihood of errors.
There are three main factors affecting the structure of strings:
Tongue
For most games (in which the choice of language is saved at the very beginning), you can store lines in separate files for each language (for example, en.json , es.json , fr.json , etc.). This is the most productive way to split strings by language, so that the game does not need to process unnecessary additional files.
Row identifiers
Then you need to think about row identifiers. The scope of this task is highly dependent on the number of text lines in the game. Aim to anticipate problems when creating ID strings, giving each of them a unique detailed identifier that makes it easy to find the right string in the future.
Basically the choice depends on personal preferences, but do not forget that in the future other developers may work with your code.
Text
Always create lines for future localization. The most common mistakes are: different lengths of strings in different languages and the absence of a suitable translation for strings. Do not allow them to reduce the quality of the script, but shortening or paraphrasing may help in the future.
If you choose this approach, the process of saving and loading localized strings will become much easier. You will not only reduce the workload in this way, but also reduce the risk of errors.
Unity allows you to create components, which significantly reduces the amount of manually developed code. It also reduces the risk of errors and saves time.
Details on the components can be read on the Unity resource page . However, in this article we will focus only on a few tasks:
Thanks to the components of Unity, you can solve all four tasks in one simple step!
For most players, it’s enough to choose a language once and finish there. One option is to locate the user and select the default local language. However, you may have to add a screen asking you to confirm the language when you first start the game. For example, not all Americans English native.
The way to select a design and implement this feature is more relevant to both UX and localization. Here it is important to save the value selected by the player (if it was selected) and save it as a new default value. After that, you do not have to ask the same question every time you start the game.
To do this in Unity, you can create a Master component to assign a default language. If the user decides to change the language setting, the new language is assigned to the component and is treated as the default language.
This can not be avoided, and the localization of the visual elements of the game can be a torture. The first thing to think about is the fonts. What is important is not only their appearance, but also the languages they support. Here are some aspects to consider:
Style, of course, is important for the brand of your game. You can find a font that looks great in English but does not support the languages you need. Then you have to make a decision: will you search for one font that supports all languages, or will you use different fonts for different languages?
It depends on the number of languages you want to support. The search for accented fonts (for Spanish, French, Italian, etc.) is not very complicated. But you are tortured to look for one font that supports, for example, several European languages and Asian display systems. And even if you find it, the file size will be very large. Therefore, do not be afraid to select individual fonts for different languages if you like their styles.
Of course, not all texts must be specified in the code. Some text elements are represented in the graphic. In addition, there are various other visual elements that you also need to think about.
Text graphics
Most elements of text graphics do not require localization. For example, character names remain the same in all languages (unless you localize them). Therefore, all graphics with their names (for example, badges, player badges, etc.) can be left unchanged.
However, meaningful names that, for example, have metaphors or puns, may also require localization , otherwise some players will not be able to appreciate the joke. Of course, you need to think not only about the names of the character, but also about the names of levels, weapons and game items.
The most important thing is not to miss the text graphics that affect the gameplay. It may be something simple, like the UI element inside a mini-game, but you will regret missing such small details.
How to localize text graphics in Unity
Having defined text graphics that need to be localized (and the one that you need to leave alone), with the help of Unity, you can easily switch between types of graphics based on the language selected by the user. There are three ways, each of which has its pros and cons:
If you can cope with such a load, we recommend creating atlases in the Unity sprite wrapper. In this way, you maintain a high-quality appearance, while ensuring performance. The disadvantage of this approach is the greater workload in creating atlases, but the sprite wrapper speeds up this work.
You can achieve the same visual level by creating separate localized graphics and calling it when necessary, but this is the least effective approach. If you are not careful, the game will work too slowly.
Another option is to completely replace graphics with text lines and UI elements. They may not look as good as graphics, but this is the most economical approach in terms of resources, allowing you to maximize the speed of the game. It can also be embedded in the standard localization process by passing texts to the translator along with other localizable strings.
AssetBundle bundles in Unity allow you to create batches of files that users download only when needed. This means that you can significantly reduce the overall size of the game, while at the same time providing full resources for any audience.
For example, users will only download texts in French, if that language is chosen as the main language in the game. Otherwise, they do not need these files, which will be stored on servers, waiting for download.
This not only greatly improves speed by reducing the number of downloadable resources, but also makes games smaller and faster, which allows you to download them first. But the best thing is that you don’t have to compromise on the files and resources you create for localization. You can provide games to any desired audience and at the same time know that users will not be limited by the resources they do not need.
So, it was the instruction for beginners on localization of games in Unity. The bad news is that you can't do it alone - you need professional translators. However, there is some good news: Unity makes managing the localization process much easier.
But the engine still can not teach you to do the localization correctly, so refer to those who help you adapt the game to a foreign audience.
The problem of an independent way is that you should always try to meet the standards and workload of large teams. Unity eases the task by simplifying the development process so that one person can handle it.
This also applies to localization, thanks to which you can introduce the whole world to your game. However, you need to be careful, because the localization of the game is a difficult process. Let's take a look at the best way to do it in Unity.
1. Use Smart Localization and I2 Localization Extensions (but neat)
Smart Localization (free and paid versions)
')
A good start to localizing a Unity project is to choose a ready-made extension called Smart Localization , developed by janeTech. The extension has two versions: free and paid version of Pro.
This is what you can trust in Smart Localization:
- Creating a folder structure for different languages.
- Import and export files
And that is all. Don't even waste time using the translation feature provided by Microsoft Translator. The author says that it is intended only to create temporary translations in the development process, and not final translations. But even when used in this capacity, it can cause problems with the length of text lines and the size of game elements.
I2 Localization ($ 45)
Among paid assets, I2 Localization , developed by gaming studio Inter Illusion , will definitely be useful.
The most convenient features of this asset are the synchronization with Google spreadsheets and the automatic display of text from right to left for Arabic .
“I2 Localization is generally a great tool for localization. [...] First and foremost is the ability to import data directly from Google Spreadsheets even after the release of the game. This is extremely useful because most localization companies provide results in an Excel file, which can be quickly transferred to Google Spreadsheets and imported all the data.
The second function, which I like, allows you to process hardcoded text in code. Instead of creating constructs from loops or switch, you can use a single string to translate the text: I2.Loc.ScriptLocalization.Get (""); ".
Daniel bathoff
Both extensions are popular with Unity developers (especially the free version of Smart Localization, for obvious reasons). These are useful tools, but use them carefully. No extension will solve all localization issues, and certainly will not perform the localization process for you.
Therefore…
2. Hire professional translators
You cannot get away from this if you are serious about selling your game in foreign markets. You need professional video game translators, and the sooner you start working with them, the better.
Prepare the first draft of translations before the start of development.
You will save a lot of time if you are coding the game after the localization process is completed. Pay particular attention to the length of words and sentences in each translation compared to the English version (or other basic language). So you can make the necessary changes in the design or again refer to the translator and work on alternatives.
If you do localization after the development is completed, it will turn into a nightmare.
3. Choose the correct text string format.
After the start of development, the first thing to do in terms of localization is to choose the formatting mode for text strings . Here you make a choice not only from the point of view of development: it will determine how easy or difficult it will be to add new languages to the game in the future or modify existing translations.
Unity supports many formats, the most popular ones are:
- Json
- XML
- Yaml
- CSV
You can also create your own format if you want. However, errors are likely, and this is one of the most difficult options for localization. Therefore, in this article we will not consider it.
If you are developing a game in JavaScript, then JSON will be the most correct. This is a simple and easy format used by many developers over the years. In addition, it is fast in processing. In addition to the benefits for the developer, it is very easy to read, even for those who are not engaged in development. This is an important plus for future translations and edits.
Many developers still work with XML, and this is a good choice if you prefer to work with this markup language. This is not the most effective language and is harder to read, so keep this in mind when creating the game.
In terms of translations, other options are much more problematic, but you need to stick to the language that is most convenient. Interact tightly with the translator to simplify his work as much as possible, because it will reduce the number of errors.
4. Decide on the structure of the lines
Choosing the most efficient way to structure strings can be a real problem. There are no clearly defined instructions for this process. Unity gives the developer the freedom to choose the structure. Freedom is, of course, always good, but it also increases the likelihood of errors.
There are three main factors affecting the structure of strings:
- Tongue
- String IDs
- Text
Tongue
For most games (in which the choice of language is saved at the very beginning), you can store lines in separate files for each language (for example, en.json , es.json , fr.json , etc.). This is the most productive way to split strings by language, so that the game does not need to process unnecessary additional files.
Row identifiers
Then you need to think about row identifiers. The scope of this task is highly dependent on the number of text lines in the game. Aim to anticipate problems when creating ID strings, giving each of them a unique detailed identifier that makes it easy to find the right string in the future.
Basically the choice depends on personal preferences, but do not forget that in the future other developers may work with your code.
Text
Always create lines for future localization. The most common mistakes are: different lengths of strings in different languages and the absence of a suitable translation for strings. Do not allow them to reduce the quality of the script, but shortening or paraphrasing may help in the future.
If you choose this approach, the process of saving and loading localized strings will become much easier. You will not only reduce the workload in this way, but also reduce the risk of errors.
5. Create most localization components in Unity.
Unity allows you to create components, which significantly reduces the amount of manually developed code. It also reduces the risk of errors and saves time.
Details on the components can be read on the Unity resource page . However, in this article we will focus only on a few tasks:
- The ability to change the language of users
- Saving the selected language
- Automatic language selection when restarting the game
- Load the correct row for each value
Thanks to the components of Unity, you can solve all four tasks in one simple step!
For most players, it’s enough to choose a language once and finish there. One option is to locate the user and select the default local language. However, you may have to add a screen asking you to confirm the language when you first start the game. For example, not all Americans English native.
The way to select a design and implement this feature is more relevant to both UX and localization. Here it is important to save the value selected by the player (if it was selected) and save it as a new default value. After that, you do not have to ask the same question every time you start the game.
To do this in Unity, you can create a Master component to assign a default language. If the user decides to change the language setting, the new language is assigned to the component and is treated as the default language.
6. Localization of visual elements in Unity
This can not be avoided, and the localization of the visual elements of the game can be a torture. The first thing to think about is the fonts. What is important is not only their appearance, but also the languages they support. Here are some aspects to consider:
- Style
- Language support
- Font sizes
- File sizes
Style, of course, is important for the brand of your game. You can find a font that looks great in English but does not support the languages you need. Then you have to make a decision: will you search for one font that supports all languages, or will you use different fonts for different languages?
It depends on the number of languages you want to support. The search for accented fonts (for Spanish, French, Italian, etc.) is not very complicated. But you are tortured to look for one font that supports, for example, several European languages and Asian display systems. And even if you find it, the file size will be very large. Therefore, do not be afraid to select individual fonts for different languages if you like their styles.
Of course, not all texts must be specified in the code. Some text elements are represented in the graphic. In addition, there are various other visual elements that you also need to think about.
Text graphics
Most elements of text graphics do not require localization. For example, character names remain the same in all languages (unless you localize them). Therefore, all graphics with their names (for example, badges, player badges, etc.) can be left unchanged.
However, meaningful names that, for example, have metaphors or puns, may also require localization , otherwise some players will not be able to appreciate the joke. Of course, you need to think not only about the names of the character, but also about the names of levels, weapons and game items.
The most important thing is not to miss the text graphics that affect the gameplay. It may be something simple, like the UI element inside a mini-game, but you will regret missing such small details.
How to localize text graphics in Unity
Having defined text graphics that need to be localized (and the one that you need to leave alone), with the help of Unity, you can easily switch between types of graphics based on the language selected by the user. There are three ways, each of which has its pros and cons:
- Creation of atlases in the Sprite Packer
- Creating a separate graphic and calling it if necessary
- Replacing graphics with text and UI elements
If you can cope with such a load, we recommend creating atlases in the Unity sprite wrapper. In this way, you maintain a high-quality appearance, while ensuring performance. The disadvantage of this approach is the greater workload in creating atlases, but the sprite wrapper speeds up this work.
You can achieve the same visual level by creating separate localized graphics and calling it when necessary, but this is the least effective approach. If you are not careful, the game will work too slowly.
Another option is to completely replace graphics with text lines and UI elements. They may not look as good as graphics, but this is the most economical approach in terms of resources, allowing you to maximize the speed of the game. It can also be embedded in the standard localization process by passing texts to the translator along with other localizable strings.
7. Use Unity AssetBundle Engine
AssetBundle bundles in Unity allow you to create batches of files that users download only when needed. This means that you can significantly reduce the overall size of the game, while at the same time providing full resources for any audience.
For example, users will only download texts in French, if that language is chosen as the main language in the game. Otherwise, they do not need these files, which will be stored on servers, waiting for download.
This not only greatly improves speed by reducing the number of downloadable resources, but also makes games smaller and faster, which allows you to download them first. But the best thing is that you don’t have to compromise on the files and resources you create for localization. You can provide games to any desired audience and at the same time know that users will not be limited by the resources they do not need.
So, it was the instruction for beginners on localization of games in Unity. The bad news is that you can't do it alone - you need professional translators. However, there is some good news: Unity makes managing the localization process much easier.
But the engine still can not teach you to do the localization correctly, so refer to those who help you adapt the game to a foreign audience.
Source: https://habr.com/ru/post/315764/
All Articles