Create Mac-on-Stick with Mini vMac
Already, few people can be surprised working with flash drives Linux, Windows, FireFox, AbiWord Thunderbird and other applications. What about a Mac 128K or Mac Plus on a USB stick? Despite some absurdity of the idea, the "portable" Mac has practical applications:
 For this project, let's call it Mac-on-Stick, we will need the following components:
Now that all the necessary components are at hand, we can begin. In the process of describing the installation, it is assumed that Mac OS X is used, but most of the described actions will be correct for Windows.

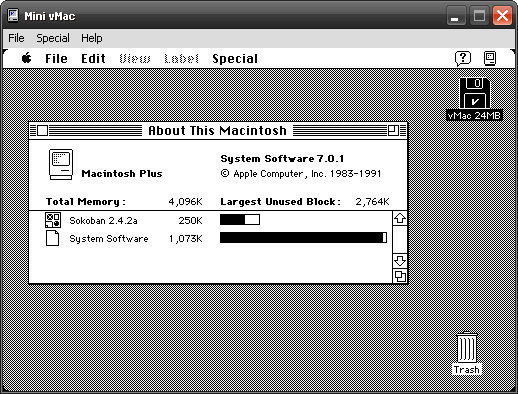
Figure 2: Mini vMac is up and running
To install applications on mac, you must make the disk image mountable. To do this, you need the SetFType utility. Unpack it, and drag the hfs24M.DSK image onto the SetFType.dmg icon (make sure that the Mini vMac is not running). Once you see the confirmation message, double-click on the hfs24M.DSK image. You want it. I would like the Mini vMac. Unmount the disk by throwing it into the Trash. Restart Mini vMac by dragging the hfs24M.DSK disk onto the Mini vMac icon. Now you can use the copied applications.
')

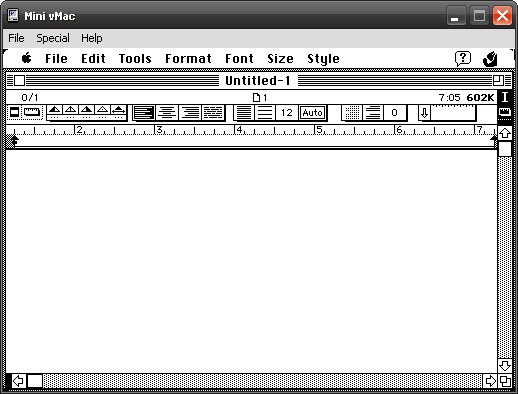
Figure 3: Running Nisus Compact
To work with a disk image in Windows, you need the HFVExplorer utility (included with Mac-on-Stick 0.2).
If you need a larger disk to work in Mini vMac, you can create it in a Mac OS X terminal or Linux console using the command:
This creates a 52MB disk image, named hfs52M.dsk, in the current directory (count is the number of 512 byte blocks). Before you can mount it using the Mini vMac utility. Click here for a copy of the vMac card. Now you can mount the disk image.
If the prospect of installing Mac-on-Stick from scratch is not impressive, then you can download the working kit via BitTorrent. The package comes with the following bundled applications:
- Play around with the old OS and applications without bothering yourself with finding an old Mac.
- Surprise your friends, or show someone how old Mac looked.
- Use Macintosh on Windows or Linux.
 For this project, let's call it Mac-on-Stick, we will need the following components:
- Emulator Mini vMac . This emulator is available for Mac OS (Classic and OS X), Windows, Linux, and even Pocket PC .
- ROM image. If you have Macintosh Plus, 128K, or SE, then you can copy the ROM from there using the CopyRoms utility . Otherwise, ROM can be downloaded .
- An empty disk image that will be a hard drive for our Mac.
- Operating system and system software. Fortunately, Apple puts out old versions of its software, including Mac OS up to version 7.5.5, on the Older Software Downloads page. This project uses System 7.0.1.
- The software with which we are going to play. For starters, you can see a list of old Mac software on the Mini vMac website .
- USB flash drive (Enough even 32MB).
Installation
Now that all the necessary components are at hand, we can begin. In the process of describing the installation, it is assumed that Mac OS X is used, but most of the described actions will be correct for Windows.
- Create a
Mac-on-Stickdirectory. - Unpack the archive with the Mini vMac and the
vmac.romfile, then copy them to theMac-on-Stickdirectory. - Unpack the
blanks-xxxzipand the disc from it at our own discretion. In order not to experience problems with free space, you can choose the largest of the available - archivehfs24M.zip. - Copy
hfs24M.DSKto theMac-on-Stickdirectory. - Unpack the System_7.0.1.smi.bin archive and transfer the resulting images to the
Mac-on-Stickdirectory. - Drag
Install 1.imageonto the Mini vMac icon. The Mini vMac will start and the installation will begin. - When the installer asks you to specify the disk on which to install the system, drag the file
hfs24M.DSKto the emulator window. - We continue the installation as usual, dragging installation disk images onto the emulator window as the installer asks for them.
- When the installation is complete, click the Restart button, and drag the
hfs24M.DSKdisk to the emulator. - If everything works, then copy the
Mac-on-Stickdirectory to the USB flash drive.

Figure 2: Mini vMac is up and running
Software installation
To install applications on mac, you must make the disk image mountable. To do this, you need the SetFType utility. Unpack it, and drag the hfs24M.DSK image onto the SetFType.dmg icon (make sure that the Mini vMac is not running). Once you see the confirmation message, double-click on the hfs24M.DSK image. You want it. I would like the Mini vMac. Unmount the disk by throwing it into the Trash. Restart Mini vMac by dragging the hfs24M.DSK disk onto the Mini vMac icon. Now you can use the copied applications.
')

Figure 3: Running Nisus Compact
To work with a disk image in Windows, you need the HFVExplorer utility (included with Mac-on-Stick 0.2).
Creating a disk image
If you need a larger disk to work in Mini vMac, you can create it in a Mac OS X terminal or Linux console using the command:
dd if=/dev/zero of=hfs52M.dsk count=106496
This creates a 52MB disk image, named hfs52M.dsk, in the current directory (count is the number of 512 byte blocks). Before you can mount it using the Mini vMac utility. Click here for a copy of the vMac card. Now you can mount the disk image.
Download Mac-on-Stick
If the prospect of installing Mac-on-Stick from scratch is not impressive, then you can download the working kit via BitTorrent. The package comes with the following bundled applications:
| Title | Description |
|---|---|
| QuickPop | Assign hotkeys to applications, documents, control panels, etc. |
| BBEdit Lite | One of the most popular text editors for Mac OS |
| Tex-Edit | Styled feature-rich text editor |
| MORE | Powerful and flexible outliner |
| Excalibur | LaTeX-aware standalone spell checker |
| Glider | Paper plain game |
| Texris | Tetris clone for two players |
| Sokoban | Game of Sokoban |
| Nisus compact | Powerful word processor |
Source: https://habr.com/ru/post/31512/
All Articles